Pytorch学习笔记3
Pytorch学习笔记3


激活函数:
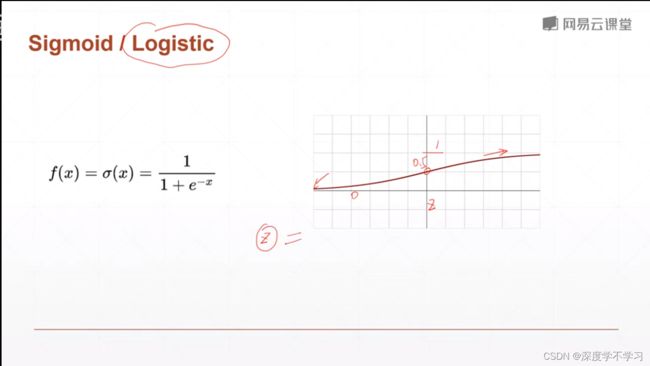
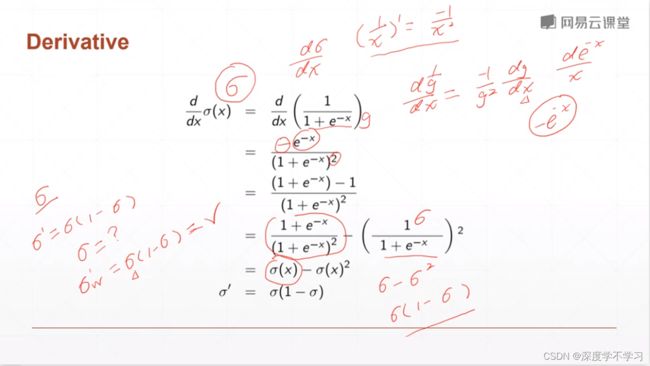
Sigmoid函数求导
theta‘=theta(1-theta)
a=torch.linspace(-100,100,10)
torch.sigmoid(a)
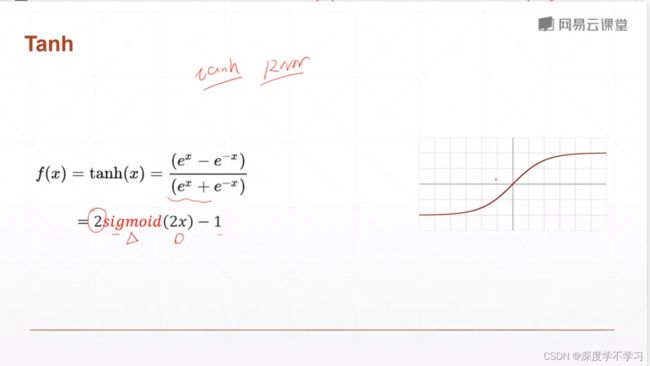
Tanh激活函数:
ReLU激活函数:

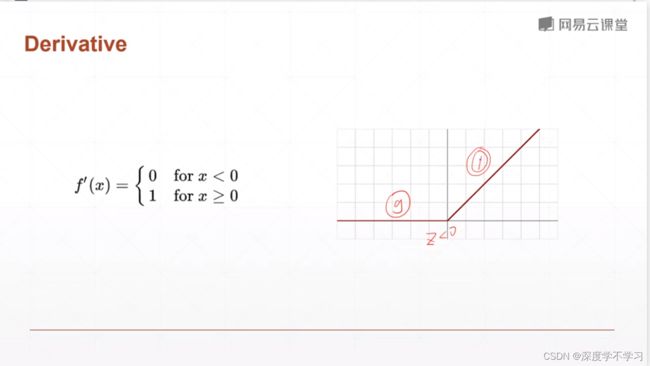
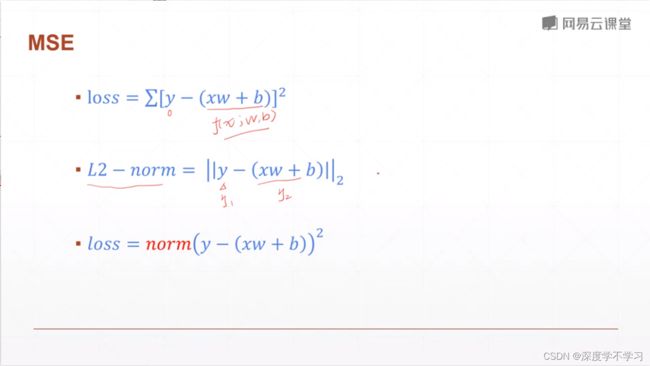
LOSS函数:

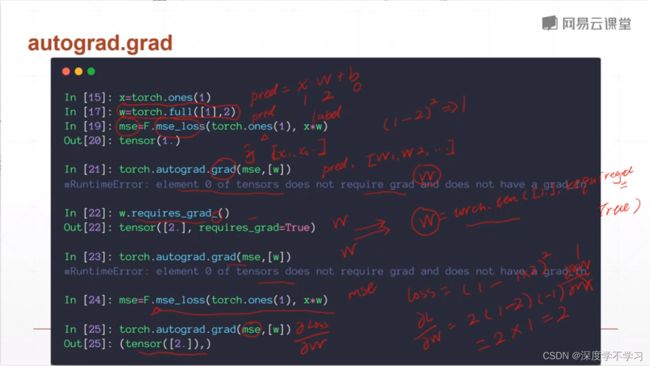
pytorch自动求导:
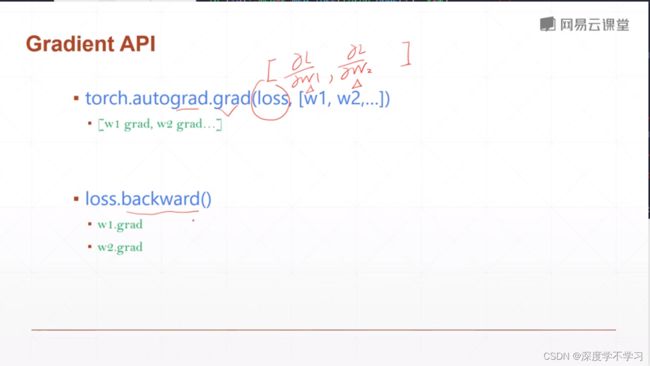
torch.autograd.grad(mse,[w])
backward函数求导
mse=F.mse_loss(torch.ones(1),x*w)
mse.backward()
Gradient API
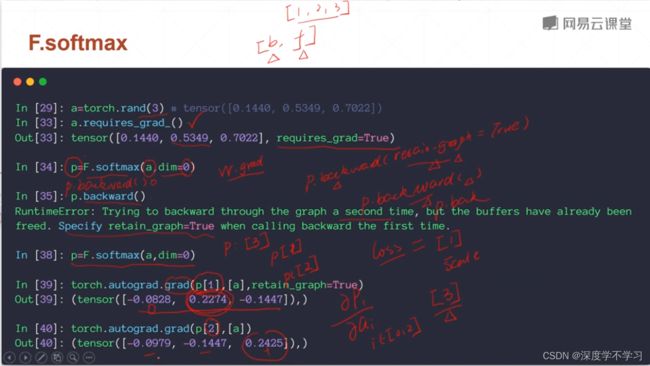
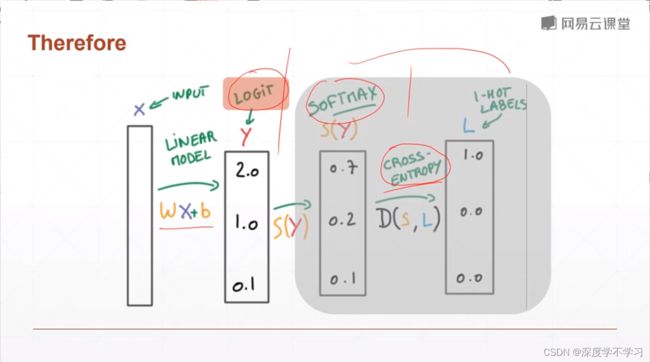
Softmax
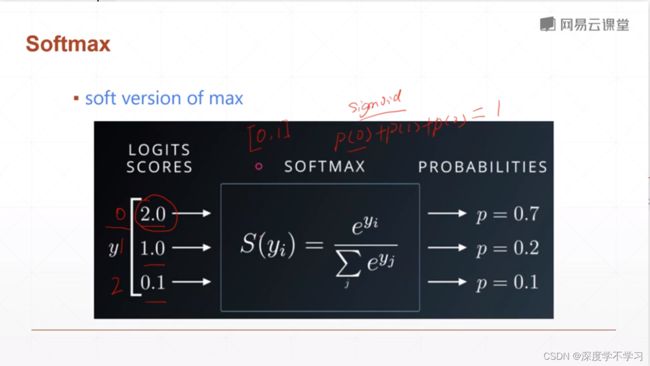
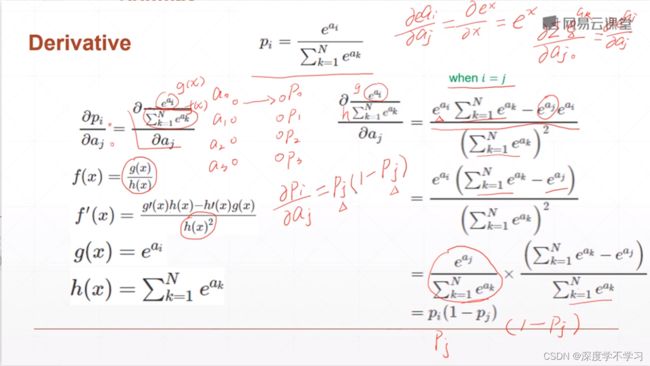
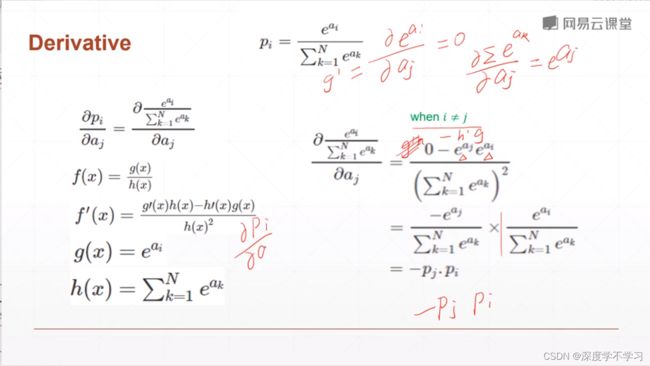
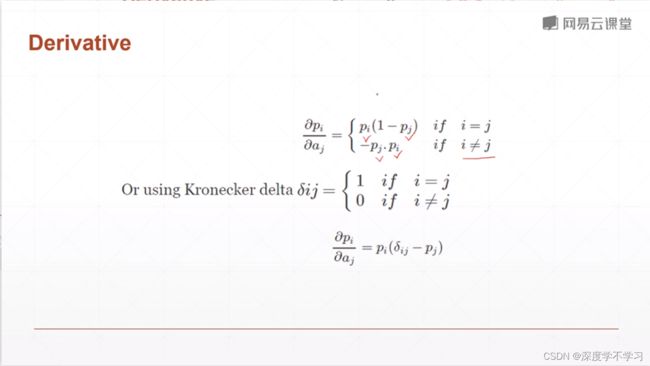
F.softmax
a=torch.rand(3)
a.requires_grad_()
p=F.softmax(a,dim=0)
p.backward()
p=F.softmax(a,dim=0)
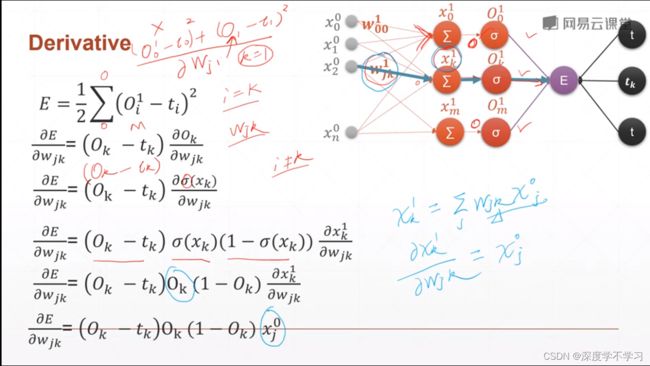
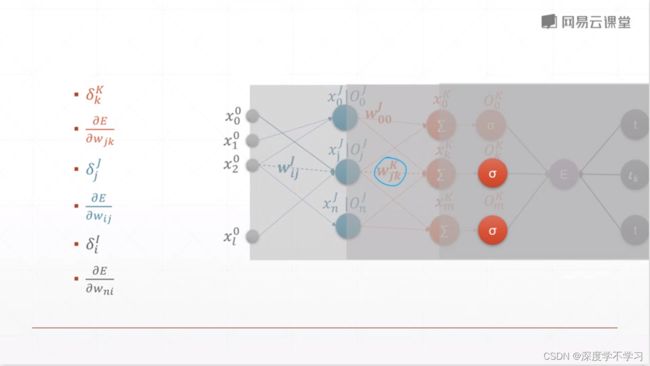
感知机的梯度推导
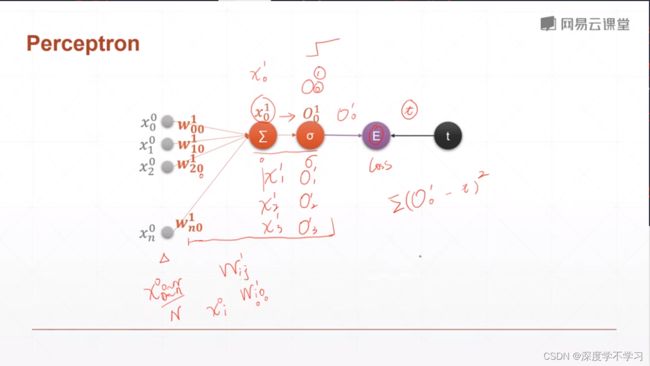
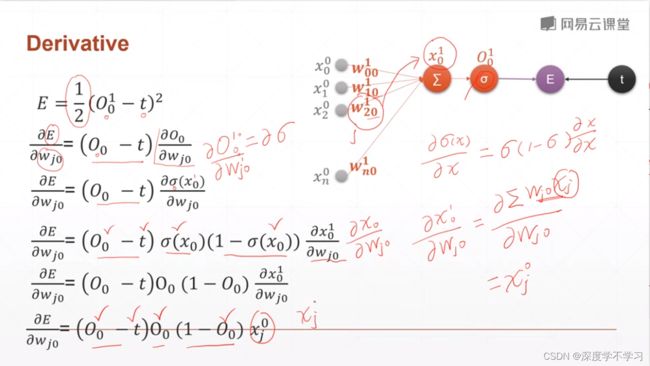
导数推导:
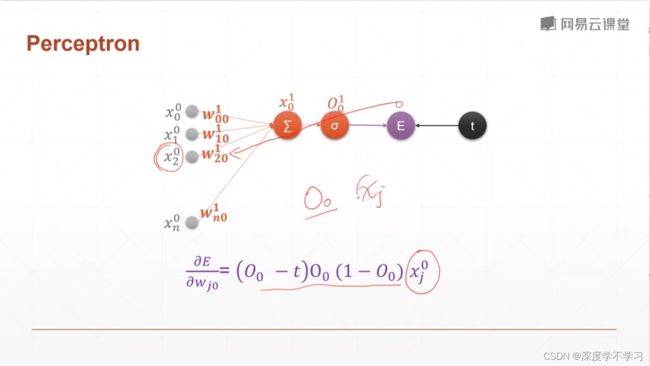

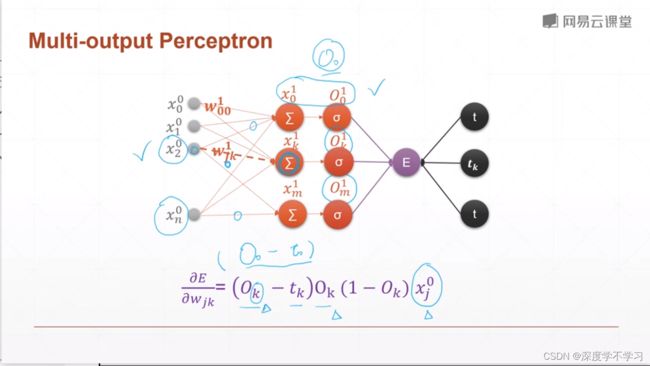
多输出感知机
链式法则:


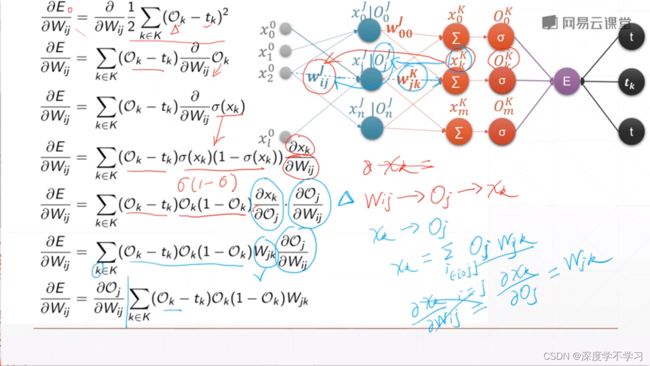
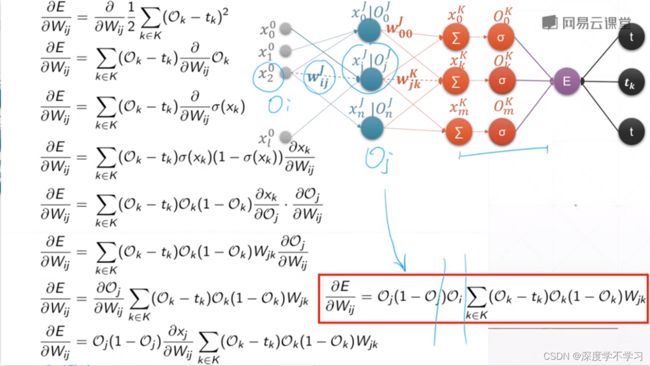
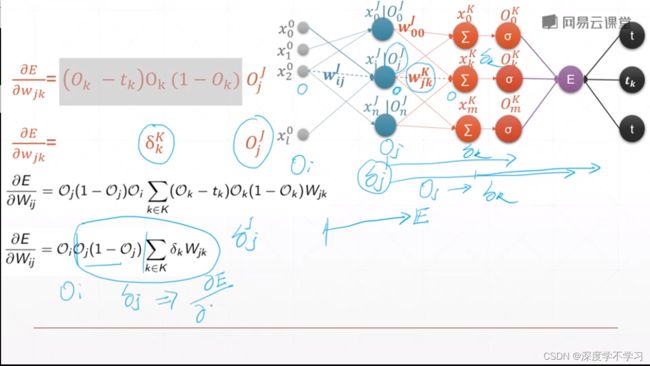
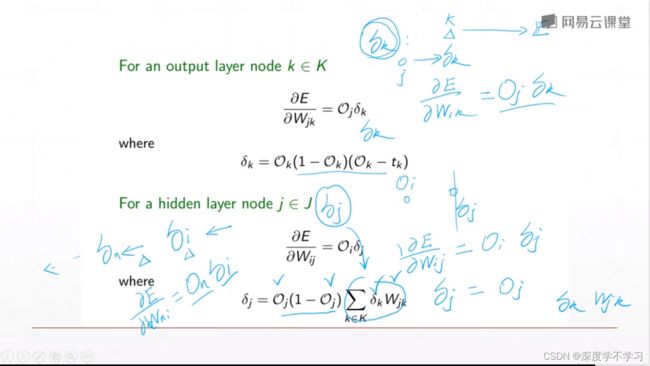
首先计算输出层,再计算倒数第二层,一直迭代,最后得到全部的梯度
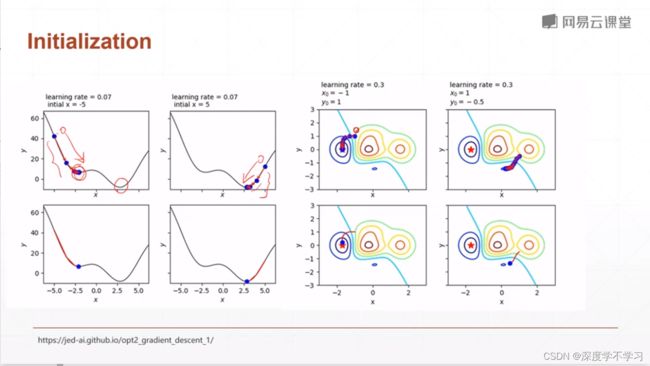
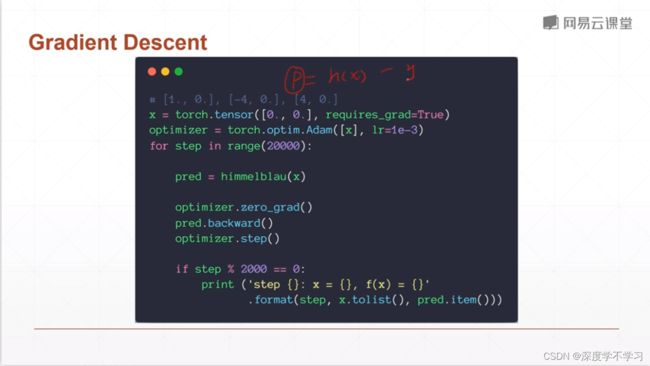
2D函数优化实例

x=np.arrange(-6,6,0.1)
np.meshgrid(x,y)
将两张map拼在一起,包含x,y的坐标
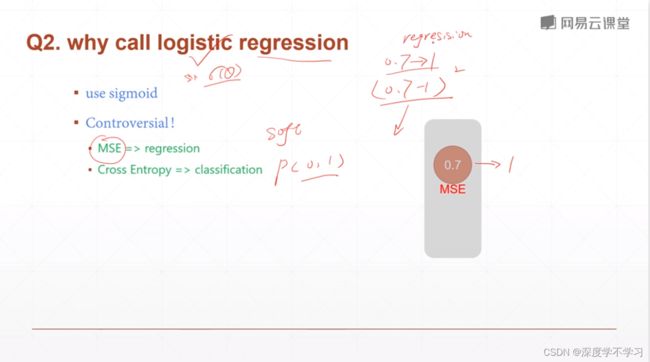
Logistic regression
Linear:y=xw+b
for probablility output:

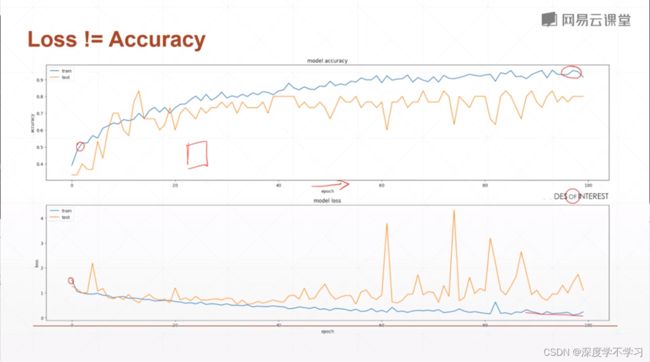
为什么不能直接最大化准确率?
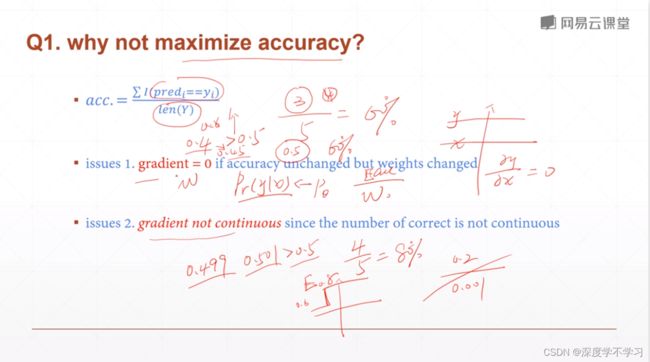
Softmax可以满足概率和为1,并且能使大概率的更大。
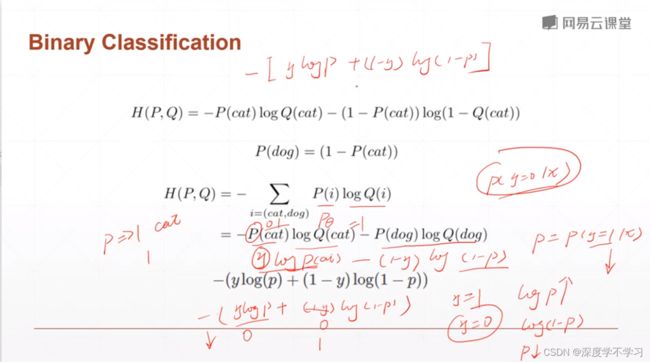
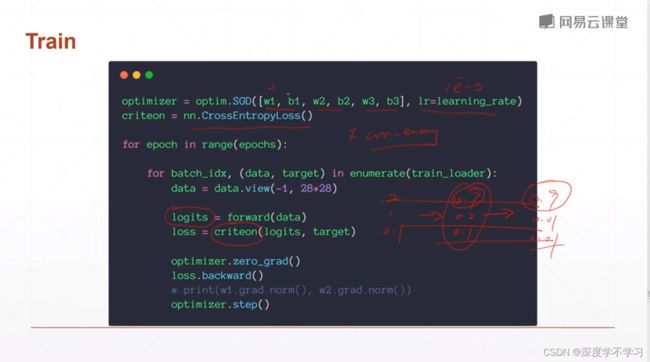
crossentrophy loss

结论:最小化交叉熵相当于最小化散度(两个分布的区别程度)
Binary classification

为什么不用MSE?
- sigmoid+MSE可能产生梯度消失
- 收敛更慢
- 有些领域可以使用(meta-learning)

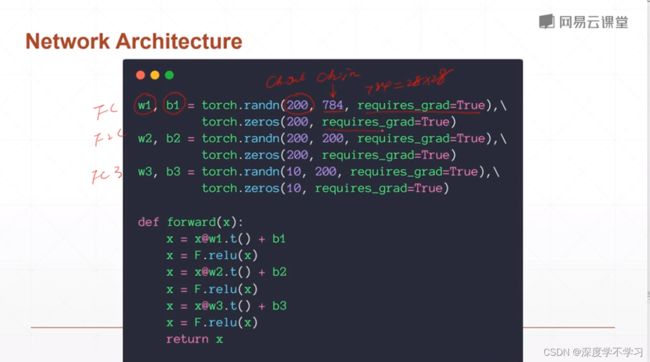
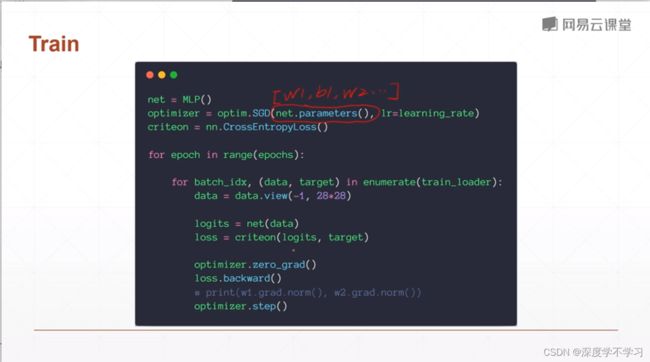
一定要加入初始化操作
全连接层

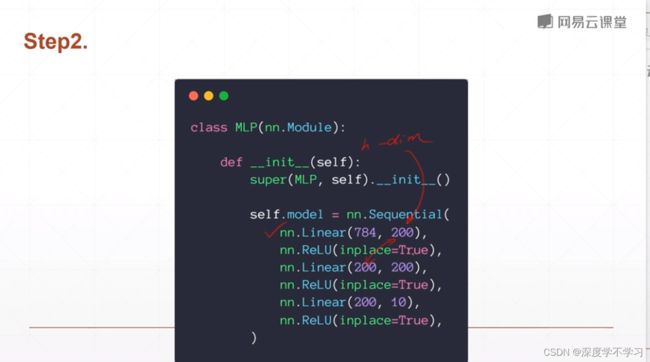
self.model=nn.Sequential(
nn.Linear(784,200),
nn.ReLu(inplace=True),
nn.Linear(200,200),…
def forward(self,x)
x=self.model(x)
return x
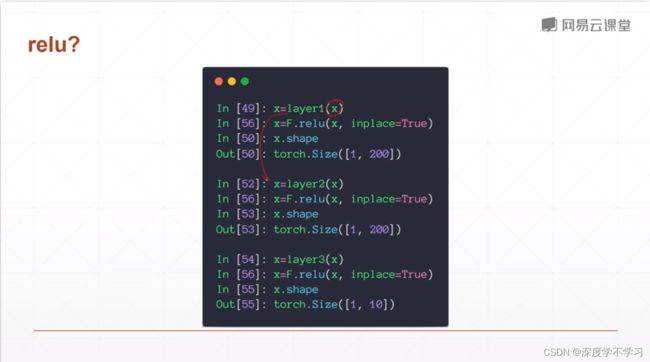
API区分

nn.Linear,nn.Relu是类风格,需要先实例化
layer=nn.Relu()
x=layer(x)
为方便,可以使用x=F.relu(x,inplace=True)直接输出经过relu的x结果。
激活函数
ReLU避免了梯度爆炸与消失的情况,计算更加简单
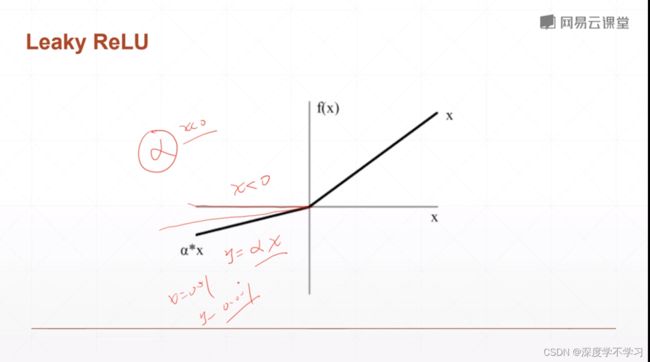
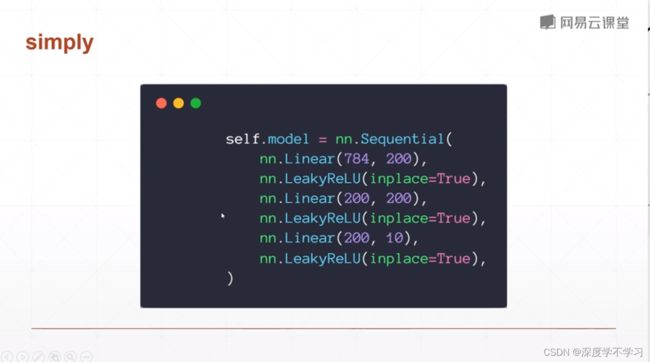
Leaky ReLU
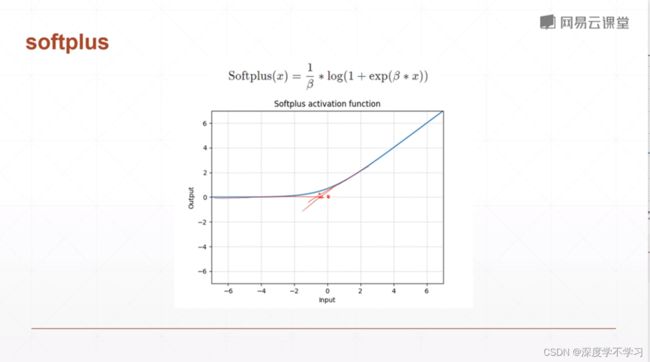
SELU:

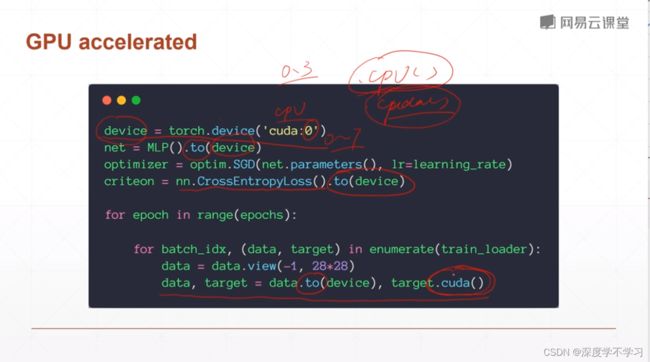
部署到GPU上:
device=torch.device(‘cuda:0’)
net=MLP().to(device)
criteon=nn.CrossEntrophyLoss().to(device)
data,target=data.to(device), target.cuda()#不推荐第二个
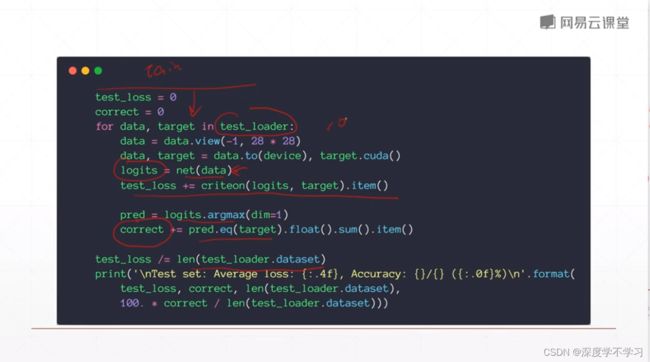
MNIST test
softmax不会改变单调性,因此在softmax之前还是之后进行argmax效果相同
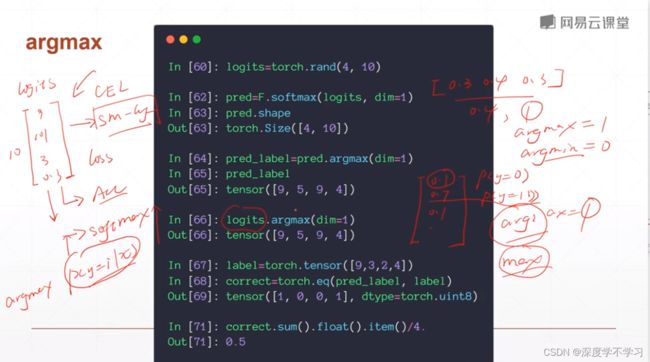
pred_label=pred.argmax(dim=1)可以求出predict的值
而后使用
correct=torch.eq(pred_label,label)
correct.sum().float().item()/4#item将tensor转为值
Visdom可视化
之前我都是使用TensorBoard:

Pytorch拥有TensorboardX
pip install tensorboardX
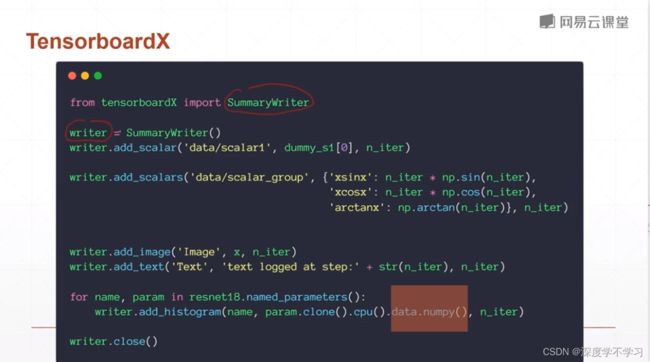
但是必须使用numpy数据,比较麻烦。
Visdom可以直接使用tensor数据
pip install visdom
python -m visdom.server
from visdom import Visdom
画曲线
viz=Visdom()
viz.line([0.],[0.],win='train_loss', opts-dict(title='train loss'))
viz.line([loss.item()],[global_step],win='train_loss',update='append')
#loss转换为数据,使用append防止数据被刷新。
#顺序为y,x

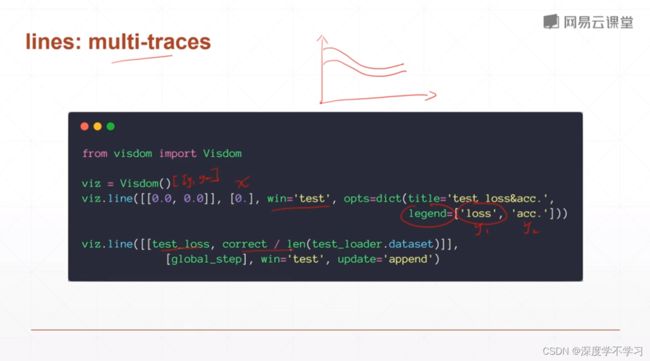
multi-traces:
viz=Visdom()
viz.line([0.],[0.],win='train_loss', opts-dict(title='train loss'))

visual X
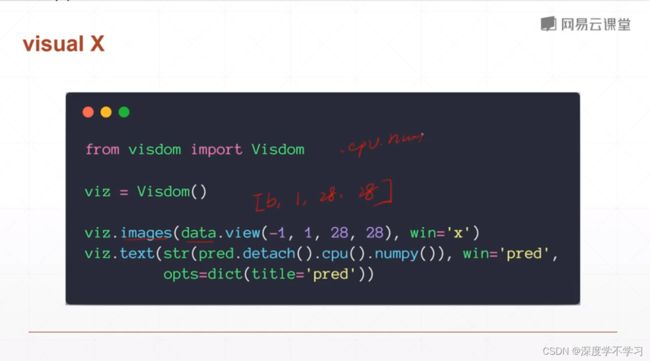
viz.images(data.view(-1,1,28,28),win=‘x’)
viz.text(str(pred.detach()/cpu().numpy()),win=‘pred’,opts=dict(title=‘pred’))