Attaching Android platform source in Eclipse
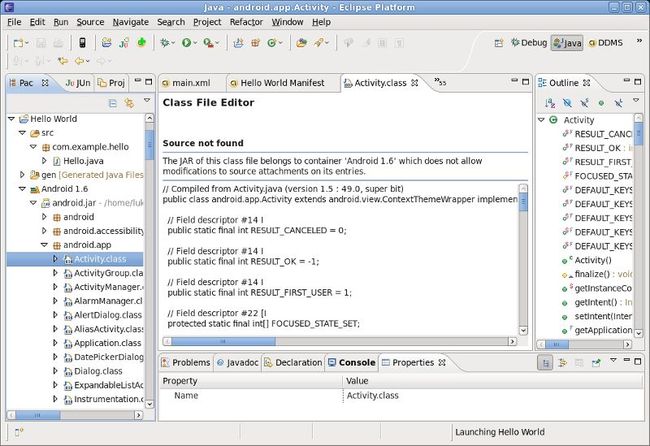
Are you tired of seeing this when you look at your platform JAR in Eclipse?
Dude, where's my source?
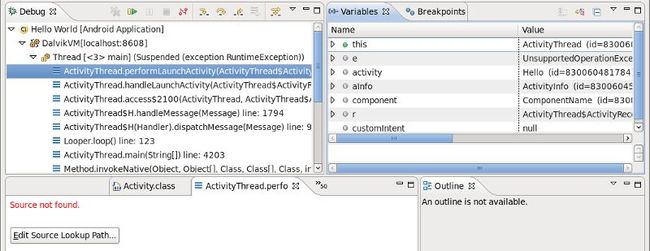
Or how about this when you’re debugging?
How am I supposed to debug this?
Android is open source, right? So how do we see the source?
Some background
- Tip: If you’re just here to get it working and don’t care where it came from, you can skip on a bit.
This article summarizes and augments three other posts that spelled out how to get the source and use it. It is surprisingly difficult to get your hands on the correct version of the source you need for this purpose, so in addition to describing that process I’m providing the end result for your convenience.
My sources
My three source posts are:
- View Android Source Code in Eclipse by Dr. Michael Forster of Google
- Browsing Android Source in Eclipse by Eric Burke
- Get source from the Android Open Source Project
Both the posts and the comments were very helpful, but somewhat out of date now. How to put it all together?
Getting the right code
The source is all available, but it’s spread out among several projects which put together constitute the Android Open Source Project. Thus I needed to install the repo tool (as described on the “Get source” page) in order to pull down all of the relevant git repositories. The articles describe getting the latest code – the trick is getting the code specific to the platform version you’re working on; at the time everyone was working with 1.0!
When you sync the Android repos, you’ll see output describing the available branches and tags something like this:
* [new branch] cupcake -> korg/cupcake * [new branch] cupcake-release -> korg/cupcake-release * [new branch] donut -> korg/donut * [new branch] donut-release -> korg/donut-release * [new branch] eclair -> korg/eclair * [new branch] master -> korg/master * [new branch] release-1.0 -> korg/release-1.0 * [new tag] android-1.0 -> android-1.0 * [new tag] android-1.5 -> android-1.5 * [new tag] android-1.5r2 -> android-1.5r2 * [new tag] android-1.5r3 -> android-1.5r3 * [new tag] android-1.5r4 -> android-1.5r4 * [new tag] android-1.6_r1 -> android-1.6_r1 * [new tag] android-1.6_r1.1 -> android-1.6_r1.1 * [new tag] android-1.6_r1.2 -> android-1.6_r1.2This list generally contains some other random stuff and varies by project. The tags seem to be logically named and standardized across projects, but I couldn’t find how to get the repo tool to pull source based on a tag (if someone knows, by all means comment below). Repo takes the -b option to specify a branch however, and the cupcake / donut / eclair branches are universal, so those are what I used to make the source archives linked in this article, e.g.:
repo init -u git://android.git.kernel.org/platform/manifest.git -b cupcake
repo sync
Of course, branches are generally moving targets, so caveat emptor.
Assembling the code as Eclipse expects it
If you follow the above and have a good connection and some patience, you’ll eventually have a directory full of some 2GiB of “stuff,” some of which is the source code you’re looking for. But Eclipse needs just the source, in just the right place. Forster’s post “View Android Source Code in Eclipse” provides a python script for rounding up the source code and creating a nice zip archive out of it, and Burke’s post “Browsing Android Source in Eclipse” describes how to figure out where to put it – in a “sources” directory created underneath the SDK platform directory. Other comments on those posts are helpful for coercing Eclipse to recognize that the source is available.
What you came here for
Without further ado, here’s how you attach source to your platform classes. N.B. all screenshots are from Eclipse 3.5 “Galileo” – other versions may differ significantly.
Download source
Download the zipped source code that I’ve gathered for each platform you are developing for.
Put the source in place
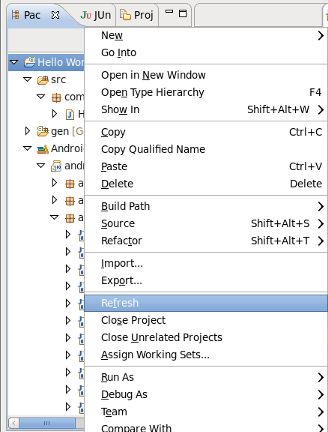
For each platform, create a folder “sources” under that platform (e.g. sdk/platforms/android-1.5/sources) and unzip the source code into it. Then refresh your project (select project and press F5 or right-click and select “Refresh”).
Right click on the project and refresh
Voila, you should see the source!
YES, I SEE the SOURCE!
Getting the debugger on board
I found that even after I’d placed sources in the platform, if I was debugging and ended up deep in the platform (In this case, with an exception), the debugger might not show the code:
Sometimes the debugger still won't show the source
However, it’s fairly straightforward to fix this. Just click on that “Edit Source Lookup Path” button to add a source lookup path. In that dialog leave “Default” selected and click “Add.”
In the following “Add Source” dialog choose “File System Directory” and hit the OK button:
Then choose the source directory where you unzipped the code. The debugger should now show all the code you can debug into.
Source in the debugger... which may or may not help you figure out what went wrong; in this case, a layout error caught at runtime.
A word of caution, though: Eclipse’s debugger seems to think that once you’ve set a source lookup for one project, it’s relevant for all of them. If you’re using different platforms for different projects, you’ll want to change the source it uses. You can do that by right-clicking on the project in the debugger and choosing “Edit Source Lookup” to repeat this process.
Getting back to source lookup in the debugger
Patches welcome
Hopefully this guide makes attaching source easy for you. If the code provided here seems out of sync with the platform when you’re debugging, let me know. If someone knows a better way to pick out the exact code for the different platform versions, comment below. If I’ve slightly (or utterly) misrepresented something, correct me. If you’re just happy to finally see your source, I’d be glad to hear about it!
出处 Attaching Android platform source in Eclipse | Android from scratch


