windows下源码编译Tensorflow gpu
windows下源码编译Tensorflow-gpu
系统配置:
- windows 10专业版
- GTX 1080 Ti
- VS2015 update3
- Python 3.6
- Cmake 3.12.1
- swigwin-3.0.12
- CUDA 9.0
- cuDNN 7.0
- 安装 CUDA sdk
- tensorflow-r1.8
1.首先配置好的系统环境
安装GPU驱动,配置CUDA cuDNN,配置系统环境变量
安装Anaconda3
下载 tensorflow 源码
确保能科学上网
2. 如下配置CMAKE
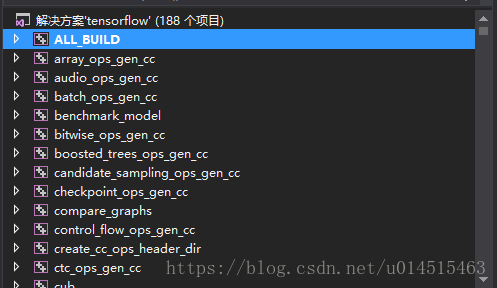
3. 在VS2015中打开工程并全部编译
4. 经过诸多问题解决之后就编译成功了!
这实在不是一个容易的问题,千万不要被4000多个错误吓跑了,总要一个一个解决的。
万一解决不了,那也只能放弃了。。。
然后再重新单独编译一下tensorflow

5. 编译INSTALL项目
编译install项目把tensorflow安装到指定的路径

以下为本次编译安装的结果

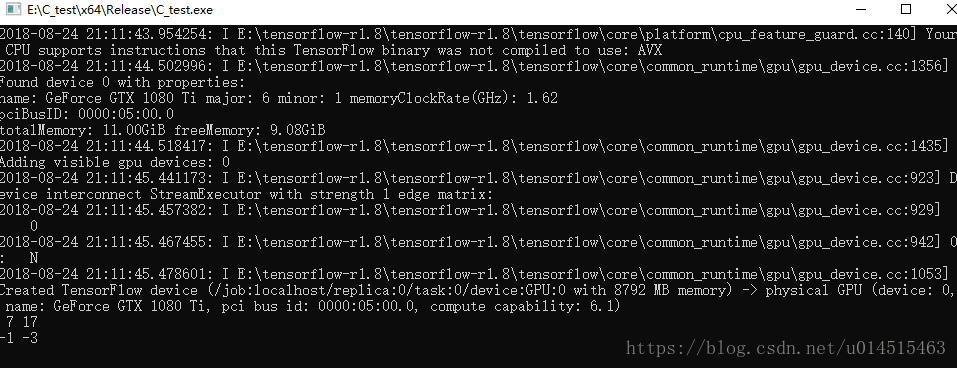
6.编译运行测试项目
新建Win32工程:将以下代码放到主cpp中
// TestTensorFlow.cpp : 定義控制枱應用進程的入口點。
#define COMPILER_MSVC
#define NOMINMAX
#include "stdafx.h"
#include session(NewSession(options));
TF_CHECK_OK(session->Create(graph_def));
// Define some data. This needs to be converted to an Eigen Tensor to be
// fed into the placeholder. Note that this will be broken up into two
// separate vectors of length 2: [1, 2] and [3, 4], which will separately
// be multiplied by the matrix.
std::vector<float> data = { 1, 2, 3, 4 };
auto mapped_X_ = Eigen::TensorMapfloat, 2, Eigen::RowMajor>>
(&data[0], 2, 2);
auto eigen_X_ = Eigen::Tensor<float, 2, Eigen::RowMajor>(mapped_X_);
Tensor X_(DT_FLOAT, TensorShape({ 2, 2 }));
X_.tensor<float, 2>() = eigen_X_;
std::vector 附加库目录:本人将Release下所有文件拷贝到C:\Program Files\tensorflow\lib,所以不需要单独添加文件,只需要设置库目录如下

本人按照参考博客配置时出现以下错误,改成单文件后成功编译运行
"You must define TF_LIB_GTL_ALIGNED_CHAR_ARRAY for your compiler."
6. 编译过程中遇到的问题
1.CUDA SDK路径找不到
CUDA SDK是需要单独下载安装的CUDA-SDK
2. 编译protobuf出错 CHECK failed: file != NULL:
CSDN博客博主给出了一种解决方案。主要分析还是git连接不太稳定。
3. error C2064: 项不会计算为接受 0 个参数的函数
该问题需要将vs2015打补丁至update3,补丁下载 安装该文件将直接升至update3
4. CUDA compilation fails on CUDA 9.x SDK
error: more than one instance of overloaded function "__hadd" matches the argument list
解决方案
修改代码
*** build\eigen\src\eigen\Eigen\src\Core\arch\CUDA\Half.h   Wed Jan 03 13:55:52 2018
--- build\eigen\src\eigen\Eigen\src\Core\arch\CUDA\Half.h   Sun Mar 11 13:24:39 2018
***************
*** 155,161 ****
--- 155,165 ----
  // conversion steps back and forth.

  EIGEN_STRONG_INLINE __device__ half operator + (const half& a, const half& b) {
+ #if defined(EIGEN_CUDACC_VER) && EIGEN_CUDACC_VER >= 90000
+   return __hadd(::__half(a), ::__half(b));
+ #else
    return __hadd(a, b);
+ #endif
  }
  EIGEN_STRONG_INLINE __device__ half operator * (const half& a, const half& b) {
    return __hmul(a, b);
***************
*** 164,172 ****
--- 168,180 ----
    return __hsub(a, b);
  }
  EIGEN_STRONG_INLINE __device__ half operator / (const half& a, const half& b) {
+ #if defined(EIGEN_CUDACC_VER) && EIGEN_CUDACC_VER >= 90000
+   return __hdiv(a, b);
+ #else
    float num = __half2float(a);
    float denom = __half2float(b);
    return __float2half(num / denom);
+ #endif
  }
  EIGEN_STRONG_INLINE __device__ half operator - (const half& a) {
    return __hneg(a);
5. 完成编译之后测试项目时出现无法解析的外部符号
LNK2001 无法解析的外部符号 "private: void __cdecl tensorflow::GraphDef::InternalSwap(class tensorflow::GraphDef *)" (?InternalSwap@GraphDef@tensorflow@@AEAAXPEAV12@@Z)
已知是tensorflow-1.9在cmake编译时出错,本人换成tensorlfow-1.8之后成功编译。
参考
[1]windows環境VS2015編譯TensorFlow C++進程完全攻略
[2]Windows10下源码编译基于GPU的tensorflow.dll


