分布式GNN系统环境配置
分布式GNN系统环境配置
- DL环境
-
- Anaconda
-
- scp命令
- 安装anaconda
-
- conda 虚拟环境命名
- 创建虚拟环境安装pytorch1.9.
- 安装DGL库
- conda环境迁移
- 配置VScode远程调试
-
- !!!配置anaconda环境
- 快速配置
- 配置debug的输入参数
- Vs code突然连接不上
- 分布式环境
-
- 数据集处理
-
- 下载
- 图分割
- 文件共享环境
-
- Server端
- client端
- 当client端为mac
- NFS客户端挂载错误
- SSH免密访问
- 一些问题
-
- 相关包没有安装
- There are stopped jobs.
- Failed bind on 192.168.1.7:30050 , error: Address already in use
- bash conda: command not found
- /usr/bin/python: No module named torch.distributed
- /opt/dgl/src/rpc/network/tcp_socket.cc:76: Failed bind on 192.168.1.9:30050 , error: Cannot assign requested address
- TensorDispatcher: dlopen failed: libtorch_cuda_cpp.so: cannot open shared object file: No such file or directory
- DDP test—— Error: RuntimeError: NCCL error in: /opt/conda/conda-bld/pytorch_1623448278899/work/torch/lib/c10d/ProcessGroupNCCL.cpp:911, unhandled system error, NCCL version 2.7.8. ncclSystemError: System call (socket, malloc, munmap, etc) failed.
- Expected all tensors to be on the same device, but found at least two devices, cuda:0 and cpu
- dgl._ffi.base.DGLError: Cannot assign node feature "h" on device cuda:0 to a graph on device cpu. Call DGLGraph.to() to copy the graph to the same device.
DL环境
Anaconda
由于已经有部分机器已经安装了anaconda,同时有安装包,所以直接将其他包传输到所需机器上
scp命令
利用scp文件传输
scp Anaconda3-2021.05-Linux-x86_64.sh [email protected]:/home/name
使用scp传文件时出现“ECDSA host key for 。。。 has changed and you have requested strict checking.Host key verification fail”
解决方案:应该是远程服务器缓存问题,参考link
安装anaconda
直接按照此链接安装
conda 虚拟环境命名
参考Anaconda——如何“重命名”conda虚拟环境(通过复制和删除操作实现)
创建虚拟环境安装pytorch1.9.
链接
conda install pytorch==1.9.0 torchvision torchaudio cudatoolkit=11.1 -c pytorch -c conda-forge
最好不要规定torchvision跟torchaudio的版本,不然有可能对应不上,从而在验证
torch.cuda.is_available()时出现false
!!!由于中间服务器被其他人使用过,使用conda install时一直出现
CondaHTTPError: HTTP 000 CONNECTION
在网上查找时基本上都是让换源,相关操作有
vim ~/.condarc
conda config --show channels
conda config --add channels
conda config --set show_channel_urls yes
conda config –remove channels
但是基本上都不管用,于是就ping了下百度域名,提示出现bad address,ping百度ip却能ping通,这个时候才知道原来是DNS解析失败
基本的解决方案可以查看linuxUbuntu解决DNS问题,无法解析域名,修改nameserver之后就可以了
!!!conda现在安装的时候可能出现
PackagesNotFoundError: The following packages are not available from current channels
查了一下可能是channel的问题,link1,link2
这个时候需要
conda config --show channels
conda config --add channels conda-forge
另外还遇到了
conda创建环境报错:NotWritableError: The current user does not have write permissions to a required path.
查了一下是权限的问题,按照link即可解决
安装DGL库
关于图网络,最近看到一个特别不错的blog,link
根据link选择合适版本的dgl,我们选用cuda11.1,运行
conda install -c dglteam dgl-cuda11.1
conda环境迁移
将其他机器的conda环境迁移到本机上,可以有离线和在线的,这里使用在线的方式。
首先在其他机器上把envs list导出
conda activate your_env_name
conda env export > envs.yml
将该yml文件移到目标机器上
conda env create -f env.yml
等待相关包安装即可,新建的环境名与原环境一致。注意:系统要求一致
配置VScode远程调试
Vscode配置link
!!!配置anaconda环境
1.打开setting.json,参考link
2.配置setting文件,很早之前配的如下
也可参考link上述配置信息标点及文件位置需要替换
    "python.condaPath":"~/.conda/envs/tf12/bin/conda",
    "python.pythonPath":"~/.conda/envs/tf12/bin/python3.6",
    "python.autoComplete.extraPaths": [
        "~/.conda/envs/tf12/bin/python"
    ],
    "python.autoComplete.addBrackets": true,
    "python.jediEnabled": false,
    "remote.SSH.showLoginTerminal": true,
    "workbench.editorAssociations": {
        "*.ipynb": "jupyter-notebook"
    },
    "python.defaultInterpreterPath": "~/.conda/envs/tf12/bin/python3.6",
    "python.analysis.extraPaths": [
        "~/.conda/envs/tf12/bin/python"
    ],
    "python.analysis.completeFunctionParens": true,
    "notebook.cellToolbarLocation": {
        "default": "right",
        "jupyter-notebook": "left"
    },
    "python.languageServer": "Microsoft",
    "window.zoomLevel": -1,
    "editor.fontSize": 15
快速配置
最近才发现vscode可以快速配置,原来在server机上python的extension没有装,装上之后右下角就可以出现一个conda虚拟环境的选项,直接选择需要的虚拟环境即可,vscode会自动帮你做好configuration。
配置debug的输入参数
查看vscode 调试python代码时添加参数(args)
Vs code突然连接不上
一直显示Retry,解决方案---->vscode远程连接服务器时一直连接不上的问题
分布式环境
根据dgl提供的tutorial进行分布式环境搭建,Distributed Node Classification
数据集处理
下载
数据集下载直接从ogb包下载,
from ogb.nodeproppred import DglNodePropPredDataset
data = DglNodePropPredDataset(name='ogbn-products')
图分割
dgl采用METIS库,具体调用使用
 dgl.distributed.partition_graph(graph, graph_name='ogbn-products', num_parts=2,
                                 out_path='2part_data',
                                 balance_ntypes=graph.ndata['train_mask'],
                                 balance_edges=True)
其中若想自定义切割,官方也提供了方法
主要是要一步步安装GKLib,METIS,ParMETIS库,这些库都是相互依赖的,详细链接为ParMETIS Installation
具体安装步骤大部分都为先
git github_url.git
make config [可加其他参数]
make install
自己的理解:其中make config应该是配置cmake 的编译器,如gcc,mpicc等以及编译环境等等之类的参数,最后使用make install在config中目标目录下生成可执行文件。
没有相关编译器使用
sudo apt-get install xxx
最后将METIS,ParMETIS安装路径添加到环境变量中(export balabala)
按照dgl文档说明的,先要将图的分割方案写成三个.txt文件,分别为xxx_nodes.txt,xxx_edges.txt,xxx_stats.txt,使用命令
mpirun -np 4 pm_dglpart xxx 2
对数据集进行切割,其中的参数可以再dgl文档中查看
最后使用dgl提供的convert.py将ParMETIS切完后的图转换为dgl统一的图结构。
文件共享环境
dgl采用NFS来共享文件
Server端
首先在server上安装
sudo apt-get install nfs-kernel-server
然后将数据集区(切完的图)共享出来
最后配置/etc/exports
内容格式为
<输出目录> [客户端1 选项(访问权限,用户映射,其他)] [客户端2 选项(访问权限,用户映射,其他)]
例如:
/home/ubuntu/workspace 192.168.0.0/16(rw,sync,no_subtree_check)
最后完成配置
sudo systemctl restart nfs-kernel-server
client端
安装
sudo apt-get install nfs-common
在安装的时候出现了一点小问题,发现国内清华源不管用了,更新成阿里云
- 备份以前的源
copy /etc/apt/sources.list /etc/apt/sources.list.bak
- 修改
vim /etc/apt/sources.list
- vim快速删除以前文件
G  #跳到最后一行
:1,.d. #删除到第一行
dd   #删除当前行
- 修改成阿里源
deb http://mirrors.aliyun.com/ubuntu/ bionic main restricted universe multiverse
deb http://mirrors.aliyun.com/ubuntu/ bionic-security main restricted universe multiverse
deb http://mirrors.aliyun.com/ubuntu/ bionic-updates main restricted universe multiverse
deb http://mirrors.aliyun.com/ubuntu/ bionic-proposed main restricted universe multiverse
deb http://mirrors.aliyun.com/ubuntu/ bionic-backports main restricted universe multiverse
deb-src http://mirrors.aliyun.com/ubuntu/ bionic main restricted universe multiverse
deb-src http://mirrors.aliyun.com/ubuntu/ bionic-security main restricted universe multiverse
deb-src http://mirrors.aliyun.com/ubuntu/ bionic-updates main restricted universe multiverse
deb-src http://mirrors.aliyun.com/ubuntu/ bionic-proposed main restricted universe multiverse
deb-src http://mirrors.aliyun.com/ubuntu/ bionic-backports main restricted universe multiverse
- 更新源并安装
sudo apt-get update && sudo apt-get install nfs-common
在client上新建一个新共享目录
然后指定客户端及共享目录
sudo mount -t nfs :/home/ubuntu/workspace /home/ubuntu/workspace
前面是server目录,后面是client端的目录
最后
sudo mount -a
ok,现在就可以在client端访问server共享的文件了。
当client端为mac
由于mac自带nfs server,所以需要检查一下nfsd的启动情况,参考一文搞定 Linux,Mac,Windows 的 NFS 网络文件共享服务部署
主要操作
sudo nfsd status
sudo nfsd start
我的Mac是Big Sur,所以在mount的时候一直报错
mount_nfs: can’t mount with remote locks when server (192.168.1.230) is not running rpc.statd: RPC prog. not avail
mount: /Users/me/temp failed with 74
以及
mount_nfs: can’t mount /volatile-volume-stripe from nas-server onto /Users/stefan/nfs/volatile: Operation not permitted
mount: /Users/stefan/nfs/volatile failed with 1
最后参考Since upgrading to Big Sur, i can not longer mount remote nfs drives
解决方案
sudo mount -o nolocks,resvport,locallocks -t nfs serveip:/home/xxxxxx xxxx/xxx
sudo mount -o nolocks,resvport,locallocks -t nfs 192.168.1.7:/home/amax/gnn-tutorial ~/Downloads/nfs
NFS客户端挂载错误
当出现NFS服务器端文件正常,但是服务器文件挂载异常时(client端文件挂载消失),此时应该是NFS服务出现某台机器关机的情况(可能是server端),需要重新建立连接并挂载。
重启server和client参考------------>重启nfs服务
(从重新加载服务器NFS开始)
- 反转了,只要在client端重启rpc服务即可。
#重启rpc
sudo service rpcbind restart
#查看nfs服务端共享情况
showmount -e 192.168.1.7
#挂载
sudo mount -t nfs 192.168.1.7:/shared_workspace /shared_workspace
SSH免密访问
按照文档How to Setup Passwordless SSH Login进行操作即可
查看ssh key pair是否存在
ls -al ~/.ssh/id_*.pub
若不存在,生成SSH key pair并发送至邮箱
ssh-keygen -t rsa -b 4096 -C "[email protected]"
查看是否生成成功
ls ~/.ssh/id_*
将密码发送至server端
ssh-copy-id remote_username@server_ip_address
如果ssh-copy-id无法使用,试试
cat ~/.ssh/id_rsa.pub | ssh remote_username@server_ip_address "mkdir -p ~/.ssh && chmod 700 ~/.ssh && cat >> ~/.ssh/authorized_keys && chmod 600 ~/.ssh/authorized_keys"
其实ssh-copy-id是将本机的公钥(也就是.pub文件里的一大串)复制到服务器上的~/.ssh/authorized_keys中
于是在使用跳板机对服务器进行免密访问时,可以手动来
- 复制本机的.pub文件内容
- 将内容粘贴到server的~/.ssh/authorized_keys中
- 配置本机~/.ssh/config的内容
Host <name>
    HostName 127.0.0.1
    User <user>
    Port <port>
    ProxyCommand ssh <cloud-user>@<cloud-host> -W %h:%p
以后就可以直接ssh 就可以啦
此时即可无密码访问server端
一些问题
在运行分布式的命令
python3 ~/workspace/dgl/tools/launch.py --workspace ~/workspace/ --num_trainers 1 --num_samplers 0 --num_servers 1 --part_config 4part_data/ogbn-products.json --ip_config ip_config.txt "python3 train_dist.py"
遇到了各种问题
相关包没有安装
pip install ogb
conda install scikit-learn
There are stopped jobs.
jobs -l
Failed bind on 192.168.1.7:30050 , error: Address already in use
这个问题主要是调试的时候30050(dgl默认端口)端口一直在被占用,所以会报错,把相关进程kill掉即可
查看所有端口占用
sudo netstat -nultp
查看特定端口占用
sudo netstat -anp |grep 22
但是经常出现多个python进程占用同一个端口,一个一个的kill太麻烦,可以通过以下命令一步解决
sudo kill -9 $(lsof -i:30050 -t)
参考
bash conda: command not found
这个问题好像是通过ssh连的时候会连到一个奇怪的位置,这里面的python版本是2.7,应该是系统自带的python环境,通过在launch.py中添加source anaconda位置解决了,但是依然出现一些问题,例如以下这个:
/usr/bin/python: No module named torch.distributed
这个问题给我的感觉是进程运行的环境不对,它直接定位到了系统自带的python环境,而我的python环境均安装在conda环境中了,dgl的launch.py中有一个选项是
    parser.add_argument('--extra_envs', nargs='+', type=str, default=[],
                        help='Extra environment parameters need to be set. For example, \
                        you can set the LD_LIBRARY_PATH and NCCL_DEBUG by adding: \
                        --extra_envs LD_LIBRARY_PATH=/usr/local/cuda/lib64:$LD_LIBRARY_PATH NCCL_DEBUG=INFO ')
其中关于这个nargs的使用可以参考argparse模块用法实例详解,这里面需要把这个参数放在中间位置,因为它会将最后的“python xxx.py”也当成参数的一部分了暂时还不知道怎么让他停止读参只能改变顺序以下个传递参数为终止。
于是我就想通过这个参数将conda的环境变量加进去,
export PATH=$PATH:/home/username/anaconda3/bin
通过这种方法(export不用加因为launch.py会自动加)让它知道conda的路径,但是这样还是会报一样的错。
最后将server对client端的命令抓取出来发现,该命令为
ssh -o StrictHostKeyChecking=no -p 22 192.168.1.7 'cd /home/amax/gnn-tutorial/distributed_node_classification; (export DGL_ROLE=server DGL_NUM_SAMPLER=0 OMP_NUM_THREADS=1 DGL_NUM_CLIENT=2 DGL_CONF_PATH=2part_data/ogbn-products.json DGL_IP_CONFIG=ip_config.txt DGL_NUM_SERVER=1 DGL_GRAPH_FORMAT=csc DGL_SERVER_ID=0; source activate torch;python main.py
尝试将引号里的内容直接在client端跑,其中只有一台机器出现等待链接,其他机器一直在报如下错
/opt/dgl/src/rpc/network/tcp_socket.cc:76: Failed bind on 192.168.1.9:30050 , error: Cannot assign requested address
这个问题查的时候说是端口占用,但是输入
sudo netstat -anp |grep 30050
时发现端口并没有被占用,而将ipconfig中的端口号更改之后还是会报一样的错误。
TensorDispatcher: dlopen failed: libtorch_cuda_cpp.so: cannot open shared object file: No such file or directory
依然报错,但是可以运行了,改了下ip.txt跟backend
DDP test—— Error: RuntimeError: NCCL error in: /opt/conda/conda-bld/pytorch_1623448278899/work/torch/lib/c10d/ProcessGroupNCCL.cpp:911, unhandled system error, NCCL version 2.7.8. ncclSystemError: System call (socket, malloc, munmap, etc) failed.
跑DDPPyTorch分布式训练简明教程中示例代码时出现以上错误
但是在跑Launching and configuring distributed data parallel applications示例时,总是会卡住不动,如下图所示
综上,nccl的问题还是没有解决,现在就直接使用gloo进行代替。然后修改dgl的代码,发现dgl没有在gpu上运行是因为代码没有写到gpu上,观察发现将代码放到gpu上的方法是将model和tensor全部.to(device)上,但是中间依然出现了以下问题:
Expected all tensors to be on the same device, but found at least two devices, cuda:0 and cpu
这种就是tensor一些在cpu上一些在gpu上,因为需要知道哪些在gpu哪些在cpu
print(next(model.parameters()).device) #查看model的位置
print(tensor.device)
将输入和model全部放到gpu上的时候,出现以下错误
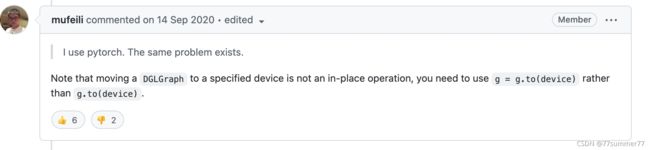
dgl._ffi.base.DGLError: Cannot assign node feature “h” on device cuda:0 to a graph on device cpu. Call DGLGraph.to() to copy the graph to the same device.
已解决,主要在于dgl在使用分布式的时候dataloader目前只支持cpu,不能加入device=gpu,另外下图也可能是一个原因。
其中使用gpu时,pytorch的model必然是在gpu上,不管是在train还是eval阶段(model.train()和model.eval()主要是和BN层以及Dropout层相关,具体参考Pytorch:model.train()和model.eval()用法和区别,以及model.eval()和torch.no_grad()的区别),所以要将数据tensor也都放到gpu上,使用gpu跑完之后再放在cpu上进行处理(如果需要的话)。
我这里面还有一个问题是由于gnn网络有两层,所以使用dataloader出来的mfg也是两个,这个时候mfg为list,不能直接.to(device),而应该一个一个的放到gpu上即可。