LoFTR配置运行: Detector-Free Local Feature Matching with Transformers ubuntu18.04 预训练模型分享
刚装好系统的空白系统ubuntu18.04安装,首先进入 软件与更新 换到国内源。
论文下载
代码下载
1.anaconda 3.5.3 安装
Index of /anaconda/archive/ | 清华大学开源软件镜像站 | Tsinghua Open Source Mirror![]() https://mirrors.tuna.tsinghua.edu.cn/anaconda/archive/
https://mirrors.tuna.tsinghua.edu.cn/anaconda/archive/
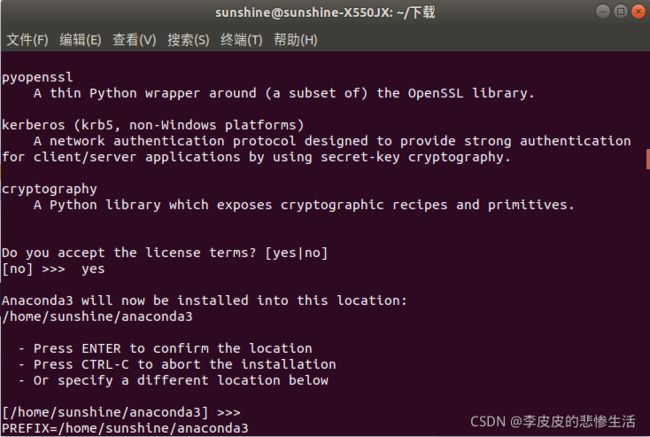
1.1 下载完成后运行安装软件:
bash Anaconda3-5.3.0-Linux-x86_64.sh1.2 一路回车,yes,问到vscode,填no,安装完成。
2.loftr下载
GitHub - zju3dv/LoFTR: Code for "LoFTR: Detector-Free Local Feature Matching with Transformers", CVPR 2021Code for "LoFTR: Detector-Free Local Feature Matching with Transformers", CVPR 2021 - GitHub - zju3dv/LoFTR: Code for "LoFTR: Detector-Free Local Feature Matching with Transformers", CVPR 2021![]() https://github.com/zju3dv/LoFTR2.1 下载后进入loftr目录,运行环境配置文件,这一步需要一点时间。
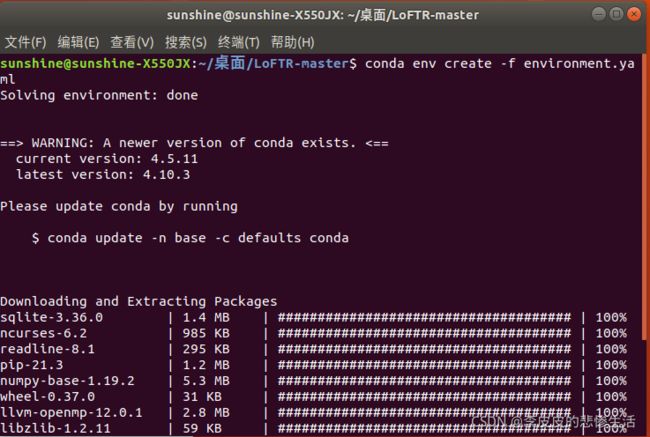
https://github.com/zju3dv/LoFTR2.1 下载后进入loftr目录,运行环境配置文件,这一步需要一点时间。
conda env create -f environment.yaml2.2 下载superglue源码
把 SuperGlue/models/superglue.py 放入/LoFTR-master/src/utils下
还需要下载预训练模型 (包含室内,室外模型,根据情况自己选)
链接: https://pan.baidu.com/s/1ESNtXXuBQWIu-QEkl6aPlQ 密码: g0lm
放到路径:LoFTR-master/weights/outdoor_ds.ckpt(自己创造)
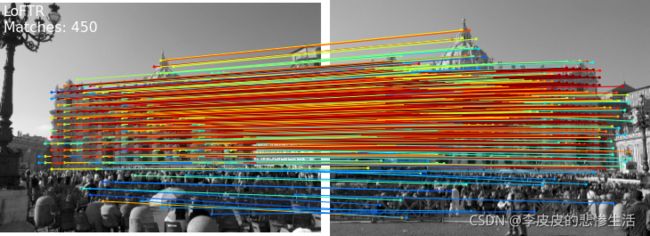
在loftr 试运行这段代码,需要改三个路径,包括输入的两张图片路径,预训练模型路径,输出两张图片的匹配图,下图是我的效果图。
import os
os.chdir("..")
from copy import deepcopy

# import os
# os.environ["CUDA_VISIBLE_DEVICES"] = "0"

import torch
import cv2
import numpy as np
import matplotlib.cm as cm
from src.utils.plotting import make_matching_figure


from src.loftr import LoFTR, default_cfg

# The default config uses dual-softmax.
# The outdoor and indoor models share the same config.
# You can change the default values like thr and coarse_match_type.

matcher = LoFTR(config=default_cfg)
matcher.load_state_dict(torch.load("/home/***改路径**/LoFTR-master/weights/outdoor_ds.ckpt")['state_dict'])####
matcher = matcher.eval().cuda()


default_cfg['coarse']

# Load example images
img0_pth = "/home/**********改路径**********.pgm"
img1_pth = "/home/**********改路径**********.pgm"
img0_raw = cv2.imread(img0_pth, cv2.IMREAD_GRAYSCALE)
img1_raw = cv2.imread(img1_pth, cv2.IMREAD_GRAYSCALE)
img0_raw = cv2.resize(img0_raw, (img0_raw.shape[1]//2, img0_raw.shape[0]//2))  # input size shuold be divisible by 8
img1_raw = cv2.resize(img1_raw, (img1_raw.shape[1]//2, img1_raw.shape[0]//2))
img0_raw = cv2.resize(img0_raw, (img0_raw.shape[1]//8*8, img0_raw.shape[0]//8*8))  # input size shuold be divisible by 8
img1_raw = cv2.resize(img1_raw, (img1_raw.shape[1]//8*8, img1_raw.shape[0]//8*8))

img0 = torch.from_numpy(img0_raw)[None][None].cuda() / 255.
img1 = torch.from_numpy(img1_raw)[None][None].cuda() / 255.
batch = {'image0': img0, 'image1': img1}

# Inference with LoFTR and get prediction
with torch.no_grad():
    matcher(batch)
    mkpts0 = batch['mkpts0_f'].cpu().numpy()
    mkpts1 = batch['mkpts1_f'].cpu().numpy()
    mconf = batch['mconf'].cpu().numpy()

# Draw
color = cm.jet(mconf)
text = [
    'LoFTR',
    'Matches: {}'.format(len(mkpts0)),
]
fig = make_matching_figure(img0_raw, img1_raw, mkpts0, mkpts1, color, text=text,path="LoFTR-master/LoFTR-colab-demo.pdf")
我也跑了自己的数据,效果很差,不如superpoint+superglue,还需用自己数据集训练。
未完待续


