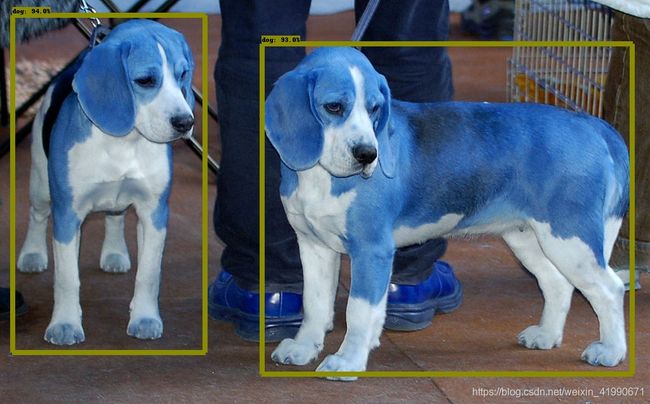
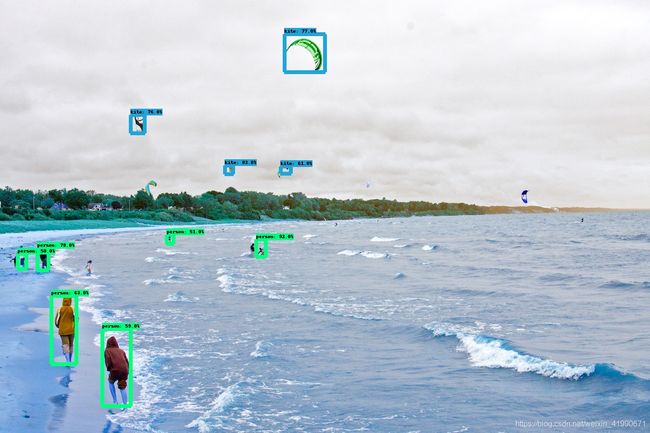
tensorflow/models reading&debuging
文章目录
- 源码链接
- 1. 环境配置
-
- 1.1 安装tensorflow
- 1.2 `pip install pycocotools`报错
- 2. include
- 3. Detection
- 4. Test
- window测试
-
-
- 坑1:
- 坑2
- 坑3
-
- 自己的测试
- 舒服了。。。
源码链接
https://github.com/tensorflow/models/tree/master/research/object_detection
下载后解压,直接下zip的记住改名models-master为models,在research/object_detection中阅读其中的notebook文件,按步骤抄到一个py文件中。
1. 环境配置
ubuntu系统,windows再说。。。。。。。。
1.1 安装tensorflow
使用清华源出问题,改为豆瓣源就好了
1.2 pip install pycocotools报错
坑1:缺个包
pip install cython
坑2: error: command ‘x86_64-linux-gnu-gcc’ failed with exit status 1
sudo apt-get install build-essential python3-dev libssl-dev libffi-dev libxml2 libxml2-dev libxslt1-dev zlib1g-dev
2. include
ModuleNotFoundError: No module named ‘object_detection’
后来发现这里出问题是因为我没有按步骤走,其实按步骤走下来就这种问题了。
3. Detection
model_name = 'ssd_mobilenet_v1_coco_2017_11_17'
detection_model = load_model(model_name)
这步需要科学上网
运行一次后下载完成,之后再次运行无需再次下载,故梯子可以关了
4. Test
运行到这步
for image_path in TEST_IMAGE_PATHS:
    show_inference(detection_model, image_path)
发现图片未显示
应该是display在jupyter中有显示,pycharm中没有显示
改用cv2
把下面这个函数改一下
def show_inference(model, image_path):
    # the array based representation of the image will be used later in order to prepare the
    # result image with boxes and labels on it.
    image_np = np.array(Image.open(image_path))
    # Actual detection.
    output_dict = run_inference_for_single_image(model, image_np)
    # Visualization of the results of a detection.
    vis_util.visualize_boxes_and_labels_on_image_array(
        image_np,
        output_dict['detection_boxes'],
        output_dict['detection_classes'],
        output_dict['detection_scores'],
        category_index,
        instance_masks=output_dict.get('detection_masks_reframed', None),
        use_normalized_coordinates=True,
        line_thickness=8)

    display(Image.fromarray(image_np))
    ## 这里增加这两句
    cv2.imshow("test",image_np)
    cv2.waitKey()#按esc换下一张图
window测试
把ubuntu中整好的代码全部打包挪到windows看效果(估计不太行)
清华源估计真不行了,继续换源
坑1:
pip install pycocotools
改为
pip install git+https://github.com/philferriere/cocoapi.git#subdirectory=PythonAPI
成功
坑2
%%bash
cd models/research/
protoc object_detection/protos/*.proto --python_out=.
%%bash
cd models/research
pip install .
报错
'protoc' 不是内部或外部命令,也不是可运行的程序
或批处理文件。
ERROR: Directory '.' is not installable. Neither 'setup.py' nor 'pyproject.toml' found.
windows安装protoc
参考windows 环境下的 protoc 安装
进入https://github.com/protocolbuffers/protobuf/releases
下载win64版本,将protoc.exe拷贝到c:\windows\system32中 ,测试如下
PS C:\Users\15518> protoc --version
libprotoc 3.12.1
然后再执行那两个命令就没问题了。
坑3
AttributeError: module 'google.protobuf.descriptor' has no attribute '_internal_create_key'
应该是tensorflow和protobuf的版本对应问题

从这个链接看到
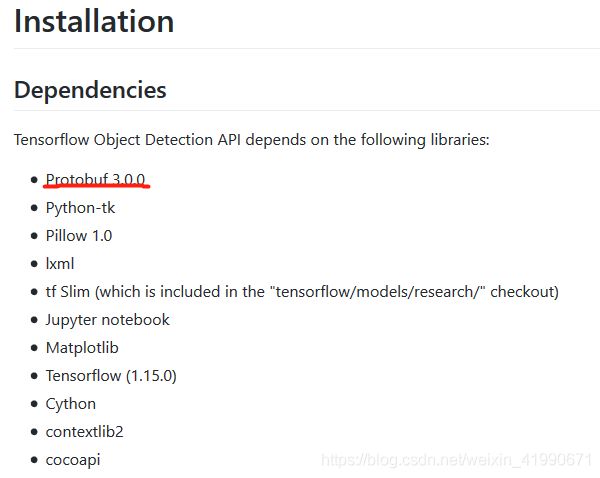 查看自己的版本
E:\self_study\git\models\research>pip install protobuf
Looking in indexes: http://mirrors.aliyun.com/pypi/simple/
Requirement already satisfied: protobuf in c:\users\15518\appdata\roaming\python\python37\site-packages (3.11.3)
Requirement already satisfied: six>=1.9 in c:\users\15518\appdata\local\programs\python\python37\lib\site-packages (from protobuf) (1.12.0)
Requirement already satisfied: setuptools in c:\users\15518\appdata\roaming\python\python37\site-packages (from protobuf) (46.1.1)
不对应,重新下,测试
PS C:\Users\15518> protoc --version
libprotoc 3.0.0
重新执行
%%bash
cd models/research/
protoc object_detection/protos/*.proto --python_out=.
%%bash
cd models/research
pip install .
报错解决!
改一下图片存储的路径(参考上下文找修改位置)
# 自己改的部分
    cv2.imshow("test",image_np)
    img_name = str(image_path)
    img_name = img_name.split("\\")[-1].split('.')[0]
    cv2.imwrite('E:\self_study\git\models\images\\'+img_name+'.jpg',image_np)
    print('E:\self_study\git\models\images\\'+img_name+'.jpg')
    cv2.waitKey()
自己的测试
查看当前模型能识别什么,一顿找找到了这句话
# List of the strings that is used to add correct label for each box.
PATH_TO_LABELS = 'object_detection/data/mscoco_label_map.pbtxt'
category_index = label_map_util.create_category_index_from_labelmap(PATH_TO_LABELS, use_display_name=True)
打开这个pbtxt
item {
  name: "/m/01g317"
  id: 1
  display_name: "person"
}
item {
  name: "/m/0199g"
  id: 2
  display_name: "bicycle"
}
item {
  name: "/m/0k4j"
  id: 3
  display_name: "car"
}

。。。。。共90个不列了
。。。。。
那就找个自行车看认不认识,上图
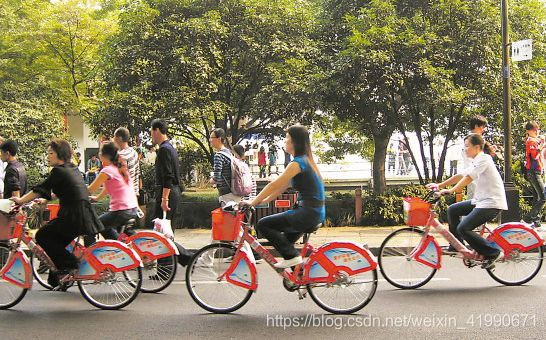 场景挺乱的,但识别效果还可以
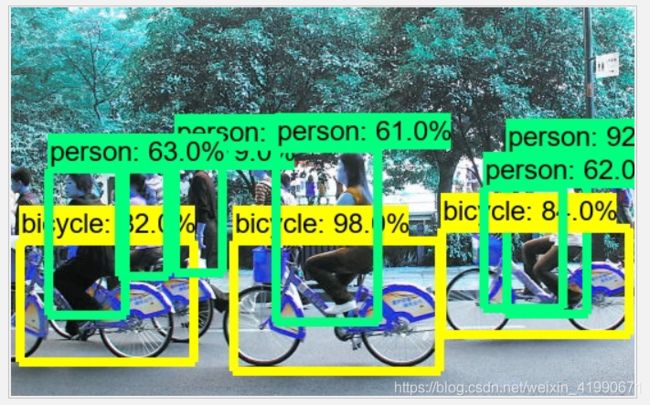 由于用的cv2打印的图片,通道和display可能不太一样,所以有色差。
舒服了。。。
最后附上我自己按步骤抄的和改的代码
## linux版本,windows需改动上一个代码块的内容
import os
import pathlib

print(pathlib.Path.cwd().parts)
os.chdir('..')
print(pathlib.Path.cwd().parts)

import numpy as np
import os
import six.moves.urllib as urllib
import sys
import tarfile
import tensorflow as tf
import zipfile
import cv2

from collections import defaultdict
from io import StringIO
from matplotlib import pyplot as plt
from PIL import Image
from IPython.display import display

## Import the object detection module.
from object_detection.utils import ops as utils_ops
from object_detection.utils import label_map_util
from object_detection.utils import visualization_utils as vis_util

# Patches:
# patch tf1 into `utils.ops`
utils_ops.tf = tf.compat.v1
# Patch the location of gfile
tf.gfile = tf.io.gfile


def load_model(model_name):
    base_url = 'http://download.tensorflow.org/models/object_detection/'
    model_file = model_name + '.tar.gz'
    model_dir = tf.keras.utils.get_file(
        fname=model_name,
        origin=base_url + model_file,
        untar=True)

    model_dir = pathlib.Path(model_dir) / "saved_model"

    model = tf.saved_model.load(str(model_dir))
    model = model.signatures['serving_default']

    return model


# List of the strings that is used to add correct label for each box.
PATH_TO_LABELS = 'object_detection/data/mscoco_label_map.pbtxt'
category_index = label_map_util.create_category_index_from_labelmap(PATH_TO_LABELS, use_display_name=True)

# If you want to test the code with your images, just add path to the images to the TEST_IMAGE_PATHS.
PATH_TO_TEST_IMAGES_DIR = pathlib.Path('object_detection/test_images')
TEST_IMAGE_PATHS = sorted(list(PATH_TO_TEST_IMAGES_DIR.glob("*.jpg")))
print(TEST_IMAGE_PATHS)

# Detection
model_name = 'ssd_mobilenet_v1_coco_2017_11_17'
detection_model = load_model(model_name)

print(detection_model.inputs)
print(detection_model.output_dtypes)
print(detection_model.output_shapes)


def run_inference_for_single_image(model, image):
    image = np.asarray(image)
    # The input needs to be a tensor, convert it using `tf.convert_to_tensor`.
    input_tensor = tf.convert_to_tensor(image)
    # The model expects a batch of images, so add an axis with `tf.newaxis`.
    input_tensor = input_tensor[tf.newaxis, ...]

    # Run inference
    output_dict = model(input_tensor)

    # All outputs are batches tensors.
    # Convert to numpy arrays, and take index [0] to remove the batch dimension.
    # We're only interested in the first num_detections.
    num_detections = int(output_dict.pop('num_detections'))
    output_dict = {key: value[0, :num_detections].numpy()
                   for key, value in output_dict.items()}
    output_dict['num_detections'] = num_detections

    # detection_classes should be ints.
    output_dict['detection_classes'] = output_dict['detection_classes'].astype(np.int64)

    # Handle models with masks:
    if 'detection_masks' in output_dict:
        # Reframe the the bbox mask to the image size.
        detection_masks_reframed = utils_ops.reframe_box_masks_to_image_masks(
            output_dict['detection_masks'], output_dict['detection_boxes'],
            image.shape[0], image.shape[1])
        detection_masks_reframed = tf.cast(detection_masks_reframed > 0.5,
                                           tf.uint8)
        output_dict['detection_masks_reframed'] = detection_masks_reframed.numpy()

    return output_dict


def show_inference(model, image_path):
    # the array based representation of the image will be used later in order to prepare the
    # result image with boxes and labels on it.
    image_np = np.array(Image.open(image_path))
    # Actual detection.
    output_dict = run_inference_for_single_image(model, image_np)
    # Visualization of the results of a detection.
    vis_util.visualize_boxes_and_labels_on_image_array(
        image_np,
        output_dict['detection_boxes'],
        output_dict['detection_classes'],
        output_dict['detection_scores'],
        category_index,
        instance_masks=output_dict.get('detection_masks_reframed', None),
        use_normalized_coordinates=True,
        line_thickness=8)

    display(Image.fromarray(image_np))

    # 自己改的部分
    cv2.imshow("test",image_np)
    img_name = str(image_path)
    img_name = img_name.split("/")[-1].split('.')[0]
    cv2.imwrite('/home/ming/Pictures/'+img_name+'.jpg',image_np)
    cv2.waitKey()


for image_path in TEST_IMAGE_PATHS:

    show_inference(detection_model, image_path)
