使用opencv实现对Mask_Rcnn的调用(C++/python)
版权所有,翻版必究。
运行环境:WIN10,pycharm,相应的CUDA,CUDNN,tensorflow1.15.0,tensorflow-gpu-1.14.0,Anaconda3
![]()
(很多问题呢都出现在环境的配置上面,所以可以的话开个虚拟环境进行训练处理)
使用python或者C++调用接口来处理,其中python可以看我之前的版本。调用.h5文件即可。本文中主要介绍一个哔哩哔哩大佬使用.pb和.pbtxt来完成调用。主要讲解的是C++和python调用的.pb文件和.pbtxt文件的生成问题。后续调用,看代码即可。(稍安毋昭,看下文)
链接在此:https://www.bilibili.com/video/BV1jJ411u7A5
大家可以去看这个人的视频,很详细。我这里主要是用于记录和自己学习,也欢迎大家一起学习。
https://www.learnopencv.com/deep-learning-based-object-detection-and-instance-segmentation-using-mask-r-cnn-in-opencv-python-c/ (这里放的是另外一个大佬对于此类问题的分析)
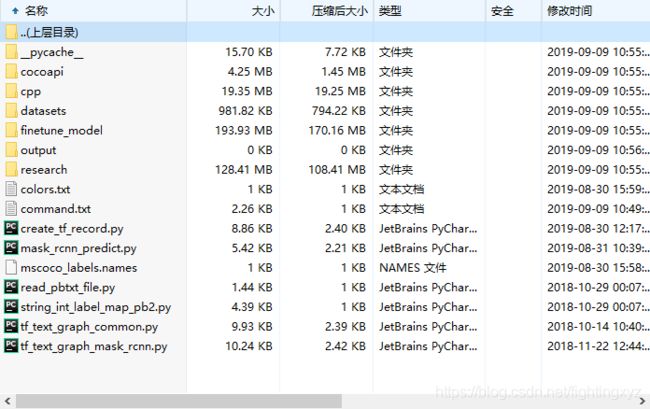
下载文件:![]()
链接:https://pan.baidu.com/s/1tI-_S-GJSW3WcMKsdHTBkQ
提取码:xk8p
第一步配置虚拟环境:
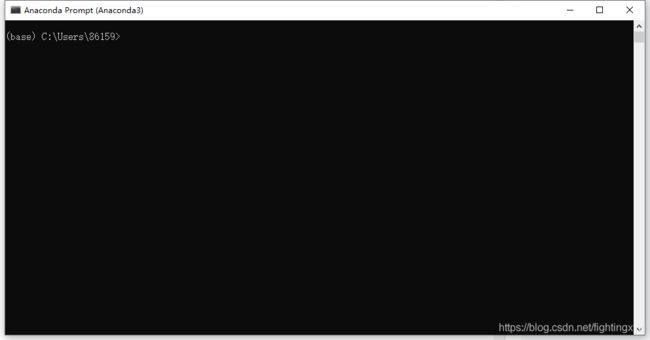
打开anoconda下的:
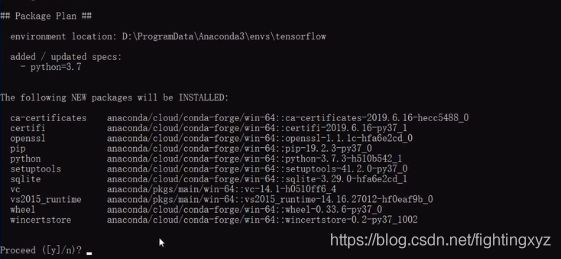
输入命令:(配置tensorflow) conda create --name tensorflow python=3.7回车即可。我都是因为已经装好了,所以不需要再装虚拟环境。
你们应该会出现这种样子:输入y即可。
然后会出现提示:
激活该环境的命令就在其中,使用conda activate tensorflow即可激活环境。然后你们的命令行会变成这样:
虚拟环境配置好了之后就需要配置安装包。看你的电脑属于那种,选择其中一种进行配置。
//CPU
conda install tensorflow=1.14.0
//GPU
conda install tensorflow-gpu=1.14.0
配置opencv opencv ipython cython pillow:conda install opencv ipython cython pillow
第二步:环境配置
#环境配置
在你安装的(Anacondal路径下).\Anaconda3\envs\tensorflow\Lib\site-packages
新建tensorflow.pth ,添加
.\models-master\research
.\models-master\research\slim
这两个文件的目录。(需要看你的压缩文件放在哪里了!!!)
#cocoapi
cd cocoapi/PythonAPI
python setup.py build_ext install
(需要配置PythonAPI目录下的文件,里面放置的是一些依赖库和文件)
第三步:转换数据
python create_tf_record.py --images_dir=./datasets/train/image --annotations_json_dir=./datasets/train/json --label_map_path=./datasets/label.pbtxt --output_path=./output/train.record
python create_tf_record.py --images_dir=./datasets/val/image --annotations_json_dir=./datasets/val/json --label_map_path=./datasets/label.pbtxt --output_path=./output/val.record
第四步:训练
#训练,修改mask_rcnn_inception_v2_coco.config里面标注有Need Modified
python ./research/object_detection/model_main.py --model_dir=./output --pipeline_config_path=./finetune_model/mask_rcnn_inception_v2_coco.config
第五步:转换模型(生成.pb文件和.pbtxt文件)
#转换模型,按需要改路径名字和文件名字
python ./research/object_detection/export_inference_graph.py --input_type image_tensor --pipeline_config_path ./finetune_model/mask_rcnn_inception_v2_coco.config --trained_checkpoint_prefix ./output/model.ckpt-1000 --output_directory ./output
python tf_text_graph_mask_rcnn.py --input ./output/frozen_inference_graph.pb --output ./output/mask_rcnn.pbtxt --config ./finetune_model/mask_rcnn_inception_v2_coco.config
python mask_rcnn_predict.py
重头戏在他的视频中使用C++的opencv来调用这块,给了我很大的启发。代码在他的这个目录下:
![]()
我会添加一些自己的理解在其中,觉得有问题的欢迎说明讨论!(不喜勿喷谢谢!)
主程序:
#include "stdafx.h"
#include
#include
#include
#include

#include
#include
#include

using namespace cv;
using namespace dnn;
using namespace std;

String textGraph = "mask_rcnn.pbtxt";
String modelWeights = "frozen_inference_graph.pb";
string classesFile = "mscoco_labels.names";
string colorsFile = "colors.txt";

float confThreshold = 0.7;
float maskThreshold = 0.3;

int ImgWidth = 224;
int ImgHight = 224;

vector classes;
vector colors;
Mat frame, blob, m_DstMat;
float m_fWidthScale;
float m_fHeighScale;

void Predect(string path);
void LoadLabelAndColor();
void drawBox(Mat& frame, int classId, float conf, Rect box, Mat& objectMask);
void postprocess(Mat& frame, const vector& outs);

int main(int argc, char** argv)
{
	LoadLabelAndColor();
	Predect("1.jpg");
	return 0;
}

void Predect(string path) {
	// Load the network
	Net net = readNetFromTensorflow(modelWeights, textGraph);
	net.setPreferableBackend(DNN_BACKEND_OPENCV);
	net.setPreferableTarget(DNN_TARGET_CPU);


	frame = imread(path);
	m_DstMat = frame.clone();
	resize(frame, frame, Size(ImgWidth, ImgHight));

	m_fWidthScale = m_DstMat.cols*1.0 / frame.cols;
	m_fHeighScale = m_DstMat.rows*1.0 / frame.rows;


	// Stop the program if reached end of video
	if (frame.empty()) {
		return ;
	}
	// Create a 4D blob from a frame.
	blobFromImage(frame, blob, 1.0, Size(frame.cols, frame.rows), Scalar(), true, false);
	//blobFromImage(frame, blob);

	net.setInput(blob);

	std::vector outNames(2);
	outNames[0] = "detection_out_final";
	outNames[1] = "detection_masks";
	vector outs;
	net.forward(outs, outNames);

	postprocess(frame, outs);

	vector layersTimes;
	double freq = getTickFrequency() / 1000;
	double t = net.getPerfProfile(layersTimes) / freq;
	string label = format("Inference time for a frame : %0.0f ms", t);
	putText(m_DstMat, label, Point(0, 15), FONT_HERSHEY_SIMPLEX, 0.5, Scalar(0, 0, 0));

	imshow("Result", m_DstMat);
	waitKey(0);

}
此处主程序没有写python版本,但是要弄python版本的话也就是改成对应的语句,难度不大。想尝试的可以试试。我这篇博客主要用于自己学习记录。
//此处就是利用程序预测出来的边框点进行图像的绘制。当然也会设置阈值对结果进行一定程度的把控!
// For each frame, extract the bounding box and mask for each detected object
void postprocess(Mat& frame, const vector& outs)
{
	Mat outDetections = outs[0];
	Mat outMasks = outs[1];

	// Output size of masks is NxCxHxW where
	// N - number of detected boxes
	// C - number of classes (excluding background)
	// HxW - segmentation shape
	const int numDetections = outDetections.size[2];
	const int numClasses = outMasks.size[1];

	cout<< "numClasses: "<(i, 2);
		if (score > confThreshold)
		{
			// Extract the bounding box
			int classId = static_cast(outDetections.at(i, 1));
			int left = static_cast(frame.cols * outDetections.at(i, 3));
			int top = static_cast(frame.rows * outDetections.at(i, 4));
			int right = static_cast(frame.cols * outDetections.at(i, 5));
			int bottom = static_cast(frame.rows * outDetections.at(i, 6));

			left = max(0, min(left, frame.cols - 1));
			top = max(0, min(top, frame.rows - 1));
			right = max(0, min(right, frame.cols - 1));
			bottom = max(0, min(bottom, frame.rows - 1));
			Rect box = Rect(left, top, right - left + 1, bottom - top + 1);

			/************************************************/
			box.x = round(box.x*m_fWidthScale);
			box.y = round(box.y*m_fHeighScale);
			box.width = round(box.width*m_fWidthScale);
			box.height = round(box.height*m_fHeighScale);
			/************************************************/

			// Extract the mask for the object
			Mat objectMask(outMasks.size[2], outMasks.size[3], CV_32F, outMasks.ptr(i, classId));

			// Draw bounding box, colorize and show the mask on the image
			drawBox(m_DstMat, classId, score, box, objectMask);

		}
	}
}
python版本:
# For each frame, extract the bounding box and mask for each detected object
def postprocess(boxes, masks):
    # Output size of masks is NxCxHxW where
    # N - number of detected boxes
    # C - number of classes (excluding background)
    # HxW - segmentation shape
    numClasses = masks.shape[1]
    numDetections = boxes.shape[2]

    frameH = frame.shape[0]
    frameW = frame.shape[1]

    for i in range(numDetections):
        box = boxes[0, 0, i]
        mask = masks[i]
        score = box[2]
        if score > confThreshold:
            classId = int(box[1])

            # Extract the bounding box
            left = int(frameW * box[3])
            top = int(frameH * box[4])
            right = int(frameW * box[5])
            bottom = int(frameH * box[6])

            left = max(0, min(left, frameW - 1))
            top = max(0, min(top, frameH - 1))
            right = max(0, min(right, frameW - 1))
            bottom = max(0, min(bottom, frameH - 1))

            # Extract the mask for the object
            classMask = mask[classId]

            # Draw bounding box, colorize and show the mask on the image
            drawBox(frame, classId, score, left, top, right, bottom, classMask)
//这一块的主要目的是在输入图像上,利用预测的掩模图以及边框点信息进行图像的绘制。

// Draw the predicted bounding box, colorize and show the mask on the image
void drawBox(Mat& frame, int classId, float conf, Rect box, Mat& objectMask)
{

	//Draw a rectangle displaying the bounding box
	rectangle(frame, Point(box.x, box.y), Point(box.x + box.width, box.y + box.height), Scalar(255, 178, 50), 3);


	//Get the label for the class name and its confidence
	string label = format("%.2f", conf);
	if (!classes.empty())
	{
		CV_Assert(classId < (int)classes.size());
		label = classes[classId] + ":" + label;
	}

	//Display the label at the top of the bounding box
	int baseLine;
	Size labelSize = getTextSize(label, FONT_HERSHEY_SIMPLEX, 0.5, 1, &baseLine);
	box.y = max(box.y, labelSize.height);
	rectangle(frame, Point(box.x, box.y - round(1.5*labelSize.height)), Point(box.x + round(1.5*labelSize.width), box.y + baseLine), Scalar(255, 255, 255), FILLED);
	putText(frame, label, Point(box.x, box.y), FONT_HERSHEY_SIMPLEX, 0.75, Scalar(0, 0, 0), 1);


	Scalar color = colors[classId%colors.size()];

	// Resize the mask, threshold, color and apply it on the image
	resize(objectMask, objectMask, Size(box.width, box.height));
	Mat mask = (objectMask > maskThreshold);

	Mat coloredRoi = (0.3 * color + 0.7 * frame(box));
	coloredRoi.convertTo(coloredRoi, CV_8UC3);

	// Draw the contours on the image
	vector contours;
	Mat hierarchy;
	mask.convertTo(mask, CV_8U);
	findContours(mask, contours, hierarchy, RETR_CCOMP, CHAIN_APPROX_SIMPLE);
	drawContours(coloredRoi, contours, -1, color, 5, LINE_8, hierarchy, 100);
	coloredRoi.copyTo(frame(box), mask);

}
python版本:
# Draw the predicted bounding box, colorize and show the mask on the image
def drawBox(frame, classId, conf, left, top, right, bottom, classMask):
    # Draw a bounding box.
    cv.rectangle(frame, (left, top), (right, bottom), (255, 178, 50), 3)

    # Print a label of class.
    label = '%.2f' % conf
    if classes:
        assert(classId < len(classes))
        label = '%s:%s' % (classes[classId], label)

    # Display the label at the top of the bounding box
    labelSize, baseLine = cv.getTextSize(label, cv.FONT_HERSHEY_SIMPLEX, 0.5, 1)
    top = max(top, labelSize[1])
    cv.rectangle(frame, (left, top - round(1.5*labelSize[1])), (left + round(1.5*labelSize[0]), top + baseLine), (255, 255, 255), cv.FILLED)
    cv.putText(frame, label, (left, top), cv.FONT_HERSHEY_SIMPLEX, 0.75, (0,0,0), 1)

    # Resize the mask, threshold, color and apply it on the image
    classMask = cv.resize(classMask, (right - left + 1, bottom - top + 1))
    mask = (classMask > maskThreshold)
    roi = frame[top:bottom+1, left:right+1][mask]

    color = colors[classId%len(colors)]
    # Comment the above line and uncomment the two lines below to generate different instance colors
    #colorIndex = random.randint(0, len(colors)-1)
    #color = colors[colorIndex]

    frame[top:bottom+1, left:right+1][mask] = ([0.3*color[0], 0.3*color[1], 0.3*color[2]] + 0.7 * roi).astype(np.uint8)

    # Draw the contours on the image
    mask = mask.astype(np.uint8)
    im2, contours, hierarchy = cv.findContours(mask,cv.RETR_TREE,cv.CHAIN_APPROX_SIMPLE)
    cv.drawContours(frame[top:bottom+1, left:right+1], contours, -1, color, 3, cv.LINE_8, hierarchy, 100)
//这一块的本质并不复杂,就是将文件中的内容读取出来,让其符合C++使用的规则。
//第一步读取文件
//第二步读取文件中的内容
//第三步放置到你需要存储的地方。比如此段代码中放置的位置为classes和colors
//这也是为了后面画图的时候,用颜色区分来进行提前准备的
void LoadLabelAndColor()
{
    ifstream ifs(classesFile.c_str());
    string line;
    while (getline(ifs, line)) classes.push_back(line);

    ifstream colorFptr(colorsFile.c_str());
    while (getline(colorFptr, line))
    {
        char* pEnd;
        double r, g, b;
        r = strtod(line.c_str(), &pEnd);
        g = strtod(pEnd, NULL);
        b = strtod(pEnd, NULL);
        Scalar color = Scalar(r, g, b, 255.0);
        colors.push_back(Scalar(r, g, b, 255.0));
    }
}
对应的python代码为:
# Load names of classes
classesFile = "mscoco_labels.names";
classes = None
with open(classesFile, 'rt') as f:
   classes = f.read().rstrip('\n').split('\n')


# Load the colors
colorsFile = "colors.txt";
with open(colorsFile, 'rt') as f:
    colorsStr = f.read().rstrip('\n').split('\n')

colors = []
for i in range(len(colorsStr)):
    rgb = colorsStr[i].split(' ')
    color = np.array([float(rgb[0]), float(rgb[1]), float(rgb[2])])
    colors.append(color)
stdafx.cpp中存放的东西如下所示:
// stdafx.cpp : 只包括标准包含文件的源文件
// MaskRCNNCPP.pch 将作为预编译头
// stdafx.obj 将包含预编译类型信息

#include "stdafx.h"

// TODO: 在 STDAFX.H 中引用任何所需的附加头文件,
//而不是在此文件中引用
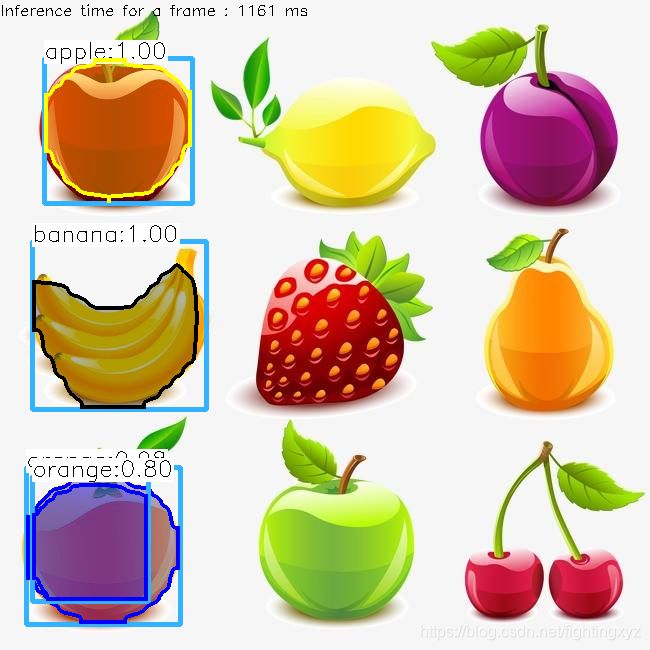
附一张结果图:
参考了很多大佬的文章,尽情期待我都下一篇文章。该文章主要是说明,如何在C#中使用opencvsharp使用该模型!!!((●'◡'●)这才是博主的本来目的)。这边主要也是给予大家一点好多文章。day day up!


