cv2.putText(frame, “FPS:“+str(fps), (5, 50), cv2.FONT_HERSHEY_SIMPLEX, 0.75, (0, 0, 255), 2)
今天给大家分享一个简单快速在cv2的可视化窗口生成文字的方法,只需要一行代码即可实现,简单快捷。需要你们的点赞关注支持,老样子,代码以开源。
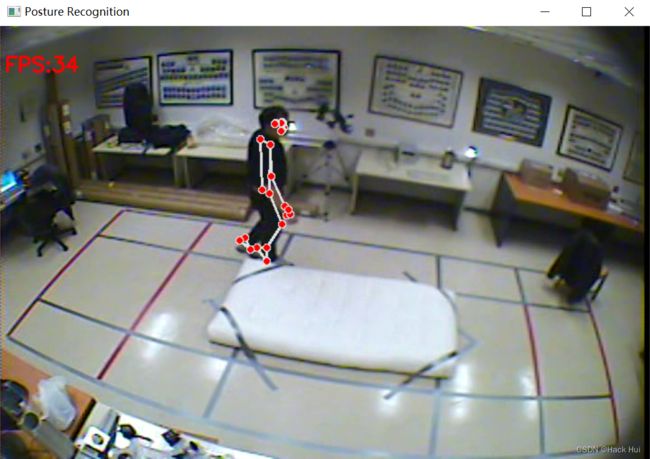
下面就以最近在做的基于姿势估计的人员摔倒为例,给大家展示一下。
首先大家先看效果图:
基于姿势估计的检测方法,大家可以自行阅读我另一篇博客,这里主要介绍如何在cv2调出的窗口界面添加文字。在
cv2.imshow()后面调用cv2内置的cv2.puttext()函数,官方的文档如下所示:
def putText(img, text, org, fontFace, fontScale, color, thickness=None, lineType=None, bottomLeftOrigin=None): # real signature unknown; restored from __doc__
    """
    putText(img, text, org, fontFace, fontScale, color[, thickness[, lineType[, bottomLeftOrigin]]]) -> img
    .   @brief Draws a text string.
    .
    .   The function cv::putText renders the specified text string in the image. Symbols that cannot be rendered
    .   using the specified font are replaced by question marks. See #getTextSize for a text rendering code
    .   example.
    .
    .   @param img Image.
    .   @param text Text string to be drawn.
    .   @param org Bottom-left corner of the text string in the image.
    .   @param fontFace Font type, see #HersheyFonts.
    .   @param fontScale Font scale factor that is multiplied by the font-specific base size.
    .   @param color Text color.
    .   @param thickness Thickness of the lines used to draw a text.
    .   @param lineType Line type. See #LineTypes
    .   @param bottomLeftOrigin When true, the image data origin is at the bottom-left corner. Otherwise,
    .   it is at the top-left corner.
    """
    pass
使用方法参数举例如下:
cv2.putText(frame, "FPS:"+str(fps), (5, 50), cv2.FONT_HERSHEY_SIMPLEX, 0.75, (0, 0, 255), 2)注意一点:这个函数的第二个位置默认传入的是字符串类型,要注意传入的数据类型匹配或者强制转换成String类型。完整实验代码示例如下:
import cv2
import time
import mediapipe as mp
from tqdm import tqdm
# 导入solution
mp_pose = mp.solutions.pose
mp_drawing = mp.solutions.drawing_utils
pose = mp_pose.Pose(static_image_mode=False,
            #    model_complexity=1,
                    smooth_landmarks=True,
           #        enable_segmentation=True,
                    min_detection_confidence=0.7,
                    min_tracking_confidence=0.7)
while cap.isOpened():
    # 获取画面
    success, frame = cap.read()

    if not success:
        print('Error')
        break

    ## !!!处理帧函数
    start=time.time()
    frame = process_frame(frame)
    end=time.time()
    fps=int(1/(end-start))

    # 图片 添加的文字 位置 字体 字体大小 字体颜色 字体粗细
    cv2.putText(frame, "FPS:"+str(fps), (5, 50), cv2.FONT_HERSHEY_SIMPLEX, 0.75, (0, 0, 255), 2)
    # 展示处理后的三通道图像
    cv2.imshow('Posture Recognition', frame)
    if cv2.waitKey(1) in [ord('q'), 27]:
        break
cap.release()
cv2.destroyAllWindows()
