Ubuntu 安装Yolo-FastestV2 的一般流程(3),将实施检测与转化为别的模型.
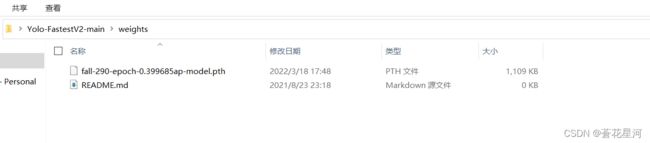
在上面,我们找到一个最大的训练模型,我们从云平台中将他下载下来.将他放到yolo-FastestV2的源码文件夹中.我的话是放到了weights中了.
接着,我们打开test.py文件.找到下面对应的代码:
if __name__ == '__main__':
    #指定训练配置文件
    parser = argparse.ArgumentParser()
    parser.add_argument('--data', type=str, default='data/fall.data',
                        help='Specify training profile *.data')
    parser.add_argument('--weights', type=str, default='weights/fall-290-epoch-0.399685ap-model.pth',
                        help='The path of the .pth model to be transformed')
    parser.add_argument('--img', type=str, default='img/fall_123.jpg',
                        help='The path of test image')
其中,data是你设置过的.data文件,然后weights是你刚刚从云平台下载放好的,最后img是你要用来测试的的图片.(上面建议都使用绝对路径.).
我们将代码拉到最后,可以发现,结果最后输出路径在img.
cv2.imwrite("img/test_result2.png", ori_img)
到这里,我们实施检测已经算是完成了.
但是作为yolo,本身就是用来实时监测的,不用来检测视频好像说不过去啊.
所以我们创建一个新的py文件,自己写一个.(其实是从网上扒回来的.)
import os
import cv2
import time
import argparse

import torch
import model.detector
import utils.utils
import utils.datasets

if __name__ == '__main__':
    #指定训练配置文件
    parser = argparse.ArgumentParser()
    parser.add_argument('--data', type=str, default='data/fall.data',  help='Specify training profile *.data')
    parser.add_argument('--weights', type=str, default='weights/fall-290-epoch-0.399685ap-model.pth', help='The path of the .pth model to be transformed')
    parser.add_argument('--img', type=str, default='img/fall_123.jpg',  help='The path of test image')
    parser.add_argument('--vid', type=str, default='0',  help='The path of test image')
    parser.add_argument('--view_img', type=bool, default=True,  help='visual the vedio')


    opt = parser.parse_args()
    cfg = utils.utils.load_datafile(opt.data)
    assert os.path.exists(opt.weights), "请指定正确的模型路径"
    assert os.path.exists(opt.img), "请指定正确的测试图像路径"

    # 模型加载
    device = torch.device("cuda" if torch.cuda.is_available() else "cpu")
    model = model.detector.Detector(cfg["classes"], cfg["anchor_num"], True).to(device)
    model.load_state_dict(torch.load(opt.weights, map_location=device))
    model.eval()

    # 1 加载视频文件
    if opt.vid=='0':
        capture=cv2.VideoCapture('person.mp4')
    else:
        capture = cv2.VideoCapture(opt.vid)
    # 2 读取视频
    ret, frame = capture.read()
    while ret:
        # 3 ret 是否读取到了帧,读取到了则为True
        cv2.imshow("video", frame)
        ret, frame = capture.read()

        # 数据预处理
        img = cv2.resize(frame, (cfg["width"], cfg["height"]), interpolation=cv2.INTER_LINEAR)
        img = img.reshape(1, cfg["height"], cfg["width"], 3)
        img = torch.from_numpy(img.transpose(0, 3, 1, 2))
        img = img.to(device).float() / 255.0

        # 模型推理
        preds = model(img)
        # 特征图后处理
        output = utils.utils.handel_preds(preds, cfg, device)
        output_boxes = utils.utils.non_max_suppression(output, conf_thres=0.4, iou_thres=0.4)

        # 加载label names
        LABEL_NAMES = []
        with open(cfg["names"], 'r') as f:
            for line in f.readlines():
                LABEL_NAMES.append(line.strip())

        h, w, _ = frame.shape
        scale_h, scale_w = h / cfg["height"], w / cfg["width"]

        # 绘制预测框
        for box in output_boxes[0]:
            box = box.tolist()

            obj_score = box[4]
            category = LABEL_NAMES[int(box[5])]

            x1, y1 = int(box[0] * scale_w), int(box[1] * scale_h)
            x2, y2 = int(box[2] * scale_w), int(box[3] * scale_h)

            cv2.rectangle(frame, (x1, y1), (x2, y2), (255, 255, 0), 2)
            cv2.putText(frame, '%.2f' % obj_score, (x1, y1 - 5), 0, 0.7, (0, 255, 0), 2)
            cv2.putText(frame, category, (x1, y1 - 25), 0, 0.7, (0, 255, 0), 2)

        # 4 若键盘按下q则退出播放
        if cv2.waitKey(20) & 0xff == ord('q'):
            break

    # 5 释放资源
    capture.release()
    # 6 关闭所有窗口
    cv2.destroyAllWindows()
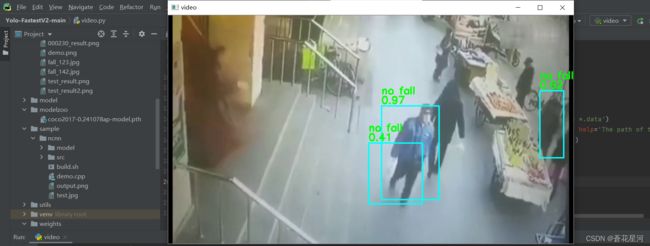
上面就是我们视频检测的代码了.稍微学过opencv的都知道,视频和使用摄像头其实是一个道理,所以,我们将下面代码中的default改成'0'就好.
parser.add_argument('--vid', type=str, default='2.mp4', help='The path of test image')当然了,也许你的电脑有多个摄像头,这里没有帮你补充,你可以在上面代码中找到下面这个部分稍微的修改一下.
 # 1 加载视频文件
    if opt.vid=='0':
        capture=cv2.VideoCapture(0)
    else:
        capture = cv2.VideoCapture(opt.vid)
运行结果如下图.
到这里,我们已经将Yolo-FastestV2跑通了.接下来,就是想办法部署到Ubuntu上.
首先,模型转换.
我们将目光看到源码的pytorch2onnx.py文件,这个文件可以帮助我们将我们的.pth转换为onnx文件.
我们保留好这个onnx文件,后面有用.
这篇先到这里.