vs2019+opencv_contrib4.6.0实现图像融合
参考:
OpenCV探索之路(二十三):特征检测和特征匹配方法汇总 - Madcola - 博客园
这篇博客使用的oencv版本和oencv_contrib版本是基于版本的,所以来更新一下。
opencv_contrib4.6.0安装详细流程请见:
vs2019配置opencv4.6.0+opencv_contrib4.6.0_rain_1324的博客-CSDN博客
我所用的图片的结果:
融合部分:
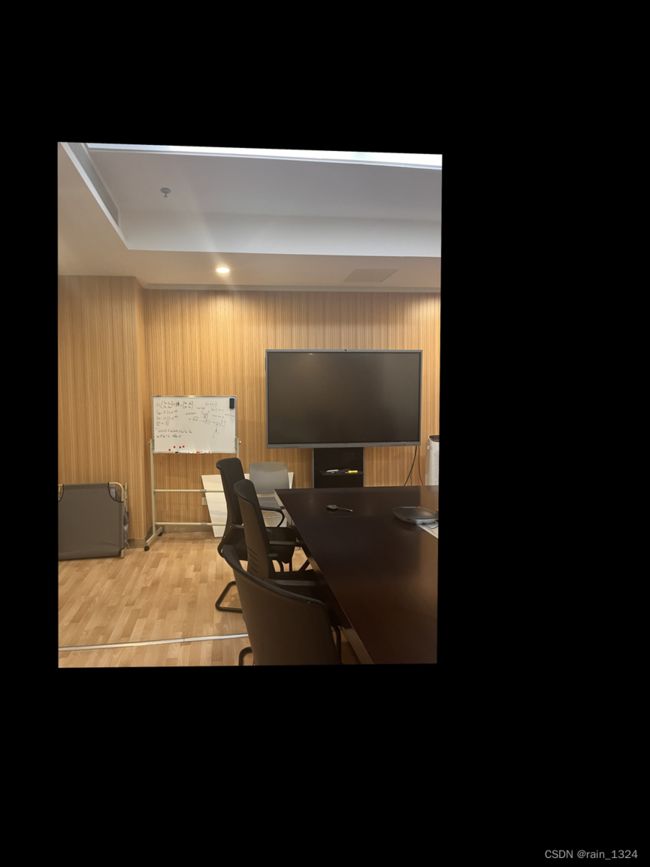
用手机拍的图片,灰度图:
上图是小场景,下图是大场景。
大场景(左图)和小场景(右图)。图中的线为配对点连线。原理参考上面分享的博客,讲得很详细。
下面这张是向场景图经过变换后在大场景中的位置图。
下面就是融合图片。
代码部分:主要修改的是hessin矩阵的阈值,和distance的值。
#include "opencv2/highgui.hpp"
#include "opencv2/xfeatures2d/nonfree.hpp"
#include "opencv2/opencv.hpp"
#include
#include

using namespace cv;
using namespace std;

void OptimizeSeam(Mat& img1, Mat& trans, Mat& dst);

typedef struct
{
    Point2f left_top;
    Point2f left_bottom;
    Point2f right_top;
    Point2f right_bottom;
}four_corners_t;

four_corners_t corners;

void CalcCorners(const Mat& H, const Mat& src)
{
    double v2[] = { 0, 0, 1 };//左上角
    double v1[3];//变换后的坐标值
    Mat V2 = Mat(3, 1, CV_64FC1, v2);  //列向量
    Mat V1 = Mat(3, 1, CV_64FC1, v1);  //列向量

    V1 = H * V2;
    //左上角(0,0,1)
    cout << "V2: " << V2 << endl;
    cout << "V1: " << V1 << endl;
    corners.left_top.x = v1[0] / v1[2];
    corners.left_top.y = v1[1] / v1[2];

    //左下角(0,src.rows,1)
    v2[0] = 0;
    v2[1] = src.rows;
    v2[2] = 1;
    V2 = Mat(3, 1, CV_64FC1, v2);
    V1 = Mat(3, 1, CV_64FC1, v1);
    V1 = H * V2;
    corners.left_bottom.x = v1[0] / v1[2];
    corners.left_bottom.y = v1[1] / v1[2];

    //右上角(src.cols,0,1)
    v2[0] = src.cols;
    v2[1] = 0;
    v2[2] = 1;
    V2 = Mat(3, 1, CV_64FC1, v2);  //列向量
    V1 = Mat(3, 1, CV_64FC1, v1);  //列向量
    V1 = H * V2;
    corners.right_top.x = v1[0] / v1[2];
    corners.right_top.y = v1[1] / v1[2];

    //右下角(src.cols,src.rows,1)
    v2[0] = src.cols;
    v2[1] = src.rows;
    v2[2] = 1;
    V2 = Mat(3, 1, CV_64FC1, v2);  //列向量
    V1 = Mat(3, 1, CV_64FC1, v1);  //列向量
    V1 = H * V2;
    corners.right_bottom.x = v1[0] / v1[2];
    corners.right_bottom.y = v1[1] / v1[2];

}


int main(int argc, char* argv[])
{


    Mat image01 = imread("19.jpg");
    Mat image02 = imread("20.jpg");

    //灰度图转换
    Mat image1, image2;
    cvtColor(image01, image1, COLOR_RGB2GRAY);
    cvtColor(image02, image2, COLOR_RGB2GRAY);

     imwrite("1.jpg", image1);
     imwrite("2.jpg", image2);
   // image1 = image01;
   // image2 = image02;

    //提取特征点
    cv::Ptr detector = cv::xfeatures2d::SurfFeatureDetector::create(2000);//hession矩阵的阈值自己设置
    vector keyPoint1, keyPoint2;//将提取的特征点以keypoint形式存储
    cv::Mat imageDesc1, imageDesc2;

    detector->detectAndCompute(image1, cv::Mat(), keyPoint1, imageDesc1);
    detector->detectAndCompute(image2, cv::Mat(), keyPoint2, imageDesc2);

    FlannBasedMatcher matcher;
    vector > matchePoints;
    vector GoodMatchePoints;

    vector train_desc(1, imageDesc1);
    matcher.add(train_desc);
    matcher.train();

    matcher.knnMatch(imageDesc2, matchePoints, 2);
    cout << "total match points: " << matchePoints.size() << endl;

    // Lowe's algorithm,获取优秀匹配点
    for (int i = 0; i < matchePoints.size(); i++)
    {
        if (matchePoints[i][0].distance < 0.55 * matchePoints[i][1].distance)
        {
            GoodMatchePoints.push_back(matchePoints[i][0]);
        }
    }

    Mat first_match;
    drawMatches(image02, keyPoint2, image01, keyPoint1, GoodMatchePoints, first_match);
    //imshow("first_match ", first_match);
    imwrite("1.jpg", first_match);

    vector imagePoints1, imagePoints2;

    for (int i = 0; i < GoodMatchePoints.size(); i++)
    {
        imagePoints2.push_back(keyPoint2[GoodMatchePoints[i].queryIdx].pt);
        imagePoints1.push_back(keyPoint1[GoodMatchePoints[i].trainIdx].pt);
    }


    Mat homo = findHomography(imagePoints1, imagePoints2,RANSAC);
    cout << "变换矩阵为:\n" << homo << endl << endl; //输出映射矩阵

    //图像配准
    Mat imageTransform1, imageTransform2;
    warpPerspective(image01, imageTransform1, homo, Size(MAX(corners.right_top.x, corners.right_bottom.x), image02.rows));
    imwrite("trans1.jpg", imageTransform1);

    int dst_width = imageTransform1.cols;  //取最右点的长度为拼接图的长度
    int dst_height = image02.rows;

    Mat dst(dst_height, dst_width, CV_8UC3);
    dst.setTo(0);

    imageTransform1.copyTo(dst(Rect(0, 0, imageTransform1.cols, imageTransform1.rows)));
    image02.copyTo(dst(Rect(0, 0, image02.cols, image02.rows)));

    //imshow("b_dst", dst);
    imwrite("b_dst.jpg", dst);


    OptimizeSeam(image02, imageTransform1, dst);

    imwrite("3.jpg", dst);

    waitKey();
    return 0;

}
void OptimizeSeam(Mat& img1, Mat& trans, Mat& dst)
{
    int start = MIN(corners.left_top.x, corners.left_bottom.x);

    double processWidth = img1.cols - start;
    int rows = dst.rows;
    int cols = img1.cols;
    double alpha = 1;
    for (int i = 0; i < rows; i++)
    {
        uchar* p = img1.ptr(i);  //获取第i行的首地址
        uchar* t = trans.ptr(i);
        uchar* d = dst.ptr(i);
        for (int j = start; j < cols; j++)
        {
            //如果遇到图像trans中无像素的黑点,则完全拷贝img1中的数据
            if (t[j * 3] == 0 && t[j * 3 + 1] == 0 && t[j * 3 + 2] == 0)
            {
                alpha = 1;
            }
            else
            {
                //img1中像素的权重,与当前处理点距重叠区域左边界的距离成正比,实验证明,这种方法确实好
                alpha = (processWidth - (j - start)) / processWidth;
            }

            d[j * 3] = p[j * 3] * alpha + t[j * 3] * (1 - alpha);
            d[j * 3 + 1] = p[j * 3 + 1] * alpha + t[j * 3 + 1] * (1 - alpha);
            d[j * 3 + 2] = p[j * 3 + 2] * alpha + t[j * 3 + 2] * (1 - alpha);

        }
    }

}


