深度学习笔记(一):环境(yoloV5)配置
前言
本文为笔者在学习深度学习,进行环境配置时集各家所长总结的一些经验,旨在能够较快的配置好深度学习所需的环境。
一、软件安装
1.1 Anaconda安装
直接在官网下载:Anaconda官网链接。
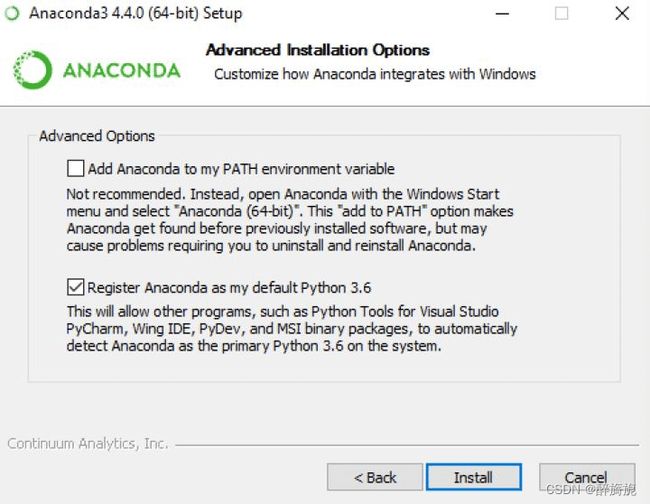
安装包下载完毕后,进行安装,更改安装路径。到下面这一步时建议勾选上Add Anaconda to my PATH environment variable,这样可以免去手动配置环境变量。
1.2 pycharm安装
同样的,直接在官网下载最新版pycharm(社区版)下载链接。
二、环境配置
2.1 环境创建
conda create -n yolov5 python=3.8
#yolov5为创建虚拟环境名称,指定python版本3.8
激活虚拟环境
activate yolov5
2.2 torch库安装
torch的安装,在安装torch前。我们要先确定电脑显卡所支持的CUDA最高版本。
查看CUDA版本步骤。打开电脑的NVIDIA控制面板,查看系统信息。
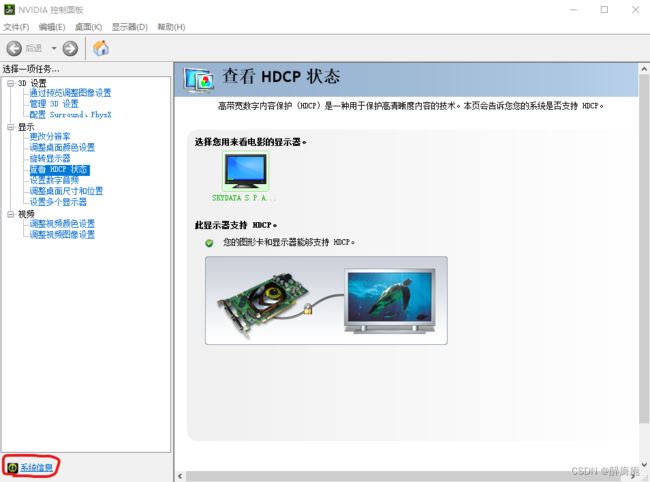
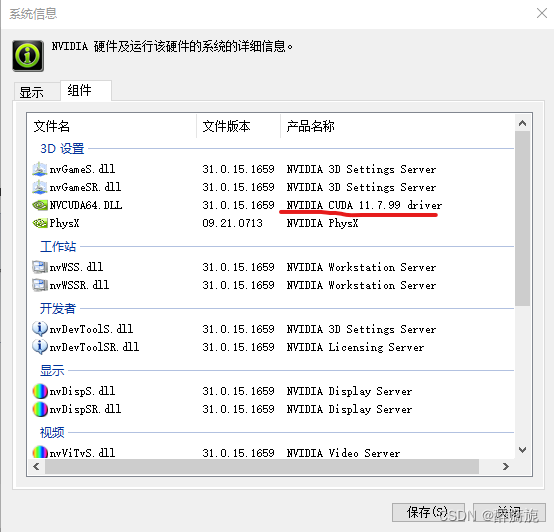 可以看到我的显卡最高支持的CUDA版本为11.7,那么我在安装时的对应版本不能超过11.7。然后根据CUDA版本安装torch库。在pytorch官网上查看自己对应CUDA版本所对应的安装命令,可点击Previous version of PyTorch可查看之前版本的安装命令。
 接下来添加镜像源,因为官网在国外,直接下载速度很慢。这里添加清华镜像源进行下载。在虚拟环境yolov5下输入下列命令。
# 添加清华镜像
conda config --add channels https://mirrors.tuna.tsinghua.edu.cn/anaconda/pkgs/free/
conda config --add channels https://mirrors.tuna.tsinghua.edu.cn/anaconda/pkgs/main/
# 添加pytorch镜像
conda config --add channels https://mirrors.tuna.tsinghua.edu.cn/anaconda/cloud/pytorch/
# for legacy win-64
conda config --add channels https://mirrors.tuna.tsinghua.edu.cn/anaconda/cloud/peterjc123/
conda config --set show_channel_urls yes
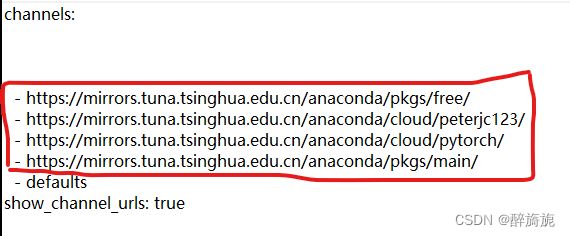
Tips:如果出现下列报错
Warning: 'https://mirrors.tuna.tsinghua.edu.cn/anaconda/pkgs/free/' already in 'channels' list, moving to the top
则记事本打开C:\Users\用户名\.condarc。将红圈中的内容删去再重新添加镜像源。
 接下来安装pytorch
conda install pytorch==1.11.0 torchvision==0.12.0 torchaudio==0.11.0 cudatoolkit=11.3
其他:在创建虚拟环境时,并不需要额外安装CUDA和Cudnn。因为虚拟环境在安装pytorch的时候已经安装了CUDA和Cudnn。
验证:pytorch安装完毕后,在yolov5环境下打开python输入下列命令。
import torch
torch.cuda.is_available()
torch.backends.cudnn.is_available()
torch.cuda_version
torch.backends.cudnn.version()
三、pycharm上部署
3.1 pycharm上部署虚拟环境
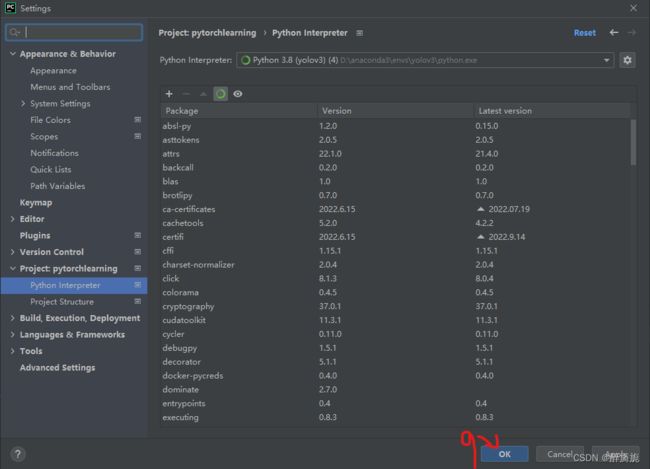
从GitHub上下载yolov5代码Link,用Pycharm打开下载文件。然后点击File–settings,再按照下列顺序进行操作。
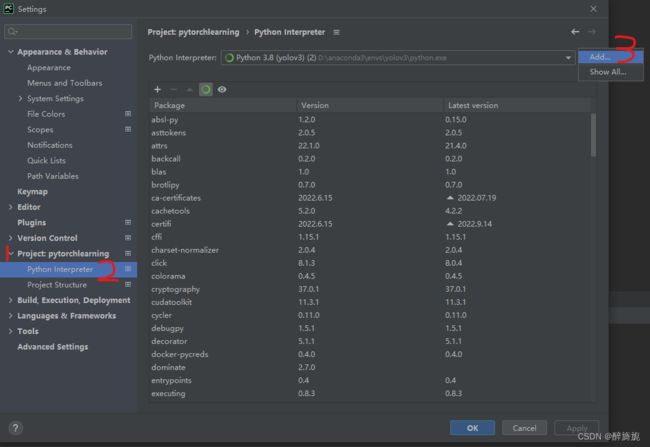
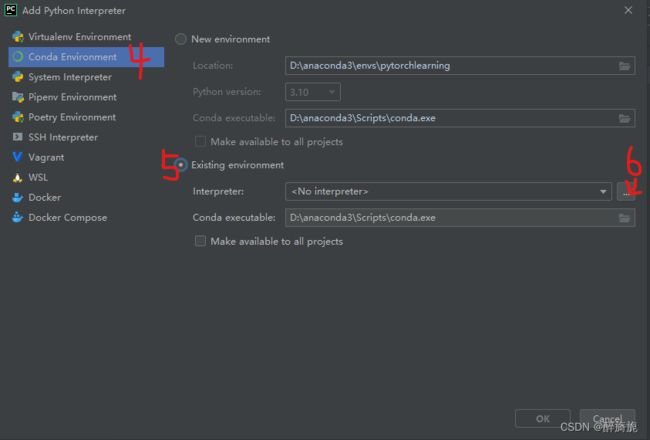
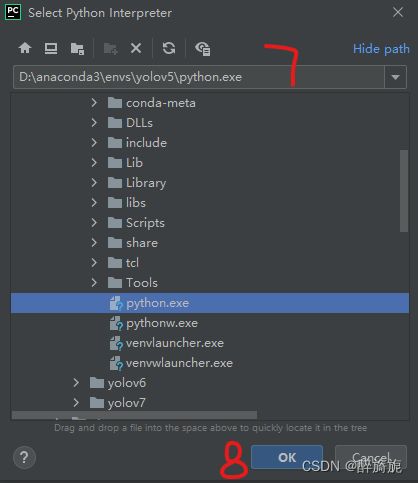
3.2 其他依赖包的安装
在pycharm的terminal中激活创建好的yolov5环境。
pip install -r requirements.txt -i https://pypi.tuna.tsinghua.edu.cn/simple
Tips:在安装其他依赖包时大概率可能会报这样一个错误,原因是缺少visual studio C++的一个工具包。
pkg_resources.DistributionNotFound: The ‘pycocotools>=2.0’ distribution was not found and is required by the application
Microsoft Visual C++ 14.0 is required
这里提供一位大佬给出的解决方法(方法链接)。需要在电脑上安装一下visual studio C++ build tools。
安装完visual studio C++ build tools后重新输入下即可。
pip install -r requirements.txt -i https://pypi.tuna.tsinghua.edu.cn/simple
总结
到这里yolov5的环境部署就结束了。最后运行一些yolov5项目中的detect.py文件测试一下。在terminal中输入python detect.py或者直接运行detect.py。运行结果如下所示。

