tensorflow精进之路(二十一)——使用slim模型对图像识别与检测(上)(Inception_ResNet_v2模型)
1、概述
上一讲,我们使用了slim训练了自己的数据,主要用于分类任务。这一讲,我们还是继续学习slim库,用它来对图像进行识别和检测。
2、下载Inception_ResNet_v2模型
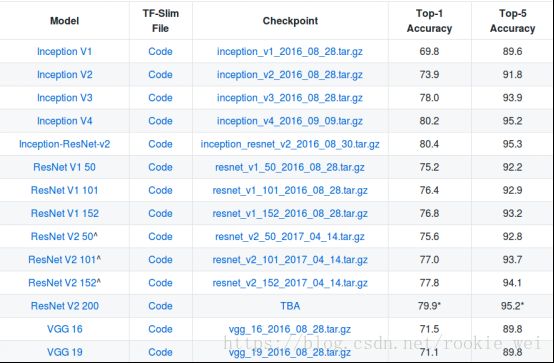
第十六讲中,我们有使用别人训练好的模型来训练我们自己的数据集,这里,我们也使用别人在ImageNet上训练好的模型来识别图片内容。打开以下网页,
https://github.com/tensorflow/models/tree/master/research/slim
下载Inception-ResNet-v2模型。
3、导入模块
#encoding:utf-8
import tensorflow as tf

from matplotlib import pyplot as plt
from nets import inception
from preprocessing import inception_preprocessing
import numpy as np
from datasets import imagenet
4、获取Inception-ResNet-v2参数
#获取inception_resnet_v2默认图片尺寸,这里为299
image_size = inception.inception_resnet_v2.default_image_size
#获取imagenet所有分类的名字,这里有1000个分类
names = imagenet.create_readable_names_for_imagenet_labels()
想知道ImageNet具体有哪些分类,可以下载下面的文件,
https://raw.githubusercontent.com/tensorflow/models/master/research/inception/inception/data/imagenet_metadata.txt
5、图片预处理
slim = tf.contrib.slim

#待测试图片路径
sample_image = 'bus.png'

#打开原图
image = tf.image.decode_jpeg(tf.read_file(sample_image), channels=3)
#对原图进行裁剪、缩放、归一化等处理,将图片大小缩放至299×299
processed_image = inception_preprocessing.preprocess_image(image,
                                                           image_size,
                                                           image_size,
                                                           is_training=False)
#增加一个维度
processed_images = tf.expand_dims(processed_image, 0)
其中,tf.expand_dims的作用是增加一个维度。例如,
import tensorflow as tf
processed_image = [[1, 4], [5, 3]]

with tf.Session() as sess:
    print(sess.run(tf.expand_dims(processed_image, 0)))
运行结果,
[[[1 4]
[5 3]]]
6、创建模型
#创建模型
arg_scope = inception.inception_resnet_v2_arg_scope()
with slim.arg_scope(arg_scope):
    logits, end_points = inception.inception_resnet_v2(processed_images, is_training=False)
7、加载模型
with tf.Session() as sess:
    # 这里是我们下载下来的模型的路径
    checkpoint_file = 'checkpoint/inception_resnet_v2_2016_08_30.ckpt'
    #加载已训练好的模型
    saver = tf.train.Saver()
    saver.restore(sess, checkpoint_file)
8、run
#通过softmax获取分类
probabilities = tf.nn.softmax(logits)

srcimage, predict_values, logit_values = sess.run([image, processed_images, probabilities])
print(np.max(logit_values))
print(np.argmax(logit_values), names[np.argmax(logit_values)])
9、显示原始图片和预处理后的图片
plt.figure()
p1 = plt.subplot(121)
p2 = plt.subplot(122)

# 显示原始图片
p1.imshow(srcimage)
p1.axis('off')
p1.set_title('source image')

# 显示预处理后的图片
p2.imshow(predict_values[0, :, :, :])
p2.axis('off')
p2.set_title('image')

plt.show()
10、运行结果
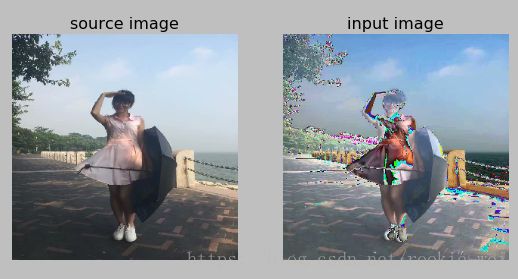
$ python demo4.py
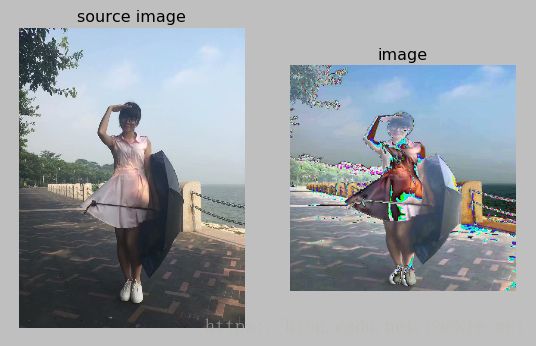
0.67273223
(579, 'gown')
识别出了莫老师的裙子。
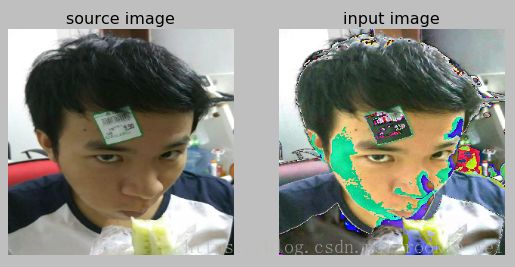
再换一张图片试试,
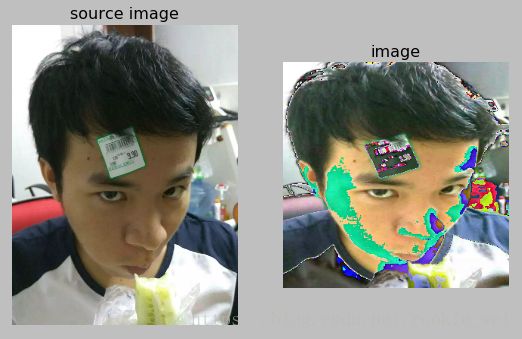
$ python demo4.py
0.79414374
(966, 'burrito')
百度看一下这个'burrito'是什么?
吐血哦,此处奔跑着一万只草泥马~~
那我就下一张'burrito'来试试!
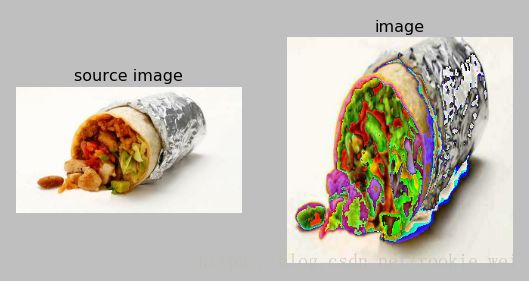
$ python demo4.py
0.9288399
(966, 'burrito')
服了!还真识别出来了,看来只能说吃货长得像吃的了~~难道是识别了手里的黄瓜?这个悬念留着下一节课再揭晓。
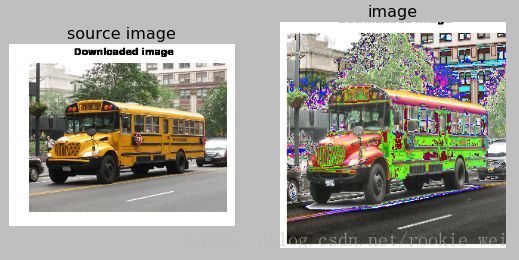
再试一张图片看看,
$ python demo4.py
0.9551897
(780, 'school bus')
这次识别的还是准确的。
11、完整代码
#encoding:utf-8
import tensorflow as tf
from matplotlib import pyplot as plt
from nets import inception
from preprocessing import inception_preprocessing
import numpy as np
from datasets import imagenet

#获取inception_resnet_v2默认图片尺寸,这里为299
image_size = inception.inception_resnet_v2.default_image_size
#获取imagenet所有分类的名字,这里有1000个分类
names = imagenet.create_readable_names_for_imagenet_labels()

slim = tf.contrib.slim

#待测试图片路径
sample_image = 'bus.png'

#打开原图
image = tf.image.decode_jpeg(tf.read_file(sample_image), channels=3)
#对原图进行裁剪、缩放、归一化等处理,将图片大小缩放至299×299
processed_image = inception_preprocessing.preprocess_image(image, image_size, image_size, is_training=False)
#增加一个维度
processed_images = tf.expand_dims(processed_image, 0)

#创建模型
arg_scope = inception.inception_resnet_v2_arg_scope()
with slim.arg_scope(arg_scope):
    logits, end_points = inception.inception_resnet_v2(processed_images, is_training=False)


with tf.Session() as sess:
    # 这里是我们下载下来的模型的路径
    checkpoint_file = 'checkpoint/inception_resnet_v2_2016_08_30.ckpt'
    #加载已训练好的模型
    saver = tf.train.Saver()
    saver.restore(sess, checkpoint_file)

    #通过softmax获取分类
    probabilities = tf.nn.softmax(logits)

    srcimage, predict_values, logit_values = sess.run([image, processed_images, probabilities])

    print(np.max(logit_values))
    print(np.argmax(logit_values), names[np.argmax(logit_values)])


    plt.figure()
    p1 = plt.subplot(121)
    p2 = plt.subplot(122)

    # 显示原始图片
    p1.imshow(srcimage)
    p1.axis('off')
    p1.set_title('source image')

    # 显示预处理后的图片
    p2.imshow(predict_values[0, :, :, :])
    p2.axis('off')
    p2.set_title('image')

    plt.show()
12、自己处理图片
上面的例子使用了自带的inception_preprocessing.preprocess_image方法处理图片,现在我们用自己写个处理的方法看看效果如何?因为跟上面的例子差不多,这里就直接给出代码了,
#encoding:utf-8
import tensorflow as tf
from matplotlib import pyplot as plt
from nets import inception
from preprocessing import inception_preprocessing
import numpy as np
from datasets import imagenet

#获取inception_resnet_v2默认图片尺寸,这里为299
image_size = inception.inception_resnet_v2.default_image_size
#获取imagenet所有分类的名字,这里有1000个分类
names = imagenet.create_readable_names_for_imagenet_labels()

slim = tf.contrib.slim

#待测试图片路径
sample_image = 'bus.png'

#打开原图
image = tf.image.decode_jpeg(tf.read_file(sample_image), channels=3)
#对原图进行裁剪、缩放、归一化等处理,将图片大小缩放至299×299
processed_image = inception_preprocessing.preprocess_image(image, image_size, image_size, is_training=False)
#增加一个维度
processed_images = tf.expand_dims(processed_image, 0)

#创建模型
arg_scope = inception.inception_resnet_v2_arg_scope()
with slim.arg_scope(arg_scope):
    logits, end_points = inception.inception_resnet_v2(processed_images, is_training=False)

with tf.Session() as sess:
    # 这里是我们下载下来的模型的路径
    checkpoint_file = 'checkpoint/inception_resnet_v2_2016_08_30.ckpt'
    #加载已训练好的模型
    saver = tf.train.Saver()
    saver.restore(sess, checkpoint_file)

    #通过softmax获取分类
    probabilities = tf.nn.softmax(logits)
    srcimage, predict_values, logit_values = sess.run([image, processed_images, probabilities])

    print(np.max(logit_values))
    print(np.argmax(logit_values), names[np.argmax(logit_values)])

    plt.figure()
    p1 = plt.subplot(121)
    p2 = plt.subplot(122)

    # 显示原始图片
    p1.imshow(srcimage)
    p1.axis('off')
    p1.set_title('source image')

    # 显示预处理后的图片
    p2.imshow(predict_values[0, :, :, :])
    p2.axis('off')
    p2.set_title('image')

    plt.show()
运行结果,
8.191614
(448, 'binoculars, field glasses, opera glasses')
8.673139
(966, 'burrito')
10.063082
(780, 'school bus')
除了第一张识别的是莫老师的眼镜以外,另外两张图片的识别结果是一样的,这也说明了,在图片预处理这块,处理方法不一样,识别到的物体也有可能不同。
那有没有什么方法,尽可能的将图片中的物体识别出来呢?这就是我们下一节要讲的了。
