卷积神经网络三-----CIFAR数据集
CIFAR也是一堆图片的数据集。在官网 http://www.cs.toronto.edu/~kriz/cifar.html 可以下载,该数据集是已经打包好的文件,分别为python、MATLIB、二进制bin文件包,方便不同的程序读取。不过该文件包在官网下载速度比较慢,可以从下面的链接中获取 https://pan.baidu.com/s/1HNgVRrCdYEuqLwug5kBJuA 密码:ghcd。

CIFAR是由Alex Krizhevsky、Vinod Nair和 Geoffrey Hinton收集而来,起初共分为 10 类
| airplane | ||||||||||
| automobile | ||||||||||
| bird | ||||||||||
| cat | ||||||||||
| deer | ||||||||||
| dog | ||||||||||
| frog | ||||||||||
| horse | ||||||||||
| ship | ||||||||||
| truck |
所以常以CIFAR-10命名。CIFAR共包含 60000 张 32x32的彩色图像(50000张训练图片、10000测试图片)。后来又出现了CIFAR-100,可以看出分类达到100种。
TensorFow中同样提供了CIFAR-10数据集的下载操作模块Models。不过 TensorFlow1.0 之后就把 Models 模块分离了出来。 从 https://github.com/tensorflow/models.git 下载models, 然后从models/tutorials/image中把cifar10文件夹复制到工作区。
代码下载比较慢,所以一般自己下载数据之后, 解压,放到自己指定文件夹中。
解压后的文件包含:
- batches.meta.txt 标签说明文件
- data_batch_x.bin 训练文件,一共5个,每个10000条
- test_batch.bin 10000测试文件
from cifar10 import cifar10_input
data_dir = './cifar/cifar-10-batches-bin'   # 下面的路径请按照自己数据放的路径写
batch_size = 128   # 一次取数据的大小

'''
程序默认的是使用测试数据集,如果使用训练数据集,需要 eval_data=False
'''
images_test, labels_test = cifar10_input.inputs(eval_data=True, data_dir=data_dir, batch_size=batch_size)
上面几句代码指定了数据的存放路径 data_dir、一次取数据的大小 batch_size,
以及读取数据cifar10_input.inputs() 返回数据集和对应的标签,但是该函数会将图片剪裁,由原来的32x32x3
变成24x24x3,然后又进行了一次图片标准化(减去像素值,并除以像素方差),这样处理是所有的输入都在一个有效的数据分布之内,便与特征的分类处理,会使梯度下降算法的收敛更快。
通过代码实现读取cifar数据。
import tensorflow as tf
import pylab

'''
从 https://github.com/tensorflow/models.git 下载models,TensorFlow1.0 之后就把 Models 模块分离了出来。
然后从models/tutorials/image中把cifar10文件夹复制到工作区
'''

from cifar10 import cifar10_input
data_dir = './cifar/cifar-10-batches-bin'   # 下面的路径请按照自己数据放的路径写

batch_size = 128   # 一次取数据的大小


'''
程序默认的是使用测试数据集,如果使用训练数据集,需要 eval_data=False
'''
images_test, labels_test = cifar10_input.inputs(eval_data=True, data_dir=data_dir, batch_size=batch_size)

'''
以下面的方式启动Session,为什么这里不使用with语法???
因为 with 语法是自动关闭Session的。运行结束后Session自动关闭的同时会把里面的所有操作都关掉,
而此时队列还在等待另一个进程往里面写数据,此时就会出现错误。(下面测试)
可以改为下面这种方式:
sess = tf.Session()
tf.global_variables_initializer().run(session=sess)
tf.train.start_queue_runners(sess=sess)
这样写在单例程序中没问题,资源会随着程序的关闭而整体销毁,但是在复杂的代码中,需要某个线程自动关闭,
而不是依赖进程的结束而销毁,这种情况下需要使用 tf.train.Coordinator 函数来创建一个协调器
以信号量的方式来协调线程间的关系,完成线程间的同步
'''
sess = tf.InteractiveSession()
tf.global_variables_initializer().run()   # 初始化全局参数

'''
TensorFlow中提供了一个队列机制,通过多线程将读取数据与计算数据分开。
因为在处理海量数据集的训练时,无法把数据集一次全部载入到内存中,需要边读边训练

tf.train.start_queue_runners()  这句话的作用是启动线程,向队列中读取数据
删除这句话会导致程序处于一个挂起的状态,因为 image_batch, label_batch = sess.run([images_test, labels_test])
这句代码是从队列中拿出指定批次的数据。但是队列中没有数据,所以程序进入挂起等待状态
'''
tf.train.start_queue_runners()
image_batch, label_batch = sess.run([images_test, labels_test])

# print('image_batch[0]: \n', image_batch[0])
# print('label_batch[0]: \n', label_batch[0])
pylab.imshow(image_batch[0])
pylab.show()


# '''
# 出错代码
# '''
# with tf.Session() as sess:
#     tf.global_variables_initializer().run()  # 初始化全局参数
#     tf.train.start_queue_runners()
#     image_batch, label_batch = sess.run([images_test, labels_test])
#
#     pylab.imshow(image_batch[0])
#     pylab.show()


'''
要使用 with语句 加上协调器
'''
with tf.Session() as sess:
    tf.global_variables_initializer().run()  # 初始化全局参数
    coord = tf.train.Coordinator()
    tf.train.start_queue_runners(sess, coord)
    image_batch, label_batch = sess.run([images_test, labels_test])

    pylab.imshow(image_batch[0])
    pylab.show()

    coord.request_stop()
代码中已经解释了很多,协调器在这里就不讲了,有兴趣了解的可以搜一下。
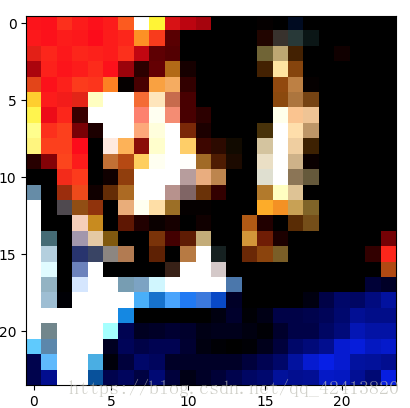
是不是看不清,那就对了。。。
下面是用卷积网络实现cifar数据集的训练
import tensorflow as tf
from cifar10 import cifar10_input
import numpy as np

'''
通过一个带有全局平均池化的的卷积神经网络对CIFAR数据集进行分类

本例使用全局平均池化层来代替传统的全连接层
使用了 3 个卷积层的同卷积操作,滤波器为 5x5,
每个卷积层后面都会跟一个步长为 2x2 的池化层,滤波器为 2x2
2层的卷积加池化后是输出为10个通道的卷积层
然后对这10个feature map进行全局平均池化,得到 10 个特征,
再对这10个特征进行softmax计算,其结果来代表最终分类
'''
# 导入数据
batch_size = 128
data_dir = './cifar/cifar-10-batches-bin'

images_train, labels_train = cifar10_input.inputs(eval_data=False, data_dir=data_dir, batch_size=batch_size)
images_test, labels_test = cifar10_input.inputs(eval_data=True, data_dir=data_dir, batch_size=batch_size)

'''
定义网络结构
对于权重 weight 统一使用函数 truncated_normal 来生成标准差为 0.1 的随机数来初始化
对于偏置值 biases 统一初始化为 0.1
卷积操作的函数中,统一进行同卷积操作,即步长为 1,padding='SAME'

池化层有两个函数:
1)一个放在卷积后面,取最大值的方法,步长为 2,padding='SAME', 即将原尺寸的长和宽各除以2
2)一个放在最后一层,取平均值的方法,步长为最终生成的特征尺寸 6X6(24X24经过两次池化变成了6X6),filter也为 6X6

倒数第二层是没有最大池化的卷积层,因为共有10类,所以卷积输出的是10个通道,并使其全局平均池化为10个节点
'''


def weight_init(shape):   # 传入 shape
    init = tf.truncated_normal(shape=shape, stddev=0.1)
    return tf.Variable(init)


def biases_init(shape):
    init = tf.constant(0.1, shape=shape)
    return tf.Variable(init)


def conv2d(input_, filter_):
    """
    padding 值为 'VALID' 的,表示边缘不填充
    padding 值为 'SAME'  的,表示便于边缘填充到卷积核可以达到图像的边缘
    """
    return tf.nn.conv2d(input_, filter_, strides=[1, 1, 1, 1], padding='SAME')


def max_pool_2x2(input_):
    return tf.nn.max_pool(input_, ksize=[1, 2, 2, 1], strides=[1, 2, 2, 1], padding='SAME')


def avg_pool_6x6(input_):
    return tf.nn.avg_pool(input_, ksize=[1, 6, 6, 1], strides=[1, 6, 6, 1], padding='SAME')


# 定义占位符
x = tf.placeholder(tf.float32, [None, 24, 24, 3])   # cifar data 的shape 为 24*24*3
y = tf.placeholder(tf.float32, [None, 10])   # 0~9 数字分类 => 10 类

w_conv1 = weight_init([5, 5, 3, 64])  # sobel算子,即卷积核(滤波器) 大小 5x5,3通道,64个卷积核
'''
out_height = in_height / strides_height  = 24 / 1 = 24
out_width = in_width / strides_width  = 24 /1 =24
padding_height = max((out_height-1)*strides_height + filter_height - in_height, 0) = max((24-1)*1+5-24, 0) = 4
padding_width = max((out_width-1)*strides_width + filter_width - in_width, 0) = max((24-1)*1+5-24, 0) = 4
padding_top = padding_height / 2 = 2
padding_bottom = padding_height - padding_top = 2
padding_left = padding_width / 2 = 2
padding_right = padding_width - padding_left = 2
'''
b_conv1 = biases_init([64])

x_image = tf.reshape(x, [-1, 24, 24, 3])

h_conv1 = tf.nn.relu(conv2d(x_image, w_conv1) + b_conv1)
h_pool1 = max_pool_2x2(h_conv1)   # shape (n, 12, 12, 64)

w_conv2 = weight_init([5, 5, 64, 64])
b_conv2 = biases_init([64])

h_conv2 = tf.nn.relu(conv2d(h_pool1, w_conv2) + b_conv2)
h_pool2 = max_pool_2x2(h_conv2)     # shape (n, 6, 6, 64)

w_conv3 = weight_init([5, 5, 64, 10])
b_conv3 = biases_init([10])
h_conv3 = tf.nn.relu(conv2d(h_pool2, w_conv3) + b_conv3)
nt_hpool3 = avg_pool_6x6(h_conv3)

nt_hpool3_flat = tf.reshape(nt_hpool3, [-1, 10])
y_conv = tf.nn.softmax(nt_hpool3_flat)

cross_entropy = -tf.reduce_sum(y*tf.log(y_conv))

train_step = tf.train.AdamOptimizer(1e-4).minimize(cross_entropy)

correct_prediction = tf.equal(tf.argmax(y_conv, 1), tf.argmax(y, 1))
accuracy = tf.reduce_mean(tf.cast(correct_prediction, 'float'))

# 启动训练
sess = tf.Session()
sess.run(tf.global_variables_initializer())
tf.train.start_queue_runners(sess=sess)   # images_train:  (128, 24, 24, 3)

# print('images_train: ', images_train.shape)
for i in range(2000):
    image_batch, label_batch = sess.run([images_train, labels_train])   # label_batch: [0 5 6 0 1 2 5 ... 2 0 7 3 7]
    label_b = np.eye(10, dtype=float)[label_batch]   # label 转成 one_hot 编码

    train_step.run(feed_dict={x: image_batch, y: label_b}, session=sess)

    if i % 200 == 0:
        train_accuracy = accuracy.eval(feed_dict={x: image_batch, y: label_b}, session=sess)
        print('step %d, train_accuracy %g' % (i, train_accuracy))


# 评估结果
image_batch, label_batch = sess.run([images_test, labels_test])
label_b = np.eye(10, dtype=float)[label_batch]
test_accuracy = accuracy.eval(feed_dict={x: image_batch, y: label_b}, session=sess)
print('Finished!!!, test_accuracy %g' % (i, train_accuracy))
