python使用opencv实现文档扫描并提取文字
目的
将输入文档使用透视变换将不规则图形变换,然后使用tesseract库进行识别文字
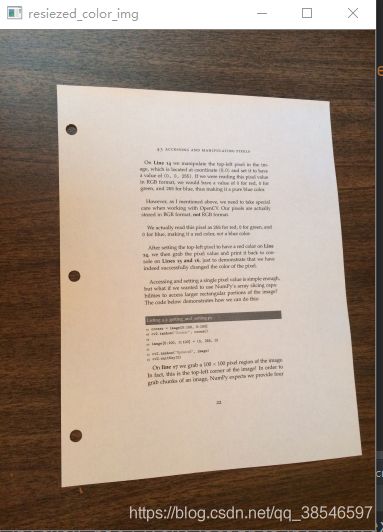
变换前图形
变换后图形
步骤
1.加载原图并显示
2.重新调整大小

3.灰度处理

4.滤波

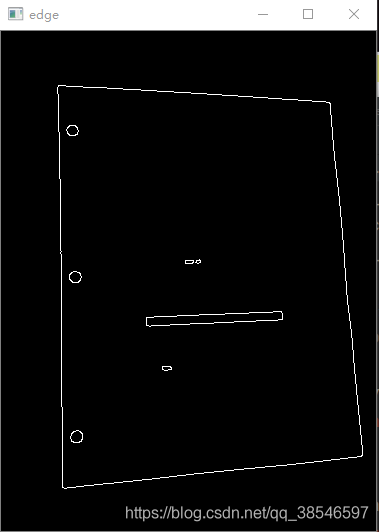
5.边缘检测

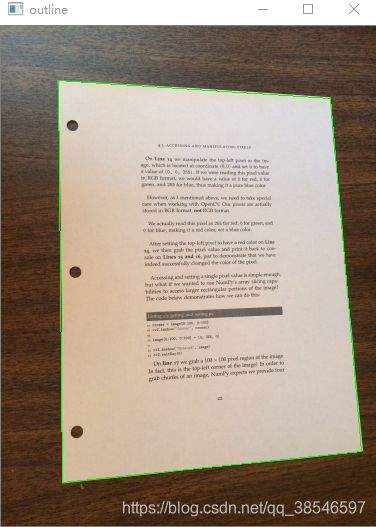
6.找出轮廓

7.透视变换
主要的步骤:
需要变换前pst1和变换后的4个坐标点pst2:这里可以使用图形的4个顶点
使用函数获得M矩阵
pts1 = np.float32([[56,65],[368,52],[28,387],[389,390]])
pts2 = np.float32([[0,0],[300,0],[0,300],[300,300]])
M = cv.getPerspectiveTransform(pts1,pts2)
根据M矩阵获得变换后的图形矩阵
dst = cv.warpPerspective(img,M,(300,300))
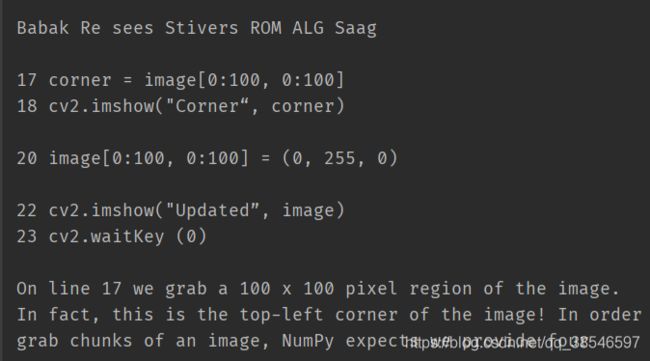
根据修改好的图形使用tesseract库来识别图中文字

代码实现
图形处理模块
import cv2 as cv
import numpy as np
import math
import pytesseract


def resized_img(img, width=None, height=None, inter = cv.INTER_AREA):
    """

    等比例重新调整大小
    :param img:
    :param width: 宽度整数
    :param height: 高度整数
    :param inter:
    :return: 返回调整后的图形矩阵
    """
    # 如果宽高都为0
    if height is None and width is None:
        return img


    h,w = img.shape[:2]
    # print(w,h)
    # 同比例放缩图  形
    prop = w/h
    # print(prop)

    if height is not None and width is not None: # 宽高都给定
        return cv.resize(img,(width,height),interpolation=inter)
    elif height is not None:# 给定高度计算宽度
        w = int(height*prop)
        return cv.resize(img,(w,height),interpolation=inter)
    else:
        h = int(width/prop)# 给定宽度计算高度
        # print(h)
        return cv.resize(img,(width,h),interpolation=inter)

def show(img, name="image", model=0):
    """

    :param img:
    :param name:
    :param model: 是否可以缩放图片
    :return:
    """
    if model == 0:
        cv.namedWindow(name, cv.WINDOW_NORMAL)
    cv.imshow(name, img)
    cv.waitKey(0)
    cv.destroyAllWindows()

def order_point(contour):
    """
    对输入的4个坐标进行排序
    分别为左上,右上,右下,左下
    :param contour:
    :return:
    """
    # contour(4,1,2)
    print(contour.shape)
    print(contour)
    rect = np.zeros((4,2), dtype=np.float32)
    s = contour.sum(axis=1)
    print(s)
    sort_s = sorted(s, key=lambda x:x[0])
    left = sort_s[:2]
    left_sort = sorted(left, key=lambda x:x[1])
    rect[0] = left_sort[0]
    rect[3] = left_sort[1]
    right=sort_s[2:4]
    right_sort = sorted(right, key=lambda x:x[0])
    rect[1] = right_sort[0]
    rect[2] = right_sort[1]
    return rect

def new_point(origin):
    """
    根据原始的4个点位置得到新的4个对应点的位置

    :param origin:
    :return:对应宽高 以及目标4个位置
    """
    top_left, top_right, bottom_right, bottom_left = origin
    # print(top_left,top_right,bottom_right,bottom_left)
    # 根据输入的坐标计算新的坐标
    w1 = math.sqrt(((top_right[1]-top_left[1])**2)+((top_right[0]-top_left[0])**2))
    w2 = math.sqrt(((bottom_right[1]-bottom_left[1])**2)+((bottom_right[0]-bottom_left[0])**2))
    print(w1,w2)
    w = int(max(w1, w2))
    h1 = math.sqrt(((top_right[1]-bottom_right[1])**2)+((top_right[0]-bottom_right[0])**2))
    h2 = math.sqrt(((top_left[1] - bottom_left[1]) ** 2) + ((top_left[0] - bottom_left[0]) ** 2))
    print(h1,h2)
    h = int(max(h1,h2 ))
    dst = np.array(
        [
            [0, 0],
            [w - 1, 0],
            [w - 1, h - 1],
            [0, h - 1],
        ],dtype=np.float32
    )
    return (w,h),dst


def ocr_preprocess():
    """对输入图像进行变换成规矩的图形"""
    # 加载原彩色图
    image = cv.imread("image/ocr_recoginze/page.jpg")
    show(image, name="image", model=0)
    print(image.shape)

    # 对图像缩放用于测试方便观察
    ration = image.shape[0]/500
    print(ration)
    resiz_color_img = resized_img(image, height=500)
    show(resiz_color_img, name="resiezed_color_img", model=1)
    print(resiz_color_img.shape)

    # 原图进行后续操作
    # resiz_color_img = image
    # 转化为灰度图
    gray = cv.cvtColor(resiz_color_img, cv.COLOR_BGR2GRAY)
    show(gray, name="gray", model=1)

    # 滤波操作
    gray = cv.GaussianBlur(gray,(5,5),0)
    show(gray, name="gauss", model=1)

    # 边缘检测
    edge = cv.Canny(gray, 100, 200, apertureSize=3)
    print(edge)
    show(edge, name="edge", model=1)

    # 边缘检测过后已经是二值化的图像
    # 进行轮廓提取
    contours, hierarchy = cv.findContours(edge, cv.RETR_EXTERNAL, cv.CHAIN_APPROX_SIMPLE)

    # 找到最大的5个轮廓
    contours = sorted(contours, key=cv.contourArea, reverse=True)[:5]
    print(len(contours))

    fit_controus = []
    # 轮廓近似
    for contour in contours:
        arclen = cv.arcLength(contour,closed=True)
        epsilon = 0.01*arclen
        approx = cv.approxPolyDP(contour, epsilon=epsilon, closed=True)
        # 轮廓近似为4个点
        if len(approx) == 4:
            fit_controus.append(approx)
            break

    # 画出轮廓
    cv.drawContours(resiz_color_img, fit_controus, -1 ,(0,255,0),1)
    show(resiz_color_img, name="outline", model=1)

    # 透视变换
    for contour in fit_controus:
        # 原始图像4个点的位置
        print("原始:",contour)
        print("ration后的:",ration*contour)
        origin = order_point(contour*ration)
        # 对应变换后的4个点的位置
        size, dst = new_point(origin)
        print(size)
        # 获得变换矩阵
        perspect_matric = cv.getPerspectiveTransform(origin, dst)
        print(perspect_matric)
        # 得到变换后的图像矩阵
        wraped = cv.warpPerspective(image,M=perspect_matric,dsize=size)
        show(wraped, name="wraped")
        cv.imwrite("my_page.png", wraped)

if __name__ == '__main__':
    ocr_preprocess()
图形识别模块
import pytesseract
from PIL import Image
# fp = open("my_page.png",'br')
text = pytesseract.image_to_string(Image.open("my_page.png"))
print(text)