python | tkinter(四)Canvas用法
python | tkinter的Canvas用法
canvas是画布的意思,so,他可以画图像操作
一、简单的画图像操作
1、画线与矩形
create_line和create_rectangle
from tkinter import *

root = Tk()

w = Canvas(root,width=200,height=100,background='white')
w.pack()

line1 = w.create_line(0,50,200,50,fill='yellow')#画线,给出两个点的坐标,fill为填充的颜色
line2 = w.create_line(100,0,100,100,fill='green')
rect1 = w.create_rectangle(0,0,18,75,fill='pink')#画个长方形,两个对角点的坐标

mainloop()
画线,给出两点坐标,调用create_line命令画出线条,绘制长方形同理(给出对角两点坐标)
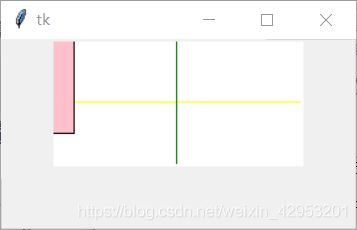
结果如上,可以看到原点在左上方
2、画椭圆(圆)
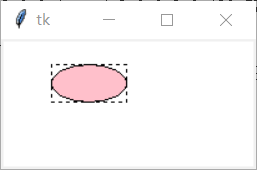
椭圆是由矩形位置确定出来的:
用命令create_oval
from tkinter import *

root = Tk()

w = Canvas(root,width=200,height=100,background='white')
w.pack()

w.create_rectangle(40,20,100,50,dash=(4,4))
w.create_oval(40,20,100,50,fill='pink')#坐标同上

mainloop()
3、画五角星
根据五个点,按顺应连接,用create_polygon
from tkinter import *
import math as m

root = Tk()

w = Canvas(root,width=200,height=100,background='white')
w.pack()

center_x = 100
center_y = 50
r = 50

points = [
    #左上点
    center_x - int(r * m.sin(2 * m.pi / 5)),
    center_y - int(r * m.cos(2 * m.pi / 5)),
    #右上点
    center_x + int(r * m.sin(2 * m.pi / 5)),
    center_y - int(r * m.cos(2 * m.pi / 5)),
    #左下点
    center_x - int(r * m.sin(m.pi / 5)),
    center_y + int(r * m.cos(m.pi / 5)),
    #顶点
    center_x,
    center_y - r,
    #右下点
    center_x + int(r * m.sin(m.pi / 5)),
    center_y + int(r * m.cos(m.pi / 5)),
    ]

w.create_polygon(points,outline='green',fill='yellow')#point为五个点依次的x和y坐标
mainloop()
由于涉及到数学运算,这里导入了math模块进行操作
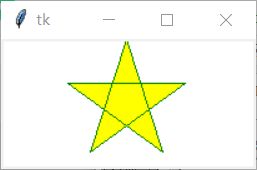
结果如上,
w.create_polygon(points,outline=‘green’,fill=‘yellow’)
这里outline=’‘时,将变为透明色,fill同理
二、图像的修改
coords:用于修改线的位置等
itemconfig:修改填充颜色等
delete:删除
from tkinter import *

root = Tk()

w = Canvas(root,width=200,height=100,background='white')
w.pack()

line1 = w.create_line(0,50,200,50,fill='yellow')#画线,给出两个点的坐标,fill为填充的颜色
line2 = w.create_line(100,0,100,100,fill='green')
rect1 = w.create_rectangle(0,0,18,75,fill='pink')#画个长方形,两个对角点的坐标

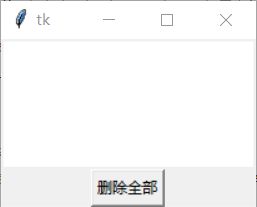
w.coords(line1,0,25,200,25)#修改线的位置
w.itemconfig(rect1,fill='red')#修改矩形的填充color
w.delete(line2)

#创建一个按钮,点击可以删除画布所有的信息
Button(root,text='删除全部',command=(lambda x=ALL:w.delete(x))).pack()

mainloop()
三、插入文字
canvas可以插入文字
from tkinter import *

root = Tk()

w = Canvas(root,width=200,height=100,background='white')
w.pack()

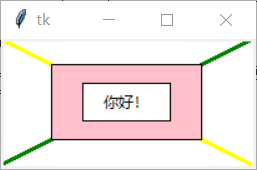
line1 = w.create_line(0,0,200,100,fill='yellow',width=3)#画线,给出两个点的坐标,fill为填充的颜色
line2 = w.create_line(200,0,0,100,fill='green',width=3)
rect1 = w.create_rectangle(40,20,160,80,fill='pink')#画个长方形,两个对角点的坐标
rect1 = w.create_rectangle(65,35,135,65,fill='white')

w.create_text(100,50,text='你好!')

mainloop()
四、绘制一个画板,有画图功能
from tkinter import *
root = Tk()
w = Canvas(root,width=400,height=200,bg='white')
w.pack()
def paint(event):
x1,y1 = (event.x - 1),(event.y - 1)
x2,y2 = (event.x + 1),(event.y + 1)
w.create_oval(x1,y1,x2,y2,outline='red')
w.bind('' ,paint)
Label(root,text='按住鼠标移动,绘图!').pack(side=BOTTOM)
mainloop()
先定义好画布的大小,这里有个bind事件,当鼠标点击时候,调用paint函数,画一个小小的圆(代表一个点,因为python没有直接画点的功能)
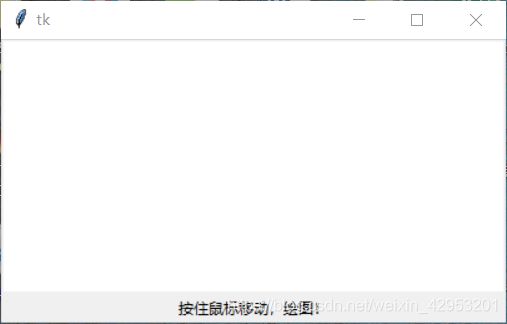
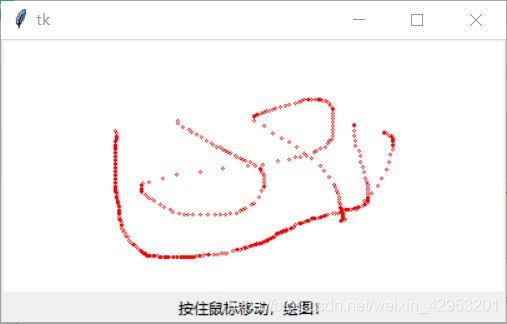
画图成功
关于bind函数,这里还有很多不懂的地方,以后再慢慢学习
