通过SpringBoot+Vue+ElementUI+EasyExcel实现文件的导入导出
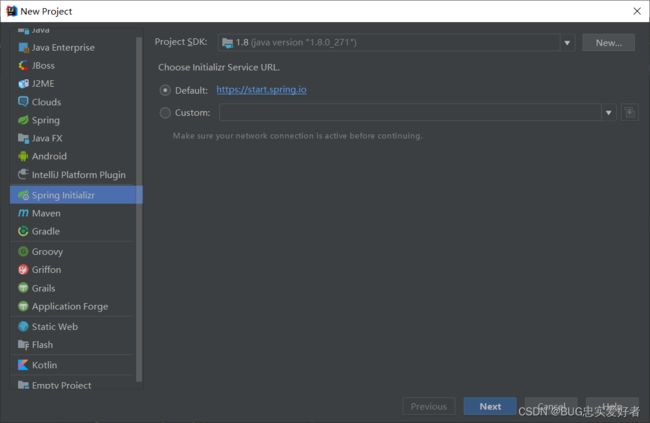
创建后端的SpringBoot项目
理论知识:文件导入就是将上传的文件保存到集合中,再将集合中的数据存到数据库中,页面通过调用数据库的数据展示出所导入的内容。文件导出就是将数据库中的数据存到集合中,将它存到excel表格中并下载到本地。
项目目录结构大致如下:

application.yml文件
server:
  port: 8088
spring:
  datasource:
    driver-class-name: com.mysql.jdbc.Driver
    url: jdbc:mysql://localhost:3306/novel
    username: root
    password: ok
  redis:
    port: 6379
    host: localhost
    database: 0
mybatis-plus:
  configuration:
    log-impl: org.apache.ibatis.logging.stdout.StdOutImpl
    map-underscore-to-camel-case: true
实体类代码如下:
package com.zb.pojo;

import com.alibaba.excel.annotation.ExcelIgnore;
import com.alibaba.excel.annotation.ExcelProperty;
import com.baomidou.mybatisplus.annotation.IdType;
import com.baomidou.mybatisplus.annotation.TableId;
import com.fasterxml.jackson.annotation.JsonFormat;
import lombok.AllArgsConstructor;
import lombok.Data;
import lombok.NoArgsConstructor;

import java.math.BigDecimal;
import java.util.Date;
import java.io.Serializable;

/**
 * (Novel)实体类
 *
 * @author makejava
 * @since 2022-08-23 17:19:15
 */
@Data
@AllArgsConstructor
@NoArgsConstructor
public class Novel implements Serializable {
    @TableId(type = IdType.AUTO)
    @ExcelIgnore
    private Integer id;
    @ExcelProperty(value = "小说名")
    private String novelName;
    @ExcelProperty(value = "作者")
    private String author;
    @ExcelProperty(value = "类型")
    private String type;
    @ExcelProperty(value = "价格")
    private BigDecimal price;
    @ExcelProperty(value = "出版社")
    private String publish;
    @ExcelProperty(value = "创建时间")
    @JsonFormat(pattern = "yyyy-MM-dd",timezone = "GMT+8")
    private Date createTime;
    @ExcelProperty(value = "浏览量")
    private Integer viewcounts;

}
注意:如果加上了@Accessors(chain = true)链式访问注解,需要收到写getter和setter方法,因为该注解与easyExcel不兼容。
mapper接口
package com.zb.mapper;

import com.zb.pojo.Novel;
import org.apache.ibatis.annotations.Mapper;
import org.springframework.stereotype.Repository;

import java.util.List;

@Mapper
@Repository
public interface NovelMapper {
    //查询列表
    List<Novel> listNovel();
    //添加
    Integer addNovel(List<Novel> list);
}
注意: 这边的添加方法的参数为集合,因为所导入的excel表中有多条数据而非一条数据。
mapper.xml文件
<?xml version="1.0" encoding="UTF-8" ?>
<!DOCTYPE mapper PUBLIC "-//mybatis.org//DTD Mapper 3.0//EN" "http://mybatis.org/dtd/mybatis-3-mapper.dtd" >
<mapper namespace="com.zb.mapper.NovelMapper">
    <insert id="addNovel">
        insert into novel(novel_name,author,type,price,publish,create_time,viewcounts) values
        <foreach collection="list" separator="," item="item" >
            (#{item.novelName},#{item.author},#{item.type},
        #{item.price},#{item.publish},#{item.createTime},#{item.viewcounts})
        </foreach>
    </insert>

    <select id="listNovel" resultType="com.zb.pojo.Novel">
        select * from novel
    </select>
</mapper>
注意: 这边的增加语句需要用到foreach标签,循环添加集合。
service接口
package com.zb.service;


import com.zb.pojo.Novel;

import java.util.List;

public interface NovelService {
    //查询列表
    List<Novel> listNovel();
    //添加
    Integer addNovel(List<Novel> list);
}
service实现类
package com.zb.service.impl;

import com.zb.mapper.NovelMapper;
import com.zb.pojo.Novel;
import com.zb.service.NovelService;
import org.springframework.stereotype.Service;
import org.springframework.transaction.annotation.Transactional;

import javax.annotation.Resource;
import java.util.List;

@Service
@Transactional
public class NovelServiceImpl implements NovelService {
    @Resource
    private NovelMapper novelMapper;

    public List<Novel> listNovel() {
        return novelMapper.listNovel();
    }

    @Override
    public Integer addNovel(List<Novel> list) {
        return novelMapper.addNovel(list);
    }
}
controller控制器
package com.zb.controller;

import com.alibaba.excel.EasyExcel;
import com.zb.pojo.Novel;
import com.zb.service.NovelService;
import com.zb.service.impl.DataListener;


import org.springframework.web.bind.annotation.*;
import org.springframework.web.multipart.MultipartFile;

import javax.annotation.Resource;
import javax.servlet.http.HttpServletResponse;
import java.io.IOException;
import java.net.URLEncoder;
import java.util.List;

@RestController
@CrossOrigin("*")
@RequestMapping("/novel")
public class NovelController {

    @Resource
    private NovelService novelService;

    //查询列表
    @RequestMapping("/listNovel")
    public List<Novel> listNovel() {
        return novelService.listNovel();
    }

    //导出数据为excel的实现过程
    @GetMapping("/down")
    public void down(HttpServletResponse response) throws IOException {
        List<Novel> userList = novelService.listNovel();

        System.out.println(userList);

        //返回输出流_excel格式
        response.setContentType("application/octet-stream");
        String fileName = URLEncoder.encode("小说信息表", "UTF-8").replaceAll("\\+", "%20");
        response.setHeader("Content-disposition", "attachment;filename*=utf-8''" + fileName + ".xlsx");

        EasyExcel.write(response.getOutputStream(), Novel.class).autoCloseStream(Boolean.FALSE).sheet("小说信息表").doWrite(userList);
        // ExcelUtil.writerExcel(response, userList);
    }
    //将excel中的数据导入到数据库中
    @PostMapping("/upload")
    @ResponseBody
    public String upload(MultipartFile file) throws IOException {
      /*  ArrayList> analysis = ExcleAnalysisUtil.analysis(file);
        for (ArrayList strings : analysis) {
            for (String string : strings) {
                System.out.println(string);
            }
        }*/
        EasyExcel.read(file.getInputStream(), Novel.class, new DataListener(novelService)).sheet().headRowNumber(1).doRead();

        return "success";

    }
}
**注意:**在导入文件的时候需要使用到监听器,所以还需要写一个监听器的工具类,因为做的是前后端分离,所以需要用到跨域注解:@CrossOrigin(“*”)。 简单描述一下这个的执行流程,最开始我们会传入DataListener监听器,然后会每次解析一行的数据,解析完成无异常的情况下调用invoke方法。
监听器
package com.zb.service.impl;

import com.alibaba.excel.context.AnalysisContext;
import com.alibaba.excel.event.AnalysisEventListener;
import com.zb.pojo.Novel;
import com.zb.service.NovelService;
import org.springframework.stereotype.Component;

import java.util.ArrayList;
import java.util.List;

@Component
public class DataListener extends AnalysisEventListener<Novel> {

    /**
     * 每隔5条存储数据库,实际使用中可以100条,然后清理list ,方便内存回收
     */

    private NovelService novelService;

    public DataListener(NovelService novelService){
        this.novelService = novelService;
    }

    List<Novel> list = new ArrayList<>();

    //读取数据会执行这方法
    @Override
    public void invoke(Novel novel, AnalysisContext analysisContext) {
        list.add(novel);
        if(list.size()%5==0) {
            novelService.addNovel(list);
            list.clear();
        }
    }

    @Override
    public void doAfterAllAnalysed(AnalysisContext analysisContext) {
        novelService.addNovel(list);
    }
}
到这里后端的工作基本上就已经完成了。
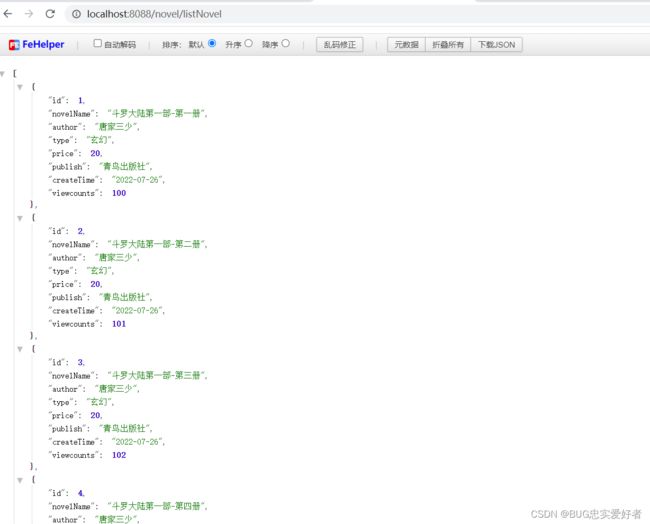
可以调用接口简单的测试一下,看看自己写的有没有问题:
前端创建项目
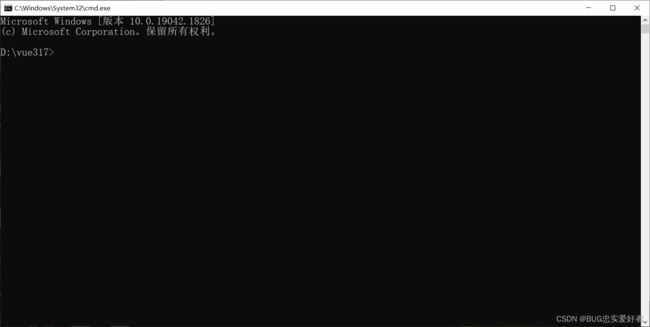
新建一个非中文文件夹,地址栏cmd回车打开黑窗口:
黑窗口输入如下命令:
npm init -y								  # 初始化项目依赖文件
cnpm i -D @vue/cli@4.5.15 				   # 安装4.5.15脚手架
npx vue -V    				      		   # 查看vue-cli版本号
npx vue create project-one 		            # 创建项目
完成之后打开vscode软件,打开刚刚创建项目的文件夹,选择到项目根路径,新建自启动文件vue.config.js。
module.exports={devServer:{open:true}}
项目目录结构如下:
安装ElementUI,打开终端窗口,输入如下命令:
npm i element-ui -S
安装axios,输入如下命令:
npm install axios -g
在src目录下的main.js文件内输入如下内容:
import Vue from 'vue'
import App from './App.vue'
//引入element-ui
import ElementUI from 'element-ui'
import 'element-ui/lib/theme-chalk/index.css'
import router from './routes';
//引入axios
import axios from 'axios'
//挂载到原型,可供全局使用
Vue.prototype.axios=axios

//在vue中使用elementUI
Vue.use(ElementUI);
Vue.config.productionTip = false

new Vue({
  router,
  render: h => h(App),
}).$mount('#app')
安装路由,在components目录下新建routes文件夹,然后新建index.js文件:
npm i vue-router@3 -S
App.vue中的内容如下:
<template>
  <div id="app">
    <router-view></router-view>
  </div>
</template>
在components目录下创建Table组件:
<template>
  <div>
    <template>
      <el-upload
            ref="upload"
            class="upload-demo"
            action="#"
            accept=".xlsx, .xls"
            :auto-upload="false"
            :on-change="uploadFile"
            :show-file-list="false"
          >
          <el-button type="primary">导入</el-button>
        </el-upload>

       <el-button type="primary" @click="exportE()">导出</el-button>
    </template>
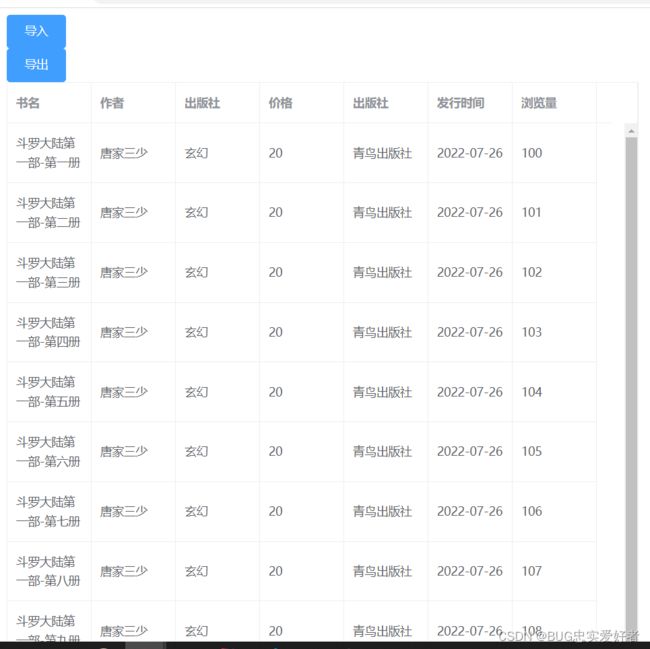
    <el-table :data="tableData" height="1000px" border style="width: 750px">
      <el-table-column prop="novelName" label="书名" width="100px">
      </el-table-column>
      <el-table-column prop="author" label="作者" width="100px">
      </el-table-column>
      <el-table-column prop="type" label="出版社" width="100px">
      </el-table-column>
      <el-table-column prop="price" label="价格" width="100px">
      </el-table-column>
      <el-table-column prop="publish" label="出版社" width="100px">
      </el-table-column>
      <el-table-column prop="createTime" label="发行时间" width="100px">
      </el-table-column>
      <el-table-column prop="viewcounts" label="浏览量" width="100px">
      </el-table-column>
    </el-table>
  </div>
</template>

<script>
export default {
  data() {
    return {
      tableData: [],
      excelVisible: false,
		errorLabel: []
    };
  },
  methods: {
    list(){
      this.axios
      .get("http://localhost:8088/novel/listNovel")
      .then((res) => {
        if (res.status == 200) {
          this.tableData = res.data;
        }
      })
      .catch((error) => {
        console.log(error);
      });
    },
    exportE() {

      window.location.href = "http://localhost:8088/novel/down";
    },
    //失败时的方法
    handleError(err) {
      this.$message.info(err.data);
    },

    //成功时的方法
    handleSuccess(response) {
      if (response.isSuccess) {
        this.$message.success(response.error);
        return;
      }
      this.$message.info(response.error);
    },

    // 上传前
    handleBeforeUpload(file) {
      // 校验
      let legalName = ["xlsx", "xls"];
      // 拿到后缀名
      let name = file.name.substring(
        file.name.lastIndexOf(".") + 1,
        file.name.length
      );
      if (legalName.includes(name)) {
        // console.log(legalName.includes(name));
      } else {
        this.$message.info("文件格式不对,仅限xls和xlsx");
        return false;
      }
    },

 uploadFile (item) {
        let formData = new FormData()
        let file = item.raw
        formData.append('file', file)
        this.axios({
          url: 'http://localhost:8088/novel/upload', //后端提供的接口
          method: 'post',
          data: formData,
          headers: {
            'Content-Type': 'multipart/form-data'
          }
        }).then(({data}) => {
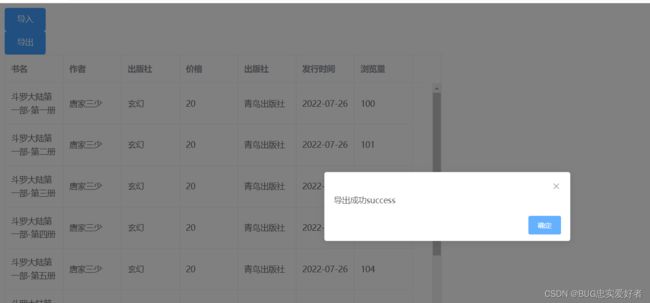
          this.$alert("导出成功"+data)
        })
    }


  },
  created() {
     this.list();

  },
};
</script>

<style>
.content {
  width: 98%;
  height: 650px;
  position: absolute;
  top: 80px;
}
.footer {
  width: 98%;
  margin-bottom: 0px;
  bottom: 0px;
}
</style>
index.js内容如下:
//专门配置整个项目路由的一块位置
import Vue from 'vue';
import Router from 'vue-router';

Vue.use(Router);

export default new Router({
    routes:[
        {
            path:'/',
            component:()=>import("@/components/Table"),
            name:"小说表格"
        }
    ]
})
