OpenHarmony开发——系统源码编译
背景
随着OpenHarmony-v3.1的发布,越来越多的开发者将目光聚焦到OpenHarmony系统开发上。对于首次接触OpenHarmony的开发者来说,如何进行源码编译是一个大难题,本文将详细介绍源码拉取到编译成功的过程,希望对开发小伙伴有所帮助。
开发环境准备
我们将使用官方推荐的Ubuntu20作为编译环境,开发板使用Hi3516DV300,由于整个编译工具链过于庞大,手动搭建编译环境非常复杂,并且容易出错,这里将使用docker搭建编译环境,可以事半功倍
安装Docker
1.首先删除可能已有的docker
$ sudo apt-get remove docker docker-engine docker.io containerd runc
2.更新apt,安装基础工具
$ sudo apt-get update
$ sudo apt-get install ca-certificates curl gnupg lsb-release
3.添加docker官方GPG key
$ curl -fsSL https://download.docker.com/linux/ubuntu/gpg | sudo gpg --dearmor -o /usr/share/keyrings/docker-archive-keyring.gpg
4.添加稳定版docker源到apt
$ echo \
"deb [arch=$(dpkg --print-architecture) signed-by=/usr/share/keyrings/docker-archive-keyring.gpg] https://download.docker.com/linux/ubuntu \
$(lsb_release -cs) stable" | sudo tee /etc/apt/sources.list.d/docker.list > /dev/null
5.安装docker
$ sudo apt-get update
$ sudo apt-get install docker-ce docker-ce-cli containerd.io
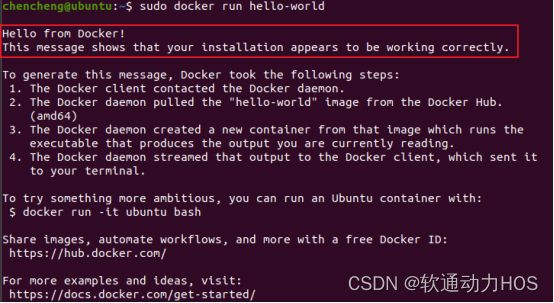
6.测试docker
$ sudo docker run hello-world
7.拉取docker编译环境
$ sudo docker pull swr.cn-south-1.myhuaweicloud.com/openharmony-docker/openharmony-docker:1.0.0
验证docker是否安装成功
拉取源码
源码拉取流程如下:
![]()
操作命令如下:
1.更新apt
$ sudo apt update

2.安装git
$ sudo apt install git-all

3.注册gitee账号,配置git ssh-key
$ git config --global user.name "yourname"
$ git config --global user.email "your-email-address"
$ git config --global credential.helper store

4.安装python3.8,需要注意,ubuntu有可能自带有python2.7,可能引发冲突,ubuntu20
$ sudo apt-get install python3.8

设置python和python3软链接为python3.8
$ sudo update-alternatives --install /usr/bin/python python /usr/bin/python3.8 1
$ sudo update-alternatives --install /usr/bin/python3 python3 /usr/bin/python3.8 1
5.安装码云repo工具
$ curl -s https://gitee.com/oschina/repo/raw/fork_flow/repo-py3 > /usr/local/bin/repo
#如果没有权限,可下载至其他目录,并将其配置到环境变量中
$ chmod a+x /usr/local/bin/repo
$ pip3 install -i https://repo.huaweicloud.com/repository/pypi/simple requests

6.拉取代码
创建代码文件夹
$ mkdir /home/openharmony3.0
$ cd /home/openharmony3.0
拉取代码
$ repo init -u https://gitee.com/openharmony/manifest.git -b refs/tags/OpenHarmony-v3.0.1-LTS --no-repo-verify
$ repo sync -c
$ repo forall -c 'git lfs pull'
开发环境
Visual Studio Code进行远程开发方式,需要安装Remote Development插件,步骤如下:
① 下载Visual Studio Code并安装,官网链接:Visual Studio Code - Code Editing. Redefined
② 安装Remote Development插件

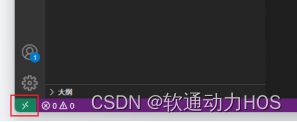
③ 点击左下角绿色图标
④ 选择连接主机
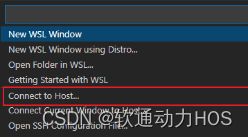
⑤ 选择增加远程主机
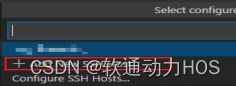
⑥ 输入ssh 用户名@IP

⑦ 输入账号密码

⑧ 选择远程主机代码目录

⑨ 成功后会展示代码目录

源码编译
1.在vscode中打开控制台,按ctrl+`可以打开,创建并启动docker容器,上一步执行完毕就直接进入容器内部了
$ sudo docker run -it -v $(pwd):/home/openharmony --name ohosc swr.cn-south-1.myhuaweicloud.com/openharmony-docker/openharmony-docker:1.0.0

2.修改容器内部的apt源为华为镜像
# sed -i "s@http://.*archive.ubuntu.com@http://repo.huaweicloud.com@g" /etc/apt/sources.list
# sed -i "s@http://.*security.ubuntu.com@http://repo.huaweicloud.com@g" /etc/apt/sources.list

3.更新apt
# apt update

4.安装ruby、ccache
# apt install ruby
# apt install ccache

5.安装编译依赖工具包
# ./build/prebuilts_download.sh

6.执行编译命令,编译耗时较久,首次编译预计1.5小时左右
# ./build.sh --product-name Hi3516DV300 --ccache
注意:
不要重复执行sudo docker run -it ...,
这样会导致重复创新多个容器,第一次编译执行完后,容器会停止,那么就需要启动容器
$ sudo docker start ohosc
// 这里ohosc是上一步 --name ohosc 给容器起的别名
进入容器内部执行编译
$ sudo docker exec -it ohosc /bin/bash
# ./build.sh --product-name Hi3516DV300 --ccache
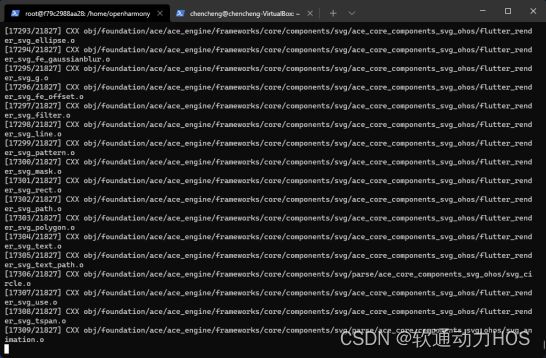
编译过程输出日志如下:
编译成功提示:
