MMSegmention系列之四(自定义数据集与自定义数据增强管道)
1、自定义数据集
1、数据配置
data在 config 文件中是数据配置的变量,用于定义数据集和数据加载器中使用的参数。
下面是一个数据配置的例子:
data = dict(
    samples_per_gpu=4,
    workers_per_gpu=4,
    train=dict(
        type='ADE20KDataset',
        data_root='data/ade/ADEChallengeData2016',
        img_dir='images/training',
        ann_dir='annotations/training',
        pipeline=train_pipeline),
    val=dict(
        type='ADE20KDataset',
        data_root='data/ade/ADEChallengeData2016',
        img_dir='images/validation',
        ann_dir='annotations/validation',
        pipeline=test_pipeline),
    test=dict(
        type='ADE20KDataset',
        data_root='data/ade/ADEChallengeData2016',
        img_dir='images/validation',
        ann_dir='annotations/validation',
        pipeline=test_pipeline))
1、train, val和test:通过使用构建和注册机制来构建数据集实例config,用于模型训练、验证和测试。build and registry
2、samples_per_gpu:模型训练时每个批次和每个gpu加载多少样本,训练的batch_size等于samples_per_gpu乘以gpu数量,例如使用8个gpu进行分布式数据并行训练,samples_per_gpu=4时,batch_size为8*4=16。如果您想定义batch_size用于测试和验证,请使用test_dataloaser和val_dataloader,并使用mmseg >=0.24.1。
3、workers_per_gpu:每个gpu用于数据加载的子进程数。0表示数据将在主进程中加载。
注意:samples_per_gpu仅用于模型训练,当模型测试和验证时,samples_per_gpu的默认设置为1 mmseg(暂不支持批推理)。
2、config.md _
Config类用于操作配置和配置文件。它支持从多种文件格式加载配置,包括python、json和yaml。它提供了类似 dict 的 API 来获取和设置值。
这是配置文件的示例test.py。
加载和使用配置
>>> cfg = Config.fromfile('test.py')
>>> print(cfg)
>>> dict(a=1,
...      b=dict(b1=[0, 1, 2], b2=None),
...      c=(1, 2),
...      d='string')
对于所有格式配置,都支持一些预定义的变量。它会将变量转换{{ var }}为其实际值。
目前,它支持四个预定义变量:
{{ fileDirname }}- 当前打开文件的目录名,例如 /home/your-username/your-project/folder
{{ fileBasename }}- 当前打开文件的基本名称,例如 file.ext
{{ fileBasenameNoExtension }}- 当前打开的文件的基本名称,没有文件扩展名,例如 file
{{ fileExtname }}- 当前打开文件的扩展名,例如 .ext
这些变量名称来自VS Code。
这是一个带有预定义变量的配置示例。
config_a.py

a = 1
b = './work_dir/{{ fileBasenameNoExtension }}'
c = '{{ fileExtname }}'
>>> cfg = Config.fromfile('./config_a.py')
>>> print(cfg)
>>> dict(a=1,
...      b='./work_dir/config_a',
...      c='.py')
对于所有格式配置,都支持继承。要重用其他配置文件中的字段,请指定_base_=‘./config_a.py’configs 列表_base_=[’./config_a.py’, ‘./config_b.py’]。以下是配置继承的 4 个示例
a = 1
b = dict(b1=[0, 1, 2], b2=None)
1、从基本配置继承,没有重叠的键
config_b.py

_base_ = './config_a.py'
c = (1, 2)
d = 'string'
>>> cfg = Config.fromfile('./config_b.py')
>>> print(cfg)
>>> dict(a=1,
...      b=dict(b1=[0, 1, 2], b2=None),
...      c=(1, 2),
...      d='string')
中的新字段config_b.py与中的旧字段相结合config_a.py
2、从具有重叠键的基本配置继承
config_c.py

_base_ = './config_a.py'
b = dict(b2=1)
c = (1, 2)
>>> cfg = Config.fromfile('./config_c.py')
>>> print(cfg)
>>> dict(a=1,
...      b=dict(b1=[0, 1, 2], b2=1),
...      c=(1, 2))
b.b2=Noneinconfig_a替换为b.b2=1in config_c.py。
3、从具有忽略字段的基本配置继承
config_d.py

_base_ = './config_a.py'
b = dict(_delete_=True, b2=None, b3=0.1)
c = (1, 2)
>>> cfg = Config.fromfile('./config_d.py')
>>> print(cfg)
>>> dict(a=1,
...      b=dict(b2=None, b3=0.1),
...      c=(1, 2))
您也可以设置_delete_=True忽略基本配置中的某些字段。所有旧钥匙b1, b2, b3都b被新钥匙取代b2, b3
4、从多个基本配置继承(基本配置不应包含相同的键)
config_e.py

c = (1, 2)
d = 'string'
config_f.py

_base_ = ['./config_a.py', './config_e.py']
>>> cfg = Config.fromfile('./config_f.py')
>>> print(cfg)
>>> dict(a=1,
...      b=dict(b1=[0, 1, 2], b2=None),
...      c=(1, 2),
...      d='string')
5、从基础引用变量
您可以使用以下语法引用 base 中定义的变量。

base.py

item1 = 'a'
item2 = dict(item3 = 'b')
config_g.py

_base_ = ['./base.py']
item = dict(a = {{ _base_.item1 }}, b = {{ _base_.item2.item3 }})
>>> cfg = Config.fromfile('./config_g.py')
>>> print(cfg.pretty_text)
item1 = 'a'
item2 = dict(item3='b')
item = dict(a='a', b='b')
6、在配置中添加弃用信息
可以在配置文件中添加弃用信息,这将UserWarning在加载此配置文件时触发。

deprecated_cfg.py

_base_ = 'expected_cfg.py'

_deprecation_ = dict(
    expected = 'expected_cfg.py',  # optional to show expected config path in the warning information
    reference = 'url to related PR'  # optional to show reference link in the warning information
)
>>> cfg = Config.fromfile('./deprecated_cfg.py')

UserWarning: The config file deprecated_cfg.py will be deprecated in the future. Please use expected_cfg.py instead. More information can be
3、build and registry
create hooks, runners, models, and datasets, through configs
要通过Registry管理代码库中的模块,有以下三个步骤。
- 创建一个构建方法(可选的,在大多数情况下你可以使用默认方法)。
- 创建一个registry.
- 3。使用此注册表管理模块。
Registry的build_func参数用于自定义如何实例化类实例或如何调用函数来获得结果,这里实现的默认参数是build_from_cfg。
mmcv.utils.build_from_cfg(cfg: Dict, registry: mmcv.utils.registry.Registry, default_args: Optional[Dict] = None) → Any
当它是一个类配置时,从配置字典构建一个模块,或者当它是一个函数配置时,从配置字典调用一个函数。
1、exmple
>>> MODELS = Registry('models')
>>> @MODELS.register_module()
>>> class ResNet:
>>>     pass
>>> resnet = build_from_cfg(dict(type='Resnet'), MODELS)
>>> # Returns an instantiated object
>>> @MODELS.register_module()
>>> def resnet50():
>>>     pass
>>> resnet = build_from_cfg(dict(type='resnet50'), MODELS)
>>> # Return a result of the calling function
2、 Parameters
Parameters
	cfg (dict) – Config dict. It should at least contain the key “type”.

	registry (Registry) – The registry to search the type from.

	default_args (dict, optional) – Default initialization arguments.

Returns
	The constructed object.

Return type
	object
3、A Simple Example
这里我们展示了一个使用注册表来管理包中的模块的简单示例。您可以在OpenMMLab项目中找到更多实际的例子。假设我们希望实现一系列Dataset Converter,用于将不同格式的数据转换为预期的数据格式。我们创建了一个名为converters的目录作为包。在包中,我们首先创建一个文件来实现生成器,名为converters/builder.py,如下所示
from mmcv.utils import Registry
# create a registry for converters
CONVERTERS = Registry('converters')
然后我们可以在包中实现不同的类或函数转换器。例如,在Converter1 .py中实现Converter1,在converter2.py中实现converter2。
from .builder import CONVERTERS

# use the registry to manage the module
@CONVERTERS.register_module()
class Converter1(object):
    def __init__(self, a, b):
        self.a = a
        self.b = b
4、下面是一个特定数据加载器的示例:
注意:在vo.24.1之前,除train、val test、samples_per_gpu和workers_per_gpu外,data中的其他键必须是pytorch中dataloader的输入关键字参数,用于模型训练、验证和测试的dataloader具有相同的输入参数。在vo24.1中,mmseg支持使用train_dataloader、test_dataloaser和val_dataloader来指定不同的关键字参数,并且仍然支持总体参数定义,但特定的数据loader设置具有更高的优先级。
data = dict(
    samples_per_gpu=4,
    workers_per_gpu=4,
    shuffle=True,
    train=dict(type='xxx', ...),
    val=dict(type='xxx', ...),
    test=dict(type='xxx', ...),
    # Use different batch size during validation and testing.
    val_dataloader=dict(samples_per_gpu=1, workers_per_gpu=4, shuffle=False),
    test_dataloader=dict(samples_per_gpu=1, workers_per_gpu=4, shuffle=False))
假设只使用一个gpu进行模型训练和测试,因为整体参数定义的优先级较低,用于训练的batch_size为4,数据集将进行洗选,用于测试和验证的batch_size为1,数据集将不进行洗选
为了使数据配置更清晰,我们建议使用特定的数据加载器设置,而不是v0.24.1之后的整体数据加载器设置,就像:
data = dict(
    train=dict(type='xxx', ...),
    val=dict(type='xxx', ...),
    test=dict(type='xxx', ...),
    # Use specific dataloader setting
    train_dataloader=dict(samples_per_gpu=4, workers_per_gpu=4, shuffle=True),
    val_dataloader=dict(samples_per_gpu=1, workers_per_gpu=4, shuffle=False),
    test_dataloader=dict(samples_per_gpu=1, workers_per_gpu=4, shuffle=False))
注意:在模型训练中,mmseg for dataloader的脚本默认值为shuffle=True, drop_last=True,在模型验证和测试中,默认值为shuffle=False, drop_last=False
5、通过重组数据自定义数据集
最简单的方法是将数据集转换为文件夹。文件结构示例如下所示。
├── data
│ ├── my_dataset
│ │ ├── img_dir
│ │ │ ├── train
│ │ │ │ ├── xxx{img_suffix}
│ │ │ │ ├── yyy{img_suffix}
│ │ │ │ ├── zzz{img_suffix}
│ │ │ ├── val
│ │ ├── ann_dir
│ │ │ ├── train
│ │ │ │ ├── xxx{seg_map_suffix}
│ │ │ │ ├── yyy{seg_map_suffix}
│ │ │ │ ├── zzz{seg_map_suffix}
│ │ │ ├── val
6、通过混合数据集定制数据集
MMSegmentation也支持混合数据集进行训练。目前它支持连接、重复和多图像混合数据集
1、重复的数据集
我们使用RepeatDataset作为包装器来重复数据集。例如,假设原始数据集是Dataset_A,为了重复它,配置如下所示
dataset_A_train = dict(
        type='RepeatDataset',
        times=N,
        dataset=dict(  # This is the original config of Dataset_A
            type='Dataset_A',
            ...
            pipeline=train_pipeline
        )
    )
2、连接数据集
有两种方法连接数据集。如果您想要连接的数据集属于具有不同注释文件的同一类型,您可以像下面这样连接数据集配置。
1、You may concatenate two ann_dir.
dataset_A_train = dict(
    type='Dataset_A',
    img_dir = 'img_dir',
    ann_dir = ['anno_dir_1', 'anno_dir_2'],
    pipeline=train_pipeline
)
2、You may concatenate two split.
dataset_A_train = dict(
    type='Dataset_A',
    img_dir = 'img_dir',
    ann_dir = 'anno_dir',
    split = ['split_1.txt', 'split_2.txt'],
    pipeline=train_pipeline
)
3、You may concatenate two ann_dir and split simultaneously.
dataset_A_train = dict(
    type='Dataset_A',
    img_dir = 'img_dir',
    ann_dir = ['anno_dir_1', 'anno_dir_2'],
    split = ['split_1.txt', 'split_2.txt'],
    pipeline=train_pipeline
)
在本例中,ann_dir_1和ann_dir_2对应split_1.txt和split_2.txt。
2. 如果要连接的数据集不同,可以像下面这样连接数据集配置
dataset_A_train = dict()
dataset_B_train = dict()

data = dict(
    imgs_per_gpu=2,
    workers_per_gpu=2,
    train = [
        dataset_A_train,
        dataset_B_train
    ],
    val = dataset_A_val,
    test = dataset_A_test
    )
下面是一个更复杂的例子,它分别重复了Dataset_A和Dataset_B N次和M次,然后将重复的数据集连接起来。
dataset_A_train = dict(
    type='RepeatDataset',
    times=N,
    dataset=dict(
        type='Dataset_A',
        ...
        pipeline=train_pipeline
    )
)
dataset_A_val = dict(
    ...
    pipeline=test_pipeline
)
dataset_A_test = dict(
    ...
    pipeline=test_pipeline
)
dataset_B_train = dict(
    type='RepeatDataset',
    times=M,
    dataset=dict(
        type='Dataset_B',
        ...
        pipeline=train_pipeline
    )
)
data = dict(
    imgs_per_gpu=2,
    workers_per_gpu=2,
    train = [
        dataset_A_train,
        dataset_B_train
    ],
    val = dataset_A_val,
    test = dataset_A_test
)
3、多映像组合数据集(Multi-image Mix Dataset)
我们使用MultiImageMixDataset作为包装器来混合来自多个数据集的图像。MultiImageMixDataset可用于多个图像混合数据增强,如马赛克和混合。一个使用MultiImageMixDataset与马赛克数据增强的例子:
train_pipeline = [
    dict(type='RandomMosaic', prob=1),
    dict(type='Resize', img_scale=(1024, 512), keep_ratio=True),
    dict(type='RandomFlip', prob=0.5),
    dict(type='Normalize', **img_norm_cfg),
    dict(type='DefaultFormatBundle'),
    dict(type='Collect', keys=['img', 'gt_semantic_seg']),
]

train_dataset = dict(
    type='MultiImageMixDataset',
    dataset=dict(
        classes=classes,
        palette=palette,
        type=dataset_type,
        reduce_zero_label=False,
        img_dir=data_root + "images/train",
        ann_dir=data_root + "annotations/train",
        pipeline=[
            dict(type='LoadImageFromFile'),
            dict(type='LoadAnnotations'),
        ]
    ),
    pipeline=train_pipeline
)
2、定制数据管道
1、数据管道设计
遵循典型的约定,我们使用Dataset和DataLoader对多个worker进行数据加载。Dataset返回与模型的forward方法的参数相对应的数据项字典。由于语义分割中的数据可能大小不同,我们在MMCV中引入了一个新的DataContainer类型来帮助收集和分发不同大小的数据。详见这里data_container.py
对数据准备管道和数据集进行分解。通常,数据集定义如何处理注释,数据管道定义准备数据字典的所有步骤。管道由一系列操作组成。每个操作以一个字典作为输入,并输出一个字典用于下一个转换。操作分为数据加载、预处理、格式化和测试时间扩展。下面是PSPNet的管道示例。
img_norm_cfg = dict(
    mean=[123.675, 116.28, 103.53], std=[58.395, 57.12, 57.375], to_rgb=True)
crop_size = (512, 1024)
train_pipeline = [
    dict(type='LoadImageFromFile'),
    dict(type='LoadAnnotations'),
    dict(type='Resize', img_scale=(2048, 1024), ratio_range=(0.5, 2.0)),
    dict(type='RandomCrop', crop_size=crop_size, cat_max_ratio=0.75),
    dict(type='RandomFlip', flip_ratio=0.5),
    dict(type='PhotoMetricDistortion'),
    dict(type='Normalize', **img_norm_cfg),
    dict(type='Pad', size=crop_size, pad_val=0, seg_pad_val=255),
    dict(type='DefaultFormatBundle'),
    dict(type='Collect', keys=['img', 'gt_semantic_seg']),
]
test_pipeline = [
    dict(type='LoadImageFromFile'),
    dict(
        type='MultiScaleFlipAug',
        img_scale=(2048, 1024),
        # img_ratios=[0.5, 0.75, 1.0, 1.25, 1.5, 1.75],
        flip=False,
        transforms=[
            dict(type='Resize', keep_ratio=True),
            dict(type='RandomFlip'),
            dict(type='Normalize', **img_norm_cfg),
            dict(type='ImageToTensor', keys=['img']),
            dict(type='Collect', keys=['img']),
        ])
]
对于每个操作,我们列出添加/更新/删除的相关dict字段
1、Data loading
LoadImageFromFile
add: img, img_shape, ori_shape
LoadAnnotations
add: gt_semantic_seg, seg_fields
2、Pre-processing
Resize
add: scale, scale_idx, pad_shape, scale_factor, keep_ratio
update: img, img_shape, *seg_fields
RandomFlip
add: flip
update: img, *seg_fields
Pad
add: pad_fixed_size, pad_size_divisor
update: img, pad_shape, *seg_fields
RandomCrop
update: img, pad_shape, *seg_fields
Normalize
add: img_norm_cfg
update: img
SegRescale
update: gt_semantic_seg
PhotoMetricDistortion
update: img
3、Formatting
ToTensor
update: specified by keys.
ImageToTensor
update: specified by keys.
Transpose
update: specified by keys.
ToDataContainer
update: specified by fields.
DefaultFormatBundle
update: img, gt_semantic_seg
Collect
add: img_meta (the keys of img_meta is specified by meta_keys)
remove: all other keys except for those specified by keys
4、Test time augmentation
2、Extend and use custom pipelines(拓展使用自定义数据增强)
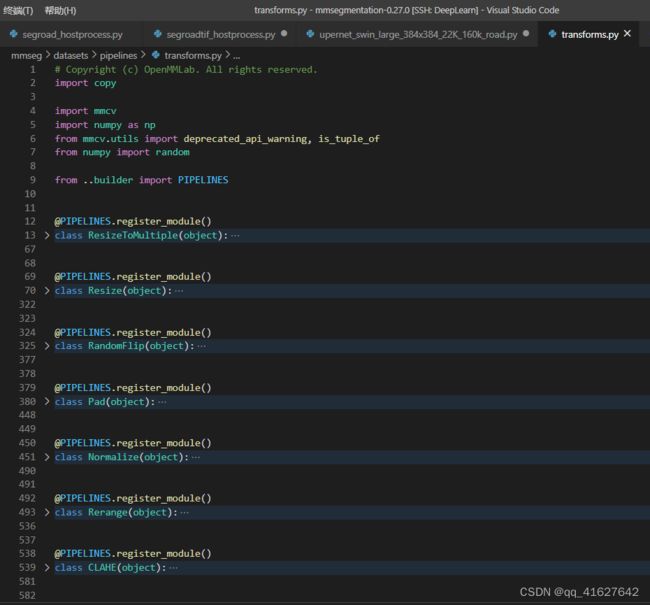
mmsegmention中的transform.py包括class ResizeToMultiple、class Resize、class RandomFlip、class RandomRotate、class AdjustGamma、class PhotoMetricDistortion、 RandomCutOut、RandomMosaic等方法


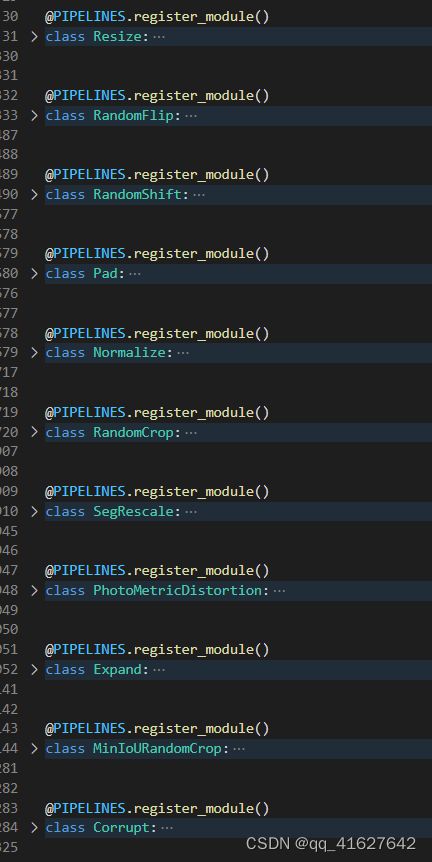
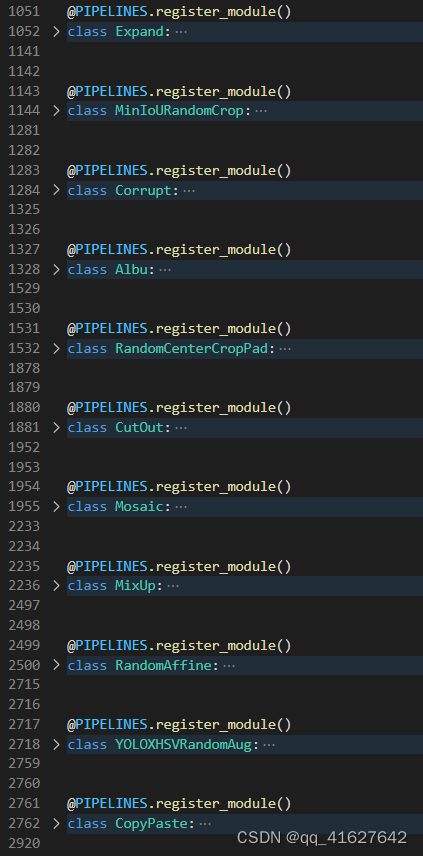
mmdetection中的transform.py包括


先transform.py导入额外需要的库
try:
    from imagecorruptions import corrupt
except ImportError:
    corrupt = None

try:
    import albumentations
    from albumentations import Compose
except ImportError:
    albumentations = None
    Compose = None
1、Write a new pipeline in any file, e.g., my_pipeline.py. It takes a dict as input and return a dict.
- 在任何文件中写入一个新的管道,例如my_pipeline.py。它接受一个字典作为输入并返回一个字典。
from mmseg.datasets import PIPELINES

@PIPELINES.register_module()
class MyTransform:
      def __init__(self,
                 prob,
                 img_scale=(640, 640),
                 center_ratio_range=(0.5, 1.5),
                 pad_val=0,
                 seg_pad_val=255):
        assert 0 <= prob and prob <= 1
        assert isinstance(img_scale, tuple)
        self.prob = prob
        self.img_scale = img_scale
        self.center_ratio_range = center_ratio_range
        self.pad_val = pad_val
        self.seg_pad_val = seg_pad_val

    def __call__(self, results):
        results['dummy'] = True
        return results
    def __repr__(self):
        repr_str = self.__class__.__name__
        repr_str += f'(prob={self.prob}, '
        repr_str += f'img_scale={self.img_scale}, '
        repr_str += f'center_ratio_range={self.center_ratio_range}, '
        repr_str += f'pad_val={self.pad_val}, '
        repr_str += f'seg_pad_val={self.pad_val})'
        return repr_str
新增class Albu(object)这个类
@PIPELINES.register_module()
class Albu(object):
    """Albumentation augmentation. Adds custom transformations from
    Albumentations library. Please, visit
    `https://albumentations.readthedocs.io` to get more information. An example
    of ``transforms`` is as followed:
    .. code-block::
            dict(
                type='ShiftScaleRotate',
                shift_limit=0.0625,
                scale_limit=0.0,
                rotate_limit=0,
                interpolation=1,
                p=0.5),
            dict(
                type='RandomBrightnessContrast',
                brightness_limit=[0.1, 0.3],
                contrast_limit=[0.1, 0.3],
                p=0.2),
            dict(type='ChannelShuffle', p=0.1),
            dict(
                type='OneOf',
                transforms=[
                    dict(type='Blur', blur_limit=3, p=1.0),
                    dict(type='MedianBlur', blur_limit=3, p=1.0)
                ],
                p=0.1),
        ]
    Args:
        transforms (list[dict]): A list of albu transformations
        keymap (dict): Contains {'input key':'albumentation-style key'}
    """
    def __init__(self, transforms, keymap=None, update_pad_shape=False):
        # Args will be modified later, copying it will be safer
        transforms = copy.deepcopy(transforms)
        if keymap is not None:
            keymap = copy.deepcopy(keymap)
        self.transforms = transforms
        self.filter_lost_elements = False
        self.update_pad_shape = update_pad_shape
        self.aug = Compose([self.albu_builder(t) for t in self.transforms])
        if not keymap:
            self.keymap_to_albu = {'img': 'image', 'gt_semantic_seg': 'mask'}
        else:
            self.keymap_to_albu = keymap
        self.keymap_back = {v: k for k, v in self.keymap_to_albu.items()}

    def albu_builder(self, cfg):
        """Import a module from albumentations.
        It inherits some of :func:`build_from_cfg` logic.
        Args:
            cfg (dict): Config dict. It should at least contain the key "type".
        Returns:
            obj: The constructed object.
        """
        assert isinstance(cfg, dict) and 'type' in cfg
        args = cfg.copy()
        obj_type = args.pop('type')
        if mmcv.is_str(obj_type):
            obj_cls = getattr(albumentations, obj_type)
        else:
            raise TypeError(f'type must be str, but got {type(obj_type)}')
        if 'transforms' in args:
            args['transforms'] = [
                self.albu_builder(transform)
                for transform in args['transforms']
            ]
        return obj_cls(**args)

    @staticmethod
    def mapper(d, keymap):

        """Dictionary mapper.
        Renames keys according to keymap provided.
        Args:
            d (dict): old dict
            keymap (dict): {'old_key':'new_key'}
        Returns:
            dict: new dict.
        """
        updated_dict = {}
        for k, v in zip(d.keys(), d.values()):
            new_k = keymap.get(k, k)
            updated_dict[new_k] = d[k]
        return updated_dict

    def __call__(self, results):
        # dict to albumentations format
        results = self.mapper(results, self.keymap_to_albu)
        results = self.aug(**results)
        # back to the original format
        results = self.mapper(results, self.keymap_back)
        # update final shape
        if self.update_pad_shape:
            results['pad_shape'] = results['img'].shape

        return results

    def __repr__(self):
        repr_str = self.__class__.__name__ + f'(transforms={self.transforms})'
        return repr_str
2、在__init__.py中导入这个新类数据增强函数
from .compose import Compose
from .formating import (Collect, ImageToTensor, ToDataContainer, ToTensor,
                        Transpose, to_tensor)
from .loading import LoadAnnotations, LoadImageFromFile
from .test_time_aug import MultiScaleFlipAug
from .transforms import (CLAHE, AdjustGamma, Normalize, Pad,
                         PhotoMetricDistortion, RandomCrop, RandomFlip,
                         RandomRotate, Rerange, Resize, RGB2Gray, SegRescale, Albu, Grid)#新增的Albu数据增强

__all__ = [
    'Compose', 'to_tensor', 'ToTensor', 'ImageToTensor', 'ToDataContainer',
    'Transpose', 'Collect', 'LoadAnnotations', 'LoadImageFromFile',
    'MultiScaleFlipAug', 'Resize', 'RandomFlip', 'Pad', 'RandomCrop',
    'Normalize', 'SegRescale', 'PhotoMetricDistortion', 'RandomRotate',
    'AdjustGamma', 'CLAHE', 'Rerange', 'RGB2Gray',  'Albu', 'Grid'
]#新增的Albu数据增强
from .my_pipeline import MyTransform
from .poly_transforms import (CorrectRBBox, PolyResize, PolyRandomFlip, PolyRandomRotate,
                              Poly_Mosaic_RandomPerspective, MixUp, PolyImgPlot)
3、Use it in config files
img_norm_cfg = dict(
    mean=[123.675, 116.28, 103.53], std=[58.395, 57.12, 57.375], to_rgb=True)
crop_size = (512, 1024)
train_pipeline = [
    dict(type='LoadImageFromFile'),
    dict(type='LoadAnnotations'),
    dict(type='Resize', img_scale=(2048, 1024), ratio_range=(0.5, 2.0)),
    dict(type='RandomCrop', crop_size=crop_size, cat_max_ratio=0.75),
    dict(type='RandomFlip', flip_ratio=0.5),
    dict(type='PhotoMetricDistortion'),
    dict(type='Normalize', **img_norm_cfg),
    dict(type='Pad', size=crop_size, pad_val=0, seg_pad_val=255),
    dict(type='MyTransform'),
    dict(type='DefaultFormatBundle'),
    dict(type='Collect', keys=['img', 'gt_semantic_seg']),
]
work_dir = 'work_dirs/swin_base_patch4_window12_dotav2/'
# model settings
norm_cfg = dict(type='GN', num_groups=32, requires_grad=True)

model = dict(
    type='OrientedRepPointsDetector',
    pretrained='/checkpoints_torch1.4/swin_base_patch4_window12_384_22kto1k.pth',
    backbone=dict(
        type='SwinTransformer',
        embed_dim=128,         # tiny 96    small 96       base 128      large 192
        depths=[2, 2, 18, 2],  # tiny 2262  small 22 18 2  base 22 18 2  large 22 18 2
        num_heads=[4, 8, 16, 32],
        window_size=12,        # tiny 7     samall 7
        mlp_ratio=4.,
        qkv_bias=True,
        qk_scale=None,
        drop_rate=0.,
        attn_drop_rate=0.,
        drop_path_rate=0.3,  # 训练时间小于1×最好置为0.1
        ape=False,    # 是否需要对嵌入向量进行相对位置编码
        patch_norm=True,
        out_indices=(1, 2, 3),  # strides: [4, 8, 16, 32]  channel:[128, 256, 512, 1024]
        use_checkpoint=True
    ),
    neck=
        dict(
        type='FPN',
        in_channels=[256, 512, 1024],
        out_channels=256,
        #start_level=1,
        add_extra_convs=True,
        num_outs=5,
        norm_cfg=norm_cfg
        ),
    bbox_head=dict(
        type='OrientedRepPointsHead',
        num_classes=16,
        in_channels=256,
        feat_channels=256,
        point_feat_channels=256,
        stacked_convs=3,
        num_points=9,
        gradient_mul=0.3,
        point_strides=[8, 16, 32, 64, 128],
        point_base_scale=2,
        norm_cfg=norm_cfg,
        loss_cls=dict(type='FocalLoss', use_sigmoid=True, gamma=2.0, alpha=0.25, loss_weight=1.0),
        loss_rbox_init=dict(type='GIoULoss', loss_weight=0.375),
        loss_rbox_refine=dict(type='GIoULoss', loss_weight=1.0),
        loss_spatial_init=dict(type='SpatialBorderLoss', loss_weight=0.05),
        loss_spatial_refine=dict(type='SpatialBorderLoss', loss_weight=0.1),
        top_ratio=0.4,))
# training and testing settings
train_cfg = dict(
    init=dict(
        assigner=dict(type='PointAssigner', scale=4, pos_num=1),  # 每个gtbox仅选一个正样本
        allowed_border=-1,
        pos_weight=-1,
        debug=False),
    refine=dict(
        assigner=dict(
            type='MaxIoUAssigner', #pre-assign to select more samples for samples selection
            pos_iou_thr=0.1,
            neg_iou_thr=0.1,
            min_pos_iou=0,
            ignore_iof_thr=-1),
        allowed_border=-1,
        pos_weight=-1,
        debug=False))

test_cfg = dict(
    nms_pre=2000,
    min_bbox_size=0,
    score_thr=0.05,
    nms=dict(type='rnms', iou_thr=0.4),
    max_per_img=2000)

# dataset settings
dataset_type = 'DotaDatasetv2'
data_root = '/media/test/4d846cae-2315-4928-8d1b-ca6d3a61a3c6/DOTA/DOTAv2.0/'
img_norm_cfg = dict(
    mean=[123.675, 116.28, 103.53], std=[58.395, 57.12, 57.375], to_rgb=True)
train_pipeline = [
    dict(type='LoadImageFromFile'),
    dict(type='LoadAnnotations', with_bbox=True),
    dict(type='CorrectRBBox', correct_rbbox=True, refine_rbbox=True),
    dict(type='PolyResize',
        img_scale=[(1333, 768), (1333, 1280)],  # 建议根据显存来确定长边的值,在线多尺度缩放幅度控制在25%左右为佳
        keep_ratio=True,
        multiscale_mode='range',
        clamp_rbbox=False),
    dict(type='PolyRandomFlip', flip_ratio=0.5),
   # dict(type='HSVAugment', hgain=0.015, sgain=0.7, vgain=0.4),
    dict(type='PolyRandomRotate', rotate_ratio=0.5, angles_range=180, auto_bound=False),
    dict(type='Pad', size_divisor=32),
   # dict(type='Poly_Mosaic_RandomPerspective', mosaic_ratio=0, ifcrop=True, degrees=0, translate=0.1, scale=0.2, shear=0, perspective=0.0),
   # dict(type='MixUp', mixup_ratio=0.5),
    dict(type='PolyImgPlot', img_save_path=work_dir, save_img_num=16, class_num=18, thickness=2),
    dict(type='Normalize', **img_norm_cfg),
    dict(type='DefaultFormatBundle'),
    dict(type='Collect', keys=['img', 'gt_bboxes', 'gt_labels'])]

test_pipeline = [
    dict(type='LoadImageFromFile'),
    dict(
        type='MultiScaleFlipAug',
        img_scale=(1024, 1024),
        flip=False,
        transforms=[
            dict(type='PolyResize', keep_ratio=True),
            dict(type='PolyRandomFlip'),
            dict(type='Normalize', **img_norm_cfg),
            dict(type='Pad', size_divisor=32),
            dict(type='ImageToTensor', keys=['img']),
            dict(type='Collect', keys=['img']),
        ])
]

data = dict(
    imgs_per_gpu=2,
    workers_per_gpu=2,
    train=dict(
        type=dataset_type,
        ann_file=data_root + 'trainval_split_1024/Train_dotav2_trainval1024_poly.json',
        img_prefix=data_root + 'trainval_split_1024/images/',
        pipeline=train_pipeline,
        Mosaic4=False,
        Mosaic9=False,
        Mixup=False),
    val=dict(
        type=dataset_type,
        ann_file=data_root + 'trainval_split_1024/Train_dotav2_trainval1024_poly.json',
        img_prefix=data_root + 'trainval_split_1024/images/',
        pipeline=test_pipeline),
    test=dict(
        type=dataset_type,
        ann_file=data_root + 'test-dev_split/Test_datav2_test1024.json',
        img_prefix=data_root + 'test-dev_split/images/',
        pipeline=test_pipeline))
evaluation = dict(interval=1, metric='bbox')

# optimizer
optimizer = dict(type='AdamW', lr=0.0001, betas=(0.9, 0.999), weight_decay=0.05,
                paramwise_cfg=dict(custom_keys={'absolute_pos_embed': dict(decay_mult=0.),
                                                 'relative_position_bias_table': dict(decay_mult=0.),
                                                 'norm': dict(decay_mult=0.)}))

# learning policy
lr_config = dict(
    policy='step',
    warmup='linear',
    warmup_iters=500,
    warmup_ratio=1.0 / 3, #
    step=[27, 33])

runner = dict(type='EpochBasedRunnerAmp', max_epochs=36)
total_epochs = 36

checkpoint_config = dict(interval=2)
# yapf:disable
log_config = dict(
    interval=20,          # 迭代n次时打印一次
    hooks=[
        dict(type='TextLoggerHook')
    ])
# yapf:enable
# runtime settings
dist_params = dict(backend='nccl')
log_level = 'INFO'
load_from = None
resume_from = None#'work_dirs/swin_tiny_patch4_window7_gradclip/latest.pth'
workflow = [('train', 1)]

# do not use mmdet version fp16
fp16 = None
optimizer_config = dict(grad_clip=dict(max_norm=35, norm_type=2))
# optimizer_config = dict(
#  #   type="DistOptimizerHook",
#  #   update_interval=1,
#     grad_clip=None,
#     coalesce=True,
#     bucket_size_mb=-1,
#  #   use_fp16=True,