SpringCloud之消息队列二:RabbitMQ订阅模型fanout
前言:上篇我们实现了消息队列的基本模型,这篇实现一下其他的订阅模型,例如fanout等
订阅模型简介
首先简要介绍一下各种消息模型,这里只写一下我自己的理解,就不过多展开了
RabbitMQ提供了6种消息模型
1、simple模式:一个生产者,一个消费者
2、work模式:一个生产者,多个消费者 ,一个消息只能被一个消费者消费
3、publish/subscribe模式:一个生产者,多个消费者,每个消息都可以一人发一份
4、routing模式:利用路由将消息发给指定消费者
5、topic 主题模式:类似routing,但不是精确发,是模糊匹配发出去
6、RPC模式:通过多个队列,每个队列给一个消费者,后端代码配合,实现类似多个生产者的效果
其中345三种是要实现的订阅模型,分别是
Fanout:广播,将消息交给所有绑定到交换机的队列
Direct:定向,把消息交给符合指定routing key 的队列
Topic:通配符,把消息交给符合routing pattern(路由模式) 的队列
Fallout消息队列实现
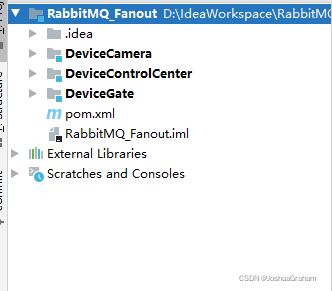
在Idea中建立一个Maven父项目,然后在它下面建三个module,分别是DeviceCamera(监控消费者),DeviceControlCenter(控制中心生产者),DevceGate(闸机设备消费者)
都是maven默认项目,不勾选任何选项
 在父项目pom.xml加入如下配置
<parent>
    <groupId>org.springframework.bootgroupId>
    <artifactId>spring-boot-starter-parentartifactId>

    <version>2.4.1version>
parent>


<dependencies>
    <dependency>
        <groupId>org.springframework.bootgroupId>
        <artifactId>spring-boot-starter-webartifactId>
    dependency>
    <dependency>
        <groupId>org.springframework.bootgroupId>
        <artifactId>spring-boot-starter-amqpartifactId>
        <version>2.4.1version>
    dependency>
dependencies>


<build>
    <plugins>

        <plugin>
            <groupId>org.apache.maven.pluginsgroupId>
            <artifactId>maven-compiler-pluginartifactId>
            <version>3.7.0version>
            <configuration>
                <source>1.8source>
                <target>1.8target>
            configuration>
        plugin>

        <plugin>
            <groupId>org.springframework.bootgroupId>
            <artifactId>spring-boot-maven-pluginartifactId>
            <version>2.0.4.RELEASEversion>
            <configuration>
                <fork>truefork>
                <includeSystemScope>trueincludeSystemScope>
            configuration>
        plugin>
    plugins>
build>
这里和上篇一样,没有什么特别的配置,三个子项目pom不变,继承父项目
生产者
之后配置设备控制中心(生产者)的application.yml

内容:
server:
  port: 8001
spring:
  application:
    name: rabbitmq-device-center
  rabbitmq:
    host: 127.0.0.1
    port: 5672
    username: guest
    password: guest
启动类正常配置,没有改动
@SpringBootApplication(exclude = DataSourceAutoConfiguration.class)
public class DeviceControlApplication {
    public static void main(String[] args) {
        SpringApplication.run(DeviceControlApplication.class, args);
    }
}
然后是config和controller

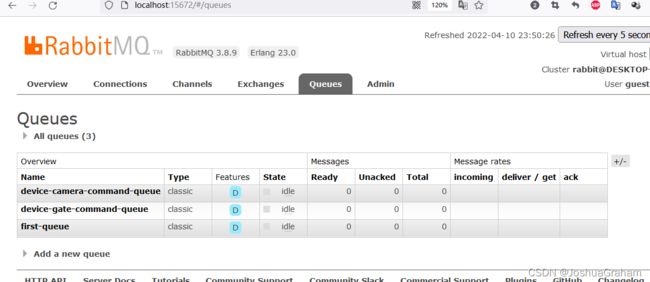
config类里:创建了交换机,创建了gate与camera队列,并且将其绑定在交换机上,同时将这些都注入容器里
@Configuration
public class RabbitMQConfig {
    @Bean
    public FanoutExchange createExchange(){
        return new FanoutExchange("device_command_exchange");
    }
    @Bean
    public Binding createDeviceGateCommandQueueBinding(){
        return new Binding("device-gate-command-queue",
                Binding.DestinationType.QUEUE,
                "device_command_exchange",
                "",
                null);
    }
    @Bean
    public Binding createDeviceCameraCommandQueueBinding(){
        return new Binding("device-camera-command-queue",
                Binding.DestinationType.QUEUE,
                "device_command_exchange",
                "",
                null);
    }
    @Bean
    public Queue createDeviceGateCommandQueue(){
        return new Queue("device-gate-command-queue");
    }

    @Bean
    public Queue createDeviceCameraCommandQueue(){
        return new Queue("device-camera-command-queue");
    }
}
在控制类里配置生产者向交换机发送消息的部分
@RestController
@RequestMapping("/")
public class DeviceCommandController {
    @Autowired
    private RabbitTemplate rabbitTemplate;
    @RequestMapping("sendCommand")
    public String sendCommand(@RequestParam String command){
        rabbitTemplate.convertAndSend("device_command_exchange", "", command);
        return "命令:“" + command + "”已发送!";
    }
}
消费者
在另外两个消费者项目里配置application.yml
除了name和port,别的和生产者都一样,只写两个变得地方
 port: 8002
 name: rabbitmq-consumer-device-gate
 port: 8003
 name: rabbitmq-consumer-device-camera
然后配置两个组件包下的监听器,用rabbitlistener注解指定队列

@Component
public class ConsumerDeviceGate {
    @RabbitListener(queues = "device-gate-command-queue")
    public void receiveMsg(String command){
        System.out.println("闸机设备收到命令:" + command);
    }
}
@Component
public class ConsumerDeviceCamera {
    @RabbitListener(queues = "device-camera-command-queue")
    public void receiveMsg(String command){
        System.out.println("监控设备收到命令:" + command);
    }
}
然后两个spring启动类正常配置
测试
打开服务

访问浏览器,url在图里
 启动生产者启动类,发送http://127.0.0.1:8001/sendCommand?command=fanout


