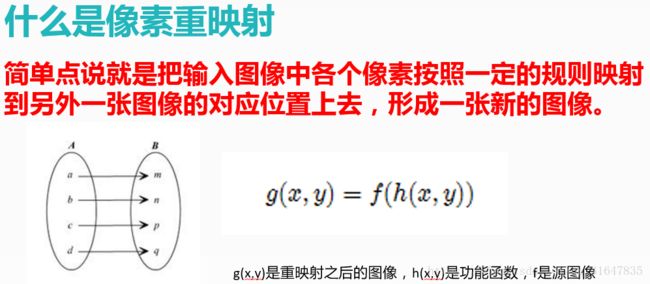
opencv笔记二十三(像素重映射remap函数)注意x,y映射表 必须为:CV_16SC2/CV_32FC1/CV_32FC2
API:
remap( InputArray src,// 输入图像
OutputArray dst,// 输出图像
InputArray map1,// x 映射表 必须为:CV_16SC2/CV_32FC1/CV_32FC2
InputArray map2,// y 映射表
int interpolation,// 选择的插值方法,常见线性插值INTER_LINEAR,可选择立方等
int borderMode,// BORDER_CONSTANT
const Scalar borderValue// color )
实验代码如下:
#include
#include
using namespace cv;
using namespace std;
int n = 50, nm = 255;
char *c1 = "OLD", *c2 = "NEW";
Mat t1, t2, t3,x,y;
int i = 0;
void MAP(void);
int main(int argc, char** argv){
	t1 = imread("houghc.png");
	if (!t1.data) {
		cout << "WRONG\n";
		return -1;
	}
	x.create(t1.size(), CV_32FC1);
	y.create(t1.size(), CV_32FC1);

	while (1) {
		i = waitKey(500);
		if ((char)i == 27)break;
		i = i % 4;
		MAP();
		remap(t1, t2, x, y, INTER_LINEAR, BORDER_CONSTANT, Scalar(100, 150, 150));
		imshow(c1, t1);
		imshow(c2, t2);
	}

	waitKey(0);
	return 0;
}

void MAP(void) {
	for (int row = 0; row < t1.rows; row++) {
		for (int col = 0; col < t1.cols; col++) {
			switch (i) {
			case 0://原图的1/2
				if (col > (t1.cols*0.25) && col<=(t1.cols*0.75) && row>(t1.rows*0.25) && row <=(t1.rows*0.75)) {
					x.at(row, col) = 2 * (col - (t1.cols*0.25) );
					y.at(row, col) = 2 * (row - (t1.rows*0.25) );
				}
				else {
					x.at(row, col) = 0;
					y.at(row, col) = 0;
				}
				break;
			case 1://左右颠倒
				x.at(row, col) = (t1.cols - col - 1);
				y.at(row, col) = row;
				break;
			case 2://上下颠倒
				x.at(row, col) = col;
				y.at(row, col) = t1.rows - row - 1;
				break;
			case 3://上下左右颠倒
				x.at(row, col) = t1.cols - col - 1;
				y.at(row, col) = t1.rows - row - 1;
				break;
			}
		}
	}
}
