Python Matplotlib库的基本使用
目录
-
-
- 1.一个坐标系中绘制多个图像
-
-
-
- linestyle = " "
- color = " "
- plt.legend(loc=" " or 数字)
-
-
- 2.多个坐标系绘制
- 3.其他图例应用举例
-
- 折线图(因为横坐标过于密集, 类似为曲线图)
- 散点图的绘制
- 柱状图的绘制
- Pie 图的绘制
-
1.一个坐标系中绘制多个图像
# 导入模块
import matplotlib.pyplot as plt
import random

# 0.准备数据
x = range(61)  # range对象, 返回值为 一个整数序列[0, ..., 60]共 61 个数字
y_shanghai = [random.uniform(15, 18) for i in x]  #
y_beijing = [random.uniform(1, 3) for i in x]

# 1.创建画布
plt.figure(figsize=(20, 8), dpi=100)   # figsize=(长, 宽比); dpi=清晰度

# 2.绘制图像
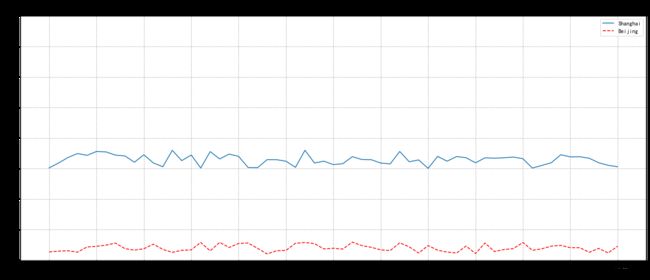
plt.plot(x, y_shanghai, label = "Shanghai")  # 此处的label 是 图例
plt.plot(x, y_beijing, color='r', label = "Beijing", linestyle='--')

# 2.1 添加x,y轴刻度
# 定义x,y轴范围
x_ticks_label = ["11点{}分".format(i) for i in x]
y_ticks = range(45)

# 修改x,y轴坐标刻度显示
# plt.xticks(x_ticks_label[::5]) # 坐标刻度因为是字符串, 不可以直接进行修改
plt.xticks(x[::5], x_ticks_label[::5])  # 用 x_ticks_label[::5] 代替 x[::5]
plt.yticks(y_ticks[::5])

# 2.2 添加网格显示
plt.grid(True, linestyle="--", alpha=1)

# 2.3 添加 xlabel, ylabel, title
plt.xlabel("Time")
plt.ylabel("Temperature")
plt.title("中午11点-12点某城市温度变化图", fontsize=20)

# 2.4 显示图例
plt.legend(loc="best")

# 2.5 图像保存(必须在show之前保存)
plt.savefig("./test_1.png")

# 3.图像显示, 并释放资源
plt.show()
linestyle = " "
-: 实线
--: 虚线
-.: 点划线
- : 点虚线
‘’ : 留空, 空格
color = " "
r: 红色; g: 绿色; b: 蓝色; w: 白色; c: 青色; m: 洋红色; y: 黄色; k: 黑色
plt.legend(loc=" " or 数字)
‘best’ 0
‘upper right’ 1
‘upper left’ 2
‘lower left’ 3
‘lower right’ 4
‘right’ 5
‘center left’ 6
‘center right’ 7
‘lower center’ 8
‘upper center’ 9
‘center’ 10
2.多个坐标系绘制
# 导入模块
import matplotlib.pyplot as plt

# 0.准备数据
x = range(61)
y_shanghai = [random.uniform(15, 18) for i in x]
y_beijing = [random.uniform(10, 13) for i in x]

# 1.创建画布
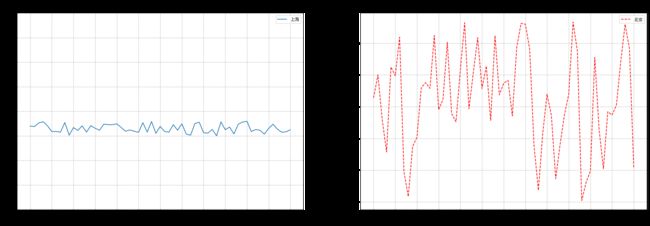
fig, axes = plt.subplots(nrows=1, ncols=2, figsize=(25, 8), dpi=100)
# fig 接收 整个图片; axes用于接收若干个坐标系, 此处 为 1行 2列, 共2个坐标系

# 2.绘制图像
axes[0].plot(x, y_shanghai, label="上海")  # lable 是 图例
axes[1].plot(x, y_beijing, color="r", linestyle="--", label="北京")

# 2.1 添加x,y轴刻度
# 设置x,y轴范围
x_ticks_label = ["11点{}分".format(i) for i in x]
y_ticks = range(45)

# 修改x,y轴坐标刻度显示
axes[0].set_xticks(x[::5])
axes[0].set_xticklabels(x_ticks_label[::5])
axes[0].set_yticks(y_ticks[::5])

axes[1].set_xticks(x[::5])
axes[1].set_xticklabels(x_ticks_label[::5]
axes[1].set_yticks(y_ticks[::5]))

# 2.2 添加网格显示
axes[0].grid(True, linestyle="--", alpha=1)
axes[1].grid(True, linestyle="--", alpha=1)

# 2.3 添加描述信息
axes[0].set_xlabel("时间")
axes[0].set_ylabel("温度")
axes[0].set_title("中午11点-12点 上海 温度变化图", fontsize=20)

axes[1].set_xlabel("时间")
axes[1].set_ylabel("温度")
axes[1].set_title("中午11点-12点 北京 温度变化图", fontsize=20)

# 2.4 图像保存
plt.savefig("./test_3.png")

# 2.5 显示图例
axes[0].legend(loc=0)
axes[1].legend(loc=0)

# 3.图像显示
plt.show()
3.其他图例应用举例
折线图(因为横坐标过于密集, 类似为曲线图)
import numpy as np
import matplotlib.pyplot as plt

# 0.准备数据
x = np.linspace(-10, 10, 1000) # 从 -10 到 10, 均匀生成 1000 个数
y = np.sin(x)

# 1.创建画布
plt.figure(figsize=(20, 8), dpi=100)

# 2.绘制坐标系以及函数图像
plt.plot(x, y, color = 'r')

# 2.1 添加网格显示
plt.grid(True, linestyle="--", alpha=1)

# 保存图像
plt.savefig("./test_4.png")

# 3.显示图像
plt.show()
散点图的绘制
import numpy as np
import matplotlib.pyplot as plt

# 0.准备数据
x = [225.98, 247.07, 253.14, 457.85, 241.58, 301.01,  20.67, 288.64,
       163.56, 120.06, 207.83, 342.75, 147.9 ,  53.06, 224.72,  29.51,
        21.61, 483.21, 245.25, 399.25, 343.35]
y = [196.63, 203.88, 210.75, 372.74, 202.41, 247.61,  24.9 , 239.34,
       140.32, 104.15, 176.84, 288.23, 128.79,  49.64, 191.74,  33.1 ,
        30.74, 400.02, 205.35, 330.64, 283.45]

# 1.创建画布
plt.figure(figsize=(20, 8), dpi=100)

# 2.绘制图像
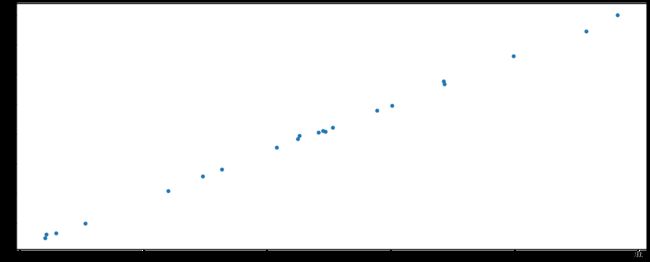
plt.scatter(x, y)

# 3.图像显示
plt.show()
柱状图的绘制
import numpy as np
import matplotlib.pyplot as plt

# 0.准备数据
# 电影名字
movie_name = [
    '雷神3:诸神黄昏', '正义联盟', '东方快车谋杀案', '寻梦环游记', '全球风暴', '降魔传', '追捕', '七十七天', '密战','狂兽', '其它']
# 横坐标
x = range(len(movie_name))
# 票房数据
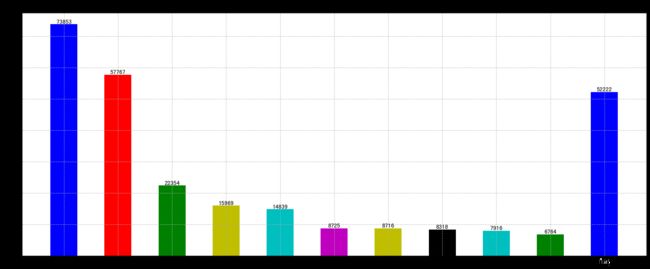
y = [73853, 57767, 22354, 15969, 14839, 8725, 8716, 8318, 7916, 6764, 52222]

# 1.创建画布
plt.figure(figsize=(20, 8), dpi=100)

# 2.绘制图像
plt.bar(x, y,
        color=['b', 'r', 'g', 'y', 'c', 'm', 'y', 'k', 'c', 'g', 'b'],
        width=0.5)

# 2.0 给 每一个条柱 添加数值标注
for a,b in zip(x, y):
	plt.text(a, b, '%.0f' % b, ha='center', va= 'bottom',fontsize=11)

# 2.1 修改x轴显示
plt.xticks(x, movie_name)  # 用movie_name 列表来取代 x 这个range对象

# 2.2 添加网格
plt.grid(linestyle="--", alpha=0.8)

# 2.3 添加标题
plt.title("电影票房收入对比")

# 3.图像显示
plt.show()
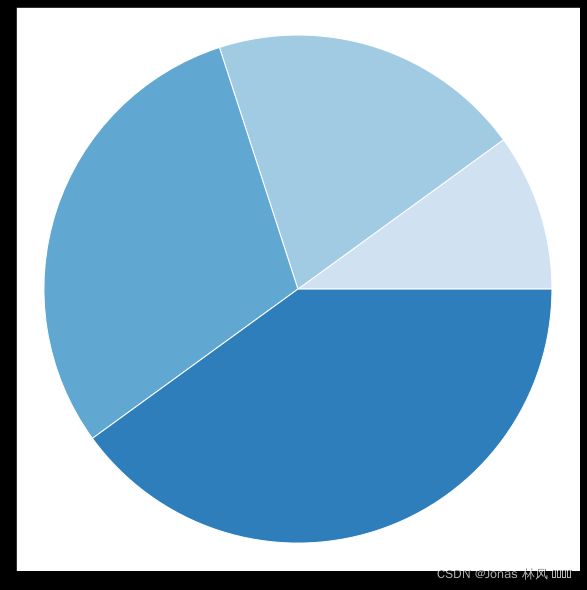
Pie 图的绘制
import matplotlib.pyplot as plt
import numpy as np

plt.style.use('_mpl-gallery-nogrid')

# make data
x = [1, 2, 3, 4]
colors = plt.get_cmap('Blues')(np.linspace(0.2, 0.7, len(x)))

# plot

ax.set(xlim=(0, 10),
       xticks=np.arange(1, 10),
       ylim=(0, 10),
       yticks=np.arange(1, 10))

fig, ax = plt.subplots(figsize=(8, 8))   # 定义画布大小为(8, 8)
ax.pie(x,
       colors=colors,
       radius=4.5,   # 定义 饼图的半径
       center=(5, 5), # 定义饼图的圆心的位置
       wedgeprops={
           "linewidth": 1,
           "edgecolor": "white"
       },
       frame=True)

plt.show()
