SpringBoot (二) --------- SpringBoot 入门
目录
- 一、创建 SpringBoot 项目的三种方式
-
- 1、第一种方式
- 2、第二种方式
- 3、第三种方式
- 二、入门案例及分析
- 三、SpringBoot 重要注解
- 四、SpringBoot 核心配置文件
-
- 1、.properties 文件 (默认采用该文件)
- 2、.yml 文件
- 五、多环境配置
- 六、SpringBoot 自定义配置
-
- 1、@Value 注解
- 2、@ConfigurationProperties
- 3、警告解决
- 4、中文乱码
- 七、SpringBoot 中使用 JSP
- 八、使用 ApplicationContext 与 CommandLineRunner
-
- 1、使用 ApplicationContext 获取容器对象
- 2、CommandLineRunner 接口
一、创建 SpringBoot 项目的三种方式
1、第一种方式
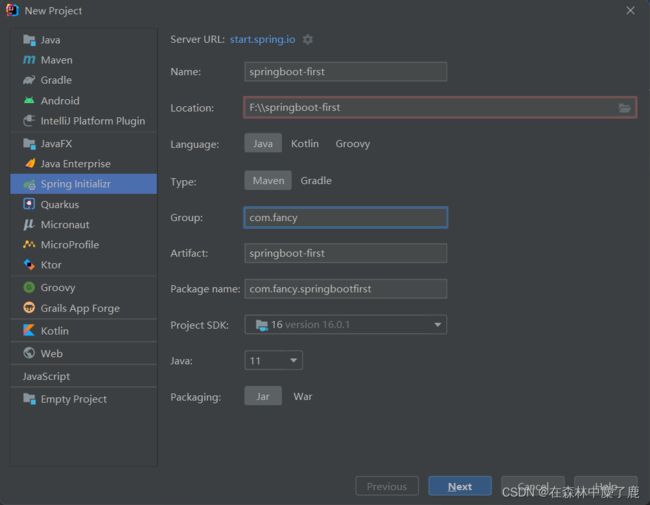
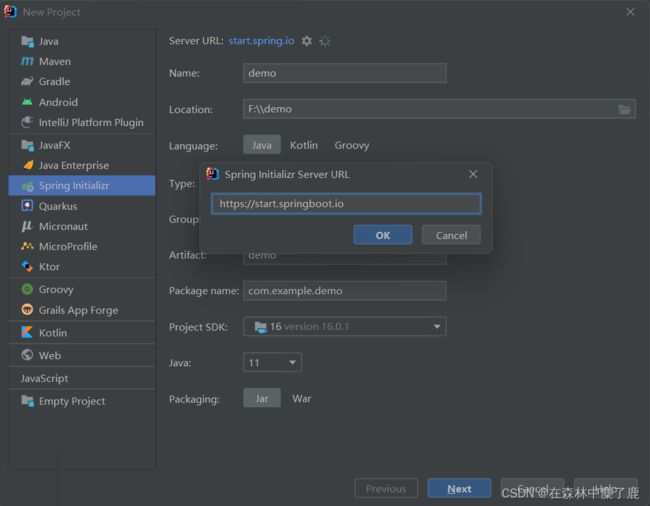
第一种方式 :https://start.spring.io
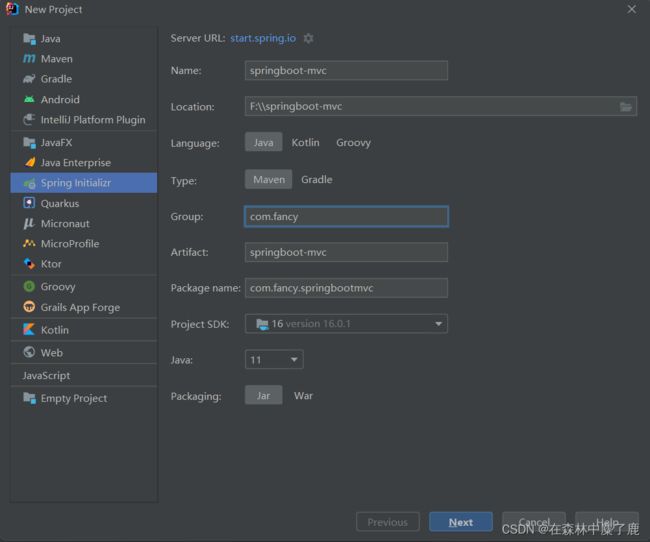
使用 spring boot 提供的初始化器。向导的方式,完成 spring boot 项目的创建 : 使用方便。
1.新建项目
2、第二种方式
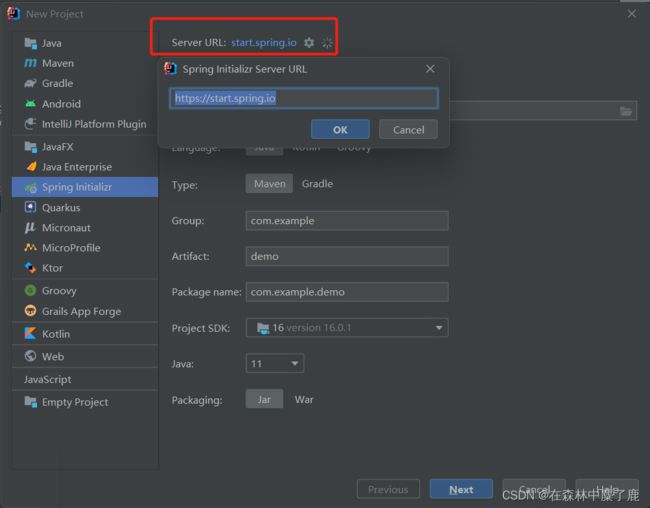
使用 springboot 提供的初始化器, 使用的国内的地址
国内地址 : https://start.springboot.io
创建项目的步骤同上
3、第三种方式
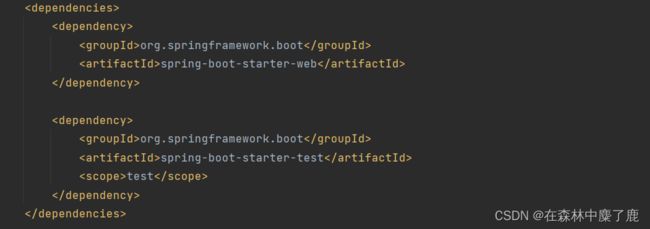
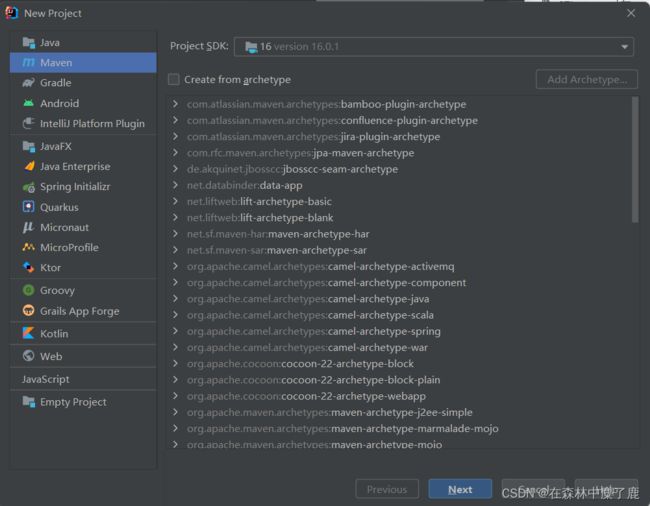
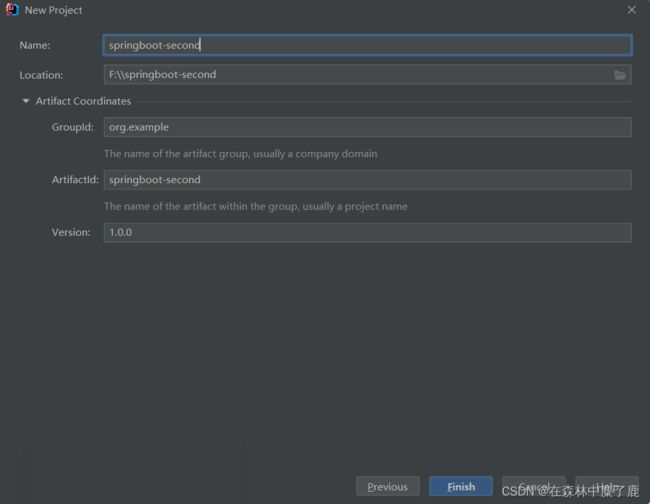
1.创建一个普通 maven 项目
<dependencies>
	<dependency>
		<groupId>org.springframework.bootgroupId>
		<artifactId>spring-boot-starter-webartifactId>
		<version>2.6.3version>
	dependency>
	<dependency>
		<groupId>org.springframework.bootgroupId>
		<artifactId>spring-boot-starter-testartifactId>
		<version>2.6.3version>
		<scope>testscope>
	dependency>
dependencies>

<build>
    <plugins>
        <plugin>
            <groupId>org.springframework.bootgroupId>
            <artifactId>spring-boot-maven-pluginartifactId>
        plugin>
    plugins>
build>
4.创建启动类
加入 @SpringBootApplication 注解
package org.example;

import org.springframework.boot.SpringApplication;
import org.springframework.boot.autoconfigure.SpringBootApplication;

import javax.swing.*;

@SpringBootApplication
public class MySpringBootMain {
    public static void main(String[] args) {
        SpringApplication.run(MySpringBootMain.class, args);
    }
}
二、入门案例及分析
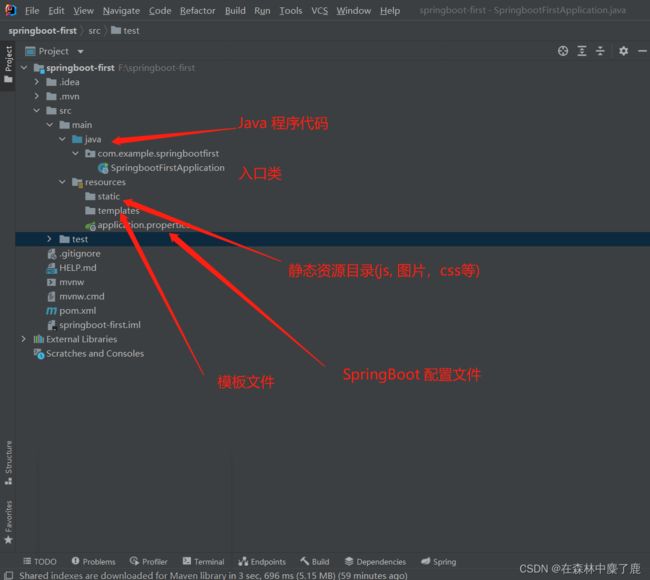
1. 新建项目
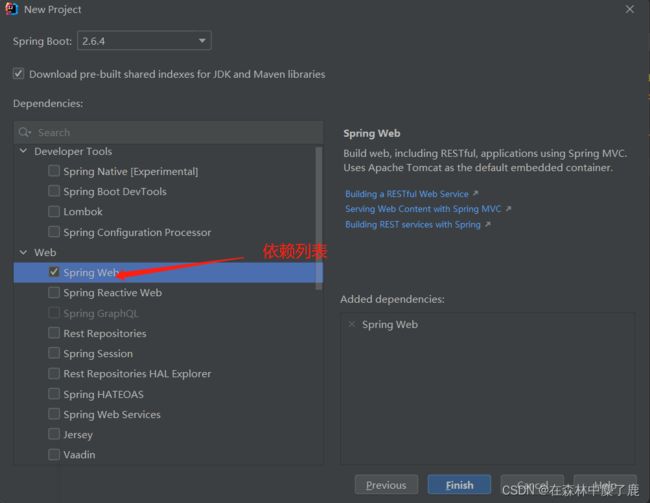
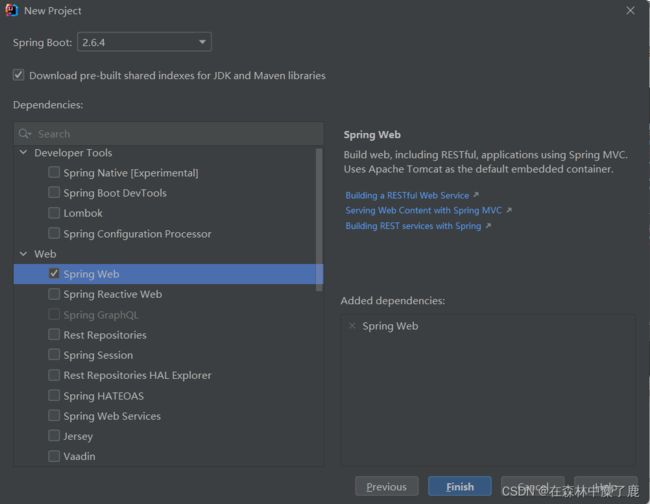
2.选择 web 依赖
我们选择添加 Spring Web 依赖,创建一个 web 项目
3.创建 controller 类
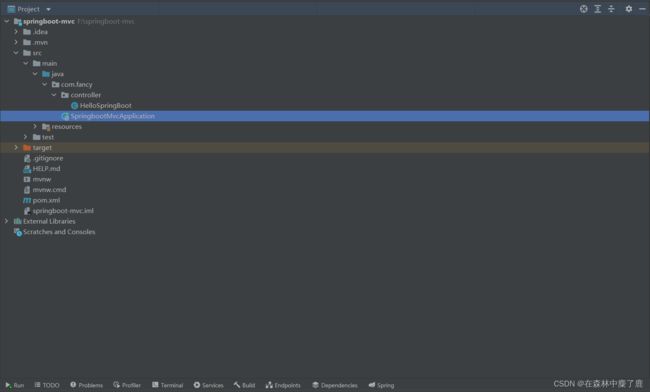
我们在 controller 包下,新建 HelloSpringBoot 这个 controller 类,用来测试 SpringBoot 处理 web 请求
package com.fancy.controller;
import org.springframework.stereotype.Controller;
import org.springframework.web.bind.annotation.RequestMapping;
import org.springframework.web.bind.annotation.ResponseBody;

@Controller
public class HelloSpringBoot {

    // @responseBody注解的作用是将controller的方法返回的对象通过适当的转换器转换为指定的格式之后,写入到response对象的body区,通常用来返回JSON数据或者是XML数据
    @RequestMapping("/hello")
    @ResponseBody
    public String helloSpringBoot() {
        return "欢迎使用SpringBoot框架";
    }
}
4.运行 SpringbootMvcApplication 类
在创建 SpringBoot 项目时,我们发现类中自带 一个叫 SpringbootMavApplicaion 类,其上面添加了@SpringBootApplication 注解点击运行,发现SpringMVC 运行环境,以及 Tomcat 都已经给你配好了,我们可以直接使用,大大减少了我们代码的操作难度。
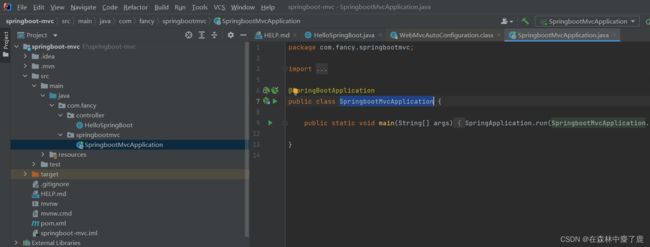
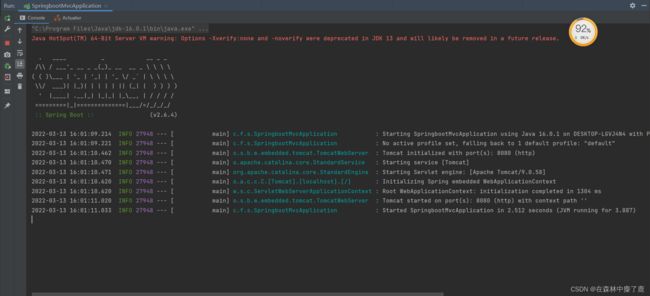
SpringbootMvcApplication 类因此被称之为主启动类
三、SpringBoot 重要注解
@SpringBootApplication
@SpringBootApplication 是一 个复合注解,是由
@SpringBootConfiguration、@EnableAutoConfiguration、@ComponentScan 联合在一起组成的。
-
@SpringBootConfiguration :就是
@Configuration这个注解的功能,这个注解的类就是配置文件的作用,可以使用 Bean 声明对象,注入到容器。 -
@EnableAutoConfiguration :开启自动配置, 把一些对象加入到 spring 容器中。例如可以把MyBatis对象创建好,封装到容器中。
-
@ComponentScan :组件扫描器, 扫描注解,根据注解的功能,创建 Java bean,给属性赋值等等。组件扫描器默认扫描的是
@ComponentScan注解所在的类包和子包。
所以说上述主启动类应放于主包之中,这样才能将所有的 Bean 都扫描到
四、SpringBoot 核心配置文件
Spring Boot 的核心配置文件用于配置 SpringBoot 程序,名字必须以 application 开始。
主要形式 :
- application.properteis
- application.yml
1、.properties 文件 (默认采用该文件)
在上面入门案例上进行修改
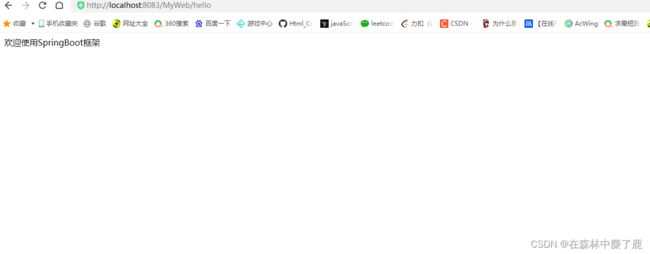
通过修改 application.properties 配置文件,在修改默认 tomcat 端口号及项目上下文件根键值对的 properties 属性文件配置方式

启动应用, 在浏览器访问 http://localhost:9093/MyWeb/
2、.yml 文件
yml 是一种 yaml 格式的配置文件,主要采用一定的空格、换行等格式排版进行配置。yaml 是一种直观的能够被计算机识别的的数据序列化格式,容易被人类阅读,yaml 类似于 xml,但是语法比 xml 简洁很多,值与前面的冒号配置项必须要有一个空格, yml 缀也可以使用 yaml 后缀。
注意 :
- 当两种格式配置文件同时存在,在 SpringBoot 2.4 开始,使用的是 yml 配置文件
- 修改配置名称都为 application
重新运行 Application ,查看启动的端口及上下文根
推荐使用 yml 格式配置文件
五、多环境配置
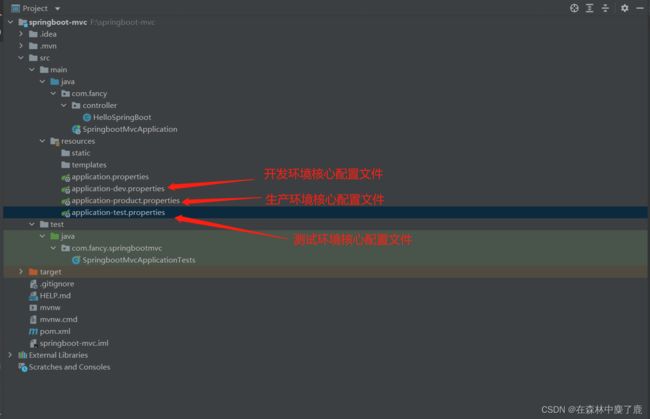
在实际开发的过程中,我们的项目会经历很多的阶段 (开发 —> 测试 —> 上线),每个阶段的配置也会不同。例如 :端口、上下文根、数据库等,那么这个时候为了方便在不同的环境之间切换 (开发环境,测试环境,准生产环境,生产环境,四个环境,需要配置五个配置文件),SpringBoot 提供了多环境配置,具体步骤如下
我们继续来沿用上述入门项目。
为每个环境创建一个配置文件,命名必须以 application-环境标识.properties|.yml 。

application-product.properties

application-test.properties

application.properties
指定使用的环境文件
六、SpringBoot 自定义配置
SpringBoot 的核心配置文件中,除了使用内置的配置项之外,我们还可以在自定义配置,然后采用如下注解去读取配置的属性值
1、@Value 注解
@Value("${key}") ,key 来自 application.properties(yml)
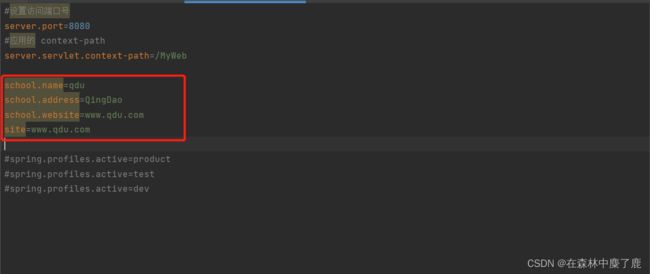
我们在 application.properties 中添加两个自定义配置项 school.name 和 school.website。在 IDEA 中可以看到这两个属性不能被SpringBoot 识别,背景是桔色的,如图。
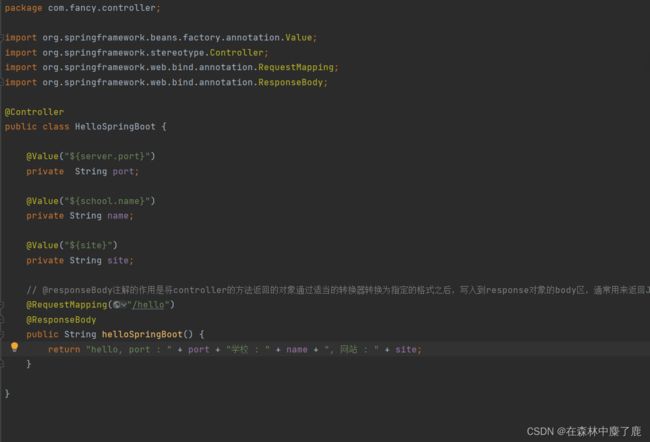
读取配置文件数据
package com.fancy.controller;

import org.springframework.beans.factory.annotation.Value;
import org.springframework.stereotype.Controller;
import org.springframework.web.bind.annotation.RequestMapping;
import org.springframework.web.bind.annotation.ResponseBody;

@Controller
public class HelloSpringBoot {

    @Value("${server.port}")
    private  String port;

    @Value("${school.name}")
    private String name;

    @Value("${site}")
    private String site;

    // @responseBody注解的作用是将controller的方法返回的对象通过适当的转换器转换为指定的格式之后,写入到response对象的body区,通常用来返回JSON数据或者是XML数据
    @RequestMapping("/hello")
    @ResponseBody
    public String helloSpringBoot() {
        return "hello, port : " + port + "学校 : " + name + ", 网站 : " + site;
    }
}
启动应用 Application ,访问浏览器
2、@ConfigurationProperties
继续沿用上述项目,这次我们将整个文件映射成一个对象,用于自定义配置项比较多的情况
案例演示 :
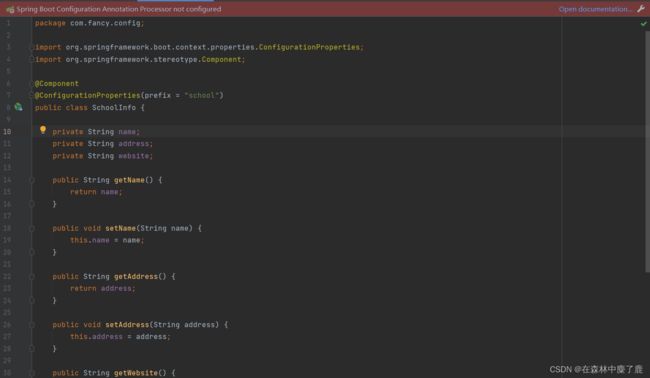
在 com.fancy.springboot.config 包下创建 SchoolInfo 类,并为该类加上 Component 和 ConfigurationProperties 注解,prefix 可以不指定,如果不指定,那么会去配置文件中寻找与该类的属性名一致的配置,prefix 的作用可以区分同名配置。
package com.fancy.config;

import org.springframework.boot.context.properties.ConfigurationProperties;
import org.springframework.stereotype.Component;

@Component
@ConfigurationProperties(prefix = "school")
public class SchoolInfo {

    private String name;
    private String address;
    private String website;

    public String getName() {
        return name;
    }

    public void setName(String name) {
        this.name = name;
    }

    public String getAddress() {
        return address;
    }

    public void setAddress(String address) {
        this.address = address;
    }

    public String getWebsite() {
        return website;
    }

    public void setWebsite(String website) {
        this.website = website;
    }
    @Override
    public String toString() {
        return "SchoolInfo{" +
                "name='" + name + '\'' +
                ", address='" + address + '\'' +
                ", website='" + website + '\'' +
                '}';
    }
}
package com.fancy.controller;

import com.fancy.config.SchoolInfo;
import org.springframework.stereotype.Controller;
import org.springframework.web.bind.annotation.RequestMapping;
import org.springframework.web.bind.annotation.ResponseBody;

import javax.annotation.Resource;

@Controller
public class SchoolController {

    @Resource
    private SchoolInfo schoolInfo;

    @RequestMapping("/myschool")
    @ResponseBody
    public String doSchool() {
        return "学校信息 : " + schoolInfo.toString();
    }
}
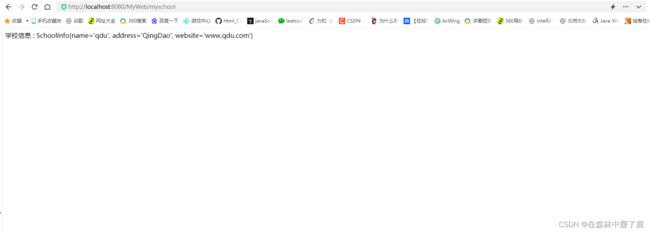
执行 Application,访问浏览器查看数据
3、警告解决
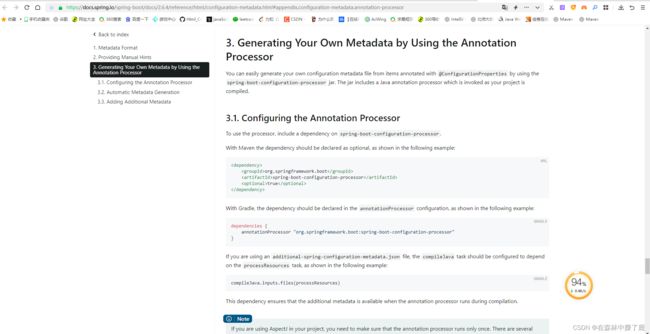
在 SchoolInfo 类中使用了 ConfigurationProperties 注解,IDEA 会出现一个警告,但不影响程序的执行

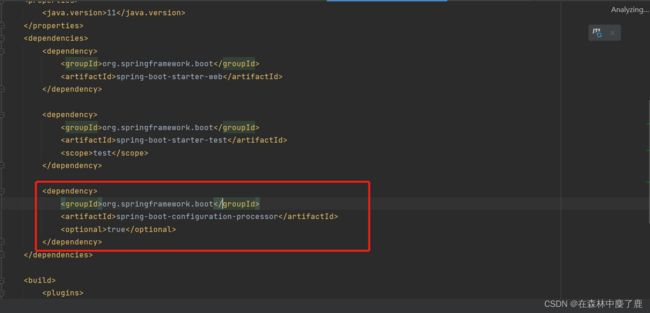
点击 open documentnation 跳转到网页,在网页中提示需要加一个依赖,我们将这个依赖拷贝,粘贴到 pom.xml 文件中
<dependency>
    <groupId>org.springframework.bootgroupId>
    <artifactId>spring-boot-configuration-processorartifactId>
    <optional>trueoptional>
dependency>
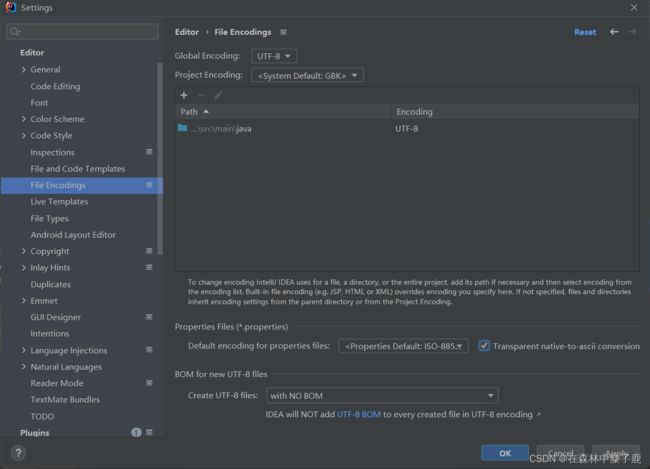
4、中文乱码
如果在 SpringBoot 核心配置文件中有中文信息,会出现乱码 :
◼ 一般在配置文件中,不建议出现中文(注释除外)
◼ 如果有,可以先转化为 ASCII 码,设置如下
七、SpringBoot 中使用 JSP
1、在 pom.xml 文件中配置依赖项
<dependency>
    <groupId>org.apache.tomcat.embedgroupId>
    <artifactId>tomcat-embed-jasperartifactId>
dependency>


<dependency>
    <groupId>javax.servletgroupId>
    <artifactId>javax.servlet-apiartifactId>
dependency>

<dependency>
    <groupId>javax.servlet.jspgroupId>
    <artifactId>javax.servlet.jsp-apiartifactId>
    <version>2.3.1version>
dependency>


<dependency>
    <groupId>javax.servletgroupId>
    <artifactId>jstlartifactId>
dependency>
2、在 pom.xml 的 build 标签中配置以下信息
SpringBoot 要求 jsp 文件必须编译到指定的 META-INF/resources 目录下才能访问,否则访问不到,其实官方已经更建议使用模板技术 Thymeleaf
<resources>
<resource>

	<directory>src/main/webappdirectory>

	<targetPath>META-INF/resourcestargetPath>

	<includes>
		<include>**/*.*include>
	includes>
resource>
resources>
3、在 application.properties 文件配置 Spring MVC 的视图展示为 jsp,这里相当于 Spring MVC 的配置
#配置 SpringMVC 的视图解析器
#其中 : /相当于 src/main/webapp 目录

spring.mvc.view.prefix=/
spring.mvc.view.suffix=.jsp
4、在 controller 包 下 创 建 JspController 类,并编写代码
package com.fancy.controller;

import org.springframework.stereotype.Controller;
import org.springframework.ui.Model;
import org.springframework.web.bind.annotation.RequestMapping;

@Controller
public class JspController {

    @RequestMapping(value="/jsp")
    public String jsp(Model model) {
        model.addAttribute("data", "SpringBoot 前端使用JSP页面");
        return "index";
    }
}
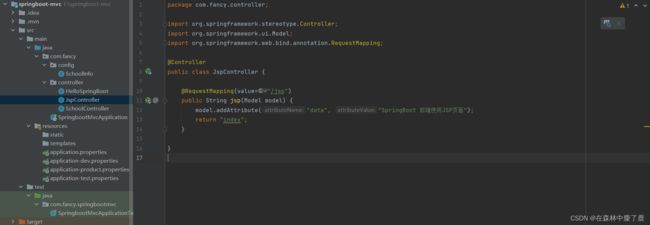
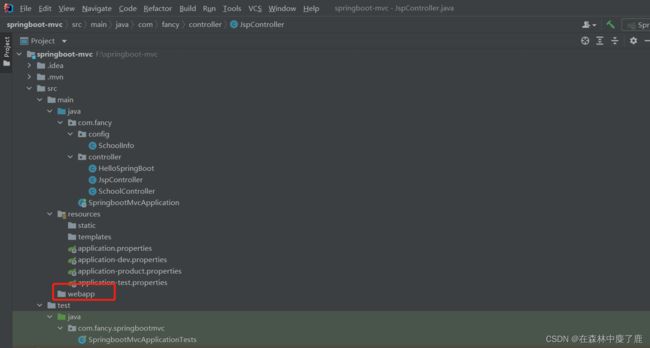
5、在 src/main 下创建一个 webapp 目录,然后在该目录下新建 index.jsp 页面
先创建个普通目录,并取名为 webapp
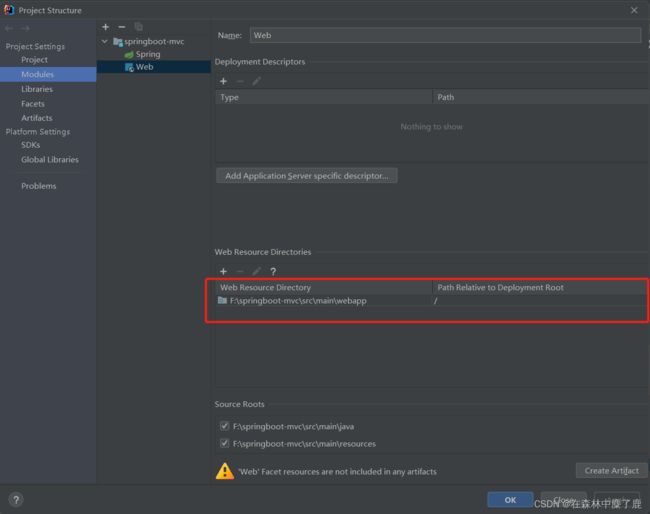
然后在 Project Structure ----> Modules ----> Web 中将其设置为 web 资源目录
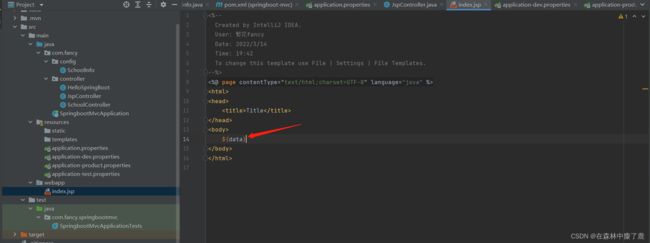
6、在 jsp 中获取 Controller 传递过来的数据
八、使用 ApplicationContext 与 CommandLineRunner
1、使用 ApplicationContext 获取容器对象
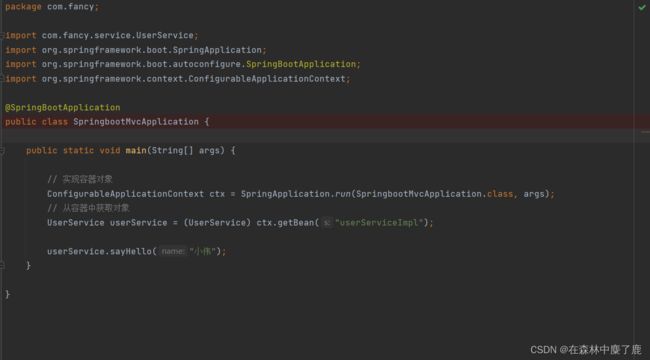
在 main 方法中 SpringApplication.run() 方法获取返回的 Spring 容器对象,再获取业务 bean 进行调用。
新建 Service 包,在包下新建 userService 接口并完成其接口实现类 userServiceImpl,实现 sayHello 方法。
package com.fancy.service.impl;

import com.fancy.service.userService;
import org.springframework.stereotype.Service;

@Service
public class userServiceImpl implements userService {
    @Override
    public void sayHello(String name) {
        System.out.println("向" + name + "say Hello");
    }
}
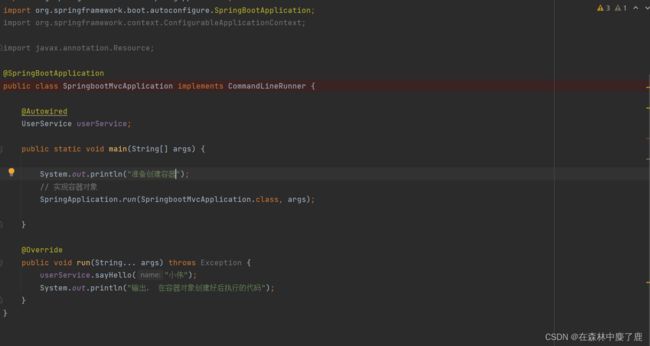
创建启动类, main 方法中获取容器对象
我们直接对启动类 SpringbootMvcApplication 进行改造
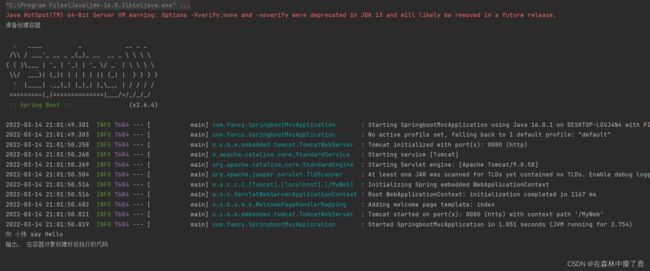
运行结果
2、CommandLineRunner 接口
开发中可能会有这样的情景:
需要在容器启动后执行一些内容。比如读取配置文件,数据库连接之类的。SpringBoot 给我们提供了两个接口来帮助我们实现这种需求。这两个接口分别为 CommandLineRunner 和 ApplicationRunner。他们的执行时机为容器启动完成的时候。这两个接口中有一个 run 方法,我们只需要实现这个方法即可。这两个接口的不同之处在于: ApplicationRunner 中 run 方 法 的 参 数 为 ApplicationArguments , 而
CommandLineRunner 接口中 run 方法的参数为 String 数组。
我们继续对启动类进行改造
run中内容在容器创建完之后执行
