TVM User Tutorial -- Compiling and Optimizing a Model with the Python Interface (AutoTVM)
Compiling and Optimizing a Model with the Python Interface (AutoTVM)
Author: Chris Hoge
注:在练习这一节之前需要自行完成TVM的安装!
在 TVMC 教程中,我们介绍了如何使用 TVM 的命令行界面 TVMC 编译、运行和调整预训练的视觉模型 ResNet-50 v2。 TVM 不仅仅是一个命令行工具,它是一个优化框架,具有可用于多种不同语言的 API,为您在使用机器学习模型时提供了极大的灵活性。
在本教程中,我们将介绍我们使用 TVMC 所做的相同基础,但展示它是如何使用 Python API 完成的。 完成本节后,我们将使用 Python API for TVM 完成以下任务:
- 为 TVM 运行时编译预训练的 ResNet-50 v2 模型。
- 通过编译的模型运行真实图像,并解释输出和模型性能。
- 使用 TVM 调整在 CPU 上建模的模型。
- 使用 TVM 收集的调整数据重新编译优化模型。
- 通过优化模型运行图像,并比较输出和模型性能。
本节的目标是概述 TVM 的功能以及如何通过 Python API 使用它们。
TVM 是一个深度学习编译器框架,有许多不同的模块可用于处理深度学习模型和运算符。 在本教程中,我们将介绍如何使用 Python API 加载、编译和优化模型。
我们首先导入一些依赖项,包括用于加载和转换模型的 onnx、用于下载测试数据的辅助实用程序、用于处理图像数据的 Python 图像库、用于图像数据预处理和后处理的 numpy、TVM 中继框架和 TVM 图形执行器。
import onnx
from tvm.contrib.download import download_testdata
from PIL import Image
import numpy as np
import tvm.relay as relay
import tvm
from tvm.contrib import graph_executor
下载和加载 ONNX 模型
在本教程中,我们将使用 ResNet-50 v2。 ResNet-50 是一种卷积神经网络,深度为 50 层,旨在对图像进行分类。 我们将使用的模型已经在超过 100 万张具有 1000 种不同分类的图像上进行了预训练。 该网络的输入图像大小为 224x224。 如果您有兴趣探索更多 ResNet-50 模型的结构,我们建议下载 Netron,一个免费提供的 ML 模型查看器。
TVM 提供了一个帮助库来下载预训练的模型。 通过模块提供模型 URL、文件名和模型类型,TVM 将下载模型并将其保存到磁盘。 对于 ONNX 模型的实例,您可以使用 ONNX runtime 将其加载到内存中。
| 使用其他模型格式 |
|---|
| TVM 支持许多流行的模型格式。 可以在 TVM 文档的编译深度学习模型部分找到一个列表。 |
model_url = "".join(
    [
        "https://github.com/onnx/models/raw/",
        "master/vision/classification/resnet/model/",
        "resnet50-v2-7.onnx",
    ]
)

model_path = download_testdata(model_url, "resnet50-v2-7.onnx", module="onnx")
onnx_model = onnx.load(model_path)
下载、预处理和加载测试图像
当涉及到预期的张量形状、格式和数据类型时,每个模型都是有独特要求的。 出于这个原因,大多数模型都需要一些预处理和后处理,以确保输入有效并解释输出。 TVMC 对输入和输出数据采用了 NumPy 的 .npz 格式。
作为本教程的输入,我们将使用猫的图像,但您可以随意用此图像替换您选择的任何图像。
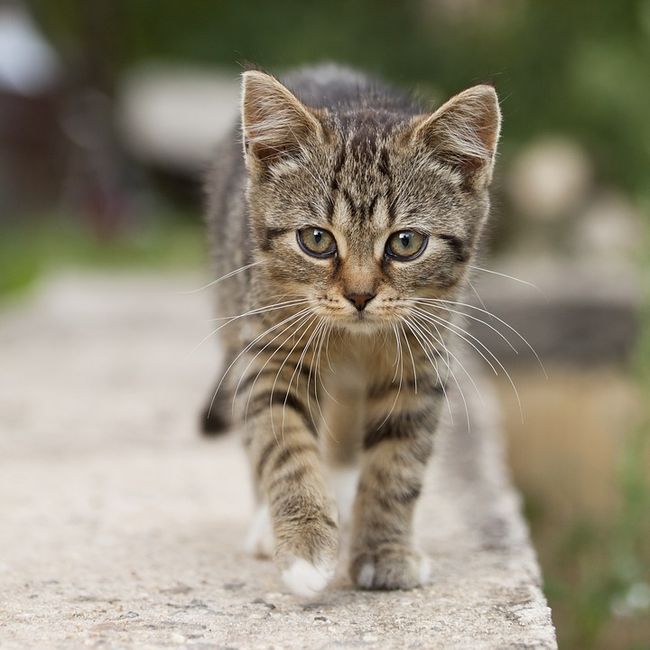 下载图像数据,然后将其转换为 numpy 数组以用作模型的输入。
img_url = "https://s3.amazonaws.com/model-server/inputs/kitten.jpg"
img_path = download_testdata(img_url, "imagenet_cat.png", module="data")

# Resize it to 224x224
resized_image = Image.open(img_path).resize((224, 224))
img_data = np.asarray(resized_image).astype("float32")

# Our input image is in HWC layout while ONNX expects CHW input, so convert the array
img_data = np.transpose(img_data, (2, 0, 1))

# Normalize according to the ImageNet input specification
imagenet_mean = np.array([0.485, 0.456, 0.406]).reshape((3, 1, 1))
imagenet_stddev = np.array([0.229, 0.224, 0.225]).reshape((3, 1, 1))
norm_img_data = (img_data / 255 - imagenet_mean) / imagenet_stddev

# Add the batch dimension, as we are expecting 4-dimensional input: NCHW.
img_data = np.expand_dims(norm_img_data, axis=0)
使用 Relay 编译模型
下一步是编译 ResNet 模型。 我们首先使用 from_onnx 导入器导入要中继的模型。 然后,我们通过标准优化将模型构建到 TVM 库中。 最后,我们从库中创建一个 TVM 图形运行时模块。
target = "llvm"
| 定义正确的目标 |
|---|
指定正确的目标会对编译模块的性能产生巨大影响,因为它可以利用目标上可用的硬件功能。 有关详细信息,请参阅为 x86 CPU 自动调整卷积网络。 我们建议确定您正在运行的 CPU 以及可选功能,并适当地设置目标。 例如,对于某些处理器,target = "llvm -mcpu=skylake",或者对于具有 AVX-512 矢量指令集的处理器,target = "llvm -mcpu=skylake-avx512"。 |
# The input name may vary across model types. You can use a tool
# like Netron to check input names
input_name = "data"
shape_dict = {input_name: img_data.shape}

mod, params = relay.frontend.from_onnx(onnx_model, shape_dict)

with tvm.transform.PassContext(opt_level=3):
    lib = relay.build(mod, target=target, params=params)

dev = tvm.device(str(target), 0)
module = graph_executor.GraphModule(lib["default"](dev))
Out:
One or more operators have not been tuned. Please tune your model for better performance. Use DEBUG logging level to see more details.
在 TVM runtime执行
现在我们已经编译了模型,我们可以使用 TVM runtime对其进行预测。 要使用 TVM 运行模型并进行预测,我们需要两件事:
- 我们刚刚生成的编译模型。
- 模型的有效输入以进行预测。
dtype = "float32"
module.set_input(input_name, img_data)
module.run()
output_shape = (1, 1000)
tvm_output = module.get_output(0, tvm.nd.empty(output_shape)).numpy()
收集基本性能数据
我们想收集一些与这个未优化模型相关的基本性能数据,然后将其与调整后的模型进行比较。 为了帮助解释 CPU 噪声,我们在多个批次中多次重复运行计算,然后收集一些关于均值、中值和标准差的基础统计数据。
import timeit

timing_number = 10
timing_repeat = 10
unoptimized = (
    np.array(timeit.Timer(lambda: module.run()).repeat(repeat=timing_repeat, number=timing_number))
    * 1000
    / timing_number
)
unoptimized = {
    "mean": np.mean(unoptimized),
    "median": np.median(unoptimized),
    "std": np.std(unoptimized),
}

print(unoptimized)
Out:
{'mean': 104.3666648492217, 'median': 103.54426596313715, 'std': 2.3251255299765776}
后处理输出
如前所述,每个模型都有自己特定的方式来提供输出张量。
在我们的例子中,我们需要使用为模型提供的查找表运行一些后处理,以将 ResNet-50 v2 的输出呈现为更易于阅读的形式。
from scipy.special import softmax

# Download a list of labels
labels_url = "https://s3.amazonaws.com/onnx-model-zoo/synset.txt"
labels_path = download_testdata(labels_url, "synset.txt", module="data")

with open(labels_path, "r") as f:
    labels = [l.rstrip() for l in f]

# Open the output and read the output tensor
scores = softmax(tvm_output)
scores = np.squeeze(scores)
ranks = np.argsort(scores)[::-1]
for rank in ranks[0:5]:
    print("class='%s' with probability=%f" % (labels[rank], scores[rank]))
Out:
class='n02123045 tabby, tabby cat' with probability=0.610551
class='n02123159 tiger cat' with probability=0.367180
class='n02124075 Egyptian cat' with probability=0.019365
class='n02129604 tiger, Panthera tigris' with probability=0.001273
class='n04040759 radiator' with probability=0.000261
调整模型
之前的模型被编译为在 TVM runtime上工作,但不包括任何特定于平台的优化。 在本节中,我们将向您展示如何使用 TVM 针对您的工作平台构建优化模型。
在某些情况下,使用我们编译的模块运行推理时,我们可能无法获得预期的性能。 在这种情况下,我们可以使用自动调谐器,为我们的模型找到更好的配置并提高性能。 TVM 中的调优是指优化模型以在给定目标上运行得更快的过程。 这与训练或微调不同,它不会影响模型的准确性,而只会影响运行时性能。 作为调整过程的一部分,TVM 将尝试运行许多不同的算子实现变体,以查看哪些执行得最好。 这些运行的结果存储在调整记录文件中。
在最简单的形式中,调优需要您提供三件事:
- 准备运行此模型的设备的规格
- 将存储调整记录的输出文件的路径
- 要调整的模型的路径。
import tvm.auto_scheduler as auto_scheduler
from tvm.autotvm.tuner import XGBTuner
from tvm import autotvm
为runner设置一些基本参数。 运行程序获取使用一组特定参数生成的编译代码并测量其性能。 number 指定我们将测试的不同配置的数量,而 repeat 指定我们将对每个配置进行多少次测量。 min_repeat_ms 是一个值,指定运行配置测试需要多长时间。 如果重复次数低于此时间,则会增加。 此选项对于在 GPU 上进行精确调优是必需的,而对于 CPU 调优则不是必需的。 将此值设置为 0 将禁用它。 timeout设置了为每个测试配置运行训练代码的时间上限。
number = 10
repeat = 1
min_repeat_ms = 0  # since we're tuning on a CPU, can be set to 0
timeout = 10  # in seconds

# create a TVM runner
runner = autotvm.LocalRunner(
    number=number,
    repeat=repeat,
    timeout=timeout,
    min_repeat_ms=min_repeat_ms,
    enable_cpu_cache_flush=True,
)
创建一个简单的结构来保存调整选项。 我们使用 XGBoost 算法来指导搜索。 对于生产作业,您需要将试验次数设置为大于此处使用的值 10。 对于 CPU,我们推荐 1500,对于 GPU 3000-4000。 所需的试验次数可能取决于特定的模型和处理器,因此值得花一些时间评估一系列值的性能,以找到调整时间和模型优化之间的最佳平衡。 因为运行调优需要大量时间,我们将试验次数设置为 10,但不建议使用这么小的值。 early_stopping 参数是在可以应用提前停止搜索的条件之前运行的最小跟踪数。 measure 选项指示将在何处构建试用代码以及将在何处运行。 在这种情况下,我们使用刚刚创建的 LocalRunner 和 LocalBuilder。 Tuning_records 选项指定将调整数据写入的文件。
tuning_option = {
    "tuner": "xgb",
    "trials": 10,
    "early_stopping": 100,
    "measure_option": autotvm.measure_option(
        builder=autotvm.LocalBuilder(build_func="default"), runner=runner
    ),
    "tuning_records": "resnet-50-v2-autotuning.json",
}
定义优化搜索算法:默认情况下,此搜索使用 XGBoost Grid 算法进行引导。 根据您的模型复杂性和可用时间量,您可能需要选择不同的算法。
设置调谐参数:在此示例中,为了节省时间,我们将试验次数和提前停止次数设置为 10。如果将这些值设置得更高,您可能会看到更多的性能改进,但这是以花费调优时间为代价的。 收敛所需的试验次数将根据模型和目标平台的具体情况而有所不同。
# begin by extracting the tasks from the onnx model
tasks = autotvm.task.extract_from_program(mod["main"], target=target, params=params)

# Tune the extracted tasks sequentially.
for i, task in enumerate(tasks):
    prefix = "[Task %2d/%2d] " % (i + 1, len(tasks))
    tuner_obj = XGBTuner(task, loss_type="rank")
    tuner_obj.tune(
        n_trial=min(tuning_option["trials"], len(task.config_space)),
        early_stopping=tuning_option["early_stopping"],
        measure_option=tuning_option["measure_option"],
        callbacks=[
            autotvm.callback.progress_bar(tuning_option["trials"], prefix=prefix),
            autotvm.callback.log_to_file(tuning_option["tuning_records"]),
        ],
    )
Out:
[Task  1/25]  Current/Best:    0.00/   0.00 GFLOPS | Progress: (0/10) | 0.00 s
[Task  1/25]  Current/Best:   83.61/  99.28 GFLOPS | Progress: (10/10) | 9.39 s Done.

[Task  2/25]  Current/Best:    0.00/   0.00 GFLOPS | Progress: (0/10) | 0.00 s
[Task  2/25]  Current/Best:   29.20/  44.65 GFLOPS | Progress: (10/10) | 8.64 s Done.

[Task  3/25]  Current/Best:    0.00/   0.00 GFLOPS | Progress: (0/10) | 0.00 s
[Task  3/25]  Current/Best:   44.41/  75.69 GFLOPS | Progress: (10/10) | 10.53 s Done.

[Task  4/25]  Current/Best:    0.00/   0.00 GFLOPS | Progress: (0/10) | 0.00 s
[Task  4/25]  Current/Best:   29.06/  60.24 GFLOPS | Progress: (10/10) | 13.08 s Done.

[Task  5/25]  Current/Best:    0.00/   0.00 GFLOPS | Progress: (0/10) | 0.00 s
[Task  5/25]  Current/Best:   23.66/  45.20 GFLOPS | Progress: (10/10) | 8.91 s Done.

[Task  6/25]  Current/Best:    0.00/   0.00 GFLOPS | Progress: (0/10) | 0.00 s
[Task  6/25]  Current/Best:   31.09/  68.37 GFLOPS | Progress: (10/10) | 8.73 s Done.

[Task  7/25]  Current/Best:    0.00/   0.00 GFLOPS | Progress: (0/10) | 0.00 s
[Task  7/25]  Current/Best:   65.03/  80.42 GFLOPS | Progress: (10/10) | 10.94 s Done.

[Task  8/25]  Current/Best:    0.00/   0.00 GFLOPS | Progress: (0/10) | 0.00 s
[Task  8/25]  Current/Best:   32.80/  80.68 GFLOPS | Progress: (10/10) | 8.72 s Done.

[Task  9/25]  Current/Best:    0.00/   0.00 GFLOPS | Progress: (0/10) | 0.00 s
[Task  9/25]  Current/Best:   46.53/  64.57 GFLOPS | Progress: (10/10) | 24.11 s
[Task 10/25]  Current/Best:    0.00/   0.00 GFLOPS | Progress: (0/10) | 0.00 s Done.

[Task 10/25]  Current/Best:   30.82/  48.08 GFLOPS | Progress: (10/10) | 8.17 s Done.

[Task 11/25]  Current/Best:    0.00/   0.00 GFLOPS | Progress: (0/10) | 0.00 s
[Task 11/25]  Current/Best:   77.05/  89.22 GFLOPS | Progress: (10/10) | 9.41 s Done.

[Task 12/25]  Current/Best:    0.00/   0.00 GFLOPS | Progress: (0/10) | 0.00 s
[Task 12/25]  Current/Best:   61.88/  74.52 GFLOPS | Progress: (10/10) | 8.19 s Done.

[Task 13/25]  Current/Best:    0.00/   0.00 GFLOPS | Progress: (0/10) | 0.00 s
[Task 13/25]  Current/Best:   70.05/  70.05 GFLOPS | Progress: (10/10) | 11.08 s Done.

[Task 14/25]  Current/Best:    0.00/   0.00 GFLOPS | Progress: (0/10) | 0.00 s
[Task 14/25]  Current/Best:   36.07/  78.54 GFLOPS | Progress: (10/10) | 32.87 s
[Task 15/25]  Current/Best:    0.00/   0.00 GFLOPS | Progress: (0/10) | 0.00 s
[Task 15/25]  Current/Best:   43.33/  64.05 GFLOPS | Progress: (10/10) | 31.58 s
[Task 16/25]  Current/Best:    0.00/   0.00 GFLOPS | Progress: (0/10) | 0.00 s Done.

[Task 16/25]  Current/Best:   24.70/  60.63 GFLOPS | Progress: (10/10) | 5.29 s Done.

[Task 17/25]  Current/Best:    0.00/   0.00 GFLOPS | Progress: (0/10) | 0.00 s
[Task 17/25]  Current/Best:   87.25/ 102.08 GFLOPS | Progress: (10/10) | 5.80 s Done.

[Task 18/25]  Current/Best:    0.00/   0.00 GFLOPS | Progress: (0/10) | 0.00 s
[Task 18/25]  Current/Best:   36.05/  81.76 GFLOPS | Progress: (10/10) | 15.41 s
[Task 19/25]  Current/Best:    0.00/   0.00 GFLOPS | Progress: (0/10) | 0.00 s
[Task 19/25]  Current/Best:   20.82/  90.13 GFLOPS | Progress: (10/10) | 12.99 s Done.

[Task 20/25]  Current/Best:    0.00/   0.00 GFLOPS | Progress: (0/10) | 0.00 s
[Task 20/25]  Current/Best:   41.25/  75.61 GFLOPS | Progress: (10/10) | 35.15 s
[Task 21/25]  Current/Best:    0.00/   0.00 GFLOPS | Progress: (0/10) | 0.00 s Done.
 Done.

[Task 21/25]  Current/Best:   30.62/  71.62 GFLOPS | Progress: (10/10) | 174.63 s
[Task 22/25]  Current/Best:    0.00/   0.00 GFLOPS | Progress: (0/10) | 0.00 s
[Task 22/25]  Current/Best:   14.67/  49.61 GFLOPS | Progress: (10/10) | 12.36 s Done.

[Task 23/25]  Current/Best:    0.00/   0.00 GFLOPS | Progress: (0/10) | 0.00 s
[Task 23/25]  Current/Best:   83.44/  87.09 GFLOPS | Progress: (10/10) | 6.68 s Done.

[Task 24/25]  Current/Best:    0.00/   0.00 GFLOPS | Progress: (0/10) | 0.00 s
[Task 24/25]  Current/Best:    1.42/  27.01 GFLOPS | Progress: (10/10) | 21.82 s
[Task 25/25]  Current/Best:    0.00/   0.00 GFLOPS | Progress: (0/10) | 0.00 s Done.

[Task 25/25]  Current/Best:    0.36/   1.98 GFLOPS | Progress: (10/10) | 38.19 s
使用调整数据编译优化模型
作为上述调优过程的输出,我们获得了存储在 resnet-50-v2-autotuning.json 中的调优记录。 编译器将使用结果为您指定目标上的模型生成高性能代码。
现在已经收集了模型的调整数据,我们可以使用优化的运算符重新编译模型以加快计算速度。
with autotvm.apply_history_best(tuning_option["tuning_records"]):
    with tvm.transform.PassContext(opt_level=3, config={}):
        lib = relay.build(mod, target=target, params=params)

dev = tvm.device(str(target), 0)
module = graph_executor.GraphModule(lib["default"](dev))
验证优化模型是否运行并产生相同的结果:
dtype = "float32"
module.set_input(input_name, img_data)
module.run()
output_shape = (1, 1000)
tvm_output = module.get_output(0, tvm.nd.empty(output_shape)).numpy()

scores = softmax(tvm_output)
scores = np.squeeze(scores)
ranks = np.argsort(scores)[::-1]
for rank in ranks[0:5]:
    print("class='%s' with probability=%f" % (labels[rank], scores[rank]))
Out:
class='n02123045 tabby, tabby cat' with probability=0.610553
class='n02123159 tiger cat' with probability=0.367179
class='n02124075 Egyptian cat' with probability=0.019365
class='n02129604 tiger, Panthera tigris' with probability=0.001273
class='n04040759 radiator' with probability=0.000261
比较调整和未调整的模型
我们希望收集与此优化模型相关的一些基本性能数据,以将其与未优化模型进行比较。 根据您的底层硬件、迭代次数和其他因素,在比较优化模型和未优化模型时,您应该会看到性能改进。
import timeit

timing_number = 10
timing_repeat = 10
optimized = (
    np.array(timeit.Timer(lambda: module.run()).repeat(repeat=timing_repeat, number=timing_number))
    * 1000
    / timing_number
)
optimized = {"mean": np.mean(optimized), "median": np.median(optimized), "std": np.std(optimized)}


print("optimized: %s" % (optimized))
print("unoptimized: %s" % (unoptimized))
Out:
optimized: {'mean': 118.84035926312208, 'median': 120.0346483848989, 'std': 15.774653321691925}
unoptimized: {'mean': 104.3666648492217, 'median': 103.54426596313715, 'std': 2.3251255299765776}
Final Remarks
在本教程中,我们提供了一个简短示例,说明如何使用 TVM Python API 编译、运行和调整模型。 我们还讨论了对输入和输出进行预处理和后处理的必要性。 在调整过程之后,我们演示了如何比较未优化和优化模型的性能。
在这里,我们展示了一个在本地使用 ResNet-50 v2 的简单示例。 然而,TVM 支持更多功能,包括交叉编译、远程执行和分析/基准测试。