kaggle在output上;pytorch安装包下载后怎么装;(最全的安装包下载带cuda版本)DGL下载;报错:UserWarning: NVIDIA GeForce RTX;fcntl报错
1、kaggle在output上运行(可以从kaggle上查看https://www.kaggle.com/houzitest/cake1111)
因为input只能读,所以再output上运行

再执行:
import torch
print(torch.__version__) # 查看torch当前版本号
print(torch.version.cuda) # 编译当前版本的torch使用的cuda版本号
print(torch.cuda.is_available()) # 查看当前cuda是否可用于当前版本的Torch,如果输出True,则表示可用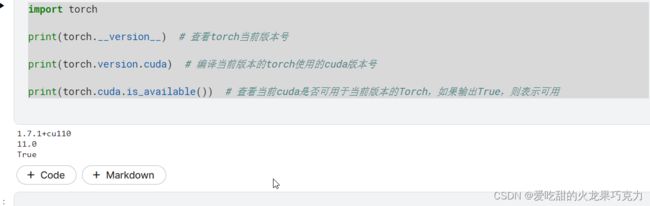
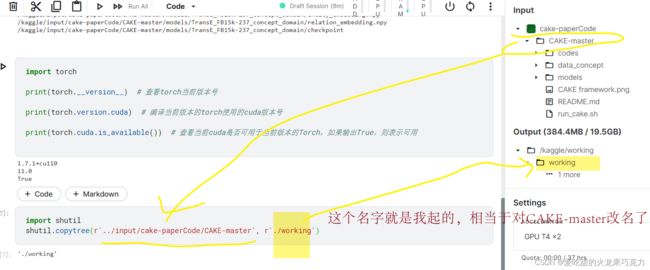
2、移动文件夹
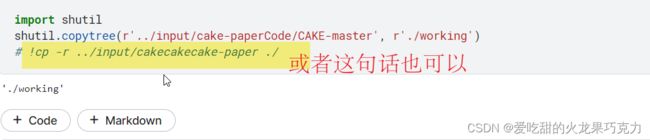
import shutil
shutil.copytree(r'../input/cake-paperCode/CAKE-master', r'./working')
# !cp -r ../input/cakecakecake-paper ./ #我就用的这个方法移动的
 接下来就可以进入文件夹 运行代码了
pytorch安装包下载后怎么装:
偶然看到了这个,我还没有用,弄的我蠢蠢欲动,等到组会结束,我再安装吧~哈哈哈哈
(106条消息) 明明安装了gpu版的pytorch可是测试的时候居然用的试cpu版的?_9677的博客-CSDN博客
DGL下载报错ERROR: dgl_cu101-0.4.3.post2-cp38-cp38-win_amd64.whl is not a
是的没错,我又来下载一遍dgl了,真的害怕极了 。。。。
没办法,还得来!
这一次,换一个傻瓜式教学,尽可能的快速成功安装!
超算云服务深度学习环境配置Pytorch1.6+CUDA10.2+DGL0.4.3_平平无奇科研小天才的博客-CSDN博客_pytorch1.6对应cuda版本
Linux 64 :: Anaconda.org
从上面链接中查看自己适合哪个版本然后下载(我是cp38 torch1.6+cu10.2)
然后报错:Defaulting to user installation because normal site-packages is not writeable
ERROR: dgl_cu101-0.4.3.post2-cp38-cp38-win_amd64.whl is not a supported wheel on this platform.
别只看红字,上面的字才是解决的key!
大佬说 python -m pip install dgl_cu101-0.4.3.post2-cp38-cp38-win_amd64.whl 就可以了,我试了一下对!!!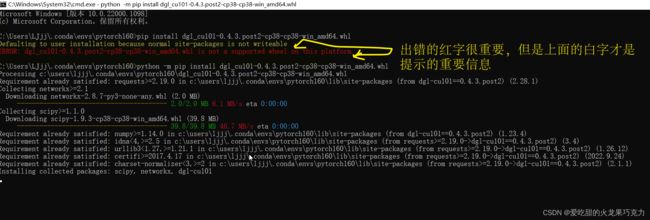
来源:超算云服务深度学习环境配置Pytorch1.6+CUDA10.2+DGL0.4.3_平平无奇科研小天才的博客-CSDN博客_pytorch1.6对应cuda版本
综上:
我的配置: torch.__version__': 1.6.0+cu101

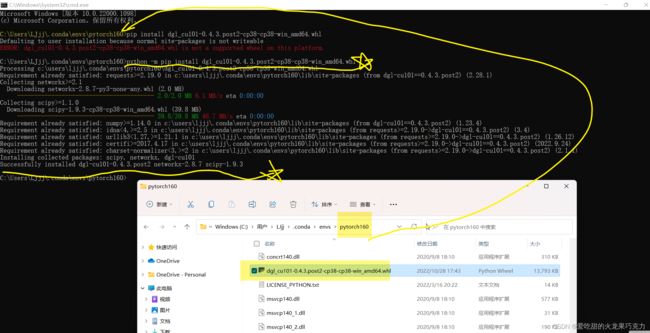
下载安装DGL的话,先安装好安装包,然后在目录下cmd,进入目录中,接着输入代码:
python -m pip install dgl_cu101-0.4.3.post2-cp38-cp38-win_amd64.whl
接下来:演示一遍pytorch110+cuda113的DGL下载:
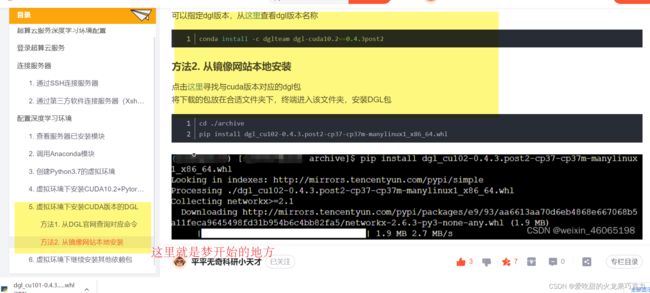
1、从这里找对应版本下载:https://conda.anaconda.org/dglteam/linux-64

知道我们要下的是谁这就好办了:https://conda.anaconda.org/dglteam/linux-64/dgl-cuda11.3-0.8.0post1-py38_0.tar.bz2
(上面的下载好好好慢。。。。不推荐,所以从另一个网址中找到我们下载的名字就行)
Simple Index
Links for dgl-cu102
2、 所以到这个网站去搜索下载:
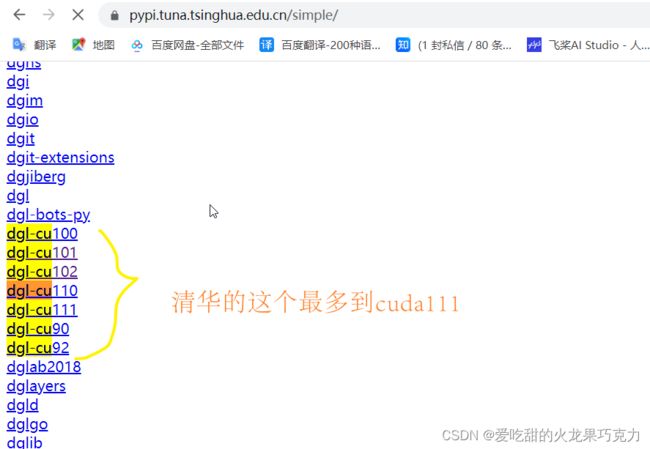
Index of /anaconda/cloud/dglteam/win-64/ | 清华大学开源软件镜像站 | Tsinghua Open Source Mirror
(来源:图神经网络环境配置:Win11+CUDA10.2+Pytorch1.10+DGL_平平无奇科研小天才的博客-CSDN博客_图神经网络环境)
可以解压后 pip install xxxx(文件夹名字)
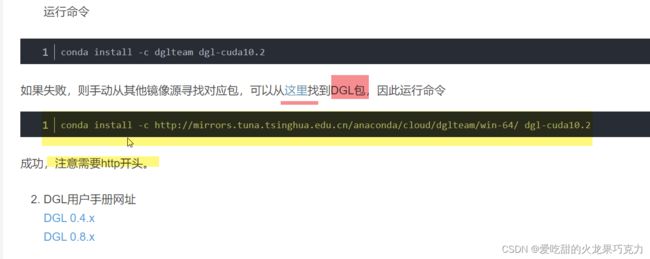
或者按照大佬说的:
conda install -c http://mirrors.tuna.tsinghua.edu.cn/anaconda/cloud/dglteam/win-64/ dgl-cuda10.2
(阴影部分的 在那个网站上右键:复制链接即可:https://mirrors.tuna.tsinghua.edu.cn/anaconda/cloud/dglteam/win-64/dgl-cuda11.3-0.8.1-py38_0.tar.bz2)
https://mirrors.tuna.tsinghua.edu.cn/anaconda/cloud/dglteam/win-64/dgl-cuda11.3-0.8.1-py38_0.tar.bz2
于是,我照葫芦画瓢,也在我的cmd上输入:
conda install -c http://mirrors.tuna.tsinghua.edu.cn/anaconda/cloud/dglteam/win-64 /dgl-cuda11.3 但是没成功,所以放弃这个方法,采用一开始的解压缩办法。

我发现不用pip install XXX,因为它本来就是解压缩的这种格式!可以直接放在对应的文件夹下使用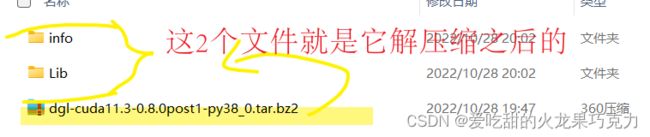
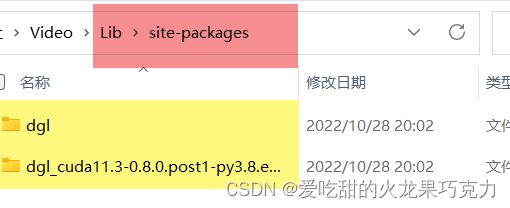
3、 在anaconda中查看,发现成功了
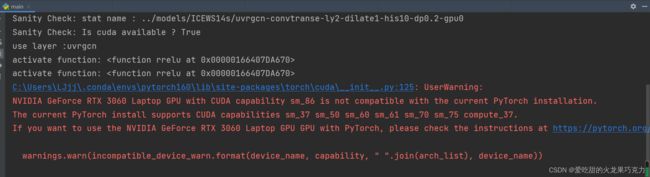
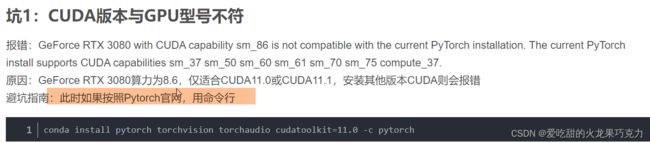
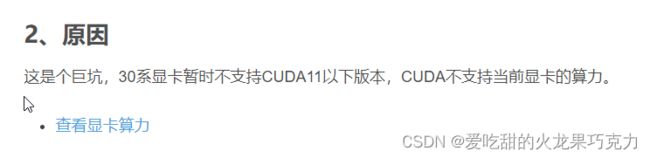
报错:UserWarning:
NVIDIA GeForce RTX 3060 Laptop GPU with CUDA capability sm_86 is not compatible with the current PyTorch installation.
The current PyTorch install supports CUDA capabilities sm_37 sm_50 sm_60 sm_61 sm_70 sm_75 compute_37.
(92条消息) GeForce RTX 3060 Laptop GPU with CUDA capability sm_86 is not compatible with the current PyTorch in_蠕动的爬虫的博客-CSDN博客
所以下次安装时还是安装11X的cuda比较好~ 推荐几个最常用的:
pytorch110+cuda113(最常用)
pytorch102+cuda113
pytorch 1.8+CUDA 11.1