pytorch——现有网络模型的使用和修改

以VGG网络为例,在Docs中,选择图像相关的torchvision,左侧的torchvision.models是一些现成的网络模型,右侧是网络模型的一个分类,第一个便是和分类有关的模型。
vgg最常用的就是vgg16和vgg19:
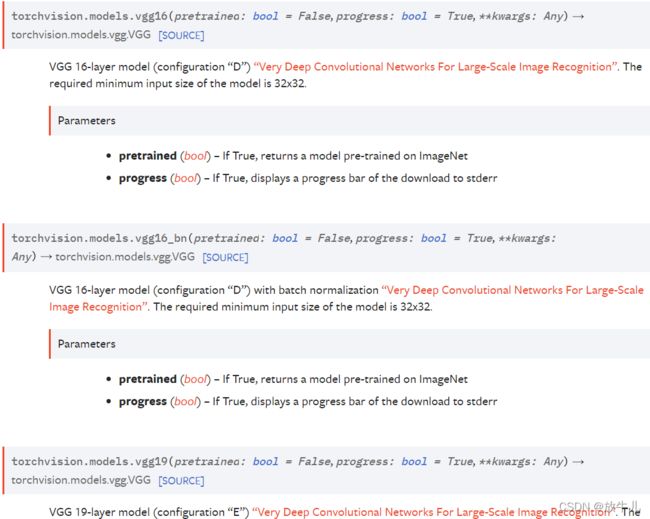
参数pretrained如果为True,则模型中的参数使用现有的已经在ImageNet数据集中训练完成的,若为False,则参数没有经过任何训练,process若为True,则会显示一个下载进度条。
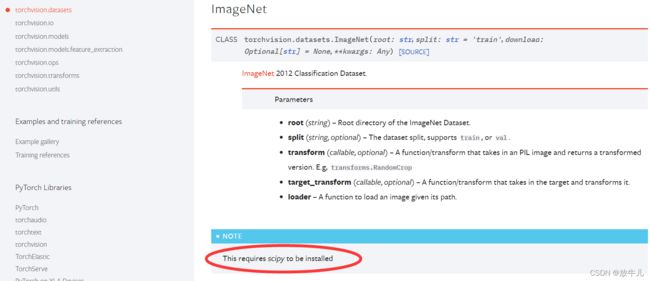
需要scipy包才可以安装,root就是路径,split是选择是训练集还是测试集,transform对PIL形式转化,target_transform对目标进行转化,loader在加载数据集时使用。
train_data = torchvision.datasets.ImageNet("./data_ImageNet", split="train", download=True, transform=torchvision.transforms.ToTensor())如果使用这种方式下载时,会报错:
RuntimeError: The dataset is no longer publicly accessible. You need to download the archives externally and place them in the root directory.
现在数据集不再公开访问,要下载好数据集然后放在目录中。从网上搜就好,训练集大小有100多个G。
我们直接加载模型:
import torchvision

vgg16_False = torchvision.models.vgg16(pretrained=False)#progress默认为True
vgg16_True = torchvision.models.vgg16(pretrained=True)
查看两个模型的参数:
vgg16_False:

vgg16_True:

设置为False时,参数是初始默认的数值,为True时,参数已经经过训练,可以得到很好的效果。打印一下训练好的网络模型:
VGG(
(features): Sequential(
(0): Conv2d(3, 64, kernel_size=(3, 3), stride=(1, 1), padding=(1, 1))
(1): ReLU(inplace=True)
(2): Conv2d(64, 64, kernel_size=(3, 3), stride=(1, 1), padding=(1, 1))
(3): ReLU(inplace=True)
(4): MaxPool2d(kernel_size=2, stride=2, padding=0, dilation=1, ceil_mode=False)
(5): Conv2d(64, 128, kernel_size=(3, 3), stride=(1, 1), padding=(1, 1))
(6): ReLU(inplace=True)
(7):...
观察最后一层:
Linear(in_features=4096, out_features=1000, bias=True)
输出有1000个,该网络是一个分类模型,可知最终有1000个类。之前博客中提到的CIFAR10数据集将图片分为了10个类,可以将vgg16最后的线性层1000改为10,或者重新加一个线性层,输入1000,输出10。
vgg16_True.add_module('add_linear', nn.Linear(1000, 100))查看add_module源码:
    def add_module(self, name: str, module: Optional['Module']) -> None:
        r"""Adds a child module to the current module.

        The module can be accessed as an attribute using the given name.

        Args:
            name (string): name of the child module. The child module can be
                accessed from this module using the given name
            module (Module): child module to be added to the module.
        """
name是新添层的名字,module就是新添加的层。新网络为:
...
(classifier): Sequential(
(0): Linear(in_features=25088, out_features=4096, bias=True)
(1): ReLU(inplace=True)
(2): Dropout(p=0.5, inplace=False)
(3): Linear(in_features=4096, out_features=4096, bias=True)
(4): ReLU(inplace=True)
(5): Dropout(p=0.5, inplace=False)
(6): Linear(in_features=4096, out_features=1000, bias=True)
)
(add_linear): Linear(in_features=1000, out_features=100, bias=True)
如果想添加到classifier中,修改为:
vgg16_True.classifier.add_module('add_linear', nn.Linear(1000, 100))如果想将最后一个Linear4096输入,1000输出修改为4096输入10输出:
vgg16_True.classifier[6] = nn.Linear(4096, 10)(因为最后一层在classifier中,并且序号为6)