目标检测VOC标注格式中,将斜框标注转化为水平框
目标检测VOC格式数据集obb标注向hbb标注的转换(polygon 2 bndbox)
- polygon(obb)和bndbox(hbb)介绍
-
- polygon(obb)
- bndbox(hbb)
- polygon2bndbox转换原理
- polygon2bndbox转换代码
- 可视化效果
-
- bndbox标注可视化代码
polygon(obb)和bndbox(hbb)介绍
polygon(obb)
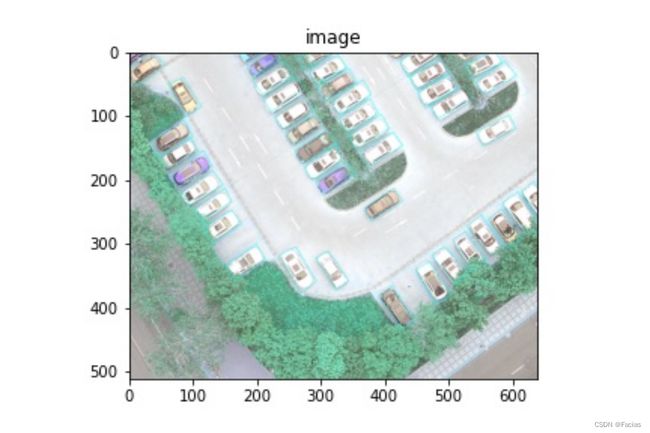
一般来说polygon标注是用来检测航拍图像,标注框的样式是斜着的四边形,因此xml文件里的描述信息为四边形的四个顶点的坐标,即每个目标一共用8个值来描述坐标信息,如下图所示:

对应标注可视化效果为(蓝色框):
bndbox(hbb)
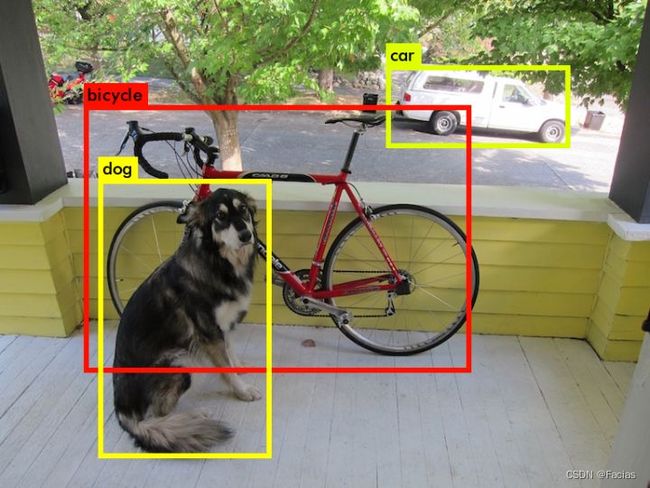
这个标注方式就是做目标检测经常见到的水平框,一般xml的描述信息为:
本人做项目时需要将polygon格式转换为bndbox格式,所以在此将转换过程记录一下,附上代码,需要自取。
polygon2bndbox转换原理
已知polygon四个顶点的信息,可以任选两个对角线上的点,当作bndbox的矩形的两个顶点。由于bndbox的两个点为矩形左下角(x_min,y_min)和右上角(x_max,y_max),所以对于polygon我们也找出其左下角(x_min,y_min)和右上角(x_max,y_max)。
对于一个斜着的四边形。在找其左下角和右上角时分三种情况:
- 中心点左边有两个点 ,此时比较左边点的y坐标,大的为左上角,小的为左下角。右边两点y坐标大的为右上角;

2. 中心点左边有一个点 ,此时比较左边点为左下角。右边点为右上角;
polygon2bndbox转换代码
import xml.dom.minidom
import os.path
path = "/Users/dijia/Desktop/RGB-Infrared/RGB-Infrared/labels/modalA/DJI_2019050801_0002.xml"#路径
xmlfile = os.path.basename(path)
name1 = xmlfile.split('.')[0]
print(name1)
dom = xml.dom.minidom.parse(path)
root = dom.documentElement
movies = root.getElementsByTagName("object") #获得所有该xml文件下所有object,返回为list形式
count = 0
def bndbox_func(lis): #传入有一个元素的列表,其中每个元素是一个列表形式的坐标
#将坐标的每一个元素映射为float
for i in range(0,len(lis)):
lis[i] = list(map(float,lis[i]))
#将lis转为array,格式为[[198. 301.],[151. 335.],[164. 359.],[212. 325.]]
coordinate = np.array(lis)
#求中心点坐标(array相当于矩阵,可以直接进行类似矩阵的运算)
center = coordinate[0]
for _ in range(1, 4):
center = center + coordinate[_]
center = center / 4
# 复制一份坐标,避免原坐标被破坏
coordinate_temp = coordinate.copy()
#找出x轴小于中心坐标点的点 left_coordinate,两个点就是左上和左下,一个点就是左下
left_coordinate = [] # 用于存储x轴小于中心坐标点的点
delete_index = []
for _ in range(4): # 将 x轴小于中心坐标点的点存储进left_coordinate
if(coordinate[_][0] < center[0]):
left_coordinate.append(coordinate[_]) #list(array1,array2)
delete_index.append(_) #list(index1,index2)
# 若上面找出有两个点,其余点即为右上和右下
right_coordinate = np.delete(coordinate_temp, delete_index, axis=0) #array
# 若上面找出有一个点
coordinate_temp = np.delete(coordinate_temp, delete_index, axis=0) #array
# 将left_coordinate做备份
left_coordinate_temp = left_coordinate.copy()
#此时对角线和x轴斜交
if(len(left_coordinate_temp) == 2):
# 比较左边两个点的y轴,大的为左上
if(left_coordinate[0][1] < left_coordinate[1][1]):
left_bottom = left_coordinate[0] #array
left_top = left_coordinate[1] #array
elif(left_coordinate[0][1] > left_coordinate[1][1]):
left_bottom = left_coordinate[1] #array
left_top = left_coordinate[0] #array
# 比较右边两个点的y轴,大的为右上
if(right_coordinate[0][1] < right_coordinate[1][1]):
right_bottom = right_coordinate[0]#array
right_top = right_coordinate[1] #array
elif(right_coordinate[0][1] > right_coordinate[1][1]):
right_bottom = right_coordinate[1]#array
right_top = right_coordinate[0] #array
#此时对角线和x轴垂直
elif(len(left_coordinate_temp) == 1):
left_bottom = left_coordinate[0] #左下
delete_index = []
for _ in range(3):
if(coordinate_temp[_][0] == center[0] and coordinate_temp[_][1] > center[1]):
left_top = coordinate_temp[_] #左上
delete_index.append(_)
if(coordinate_temp[_][0] == center[0] and coordinate_temp[_][1] < center[1]):
right_bottom = coordinate_temp[_] #右下
delete_index.append(_)
coordinate_temp = np.delete(coordinate_temp, delete_index, axis=0)
right_top = coordinate_temp[0] #右上
return left_top[0],left_top[1],right_bottom[0],right_bottom[1]
if __name__ == "__main__":
for movie in movies:
print("*****Movie*****:" + str(count))
print(movie)
z = movie.getElementsByTagName('polygon')[0].childNodes #每个object只有一个polygon,movie.getElementsByTagName('polygon')得到
#一个[]形式nodelist,而[0]得到
#可视化效果
bndbox标注可视化代码
#用opencv画polygon
import cv2
import os
import numpy as np
import xml.etree.ElementTree as ET
import matplotlib.pyplot as plt

xml_file = '/Users/dijia/Desktop/原始数据/xml/000617_303.735857.xml'
tree = ET.parse(xml_file)
root = tree.getroot()
imgfile = '/Users/dijia/Desktop/原始数据/rgb/000617_303.735857.jpg'
im = cv2.imread(imgfile)

polygon_list = []
for object in root.findall('object'):
    li = []
    object_name = object.find('name').text
    Xmin = int(float(object.find('bndbox').find('xmin').text))
    Ymin = int(float(object.find('bndbox').find('ymin').text))
    Xmax = int(float(object.find('bndbox').find('xmax').text))
    Ymax = int(float(object.find('bndbox').find('ymax').text))
    cv2.rectangle(im, (Xmin, Ymin), (Xmax, Ymax), (255,0,0), True)
    #cv2.circle(im, (Xmin, Ymin), radius=5, color=(255, 0, 0))
    #cv2.circle(im, (Xmax, Ymax), radius=5, color=(255, 0, 0))
plt.figure("Image") # 图像窗口名称
plt.imshow(im)
plt.axis('on') # 关掉坐标轴为 off
plt.title('image') # 图像题目
plt.savefig('/Users/dijia/Desktop/test4.jpg')
plt.show()
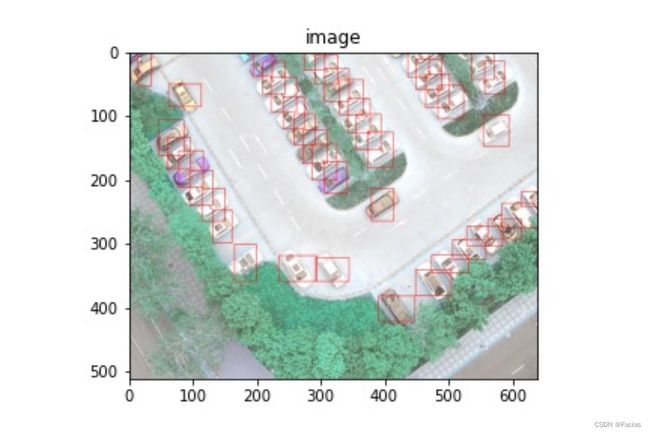
可视化效果(红色框):

转换后可以用可视化代码查看效果,polygon的可视化稍微改一下就行,这里不贴相关代码了。
将polygon标注的对角线点找到,效果如图:

将其画成bndbox:

虽然目标有些区域被圈出去了,不过能凑活着训练。这里还是建议在标注数据前就构思好需要用什么标注信息。


