Linear Regression with PyTorch 用PyTorch实现线性回归
文章目录
-
- 4、Linear Regression with PyTorch 用PyTorch实现线性回归
-
- 4.1 Prepare dataset 准备数据集
- 4.2 Design Model 设计模型
-
- 4.2.1 __call__() 作用
- 4.3 Construct Loss and Optimizer 构造损失和优化器
- 4.4 Training Cycle 训练周期
- 4.5 Test Model 测试模型
- 4.6 Different Optimizer
-
- 4.6.1 Adagrad
- 4.6.2 Adam
- 4.6.3 Adamax
- 4.6.4 ASGD
- 4.6.5 LBFGS
- 4.6.6 RMSprop
- 4.6.7 Rprop
- 4.6.8 SGD
- 4.7 More Example
4、Linear Regression with PyTorch 用PyTorch实现线性回归
4.1 Prepare dataset 准备数据集
在PyTorch中,计算图是以小批量的方式进行的,所以 X 和 Y 是 3×1 的张量:
import torch
from torch import nn

x_data = torch.Tensor([[1.0], [2.0], [3.0]])
y_data = torch.Tensor([[2.0], [4.0], [6.0]])
注意:根据广播机制,所以 w 和 b 也都为 3 * 1(3行1列)。参考:什么是广播机制
我们来复习一下梯度下降算法:
4.2 Design Model 设计模型
class Liang(nn.Module):
    def __init__(self):
        super(Liang, self).__init__()
        self.linear = nn.Linear(1, 1)

    def forward(self, x):
        y_pred = self.linear(x)
        return y_pred


model = Liang()
说明:
- 我们的模型类应该继承自
nn.Module模块,它是所有神经网络模块的基类。 - 必须实现成员方法
__init__()和forward()。 - 构造对象:
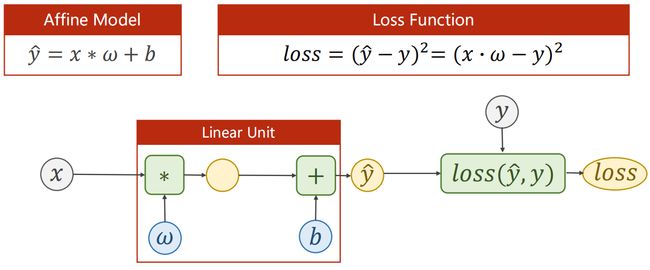
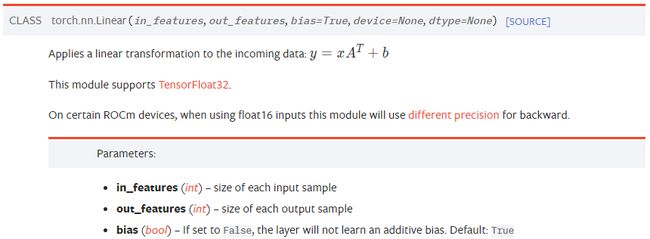
nn.Linear()就是上图中的 Linear Unit,包含 weight 和 bias。 nn.Linear类已经实现了神奇的方法__call__(),它使类的实例可以被调用(就像一个函数一样);通常情况下forward()将被调用。
参考文档:Linear
4.2.1 call() 作用
当我们不清楚会传入多少变量时(或传入变量过多时):
def func(a, b, c, x, y):
    pass


func(1, 2, 3, x=4, y=5)
将变量替换成 *args,将其打印会输出一个元组;将变量替换成 **kwargs,将其打印会输出一个字典:
def func(*args, **kwargs):
    print(args)  # (1, 2, 3)
    print(kwargs)  # {'x': 4, 'y': 5}


func(1, 2, 3, x=4, y=5)
实例:
class Liang:
    def __init__(self):
        pass

    def __call__(self, *args, **kwargs):
        print('Hello' + str(args[0]))  # Hello1


liang = Liang()
liang(1, 2, 3)
4.3 Construct Loss and Optimizer 构造损失和优化器
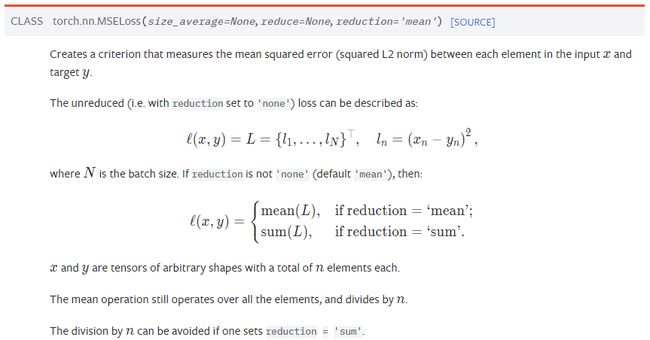
criterion = torch.nn.MSELoss(size_average=False)
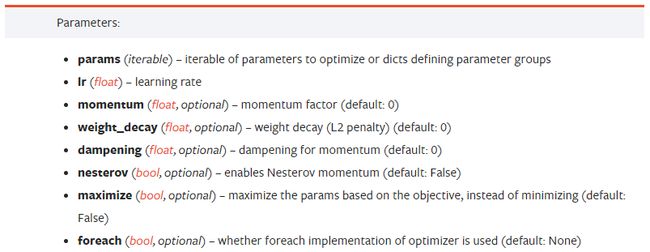
optimizer = torch.optim.SGD(model.parameters(), lr=0.01)
报错:
UserWarning: size_average and reduce args will be deprecated, please use reduction='sum' instead.即:
size_average和reduce args将被弃用,请使用reduction='sum'代替。
criterion = torch.nn.MSELoss(reduction='sum')
optimizer = torch.optim.SGD(model.parameters(), lr=0.01)
参考文档:MSELoss
参考文档:SGD
4.4 Training Cycle 训练周期
for epoch in range(100):
    y_pred = model(x_data)  # Forward: Predict
    loss = criterion(y_pred, y_data)  # Forward: Loss
    print(epoch, loss)

    optimizer.zero_grad()  # The grad computed by .backward() will be accumulated. So before backward, remember set the grad to ZERO!!!
    loss.backward()  # Backward: Autograd
    optimizer.step()  # Update
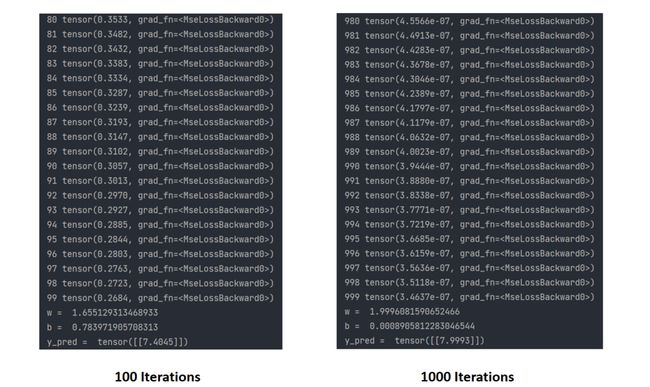
4.5 Test Model 测试模型
import torch
from torch import nn

x_data = torch.Tensor([[1.0], [2.0], [3.0]])
y_data = torch.Tensor([[2.0], [4.0], [6.0]])


class Liang(nn.Module):
    def __init__(self):
        super(Liang, self).__init__()
        self.linear = nn.Linear(1, 1)

    def forward(self, x):
        y_pred = self.linear(x)
        return y_pred


model = Liang()

criterion = torch.nn.MSELoss(reduction='sum')
optimizer = torch.optim.SGD(model.parameters(), lr=0.01)

for epoch in range(1000):
    y_pred = model(x_data)  # Forward: Predict
    loss = criterion(y_pred, y_data)  # Forward: Loss
    print(epoch, loss)

    optimizer.zero_grad()  # The grad computed by .backward() will be accumulated. So before backward, remember set the grad to ZERO!!!
    loss.backward()  # Backward: Autograd
    optimizer.step()  # Update

# Output weight and bias
print('w = ', model.linear.weight.item())
print('b = ', model.linear.bias.item())

# Test Model
x_test = torch.Tensor([[4.0]])
y_test = model(x_test)
print('y_pred = ', y_test.data)
4.6 Different Optimizer
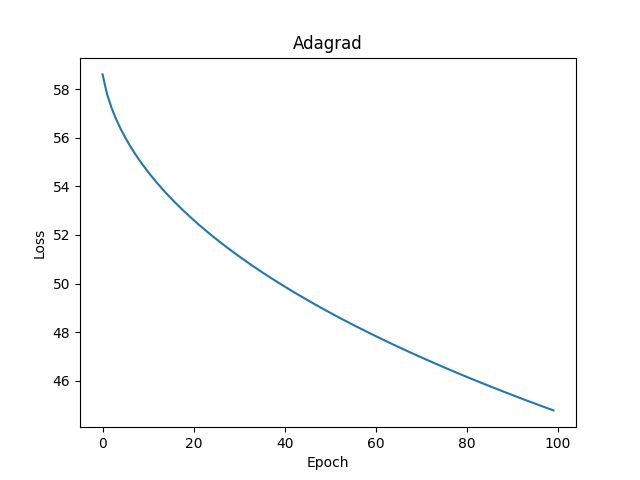
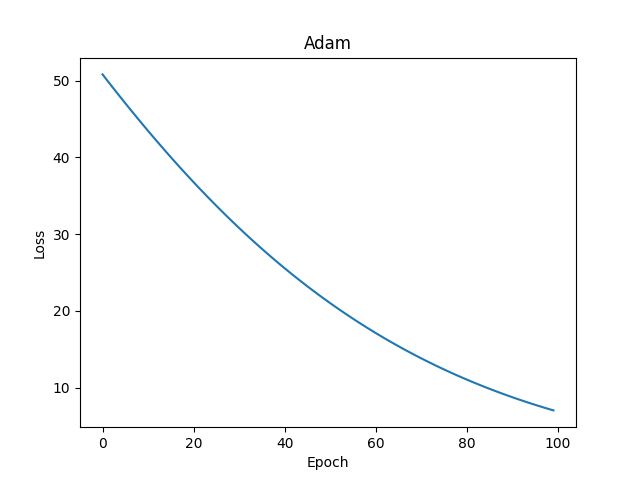
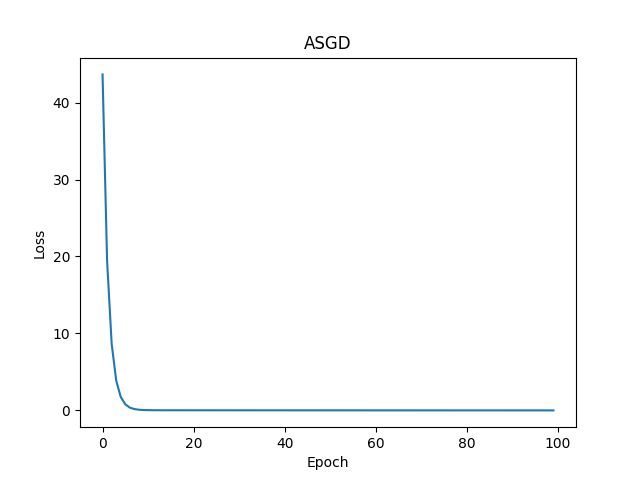
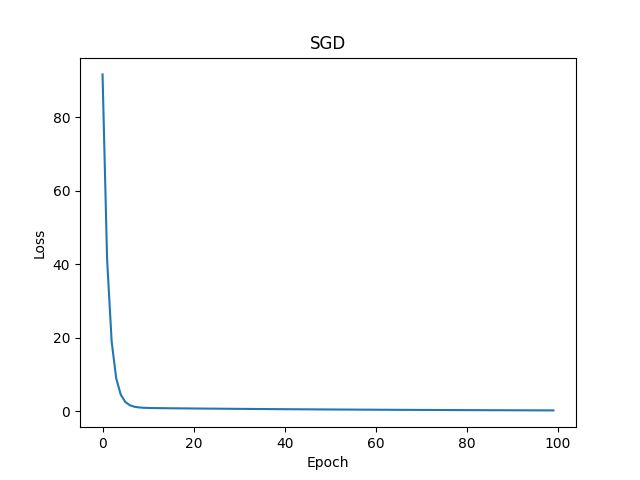
如果想要直观的看出每个优化器的效果,那我们可以借助 matplotlib 画图来展现:
1、导包
import matplotlib.pyplot as plt

2、创建空列表(存放:迭代次数 + 损失值)
epoch_list = []
loss_list = []

3、向列表中添加元素
epoch_list.append(epoch)
loss_list.append(loss.item())

4、画图
plt.plot(epoch_list, loss_list) # 横纵坐标值
plt.xlabel('Epoch') # x轴名称
plt.ylabel('Loss') # y轴名称
plt.title('SGD') # 图标题
plt.show() # 展示
4.6.1 Adagrad
参考文档:Adagrad
4.6.2 Adam
参考文档:Adam
4.6.3 Adamax
参考文档:Adamax
4.6.4 ASGD
参考文档:ASGD
4.6.5 LBFGS
参考文档:LBFGS
TypeError: step() missing 1 required positional argument: 'closure'
LBFGS要传递闭包,暂未解决!
4.6.6 RMSprop
参考文档:RMSprop
4.6.7 Rprop
参考文档:Rprop
4.6.8 SGD
参考文档:SGD
4.7 More Example
https://pytorch.org/tutorials/beginner/pytorch_with_examples.html


