使用Yolov3训练kitti数据集(或者其它数据集)
代码: https://github.com/duxuan11/yolov3_kitti
一 数据集的下载与配置
1.下载kitti数据集
打开以下网页:
http://www.cvlibs.net/datasets/kitti/eval_object.php?obj_benchmark=2d
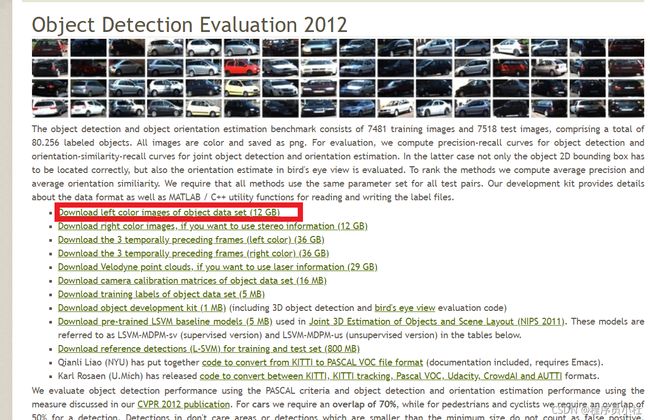
只需要下载Download left color images of object data set (12 GB)和对应的标签Download training labels of object data set (5 MB)即可。
他会发邮件到你的邮箱里。
1.1kitti标签文件介绍

对应的标签文件

对应数据的类型:

2.介绍voc格式:
voc格式如图:

JPEGImage主要存放jpg图片文件
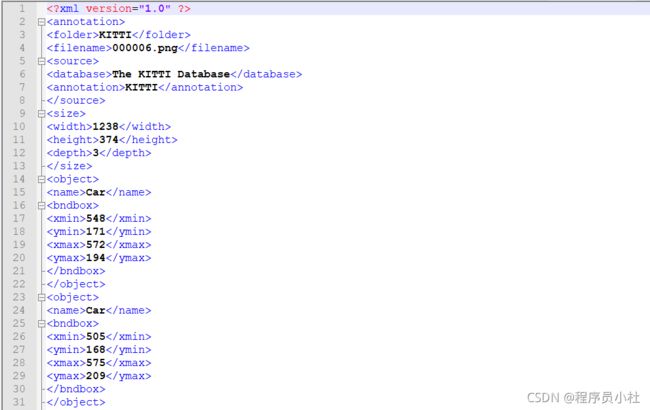
Annotations是标签文件,对应JPEGImage,主要以xml形式存放

xml主要存放图片的名称,大小,来源,以及图片的标签等。
kitti -> voc 需要经过以下变换:

ImageSets主要分割训练集验证集等,存放文件的名称,除去.jpg

注意kitti的图片放到JPEGImages里,label_2文件夹直接移到Annotations里

3.修改kitti数据集的类别:
由于该数据集有8类,因此我们想改的简单点,将原来的8类物体转换为我们现在需要的3类:Car,Pedestrain,Cyclist。我们把原来的Car、Van、Truck,Tram合并为Car类,把原来的Pedestrain,Person合并为现在的Pedestrain,原来的Cyclist这一类保持不变。
代码在yolo3-pytorch-master\VOCdevkit\VOC2007文件夹里
modify_annotations_txt.py
使用该代码
# modify_annotations_txt.py
import glob
import string
save_xml = ''
txt_list = glob.glob('Annotations/label_2/*.txt') #kitti的标签文件路径 注意修改路径
def show_category(txt_list):
    category_list= []
    for item in txt_list:
        try:
            with open(item) as tdf:
                for each_line in tdf:
                    labeldata = each_line.strip().split(' ')
                    category_list.append(labeldata[0])
        except IOError as ioerr:
            print('File error:'+str(ioerr))
    print(set(category_list))
def merge(line):
    each_line=''
    for i in range(len(line)):
        if i!= (len(line)-1):
            each_line=each_line+line[i]+' '
        else:
            each_line=each_line+line[i]
    each_line=each_line+'\n'
    return (each_line)
print('before modify categories are:\n')
show_category(txt_list)
for item in txt_list:
    new_txt=[]
    try:
        with open(item, 'r') as r_tdf:
            for each_line in r_tdf:
                labeldata = each_line.strip().split(' ')
                if labeldata[0] in ['Truck','Van','Tram']:
                    labeldata[0] = labeldata[0].replace(labeldata[0],'Car')
                if labeldata[0] == 'Person_sitting':
                    labeldata[0] = labeldata[0].replace(labeldata[0],'Pedestrian')
                if labeldata[0] == 'DontCare':
                    continue
                if labeldata[0] == 'Misc':
                    continue
                new_txt.append(merge(labeldata))
        with open(item,'w+') as w_tdf:
            for temp in new_txt:
                w_tdf.write(save_xml+temp)
    except IOError as ioerr:
        print('File error:'+str(ioerr))
print('\nafter modify categories are:\n')
show_category(txt_list)

4.修改kitti的文件格式
使用格式转换工厂将png->jpg 并且存放在voc2007文件夹下的JPEGImages下
此外由于kitti的标签文件是txt格式的,因此需要写个python程序将txt标签转成voc需要的格式xml。
kitti_txt_to_xml.py 代码在yolo3-pytorch-master\VOCdevkit\VOC2007
# kitti_txt_to_xml.py
# encoding:utf-8
# 根据一个给定的XML Schema,使用DOM树的形式从空白文件生成一个XML
from xml.dom.minidom import Document
import cv2
import os
def generate_xml(name,split_lines,img_size,class_ind):
    doc = Document() # 创建DOM文档对象
    annotation = doc.createElement('annotation')
    doc.appendChild(annotation)
    title = doc.createElement('folder')
    title_text = doc.createTextNode('KITTI')
    title.appendChild(title_text)
    annotation.appendChild(title)
    img_name=name+'.jpg'
    title = doc.createElement('filename')
    title_text = doc.createTextNode(img_name)
    title.appendChild(title_text)
    annotation.appendChild(title)
    source = doc.createElement('source')
    annotation.appendChild(source)
    title = doc.createElement('database')
    title_text = doc.createTextNode('The KITTI Database')
    title.appendChild(title_text)
    source.appendChild(title)
    title = doc.createElement('annotation')
    title_text = doc.createTextNode('KITTI')
    title.appendChild(title_text)
    source.appendChild(title)
    size = doc.createElement('size')
    annotation.appendChild(size)
    title = doc.createElement('width')
    title_text = doc.createTextNode(str(img_size[1]))
    title.appendChild(title_text)
    size.appendChild(title)
    title = doc.createElement('height')
    title_text = doc.createTextNode(str(img_size[0]))
    title.appendChild(title_text)
    size.appendChild(title)
    title = doc.createElement('depth')
    title_text = doc.createTextNode(str(img_size[2]))
    title.appendChild(title_text)
    size.appendChild(title)
    for split_line in split_lines:
        line=split_line.strip().split()
        if line[0] in class_ind:
            object = doc.createElement('object')
            annotation.appendChild(object)
            title = doc.createElement('name')
            title_text = doc.createTextNode(line[0])
            title.appendChild(title_text)
            object.appendChild(title)
            bndbox = doc.createElement('bndbox')
            object.appendChild(bndbox)
            title = doc.createElement('xmin')
            title_text = doc.createTextNode(str(int(float(line[4]))))
            title.appendChild(title_text)
            bndbox.appendChild(title)
            title = doc.createElement('ymin')
            title_text = doc.createTextNode(str(int(float(line[5]))))
            title.appendChild(title_text)
            bndbox.appendChild(title)
            title = doc.createElement('xmax')
            title_text = doc.createTextNode(str(int(float(line[6]))))
            title.appendChild(title_text)
            bndbox.appendChild(title)
            title = doc.createElement('ymax')
            title_text = doc.createTextNode(str(int(float(line[7]))))
            title.appendChild(title_text)
            bndbox.appendChild(title)
    # 将DOM对象doc写入文件
    f = open('Annotations/'+name+'.xml','w')
    f.write(doc.toprettyxml(indent = ''))
    f.close()
if __name__ == '__main__':
    class_ind=('Pedestrian', 'Car', 'Cyclist')
    cur_dir=os.getcwd()
    print(cur_dir)
    labels_dir=os.path.join(cur_dir,'Annotations/label_2/')
    for parent, dirnames, filenames in os.walk(labels_dir): # 分别得到根目录,子目录和根目录下文件
        for file_name in filenames:
            full_path=os.path.join(parent, file_name) # 获取文件全路径
            f=open(full_path)
            split_lines = f.readlines()
            name= file_name[:-4] # 后四位是扩展名.txt,只取前面的文件名
            img_name=name+'.jpg'
            img_path=os.path.join('./JPEGImages/',img_name) # 路径需要自行修改
            img_size=cv2.imread(img_path).shape
            generate_xml(name,split_lines,img_size,class_ind)
print('all txts has converted into xmls')
运行之后

接着运行VOC2007\voc2yolo3.py文件
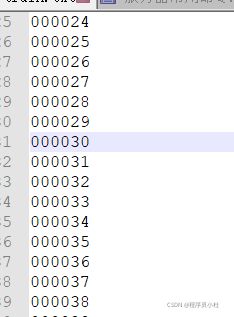
生成 ImageSets\Main\文件夹下的:
只有train.txt与trainval.txt有数据

接着运行根目录下的:
voc_annotation.py
生成:

二 代码运行
好了可以运行train.py

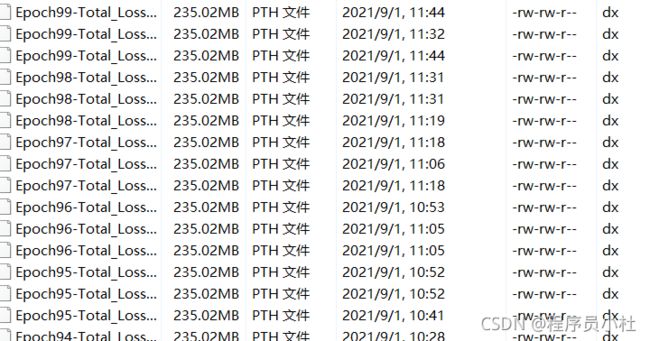
当训练完成,我们在logs文件夹下,随便选一个训练得到的权重,用来预测和检验。放到model_data,并且修改yolo.py文件中的model_path。
运行predict.py


效果还行
本文参考视频
https://www.bilibili.com/video/BV1Hp4y1y788?from=search&seid=16154052976832451390