人脸识别速度超高识别度超高项目,可实时进行检测,一看就会!
1.本项目属于pytorch-facenet项目,核心代码是facenet算法,经过1周的代码修改,可以进行入库和识别的连续操作,经过测试,识别效果很好,在GPU环境中可以进行实时摄像头的识别,同时项目将放在百度网盘中供大家免费下载,技术无价,大家一起学习改进!

2.软件环境大家需要anaconda+pycharm+cuda10.0,这是我的GPU环境。python库包环境如下,大家根据下面的库包下载相对应的库,主要的两个库包是torch=1.2.0和torchvision==0.4.0。
numpy==1.16.2
opencv_python==3.4.8.29
Pillow==8.4.0
requests==2.27.1
setuptools==58.0.4
tensorflow==1.13.1
torch=1.2.0
torchvision==0.4.0
tqdm==4.62.3
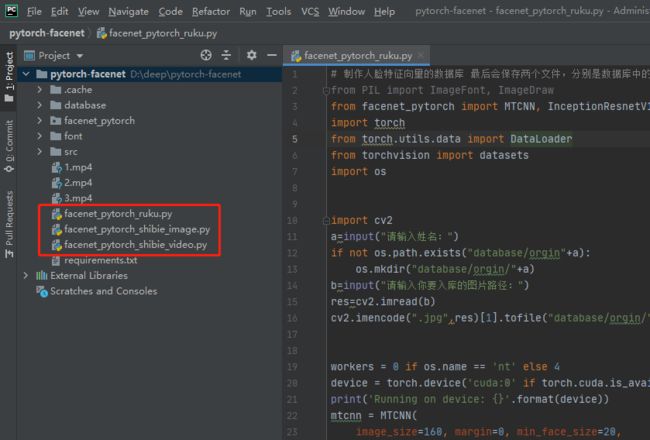
3.主要项目结构如下,里面包含算法和模型放置在文件夹内,主要是以下目录结构中三个py文件讲解,分别是facenet_pytorch_ruku.py、facenet_pytorch_shibie_image.py、facenet_pytorch_shibie_video.py,第一个py文件是来进行人脸入库操作,会生成库模型以供接下来的操作,第二个py文件是来进行人脸图片识别操作,第三个py文件是来进行人脸视频识别操作。
4.facenet_pytorch_ruku.py文件中开始是需要输入你要入库的姓名,同时准备好一张人脸照片,然后输入人脸图片照片的地址,输入完成之后会自动将照片中的人脸截图入库保存,同时生成一个人脸模型。

5.facenet_pytorch_ruku.py完整代码如下
from PIL import ImageFont, ImageDraw
from facenet_pytorch import MTCNN, InceptionResnetV1
import torch
from torch.utils.data import DataLoader
from torchvision import datasets
import os


import cv2
a=input("请输入姓名:")
if not os.path.exists("database/orgin"+a):
    os.mkdir("database/orgin/"+a)
b=input("请输入你要入库的图片路径:")
res=cv2.imread(b)
cv2.imencode(".jpg",res)[1].tofile("database/orgin/"+a+"/"+"1.jpg")


workers = 0 if os.name == 'nt' else 4
device = torch.device('cuda:0' if torch.cuda.is_available() else 'cpu')
print('Running on device: {}'.format(device))
mtcnn = MTCNN(
    image_size=160, margin=0, min_face_size=20,
    thresholds=[0.8, 0.8, 0.9], factor=0.709, post_process=True,
    device=device
)
# InceptionResnetV1提供了两个预训练模型,分别在vggface数据集和casia数据集上训练的。
# 预训练模型如果不手动下载,可能速度会很慢,可以从作者给的谷歌云链接下载,然后放到C:\Users\你的用户名\.cache\torch\checkpoints这个文件夹下面
# 如果是linux系统,那么存放在/home/你的用户名/.cache/torch/checkpoints下面
resnet = InceptionResnetV1(pretrained='vggface2').eval().to(device)


def collate_fn(x):
    return x[0]


# 将所有的单人照图片放在各自的文件夹中,文件夹名字就是人的名字,存放格式如下
'''
--orgin
  |--zhangsan
     |--1.jpg
     |--2.jpg
  |--lisi
     |--1.jpg
     |--2.jpg
'''
dataset = datasets.ImageFolder('./database/orgin')  # 加载数据库
dataset.idx_to_class = {i: c for c, i in dataset.class_to_idx.items()}
loader = DataLoader(dataset, collate_fn=collate_fn, num_workers=workers)
aligned = []  # aligned就是从图像上抠出的人脸,大小是之前定义的image_size=160
names = []
i = 1
for x, y in loader:
    path = './database/aligned/{}/'.format(dataset.idx_to_class[y])  # 这个是要保存的人脸路径
    print("1-1",path)
    if not os.path.exists(path):
        i = 1
        os.mkdir(path)
    # 如果要保存识别到的人脸,在save_path参数指明保存路径即可,不保存可以用None
    x_aligned, prob = mtcnn(x, return_prob=True, save_path=path + '/{}.jpg'.format(i))
    print("1-2", x_aligned,i)
    i = i + 1
    if x_aligned is not None:
        print('Face detected with probability: {:8f}'.format(prob))
        aligned.append(x_aligned)
        names.append(dataset.idx_to_class[y])

aligned = torch.stack(aligned).to(device)
embeddings = resnet(aligned).detach().cpu()  # 提取所有人脸的特征向量,每个向量的长度是512
# 两两之间计算混淆矩阵
dists = [[(e1 - e2).norm().item() for e2 in embeddings] for e1 in embeddings]
torch.save(embeddings, './database/database.pt')  # 当然也可以保存在一个文件
torch.save(names, './database/names.pt')

# mtcnn网络负责检测人脸
mtcnn = MTCNN(keep_all=True, device=device)
resnet = InceptionResnetV1(pretrained='vggface2').eval().to('cuda')

names = torch.load("./database/names.pt")
embeddings = torch.load("./database/database.pt").to('cuda')
6.facenet_pytorch_ruku.py文件代码运行展示效果


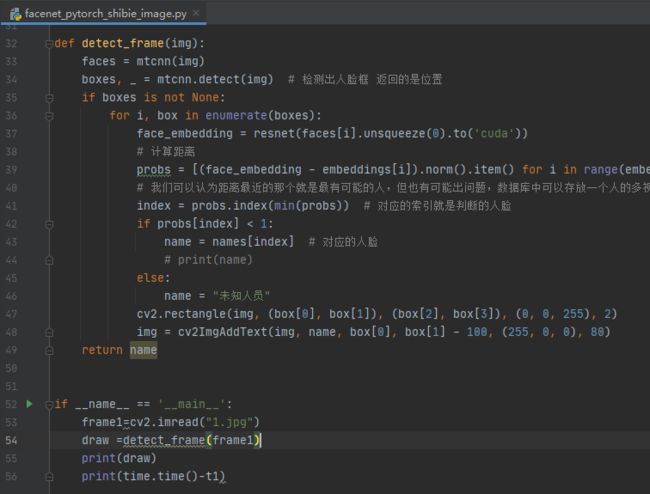
7.facenet_pytorch_shibie_image.py文件主要目的是将一张图片经过人脸模型的检测和识别,最后判断出姓名并且输出。
8.facenet_pytorch_shibie_image.py完整代码如下
import time
import cv2
from PIL import ImageFont, ImageDraw, Image
from facenet_pytorch import MTCNN, InceptionResnetV1
import torch
import os
import numpy
import time
t1=time.time()

workers = 0 if os.name == 'nt' else 4
device = torch.device('cuda:0' if torch.cuda.is_available() else 'cpu')
print('Running on device: {}'.format(device))

# mtcnn网络负责检测人脸
mtcnn = MTCNN(keep_all=True, device=device)
resnet = InceptionResnetV1(pretrained='vggface2').eval().to('cuda')

names = torch.load("./database/names.pt")
embeddings = torch.load("./database/database.pt").to('cuda')


def cv2ImgAddText(img, text, a, b, textColor=(0, 255, 0), textSize=20):
    if (isinstance(img, numpy.ndarray)):
        img = Image.fromarray(cv2.cvtColor(img, cv2.COLOR_BGR2RGB))
    draw = ImageDraw.Draw(img)
    fontStyle = ImageFont.truetype("./font/msyhbd.ttc", textSize, encoding="utf-8")
    draw.text((a, b), text, textColor, font=fontStyle)
    return cv2.cvtColor(numpy.asarray(img), cv2.COLOR_RGB2BGR)


def detect_frame(img):
    faces = mtcnn(img)
    boxes, _ = mtcnn.detect(img)  # 检测出人脸框 返回的是位置
    if boxes is not None:
        for i, box in enumerate(boxes):
            face_embedding = resnet(faces[i].unsqueeze(0).to('cuda'))
            # 计算距离
            probs = [(face_embedding - embeddings[i]).norm().item() for i in range(embeddings.size()[0])]
            # 我们可以认为距离最近的那个就是最有可能的人,但也有可能出问题,数据库中可以存放一个人的多视角多姿态数据,对比的时候可以采用其他方法,如投票机制决定最后的识别人脸
            index = probs.index(min(probs))  # 对应的索引就是判断的人脸
            if probs[index] < 1:
                name = names[index]  # 对应的人脸
                # print(name)
            else:
                name = "未知人员"
            cv2.rectangle(img, (box[0], box[1]), (box[2], box[3]), (0, 0, 255), 2)
            img = cv2ImgAddText(img, name, box[0], box[1] - 100, (255, 0, 0), 80)
    return name


if __name__ == '__main__':
    frame1=cv2.imread("1.jpg")
    draw =detect_frame(frame1)
    print(draw)
    print(time.time()-t1)
9.facenet_pytorch_shibie_image.py运行效果展示

10.facenet_pytorch_shibie_video.py文件主要目的是将视频内的人脸经过人脸模型的检测和识别,最后判断出姓名并且输出在视频显示窗口中。

11.facenet_pytorch_shibie_video.py文件完整代码
#视频识别
import cv2
from PIL import ImageFont, ImageDraw, Image
from facenet_pytorch import MTCNN, InceptionResnetV1
import torch
import os
import numpy
import time
t1=time.time()

workers = 0 if os.name == 'nt' else 4
device = torch.device('cuda:0' if torch.cuda.is_available() else 'cpu')
print('Running on device: {}'.format(device))

# mtcnn网络负责检测人脸
mtcnn = MTCNN(keep_all=True, device=device)
resnet = InceptionResnetV1(pretrained='vggface2').eval().to('cuda')

names = torch.load("./database/names.pt")
embeddings = torch.load("./database/database.pt").to('cuda')


def cv2ImgAddText(img, text, a, b, textColor=(0, 255, 0), textSize=20):
    if (isinstance(img, numpy.ndarray)):
        img = Image.fromarray(cv2.cvtColor(img, cv2.COLOR_BGR2RGB))
    draw = ImageDraw.Draw(img)
    fontStyle = ImageFont.truetype("./font/msyhbd.ttc", textSize, encoding="utf-8")
    draw.text((a, b), text, textColor, font=fontStyle)
    return cv2.cvtColor(numpy.asarray(img), cv2.COLOR_RGB2BGR)
def write_chinese(img,  content,position,font_type, font_size,color):
    # 图像从OpenCV格式转换成PIL格式
    img_PIL = Image.fromarray(cv2.cvtColor(img, cv2.COLOR_BGR2RGB))
    # 字体  字体*.ttc的存放路径一般是: /usr/share/fonts/opentype/noto/ 查找指令locate *.ttc
    font = ImageFont.truetype(font_type, font_size)
    # 字体颜色
    # 文字输出位置
    # 输出内容
    draw = ImageDraw.Draw(img_PIL)
    draw.text(position, content, font=font, fill=color)
    # 转换回OpenCV格式
    img_OpenCV = cv2.cvtColor(numpy.asarray(img_PIL), cv2.COLOR_RGB2BGR)
    return img_OpenCV


def detect_frame(img):
    faces = mtcnn(img)
    boxes, _ = mtcnn.detect(img)  # 检测出人脸框 返回的是位置
    if boxes is not None:
        for i, box in enumerate(boxes):
            face_embedding = resnet(faces[i].unsqueeze(0).to('cuda'))
            # 计算距离
            probs = [(face_embedding - embeddings[i]).norm().item() for i in range(embeddings.size()[0])]
            # 我们可以认为距离最近的那个就是最有可能的人,但也有可能出问题,数据库中可以存放一个人的多视角多姿态数据,对比的时候可以采用其他方法,如投票机制决定最后的识别人脸
            index = probs.index(min(probs))  # 对应的索引就是判断的人脸
            if probs[index] < 1:
                name = names[index]  # 对应的人脸
                # print(name)
            else:
                name = "未知人员"
            cv2.rectangle(img, (box[0], box[1]), (box[2], box[3]), (0, 0, 255), 2)
            img = cv2ImgAddText(img, name, box[0], box[1] - 100, (255, 0, 0), 80)
            ket=(box[0], box[1])
            print((box[0], box[1]))
    return name,ket


if __name__ == '__main__':
    cap=cv2.VideoCapture("3.mp4")
    while (cap.isOpened()):
        ret, frame = cap.read()
        if ret==True:
            draw,ket = detect_frame(frame)
            # frame = cv2.putText(frame, (draw), (0, 40), cv2.FONT_HERSHEY_SIMPLEX, 1, (0, 255, 0), 2)
            frame = write_chinese(frame, (draw),ket,'font/simhei.ttf', 20, (255, 0, 255), )
            cv2.imshow('Video', frame)
            cv2.waitKey(1)
            if draw!="未知人员":
                print(draw)
        else:
            break
12.facenet_pytorch_shibie_video.py文件运行效果展示


13.完整项目如下,保存在百度网盘中,点击即可下载。
链接:https://pan.baidu.com/s/1pUkLD-PK_pBLBbP9kY0-3g
提取码:b075
14.运行成功的小伙伴麻烦一键三连,感谢感谢!!!