SpringBoot创建web项目
本人使用的是eclipse平台,安装SpringBoot插件即可。下面介绍如何使用springboot创建web项目。
1.创建项目工程
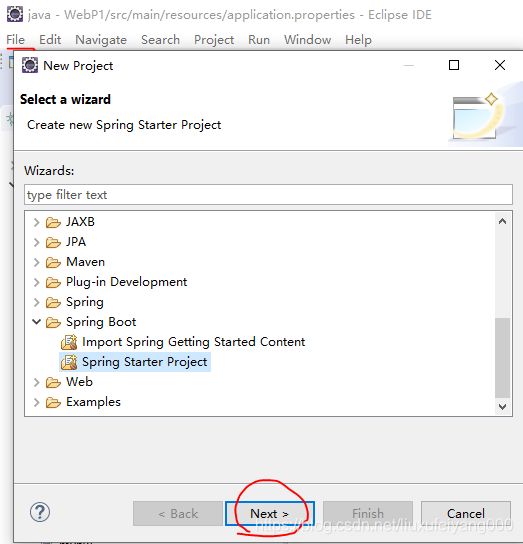
File->New->Project...->Spring Boot->Spring Starter Project,点击Next按钮
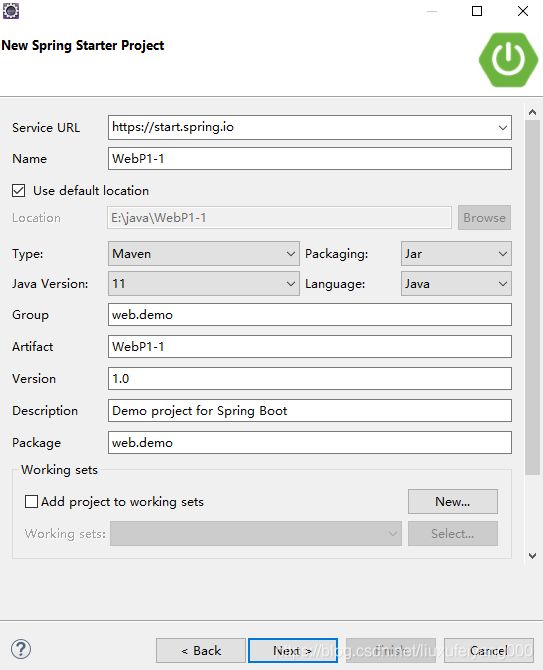
填写相关信息,点击Next按钮
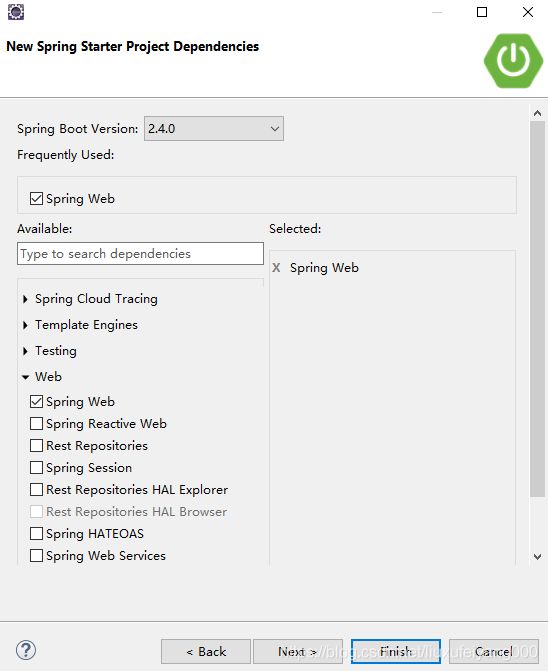
选择Spring Web,点击Finish按钮
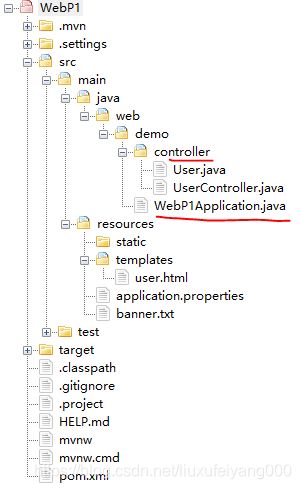
web主要通过启动类 + POM配置 + 控制器+ 视图 + 项目配置实现,完整目录结构如下:
启动类: WebP1Application.java
POM配置: pom.xml
控制器:controller文件夹下的.java文件
视图:templates文件夹下的.html文件
项目配置:application.properties文件或application.yml文件(直接改后缀名为.yml即可)
2.启动类WebP1Application.java(本文不需要任何改动,可根据自己的需求改动)
package web.demo;

import org.springframework.boot.SpringApplication;
import org.springframework.boot.autoconfigure.SpringBootApplication;

@SpringBootApplication
public class WebP1Application {

	public static void main(String[] args) {
		SpringApplication.run(WebP1Application.class, args);
	}

}
3.pom.xml配置(POM文件用于maven构建,这里这种添加spring-boot-starter-web和spring-boot-starter-thymeleaf依赖,其中thymeleaf是用于html页面的code)
完整的文件内容如下:
	4.0.0

		org.springframework.boot
		spring-boot-starter-parent
		2.4.0


	web.demo
	WebP1
	1.0
	WebP1
	Demo project for Spring Boot


		1.8


			org.springframework.boot
			spring-boot-starter-web


			org.springframework.boot
			spring-boot-starter-test
			test


			org.springframework.boot
			spring-boot-starter-thymeleaf


				org.springframework.boot
				spring-boot-maven-plugin
4.添加控制器controller(controller文件夹下的User.java文件定义的User类是UserController.java要用到的数据)
注意控制器文件夹一定和启动类在一个目录(我的当初不在一个目录,总是不能成功访问页面)
UserController.java内容如下:
package web.demo.controller;
import java.util.ArrayList;
import java.util.List;
import org.springframework.stereotype.Controller;
import org.springframework.ui.Model;
import org.springframework.web.bind.annotation.RequestMapping;
import org.springframework.web.bind.annotation.RequestMethod;
@Controller
public class UserController {
@RequestMapping(value="/user", method = RequestMethod.GET) //网址
public String Info(Model model) {
List users=new ArrayList();
users.add(new User("李雷", "男", "爬山"));
users.add(new User("韩梅梅", "女", "游泳"));
users.add(new User("小明", "男", "踢皮球"));
model.addAttribute("users", users);
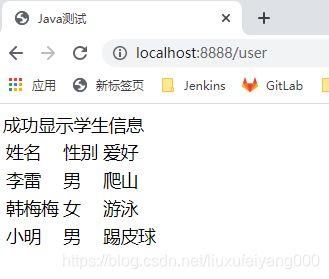
model.addAttribute("result", "成功显示学生信息");
return "user"; //返回user.html
}
} User.java内容如下:
package web.demo.controller;

public class User {
	private String name;
	private String sex;
	private String hobby;

	public User() {
        super();
    }

	public User(String name, String sex, String hobby) {
        super();
        this.name = name;
        this.sex = sex;
        this.hobby = hobby;
    }

	public String getName() {
        return name;
    }
    public void setName(String name) {
        this.name = name;
    }
    public String getSex() {
        return sex;
    }
    public void setSex(String sex) {
        this.sex = sex;
    }
    public String getHobby() {
        return hobby;
    }
    public void setHobby(String hobby) {
        this.hobby = hobby;
    }
}
5.添加视图文件,在resources文件夹的templates文件夹下创建.html文件
User.html内容如下:
		Java测试


				姓名
				性别
				爱好
6.配置项目信息
application.properties内容如下:
server.servlet.context-path=/
server.port=${port:8888}
server.tomcat.uri-encoding=UTF-8
spring.thymeleaf.cache=false
spring.thymeleaf.prefix=classpath:/templates/
spring.thymeleaf.suffix=.html
如果是application.yml文件,内容如下:
server:
  port: 8888
  tomcat:
    uri-encoding: UTF-8
  servlet:
    context-path: /

spring:
  thymeleaf:
    prefix: classpath:/templates/
    suffix: .html
    cache: false
7.启动项目, 右键项目->Run As->Spring Boot App,没有报错就表示正常run起来了
访问网页http://localhost:8888/user即可正确浏览到页面