pytorch中的grid_sample()
torch.nn.functional.grid_sample
首先我们看pytorch文档中给出的描述:
torch.nn.functional.grid_sample(input, grid, mode=‘bilinear’, padding_mode=‘zeros’, align_corners=None)
Given an input and a flow-field grid, computes the output using input values and pixel locations from grid.

input是输入,也就是说input根据grid的映射得到输出。
如果输入是4D的,常见形式是图像,每个像素点有两个坐标,输出的维度为Hout和Wout,我们要得到输出图像中某一坐标处的值,就要知道该点对应的input中的坐标。

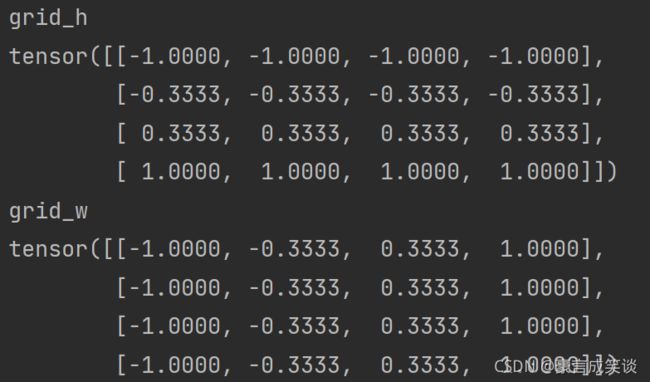
如图所示,是在使用双线性差值的情况下,将4×4大小的矩阵映射到3×3大小。注意grid_w为[… , 0],grid_h为[… , 1]。
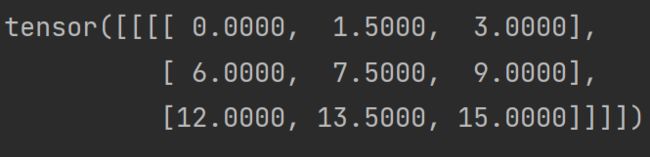
inp = torch.arange(0, 16)
inp = inp.reshape((1, 1, 4, 4)).float()
print(inp)
out_h = 3
out_w = 3
new_h = torch.linspace(-1, 1, out_h).view(-1, 1).repeat(1, out_w)
new_w = torch.linspace(-1, 1, out_w).repeat(out_h, 1)
print(new_h)
print(new_w)
grid = torch.cat((new_w.unsqueeze(2), new_h.unsqueeze(2)), dim=2)
grid = grid.unsqueeze(0)
outp = F.grid_sample(inp, grid=grid, mode='bilinear')
print(outp)
tensor.repeat():重复某一维度,1表示不重复,如果参数的个数超过了tensor的维度,那么将会对tensor从dim=0开始添加维度,直到与参数维度相同。
相同的,我们可以得到输入为5D的情况,这是我们需要3个坐标来确定输出在输入中的位置,因此grid最后一个维度为3。

差值方法,如果mode=‘bilinear’,输入是4D时使用双线性差值,输入为5D时使用三线性差值。
![]()
默认填充为0填充,在上述例子中,如果我们使用padding_mode=‘border’,输出为:

默认为False,如果设置为True,-1和1将会被放到输入的角像素的中心,如下图所示。

输出为:
这时如果将输出H,W设置为4,将会得到和输入相同的输出:

这其中还有一个重要的问题,我们将grid的值归一化到[-1,1]是为了方便计算,但是我们访问元素时仍然需要整数的索引,所以我们怎么将grid中的坐标转换到input中的坐标呢?
input_x = (grid_x+1)/2)×(Hinput-1)
input_y = (grid_y+1)/2)×(Winput-1)
如:在输出H,W设置为4,align_corners=True的情况下,我们得到grid_h和grid_w如图所示,我们取x,y=1,0, grid_x=-0.3333,(grid_w中(1,0)位置的值)grid_y=-1,计算得到input_x=1,input_y=0,即输出中(1,0)位置的值也就是输入(1,0)位置的值。
warp变换
def warping(disp, ind_source, ind_target, img_source, an, device, orientation='forward'):
    """
    warping one source image/map to the target
    disp:disparity_map,two adjacent views 1 x h x w
    ind_source:source view location , tensor type
    ind_target:
    img_source:
    an:view array size,9
    orientation:forward,backward
    """
    N, h, w = img_source.shape
    ind_target = ind_target.to(device)
    ind_source = ind_source.to(device)
    disp = disp.to(device)
    ind_source = ind_source.type_as(disp)
    ind_target = ind_target.type_as(disp)

    ind_h_source = torch.floor(ind_source / an)
    ind_w_source = ind_source % an

    ind_h_target = torch.floor(ind_target / an)
    ind_w_target = ind_target % an

    # generate grid
    XX = torch.arange(0, w).view(1, 1, w).expand(N, h, w).type_as(img_source)  # [N,h,w]
    XX = XX.to(device)
    YY = torch.arange(0, h).view(1, h, 1).expand(N, h, w).type_as(img_source)
    YY = YY.to(device)

    if orientation == 'backward':
        grid_w = XX + disp * (ind_w_target - ind_w_source)
        grid_h = YY + disp * (ind_h_target - ind_h_source)
    elif orientation == 'forward':
        grid_w = XX + disp * (ind_w_source - ind_w_target)
        grid_h = YY + disp * (ind_h_source - ind_h_target)
    else:
        print('parameter orientation,s value is wrong')

    grid_w_norm = 2.0 * grid_w / (w - 1) - 1.0
    grid_h_norm = 2.0 * grid_h / (h - 1) - 1.0

    grid = torch.stack((grid_w_norm, grid_h_norm), dim=3)  # [N,h,w,2]

    # inverse warp
    img_source = torch.unsqueeze(img_source, 0)
    img_target = functional.grid_sample(img_source, grid)  # [N,1,h,w]
    img_target = torch.squeeze(img_target, 1)  # [N,h,w]
    return img_target
如果是正向warp,如已知view3的视差,将view3 warp到view4,view3视差为正的情况下应该向右平移,gridw应该加上一个负值,所以应该是视差乘上一个(3-4),如果是反向warp,即已知的是view4的视差,如果view4的视差为正值,则warp到view3,需要向左移动,加上一个正值(4-3)。