Pytorch《GAN模型生成MNIST数字》
这里的代码都是,参考网上其他的博文学习的,今天是我第一次学习GAN,心情难免有些激动,想着赶快跑一个生成MNIST数字图像的来瞅瞅效果,看看GAN的神奇。
参考博文是如下三个:
https://www.jb51.net/article/178171.htm
https://blog.csdn.net/happyday_d/article/details/84961175
https://blog.csdn.net/weixin_41278720/article/details/80861284
代码不是原创,只是学习和看明白了。能让我们很直观看到GAN是如何训练的,以及产生的效果。
一:实例一
导入必要的包,以及定义一些图像处理的函数,比如展示图像的函数,加载MNIST数据集,并且将数据集转变成成128批量大小的批次,这个加载数据集和转换批次的操作是之前我做其他BP,CNN网络练习的时候见到过的,再次强调一下:MNIST数据加再进来后默认就是[1, 28, 28]的维度,需要变成784维度向量的话得后续自己view函数处理。
import torch
from torch import nn
from torch.autograd import Variable

import torchvision.transforms as tfs
from torch.utils.data import DataLoader, sampler
from torchvision.datasets import MNIST

import numpy as np

import matplotlib.pyplot as plt
import matplotlib.gridspec as gridspec

plt.rcParams['figure.figsize'] = (10.0, 8.0)  # 设置画图的尺寸
plt.rcParams['image.interpolation'] = 'nearest'
plt.rcParams['image.cmap'] = 'gray'


def show_images(images):  # 定义画图工具
    images = np.reshape(images, [images.shape[0], -1])
    sqrtn = int(np.ceil(np.sqrt(images.shape[0])))
    sqrtimg = int(np.ceil(np.sqrt(images.shape[1])))

    fig = plt.figure(figsize=(sqrtn, sqrtn))
    gs = gridspec.GridSpec(sqrtn, sqrtn)
    gs.update(wspace=0.05, hspace=0.05)

    for i, img in enumerate(images):
        ax = plt.subplot(gs[i])
        plt.axis('off')
        ax.set_xticklabels([])
        ax.set_yticklabels([])
        ax.set_aspect('equal')
        plt.imshow(img.reshape([sqrtimg, sqrtimg]))
    return

def preprocess_img(x):
    x = tfs.ToTensor()(x)
    return (x - 0.5) / 0.5

def deprocess_img(x):
    return (x + 1.0) / 2.0


NUM_TRAIN = 60000

NOISE_DIM = 100
batch_size = 128

train_set = MNIST('./data', train=True, transform=preprocess_img)
train_data = DataLoader(train_set, batch_size=batch_size, shuffle=True)

imgs = deprocess_img(train_data.__iter__().next()[0].view(batch_size, 784)).numpy().squeeze()  # 可视化图片效果
# 这里可以先看到128 batch_size 的一部分图片
print(imgs.shape)
show_images(imgs)
定义判别网络,这一步其实就是构造一个数字识别网络,只不过略微有些区别,这里不是识别具体的数字,而是识别是不是真实的图片,输出只有两个(0或者1),1代表是真实的图片,0代表的是构造的虚假图片。输出其实是个概率值。
# 判别网络
class discriminator(torch.nn.Module):
    def __init__(self, noise_dim=NOISE_DIM):
        # 调用父类的初始化函数,必须要的
        super(discriminator, self).__init__()
        self.net = nn.Sequential(
            nn.Linear(784, 256),
            nn.LeakyReLU(0.2),
            nn.Linear(256, 256),
            nn.LeakyReLU(0.2),
            nn.Linear(256, 1)
        )

    def forward(self, img):
        img = self.net(img)
        return img
构造生成网络。看似是跟判别网络很类似,其实这里的结构可以任意自行变换,输入是一个100维度的向量,向量值都是随机产生的随机数。最后生了一个784维度的图像数据,这个理的数据将会别送到判别网络中去做判别。
# 生成网络
class generator(torch.nn.Module):
    def __init__(self, noise_dim=NOISE_DIM):
        # 调用父类的初始化函数,必须要的
        super(generator, self).__init__()
        self.net = nn.Sequential(
            nn.Linear(noise_dim, 256),
            nn.ReLU(True),
            nn.Linear(256, 256),
            nn.ReLU(True),
            nn.Linear(256, 784),
            nn.Tanh()
        )

    def forward(self, img):
        img = self.net(img)
        return img
定义损失函数和优化器,这里优化器采用了Adam优化器,损失函数采用了二分类的交叉熵损失函数
# 二分类的交叉熵损失函数
bce_loss = nn.BCEWithLogitsLoss()

# 使用 adam 来进行训练,学习率是 3e-4, beta1 是 0.5, beta2 是 0.999
def get_optimizer(net):
    optimizer = torch.optim.Adam(net.parameters(), lr=3e-4, betas=(0.5, 0.999))
    return optimizer
定义两个函数,分别计算判别网络和生成网络的代价估算,对于判别网络来说,希望真实的图片预测都是输出1,期望标签是1,对于假的图片希望都是模型输出0,期望标签是0。
而对于生成网络来说,希望模型输出是1,因此期望标签是1。
def discriminator_loss(logits_real, logits_fake):  # 判别器的 loss
    size = logits_real.shape[0]
    true_labels = Variable(torch.ones(size, 1)).float()
    size = logits_fake.shape[0]
    false_labels = Variable(torch.zeros(size, 1)).float()
    loss = bce_loss(logits_real, true_labels) + bce_loss(logits_fake, false_labels)
    return loss


def generator_loss(logits_fake):  # 生成器的 loss
    size = logits_fake.shape[0]
    true_labels = Variable(torch.ones(size, 1)).float()
    loss = bce_loss(logits_fake, true_labels)
    return loss
定义训练流程函数
def train_a_gan(D_net, G_net, D_optimizer, G_optimizer, discriminator_loss, generator_loss, show_every=250,
                noise_size=NOISE_DIM, num_epochs=10):
    iter_count = 0
    for epoch in range(num_epochs):
        for x, _ in train_data:
            bs = x.shape[0]
            # 判别网络
            real_data = Variable(x).view(bs, -1)  # 真实数据
            logits_real = D_net(real_data)  # 判别网络得分

            sample_noise = (torch.rand(bs, noise_size) - 0.5) / 0.5  # -1 ~ 1 的均匀分布
            g_fake_seed = Variable(sample_noise)
            fake_images = G_net(g_fake_seed)  # 生成的假的数据
            logits_fake = D_net(fake_images)  # 判别网络得分

            d_total_error = discriminator_loss(logits_real, logits_fake)  # 判别器的 loss
            D_optimizer.zero_grad()
            d_total_error.backward()
            D_optimizer.step()  # 优化判别网络

            # 生成网络
            g_fake_seed = Variable(sample_noise)
            fake_images = G_net(g_fake_seed)  # 生成的假的数据

            gen_logits_fake = D_net(fake_images)
            g_error = generator_loss(gen_logits_fake)  # 生成网络的 loss
            G_optimizer.zero_grad()
            g_error.backward()
            G_optimizer.step()  # 优化生成网络

            if (iter_count % show_every == 0):
                print('Iter: {}, D: {:.4}, G:{:.4}'.format(iter_count, d_total_error.item(), g_error.item()))
                imgs_numpy = deprocess_img(fake_images.data.cpu().numpy())
                show_images(imgs_numpy[0:16])
                plt.show()
                print()
            iter_count += 1
            print('iter_count: ', iter_count)
开始进行训练
D = discriminator()
G = generator()

D_optim = get_optimizer(D)
G_optim = get_optimizer(G)

train_a_gan(D, G, D_optim, G_optim, discriminator_loss, generator_loss)
代码清晰明了,对于初学者跑出一个GAN很有直观上的印象,以及怎么训练GAN也有很清晰的认识。
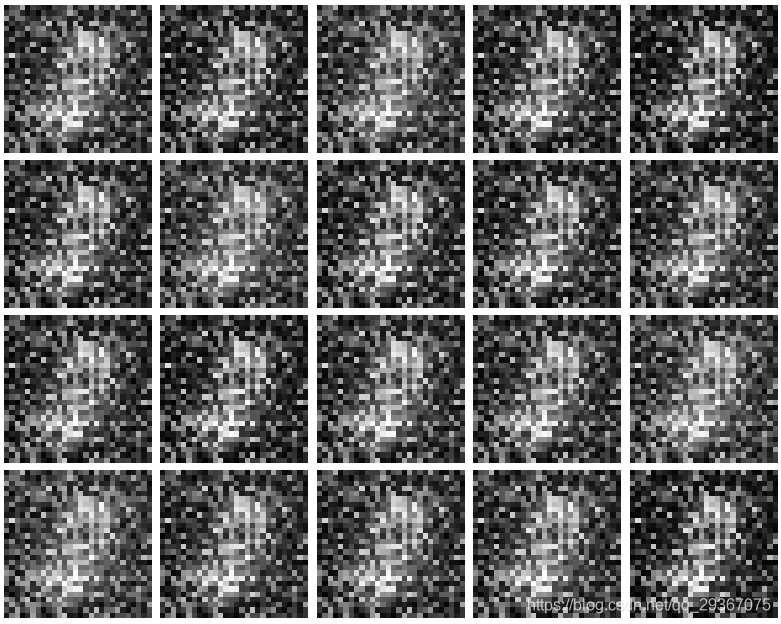
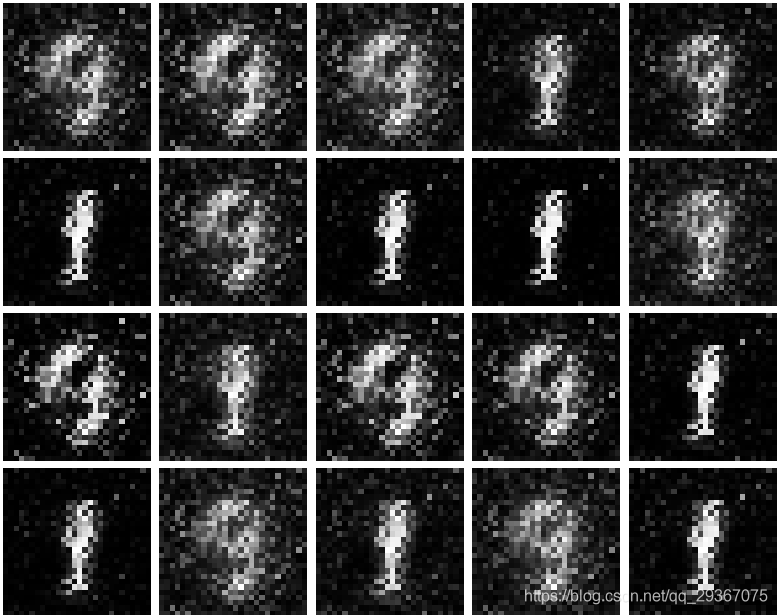
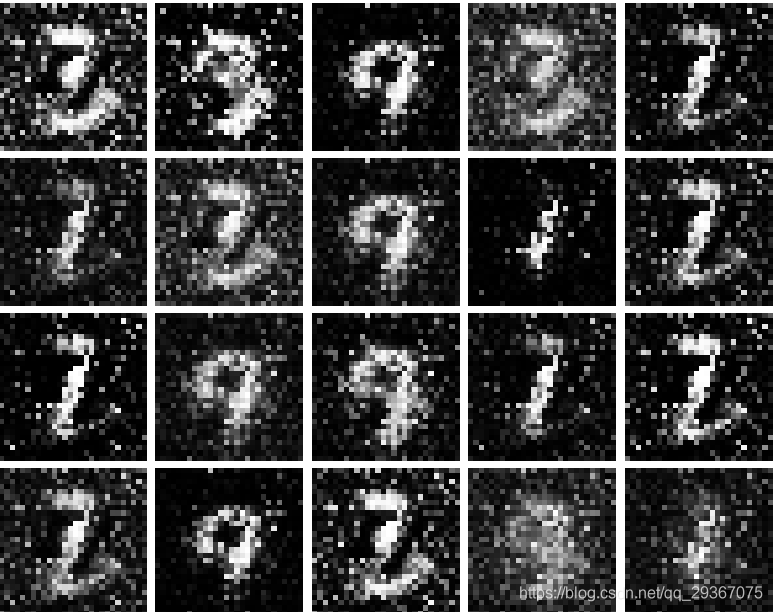
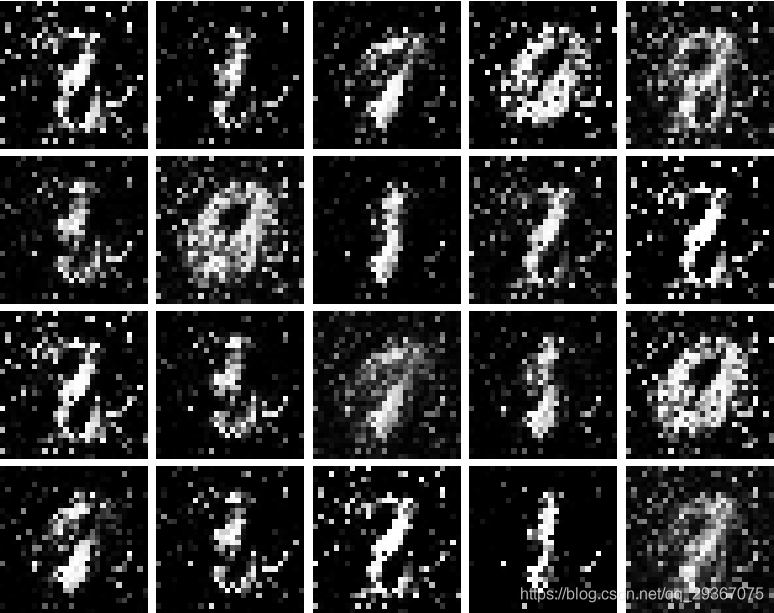
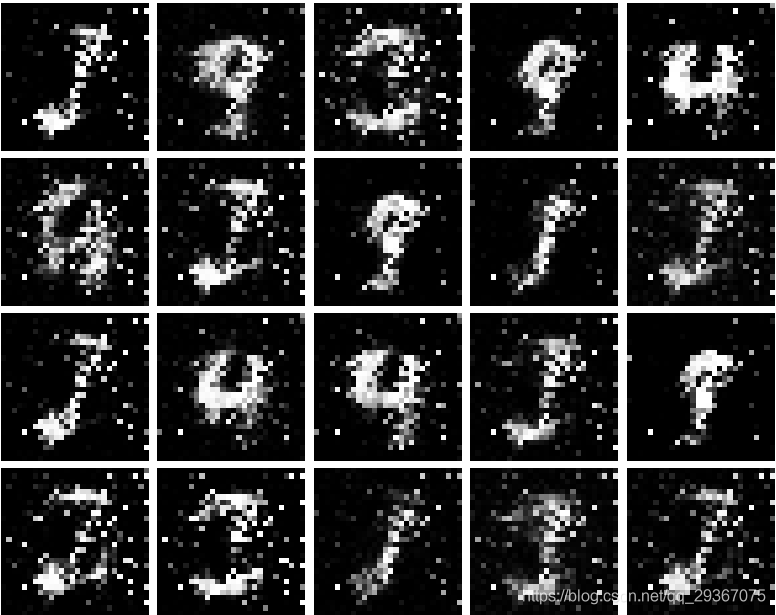
总体趋势是随着迭代次数的增加,图像会变得稍微清晰一点点,数字的轮廓也明显一些。
图像十分不清晰,只能看到大概的样子,但是起码也有了数字的大致轮廓了,如果加上去雾处理的话可能效果会再好一些。
二:实例二
实例一用的是BP全连接网络结构,其他的都不动,我们把判别网络和生成网络的模型改成CNN卷积的模型,如下:
class discriminator(nn.Module):
    def __init__(self):
        super(discriminator, self).__init__()
        self.conv = nn.Sequential(
            nn.Conv2d(1, 32, 5, 1),
            nn.LeakyReLU(0.01),
            nn.MaxPool2d(2, 2),
            nn.Conv2d(32, 64, 5, 1),
            nn.LeakyReLU(0.01),
            nn.MaxPool2d(2, 2)
        )
        self.fc = nn.Sequential(
            nn.Linear(1024, 1024),
            nn.LeakyReLU(0.01),
            nn.Linear(1024, 1)
        )

    def forward(self, x):
        x = self.conv(x)
        x = x.view(x.shape[0], -1)
        x = self.fc(x)
        return x


class generator(nn.Module):
    def __init__(self, noise_dim=NOISE_DIM):
        super(generator, self).__init__()
        self.fc = nn.Sequential(
            nn.Linear(noise_dim, 1024),
            nn.ReLU(True),
            nn.BatchNorm1d(1024),
            nn.Linear(1024, 7 * 7 * 128),
            nn.ReLU(True),
            nn.BatchNorm1d(7 * 7 * 128)
        )

        self.conv = nn.Sequential(
            nn.ConvTranspose2d(128, 64, 4, 2, padding=1),
            nn.ReLU(True),
            nn.BatchNorm2d(64),
            nn.ConvTranspose2d(64, 1, 4, 2, padding=1),
            nn.Tanh()
        )

    def forward(self, x):
        x = self.fc(x)
        x = x.view(x.shape[0], 128, 7, 7)  # reshape 通道是 128,大小是 7x7
        x = self.conv(x)
        return x
效果确实比BP网络的要好多了,生成的图像更加清晰。
来看下效果变化:
总体上看,图像更加清晰,对着迭代次数的增加,图像越清晰。
