P8:卷积层的使用
1、卷积操作:
输入如下:
import torch
import torch.nn.functional as F
input = torch.tensor([[1,2,0,3,1],
                      [0,1,2,3,1],
                      [1,2,1,0,0],
                      [5,2,3,1,1],
                      [2,1,0,1,1]])

kernel = torch.tensor([[1,2,1],
                       [0,1,0],
                       [2,1,0]])

# 要变换尺寸,不能直接输入。因为conv2d的要求。
input = torch.reshape(input, (1,1,5,5)) # batch_size、channel、高、宽
kernel = torch.reshape(kernel, (1,1,3,3))

print(input.shape)
print(kernel.shape)
形状如下:
通过卷积层1:
output = F.conv2d(input, kernel, stride=1)
print(output)
结果如下:
通过卷积层2:
output2 = F.conv2d(input, kernel, stride=2)
print(output2)
结果如下:
通过卷积层3:
output3 = F.conv2d(input, kernel, stride=1, padding=1)
print(output3)
结果如下:
2、自定义卷积层【实例】:
1、准备数据集:
import torch
import torchvision
from torch import nn
from torch.nn import Conv2d
from torch.utils.data import DataLoader
from torch.utils.tensorboard import SummaryWriter

dataset = torchvision.datasets.CIFAR10('dataset', train=False, transform=torchvision.transforms.ToTensor(), download=True)

dataloader = DataLoader(dataset, batch_size=64)
2、定义神经网络:
class Tudui(nn.Module):
    def __init__(self):
        super(Tudui, self).__init__()
        self.conv1 = Conv2d(in_channels=3, out_channels=6, kernel_size=3, stride=1, padding=0)

    def forward(self, x):
        x = self.conv1(x)
        return x
3、调用神经网络:
tudui = Tudui()
print(tudui)
输出网络信息如下:
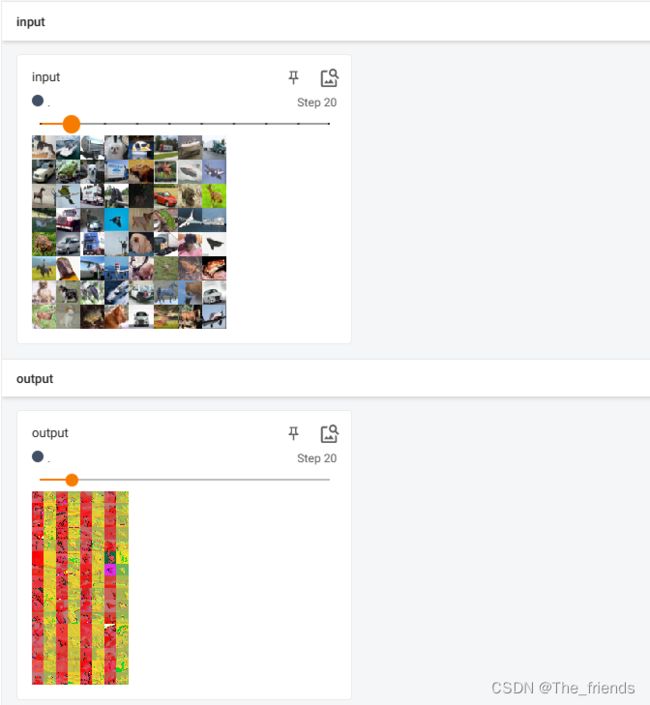
4、扫一遍数据,并用tensorboard显示:
writer = SummaryWriter('logs')

step = 0
for data in dataloader:
    imgs, targets = data
    output = tudui(imgs)
    print(imgs.shape)
    print(output.shape)
    # torch.Size([64, 3, 32, 32])
    writer.add_images('input', imgs, step)
    # torch.Size([64, 6, 30, 30])  --- [xxx,3,30,30]   ; 6个channel没办法显示

    output = torch.reshape(output, (-1,3,30,30))
    writer.add_images('output', output, step)

    step += 1

writer.close()
结果如下:


