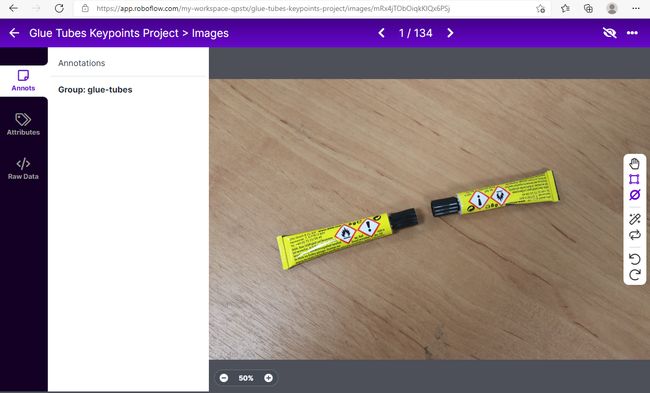
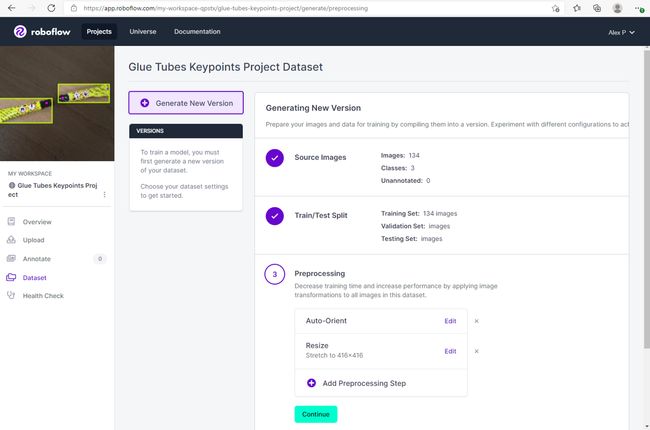
如何使用 Roboflow 标注关键点
Roboflow 是一款易于使用的在线图像标注软件。当我需要标注数据集以进行对象检测时,我总是使用它。
对图像进行对象检测标注是指在图像上绘制和标注对象周围的边界框。
但是,当涉及到关键点的标注时,Roboflow 会显示以下消息:
目前,我们只支持对象检测(边界框)和单类分类项目。我们根据用户需求进行优先排序。您可以通过添加投票记录您的支持并请求此功能。
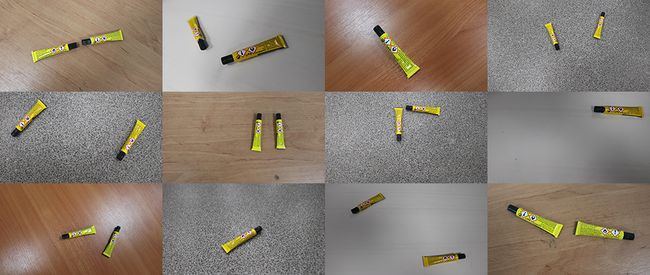
最近,我需要使用胶管对图像数据集进行关键点标注,以训练自定义关键点 RCNN。
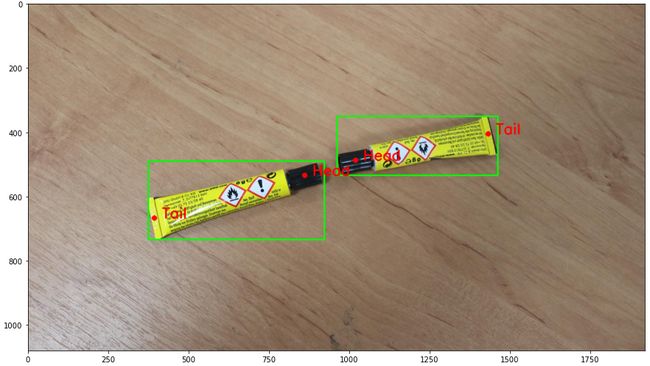
- 边界框坐标(每个胶管应该有一个边界框,用
[x1, y1, x2, y2]格式即左上角和右下角点描述); - 关键点的坐标和可见性(每个胶管应该有 2 个关键点
即头部和尾部以[x, y, visibility]格式描述)。
下面是标注后可视化的结果:
但我找不到在线工具来标注关键点。所以我想出了一个想法,如何通过使用可用的 Roboflow 功能和自定义 python 脚本来做到这一点。
下面是该过程的分步描述。
1.标注关键点和边界框
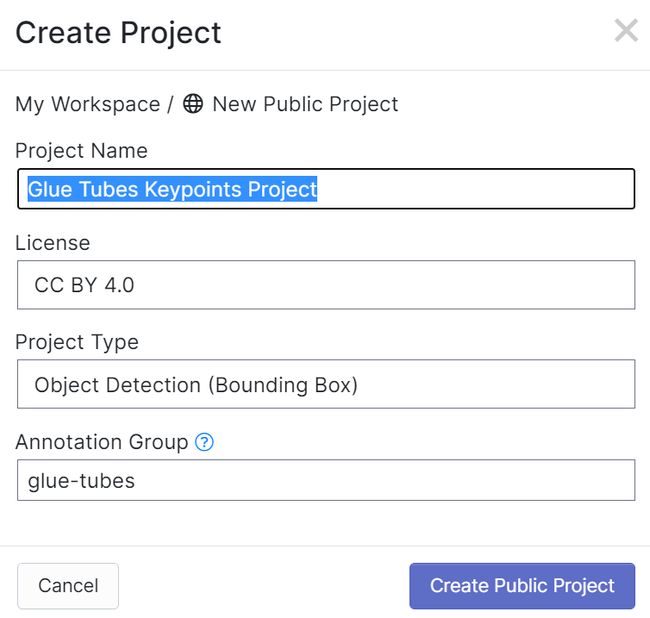
- 1)在
https://roboflow.com注册一个免费帐户,然后登录并单击Create New Project:
-
4.3)在左边的胶管周围画一个矩形并为其设置类名
Tube,按Enter:
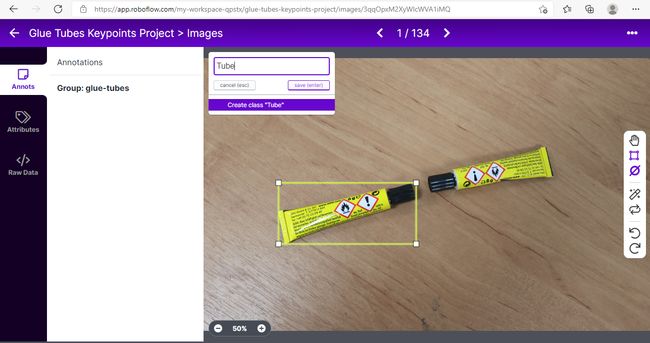
您将看到新类Tube出现在左侧的注释栏中:

在右胶管周围画一个矩形。现在你有两个边界框:

-
4.4)在左胶管盖的中心画一个小矩形。这个矩形的中心将是胶管的第一个关键点。为它设置类名
Head,按Enter:
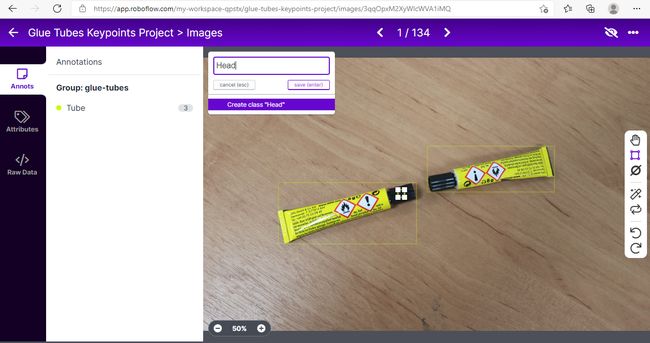
你会看到一个新的类Head出现在左边的注释栏中:

对右边的胶管盖做同样的事情。现在你有两个与头部关键点相关的矩形:

-
4.5)在左胶管尾部的中心画一个小矩形。这个矩形的中心将是胶管的第二个关键点。为其设置类名
Tail,按Enter:
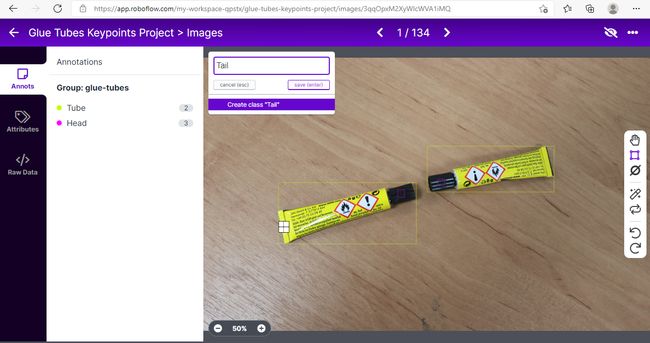
您会看到左侧的注释列中出现了一个新类Tail:

对右边的胶管做同样的事情。现在您有两个与尾部关键点相关的矩形:

-
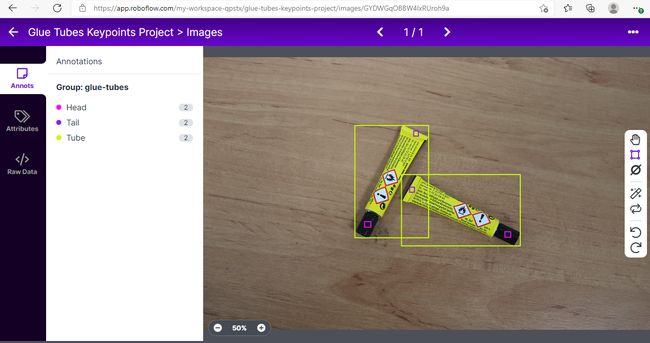
4.6)重要的!要将与关键点相关的矩形转换为关键点,您需要使用我将在本文后面提供的自定义 python 脚本。仅当对象(在我们的例子中为胶管)的边界框仅包含与该特定对象相关的那些关键点时,此脚本才能正常工作。
例如,在下图中,左胶管的边界框不仅包含其自身的头尾关键点,还包含右胶管的尾部关键点。你应该避免这样的重叠:
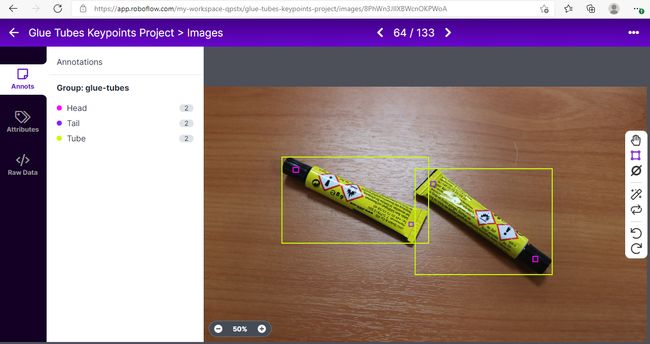
在下图中,边界框部分重叠,但可以通过这样一种方式来绘制关键点,即每个包围框只包含与其胶管相关的头部和尾部关键点:
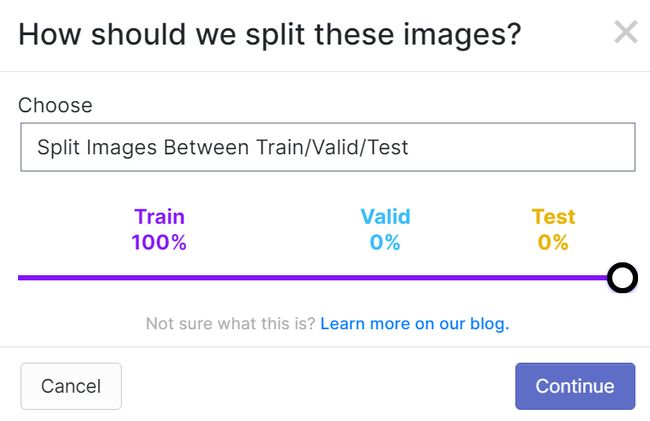
-
5.2)默认情况下,会添加
Auto-Orient和Resize等预处理步骤。删除那些。此外,不要在下一步添加任何增强。
点击Generate按钮:
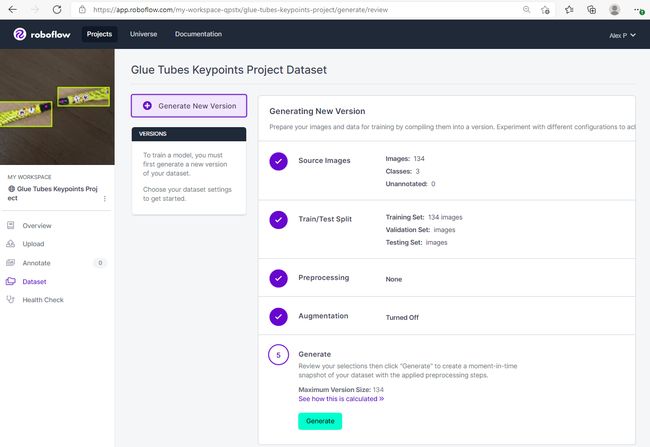
-
5.4)在导出选项中选择
YOLO v5 PyTorch格式和download zip to computer,然后单击Continue:

-
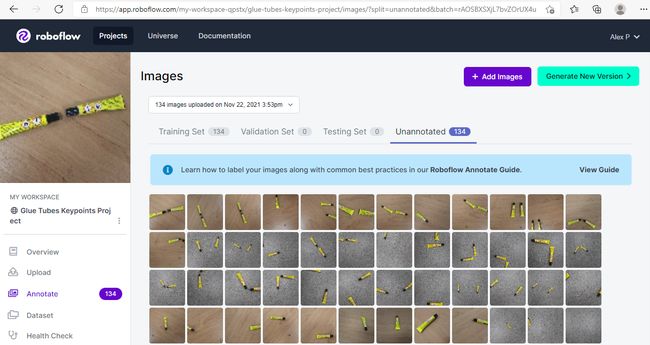
5.5)这次您不必在 Roboflow 中自己用胶管标注整个数据,我已经为您完成了!只需从此处下载并解压缩文件。
2.使用 python 脚本转换标注文件
在下载的文档中,您将看到文件 data.yaml 以及文件夹 train/images 和 train/labels。
文件 data.yaml 包含以下类名列表:['Tube'、'Head'、'Tail']。
train/images 文件夹中的每个图像在 train/labels 文件夹中都有一个对应的同名 txt 文件。
train/labels 文件夹中的 txt 文件具有以下结构(这里是一个示例):
2 0.7460938 0.3745370 0.0015625 0.0027778
0 0.6315104 0.4097222 0.2598958 0.1712963
1 0.5307292 0.4509259 0.0020833 0.0037037
1 0.4484375 0.4944444 0.0020833 0.0037037
0 0.3372396 0.5666667 0.2859375 0.2268519
2 0.2044271 0.6171296 0.0026042 0.0046296
txt 文件中的每一行对应于某个矩形,由五个数字组成。第一个数字是列表 ['Tube', 'Head', 'Tail'] 中矩形类的索引。其他四个数字是 x_center y_center width height 格式的矩形的归一化坐标。
例如,如果您需要将 x 坐标从归一化格式转换为绝对格式,则应将归一化 x 坐标乘以图像的宽度(以像素为单位)。
要获取关键点及其坐标,您需要转换这些行。如果第一个数字为0,则矩形坐标应转换为[x_top_left,y_top_left,x_bottom_right,y_bottom_right]格式的胶管边界框的绝对坐标。如果第一个数字是 1 或 2,则矩形应转换为 [x, y, visibility] 格式的关键点(头部或尾部)的绝对坐标。
- 2.1) 在 Jupyter Notebook 中创建一个新笔记本。首先,您需要导入必要的模块:
import json
import os
import cv2
import matplotlib.pyplot as plt
- 2.2) 让我们看看
/train/images文件夹中的第一张图片:
file_image_example = '/path/to/dataset/train/images/IMG_4801_JPG_jpg.rf.004c63fe3ea1692644120c6040d32108.jpg'

img = cv2.imread(file_image_example)
img = cv2.cvtColor(img, cv2.COLOR_BGR2RGB)

plt.figure(figsize=(15,15))
plt.imshow(img)
- 2.3) 现在让我们看看
/train/labels文件夹中第一个 txt 文件的内容:
file_labels_example = '/path/to/dataset/train/labels/IMG_4801_JPG_jpg.rf.004c63fe3ea1692644120c6040d32108.txt'

with open(file_labels_example) as f:
    lines_txt = f.readlines()
    lines = []
    for line in lines_txt:
        lines.append([int(line.split()[0])] + [round(float(el), 7) for el in line.split()[1:]])

for idx, line in enumerate(lines):
    print("Rectangle {}:".format(idx+1), line)
您将看到以下输出:
Rectangle 1: [2, 0.7460938, 0.374537, 0.0015625, 0.0027778]
Rectangle 2: [0, 0.6315104, 0.4097222, 0.2598958, 0.1712963]
Rectangle 3: [1, 0.5307292, 0.4509259, 0.0020833, 0.0037037]
Rectangle 4: [1, 0.4484375, 0.4944444, 0.0020833, 0.0037037]
Rectangle 5: [0, 0.3372396, 0.5666667, 0.2859375, 0.2268519]
Rectangle 6: [2, 0.2044271, 0.6171296, 0.0026042, 0.0046296]
这里第 2 和第 5 个矩形与边界框相关,第 3 和第 4 个矩形与头部关键点相关,第 1 和第 6 个矩形与尾部关键点相关。现在您需要在与关键点相关的矩形和与边界框相关的矩形之间找到匹配项。
- 2.4) 这是一个匹配关键点和边界框的函数,并将注释从 Roboflow 格式转换为 KeypointRCNN 模型所需的格式:
keypoint_names = ['Head', 'Tail']

# Dictionary to convert rectangles classes into keypoint classes because keypoint classes should start with 0
rectangles2keypoints = {1:0, 2:1}

def converter(file_labels, file_image, keypoint_names):

    img = cv2.imread(file_image)
    img_w, img_h = img.shape[1], img.shape[0]

    with open(file_labels) as f:
        lines_txt = f.readlines()
        lines = []
        for line in lines_txt:
            lines.append([int(line.split()[0])] + [round(float(el), 5) for el in line.split()[1:]])

    bboxes = []
    keypoints = []

    # In this loop we convert normalized coordinates to absolute coordinates
    for line in lines:
        # Number 0 is a class of rectangles related to bounding boxes.
        if line[0] == 0:
            x_c, y_c, w, h = round(line[1] * img_w), round(line[2] * img_h), round(line[3] * img_w), round(line[4] * img_h)
            bboxes.append([round(x_c - w/2), round(y_c - h/2), round(x_c + w/2), round(y_c + h/2)])

        # Other numbers are the classes of rectangles related to keypoints.
        # After convertion, numbers of keypoint classes should start with 0, so we apply rectangles2keypoints dictionary to achieve that.
        # In our case:
        # 1 is rectangle for head keypoint, which is 0, so we convert 1 to 0;
        # 2 is rectangle for tail keypoint, which is 1, so we convert 2 to 1.
        if line[0] != 0:
            kp_id, x_c, y_c = rectangles2keypoints[line[0]], round(line[1] * img_w), round(line[2] * img_h)
            keypoints.append([kp_id, x_c, y_c])

    # In this loop we are iterating over each keypoint and looking to which bounding box it matches.
    # Thus, we are matching keypoints and corresponding bounding boxes.
    keypoints_sorted = [[[] for _ in keypoint_names] for _ in bboxes]
    for kp in keypoints:
        kp_id, kp_x, kp_y = kp[0], kp[1], kp[2]
        for bbox_idx, bbox in enumerate(bboxes):
            x1, y1, x2, y2 = bbox[0], bbox[1], bbox[2], bbox[3]
            if x1 < kp_x < x2 and y1 < kp_y < y2:
                keypoints_sorted[bbox_idx][kp_id] = [kp_x, kp_y, 1] # All keypoints are visible

    return bboxes, keypoints_sorted
- 2.5) 让我们看看这个函数是如何工作的:
bboxes, keypoints_sorted = converter(file_labels_example, file_image_example, keypoint_names)

print("Bboxes:", bboxes)
print("Keypoints:", keypoints_sorted)
您将看到以下输出:
Bboxes: [[962, 350, 1462, 534], [374, 490, 922, 734]]
Keypoints: [[[1019, 487, 1], [1432, 405, 1]], [[861, 534, 1], [393, 667, 1]]]
在这里可以看到坐标为[[1019, 487, 1], [1432, 405, 1]]的关键点与坐标为[962, 350, 1462, 534]的边界框相关,坐标为[[861, 534, 1], [393, 667, 1]] 的关键点与坐标为 [374, 490, 922, 734] 的边界框相关。 这里的每个关键点的可见性都等于 1。
- 2.6) 让我们可视化图像上的边界框和关键点:
for bbox_idx, bbox in enumerate(bboxes):
    top_left_corner, bottom_right_corner = tuple([bbox[0], bbox[1]]), tuple([bbox[2], bbox[3]])
    img = cv2.rectangle(img, top_left_corner, bottom_right_corner, (0,255,0), 3)

    for kp_idx, kp in enumerate(keypoints_sorted[bbox_idx]):
        center = tuple([kp[0], kp[1]])
        img = cv2.circle(img, center, 5, (255,0,0), 5)
        img = cv2.putText(img, " " + keypoint_names[kp_idx], center, cv2.FONT_HERSHEY_SIMPLEX, 1.5, (255,0,0), 4)

plt.figure(figsize=(15,15))
plt.imshow(img)
- 2.7) 让我们定义一个将标注保存到 json 文件中的函数:
def dump2json(bboxes, keypoints_sorted, file_json):
    annotations = {}
    annotations['bboxes'], annotations['keypoints'] = bboxes, keypoints_sorted
    with open(file_json, "w") as f:
        json.dump(annotations, f)
函数 dump2json() 将通过以下方式为上面示例中的图像保存注释:
{"bboxes": [[962, 350, 1462, 534], [374, 490, 922, 734]], "keypoints": [[[1019, 487, 1], [1432, 404, 1]], [[861, 534, 1], [392, 666, 1]]]}
- 2.8) 创建
/train/annotations文件夹。 - 2.9) 运行将标签转换为注释并将它们保存到
/train/annotations文件夹的最后一个代码块:
IMAGES = '/path/to/dataset/train/images'
LABELS = '/path/to/dataset/train/labels'
ANNOTATIONS = '/path/to/dataset/train/annotations'

files_names = [file.split('.jpg')[0] for file in os.listdir(IMAGES)]

for file in files_names:
    file_labels = os.path.join(LABELS, file + ".txt")
    file_image = os.path.join(IMAGES, file + ".jpg")
    bboxes, keypoints_sorted = converter(file_labels, file_image, keypoint_names)
    dump2json(bboxes, keypoints_sorted, os.path.join(ANNOTATIONS, file + '.json'))
转换标注后,您需要手动拆分数据集为训练/测试集。
现在,带有标注关键点的胶管图像数据集已准备就绪。您也可以从这里下载。
这是一个 GitHub 存储库和一个包含上述所有步骤的笔记本。
更新: 您可能感兴趣阅读这边文章:如何使用 PyTorch 训练自定义关键点检测模型
参考目录
https://medium.com/@alexppppp/how-to-annotate-keypoints-using-roboflow-9bc2aa8915cd
