将MATLAB的figure窗体嵌入到C#窗体应用的(panel)中
本文主要讲解将MATLAB绘制的figure窗体嵌入到C#winform窗体的panel控件中。
在网上找了相关的资料后,发现网上大部分的处理方法是创建新线程和跨线程的方式,复不复杂我就不说了,而且我用网上的方法后,还出现了不少的奇葩bug。
首先,为了程序的美观和易读性,我们将MATLAB的figure嵌入C#这个功能封装成一个我们自定义的类,这样的好处是当有多个C#窗体需要嵌入figure时,不需要再重写代码,直接调用即可。
MATLAB部分
步骤一:
编写一个简单的绘图程序。

步骤二:
封装成dll,这里就不展开讲了,具体步骤看我另一篇博客,链接放下面了https://blog.csdn.net/yty2545340913/article/details/123127784?spm=1001.2014.3001.5501

记住这个文件,一会儿要用

C#部分
步骤一:
新建一个C#窗体应用。这就不用我教了吧,哈哈哈。
步骤二:
修改目标平台为x64,一定要记得改呀兄弟们,这个错误我踩了好几次坑了,每次都不记得改。

步骤三:
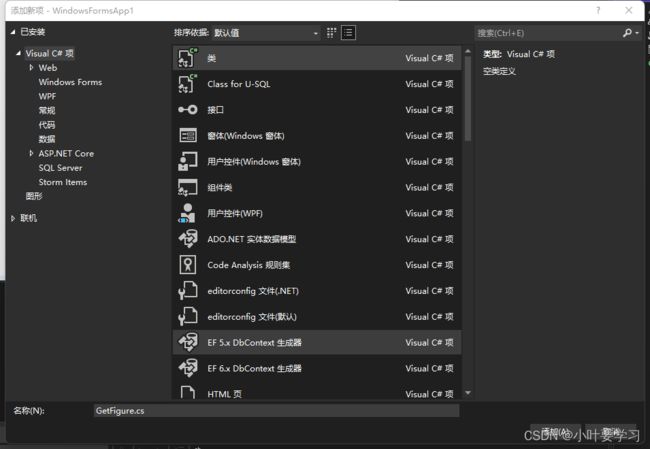
新建一个.cs文件,命名为“GetFigure.cs”。
步骤四:
引入Windows的API,这一部分主要是引入对窗体处理的函数,抄就行了,他是个dll,我也不知道咋实现的。不要忘了using
using System;
using System.Collections.Generic;
using System.Linq;
using System.Text;
using System.Threading.Tasks;

using System.Runtime.InteropServices; // 对Windows窗体进行的操作
using System.Windows.Forms; // 对C#窗体进行的操作
using System.Threading; // 这个不说了,线程的问题了

namespace WindowsFormsApp1
{
    internal class GetFigure
    {
        #region 引入WindowsAPI
        //FindWindow用来查找窗体。
        [DllImport("user32.dll")]
        public static extern IntPtr FindWindow(string strclassName, string strWindowText);

        //SetParent用来设置窗体的父窗体。
        [DllImport("user32.dll")]
        public static extern int SetParent(IntPtr hWndChild, IntPtr hWndNewParent);

        //MoveWindow用来改变窗体大小。
        [DllImport("user32.dll")]
        public static extern int MoveWindow(IntPtr hWnd, int x, int y, int nWidth, int nHeight, bool BRePaint);

        //DestroyWindow用来关闭并窗体。
        [DllImport("user32.dll")]
        public static extern bool DestroyWindow(IntPtr hWnd);

        private const int GWL_STYLE = (-16);
        public const int WS_CAPTION = 0xC00000;

        //GetWindowLong 获取index
        [DllImport("USER32.DLL")]
        public static extern int GetWindowLong(IntPtr hWnd, int nIndex);

        //SetWindowLong 隐藏标题栏
        [DllImport("user32.dll")]
        public static extern int SetWindowLong(IntPtr hWnd, int nIndex, int dwNewLong);

        #endregion 引入dll


        ///
        /// 将指定的figure放入指定的控件(Control)中
        ///
        /// 想要嵌入的figure的名称
        /// 想要嵌入到哪个控件中
        public static void getFifure(string windowName, Control control)
        {
            IntPtr hWnd = new IntPtr(0); // 定义一个图像句柄
            hWnd = FindWindow(null, windowName); // 寻找有没有这个图窗
            //判断这个窗体是否有效
            if (hWnd != IntPtr.Zero)
            {
                //MessageBox.Show("找到窗口"); // 调试的时候可以观察有没有成功
                // 设置窗体的父窗体
                SetParent(hWnd, control.Handle);
                control.Tag = hWnd;
                // 隐藏标题栏
                SetWindowLong(hWnd, GWL_STYLE, GetWindowLong(hWnd, GWL_STYLE) & ~WS_CAPTION);
                // 改变窗体大小
                MoveWindow(hWnd, 0, 0, control.ClientSize.Width, control.ClientSize.Height, true);
                // 这个地方我也是结合网上查找的资料,应该是刷新的功能吧,你们也可以去掉试试
                Thread.Sleep(200);
                MoveWindow(hWnd, 0, 0, control.ClientSize.Width, control.ClientSize.Height, true);
            }

        }
    }
}
步骤五:
在Form1窗体上拖动一些控件,还有个timer定时器别忘了
步骤六:
添加引用,就是刚才保存的“test.dll”文件,由于没有数据传输,所以就不需要添加MWArray.dll。个人建议是将test.dll复制到C#项目文件下的bin\Debug文件夹里,方便管理和打包。具体步骤都在我上面那一篇博客里。

步骤七:
下面就是写代码了,讲一下大致思路。
窗体生成前的命令:设置定时器的周期并开启定时器
定时器执行的命令:寻找是否有figure窗体,并将窗体嵌入到指定控件
按钮执行的命令:调用dll,执行绘图命令,生成figure窗体
using System;
using System.Collections.Generic;
using System.ComponentModel;
using System.Data;
using System.Drawing;
using System.Linq;
using System.Text;
using System.Threading.Tasks;
using System.Windows.Forms;

namespace WindowsFormsApp1
{
    public partial class Form1 : Form
    {
        ///
        /// 实例化dll
        ///
        test.Class1 tst1 = new test.Class1();

        ///
        /// 定义要查找的figure窗体的名称
        ///
        string winName = "figure 1";

        ///
        /// Form1的构造函数,这个是自带的
        ///
        public Form1()
        {
            InitializeComponent();
        }

        ///
        /// 窗体生成前要执行的命令
        ///
        ///
        ///
        private void Form1_Load(object sender, EventArgs e)
        {
            // 设置定时器的运行周期
            timer1.Interval = 400;
            // 开启定时器
            timer1.Start();
        }

        ///
        /// 定时器执行的命令
        ///
        ///
        ///
        private void timer1_Tick(object sender, EventArgs e)
        {
            // 调用了我们刚才创建的类中的getFigure方法
            // 要查找的figure图窗的名字为winName
            // 图窗要嵌入到的对象是panel1
            GetFigure.getFifure(winName, panel1);
        }

        ///
        /// "干就完了"按钮点击后执行的命令
        ///
        ///
        ///
        private void button1_Click(object sender, EventArgs e)
        {
            // 调用dll,执行绘图的命令
            tst1.test();
        }

    }
}
结果展示

几个注意点:
1. 目标平台一定要改为x64
2. 可能会出现figure在空间中显示不全,解决方法
(1)C#窗体默认打开方式为最大化,即WindowState属性设置为Maximized
(2)调整timer1的执行周期和线程休眠的时间,这块地方我也不是很懂