使用Visual Studio Code 运行ROS
Visual Studio Code 运行ROS
-
- 学习目标:
- 操作步骤:
-
- Visual Studio Code下载
- Visual Studio Code安装与卸载
-
- 安装
-
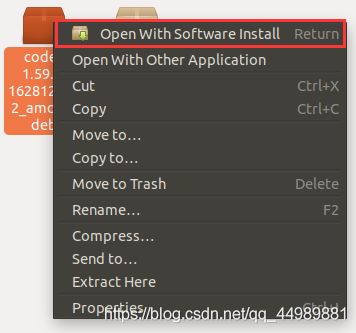
- 方式1:双击安装即可(或右击选择安装)
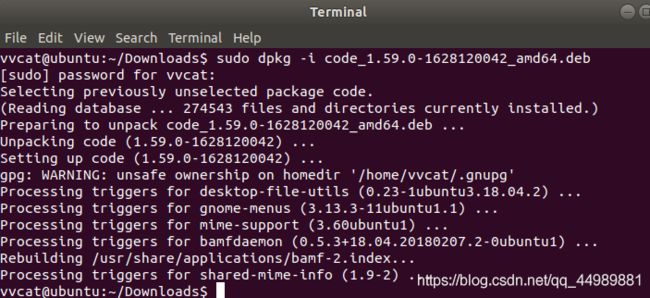
- 方式2:sudo dpkg -i xxxx.deb
- 卸载
- 集成 ROS 插件
- 使用步骤
-
-
- 创建 ROS 工作空间
- 启动 vscode打开工作空间
- 使用vscode 编译 ros
- 创建 ROS 功能包
-
- C++ 实现
- python 实现
- 配置 CMakeLists.txt
-
- C++ 配置格式:
- Python 配置格式:
- 执行ROS功能包
-
- 使用C++在控制台输出 Hello ROS !!!
- 使用Python在控制台输出 你好 Python
- 添加launch文件启动ROS节点
- 踩坑
- 总结
-
学习目标:
Visual Studio Code 运行ROS
环境:
- ubuntu:18.04.5 LTS
- VMware:15.5.0
- Visual Studio Code:1.59.0
- ROS:melodic
- Python:3.6.9
- gcc:7.5.0
Visual Studio Code下载:https://code.visualstudio.com/docs?start=true
Visual Studio Code 历史版本下载链接: https://code.visualstudio.com/updates
操作步骤:
ROS中的程序即使使用不同的编程语言,实现流程大致如下:
- 创建工作空间
- 编译工作空间
- 创建ROS功能包
- 进入ROS包的src目录编辑源文件
- 编辑功能包下的Cmakelist.txt文件
- 进入工作空间目录并编译(ROS版本为melodic,Python无需编译)
- 配置环境变量
- 启动ROS Master 和 执行编写的源文件
Visual Studio Code下载
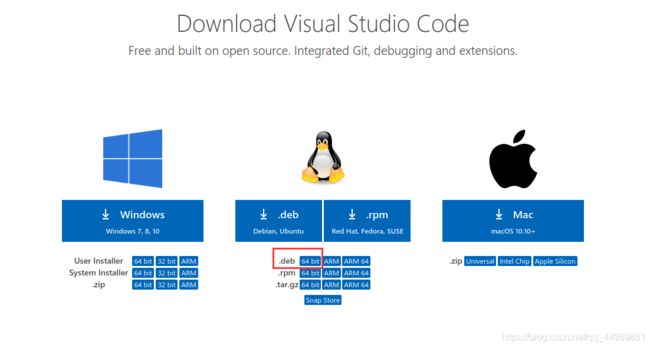
进入Visual Studio Code官方找到 Download 的点击进行下载。
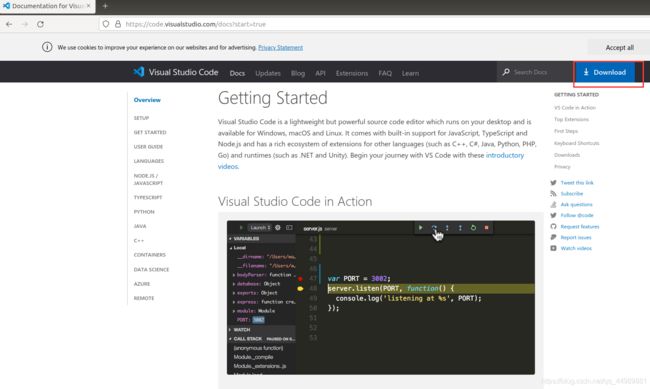
由于使用的操作系统格式ubuntu,选择 .deb 64bit 进行下载。
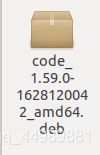
以下是下载完以后在电脑本地的安装包。
Visual Studio Code安装与卸载
安装
方式1:双击安装即可(或右击选择安装)
方式2:sudo dpkg -i xxxx.deb
sudo dpkg -i code_1.59.0-1628120042_amd64.deb
把Visual Studio Code添加到收藏夹
Show Applications → 搜索 Visual Studio Code → 右击选择 Add to Favorites

以下为启动 Visual Studio Code,看到的界面。

卸载
使用以下指令卸载 Visual Studio Code
sudo dpkg --purge code
集成 ROS 插件
使用 VScode 开发 ROS 程序,需要先安装一些插件,常用插件如下:
- Python
- C/C++
- CMake Tools
- ROS
打开插件插件库,安装第三方插件。
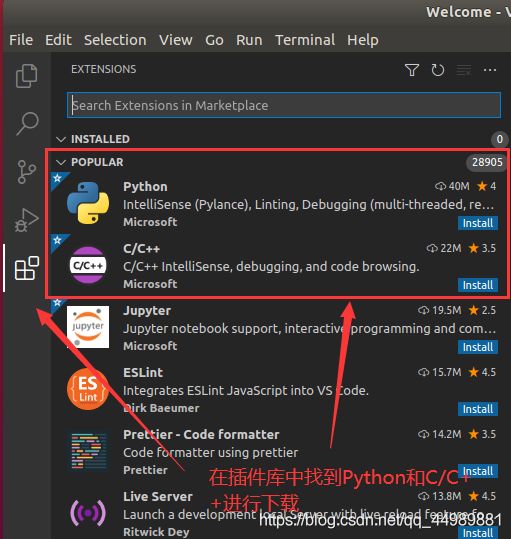
通过搜索框搜索 CMake Tools和ROS插件。


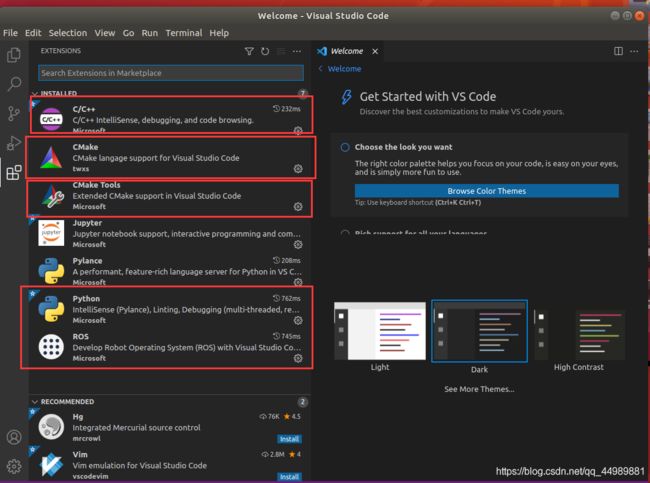
安装完成后,加载的插件有以下几个,就算安装成功了。
使用步骤
4.vscode 使用_基本配置
创建 ROS 工作空间
格式:
mkdir -p xxx_ws/src(必须得有 src)
例如:
mkdir -p day02_ws/src
创建成功后,会在Home目录下生成 day02_ws 工作空间
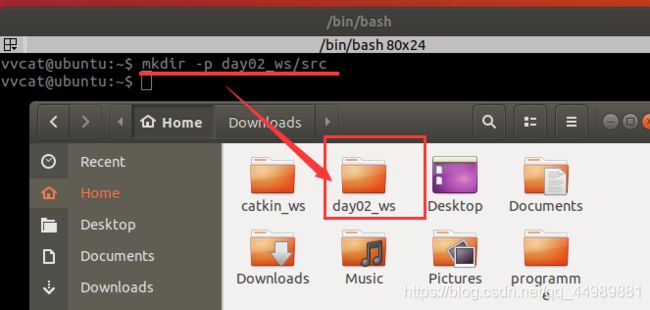
进入刚创建的工作空间
cd ~/day02_ws
编译工作空间
catkin_make
启动 vscode打开工作空间
cd ~/day02_ws
创建完工作空间后,要使用vscode打开工作空间,使用以下命令。
code .
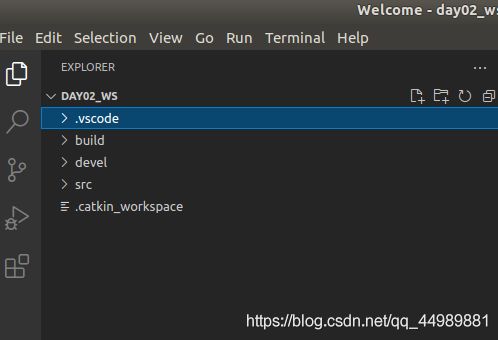
在 vscode 中可以看到,工作空间下有以下文件
- .vscode
- build:编译空间
- devel:开发空间
- src:代码空间
- .catkin_workspace
使用vscode 编译 ros
在vscode中设置快捷键编译的方法如下:
先使用快捷键 ctrl + shift + B 调用编译选项配置
选择: catkin_make:build
可以点击配置设置为默认,修改 .vscode/tasks.json 文件
以下为vscode添加的默认配置。
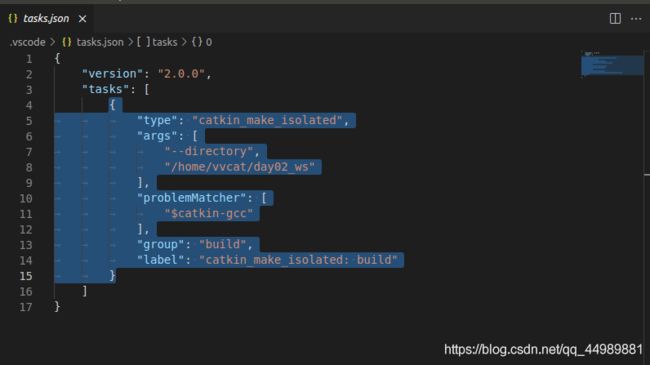
如果需要设置快捷键编译,把 .vscode/tasks.json 文件的内容全部替换为以下内容:
{
// 有关 tasks.json 格式的文档,请参见
    // https://go.microsoft.com/fwlink/?LinkId=733558
    "version": "2.0.0",
    "tasks": [
        {
            "label": "catkin_make:debug", //代表提示的描述性信息
            "type": "shell",  //可以选择shell或者process,如果是shell代码是在shell里面运行一个命令,如果是process代表作为一个进程来运行
            "command": "catkin_make",//这个是我们需要运行的命令
            "args": [],//如果需要在命令后面加一些后缀,可以写在这里,比如-DCATKIN_WHITELIST_PACKAGES=“pac1;pac2”
            "group": {"kind":"build","isDefault":true},
            "presentation": {
                "reveal": "always"//可选always或者silence,代表是否输出信息
            },
            "problemMatcher": "$msCompile"
        }
    ]
}
创建 ROS 功能包
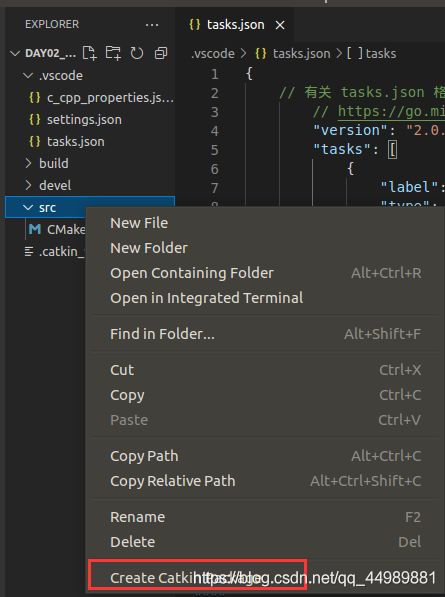
选定 src 右击 —> create catkin package
hello_world_c
添加依赖
roscpp rospy std_msgs

依赖添加成功后,会自动生成 hello_world_c 功能包所需要的相关文件。
注意:使用快捷键 ctrl + shift + B 调用编译,可以验证加入的依赖是否正确。

C++ 实现
在功能包的 src 下新建 cpp 文件
以下为hello_ros_c.cpp文件内容
/*
    控制台输出 Hello ROS !!!
*/
#include "ros/ros.h"

int main(int argc, char *argv[])
{
    setlocale(LC_ALL,""); // 防止输出日志乱码
    //执行节点初始化
    ros::init(argc,argv,"HelloVSCode");

    //输出日志
    ROS_INFO("Hello ROS !!!");
    return 0;
}
注:: main 函数的参数不可以被 const 修饰
python 实现
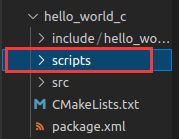
在 功能包 下新建 scripts 文件夹,添加 python 文件,并添加可执行权限
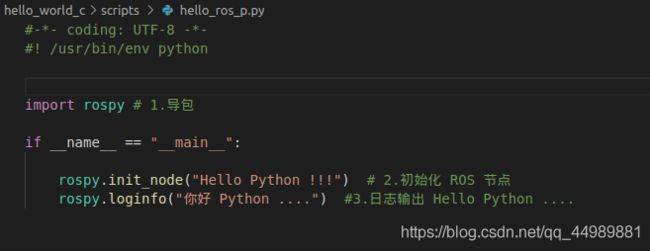
以下为hello_ros_p.py文件内容
#-*- coding: UTF-8 -*-
#! /usr/bin/env python
##指定解释器

# 1.导包
import rospy

#2.编写主入口
if __name__ == "__main__":
	# 3.初始化 ROS 节点
    rospy.init_node("hello_world")
    # 4.输出日志
    rospy.loginfo("你好 Python ....")
选择Open in Integrated Terminal (在集成终端中打开)。
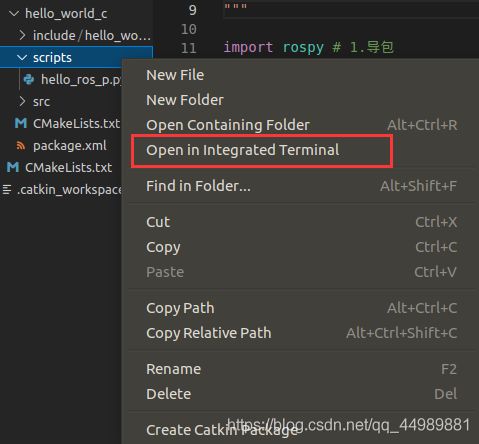
给所有的Python文件加上可执行权限
chmod +x *.py
通过以下命令查看Python文件的权限
ls -l
配置 CMakeLists.txt
C++ 配置格式:
add_executable(节点名称
  src/C++源文件名.cpp
)
target_link_libraries(节点名称
  ${catkin_LIBRARIES}
)
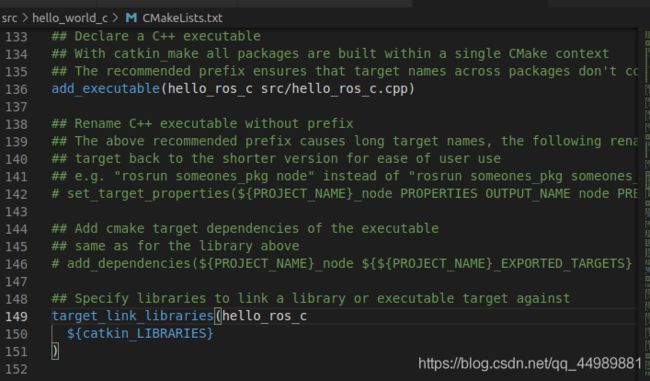
配置如下:
add_executable(hello_ros_c
  src/hello_ros_c.cpp
)
target_link_libraries(hello_ros_c
  ${catkin_LIBRARIES}
)
Python 配置格式:
Python 配置:
catkin_install_python(PROGRAMS scripts/自定义文件名.py
  DESTINATION ${CATKIN_PACKAGE_BIN_DESTINATION}
)
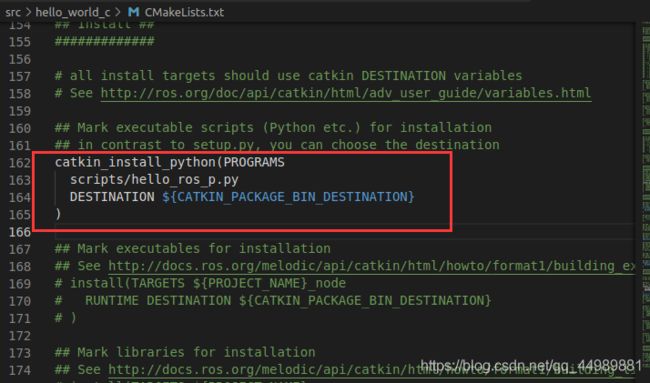
配置如下:
catkin_install_python(PROGRAMS
  scripts/hello_ros_p.py
  DESTINATION ${CATKIN_PACKAGE_BIN_DESTINATION}
)
配置完成后,使用快捷键 ctrl + shift + B 编译
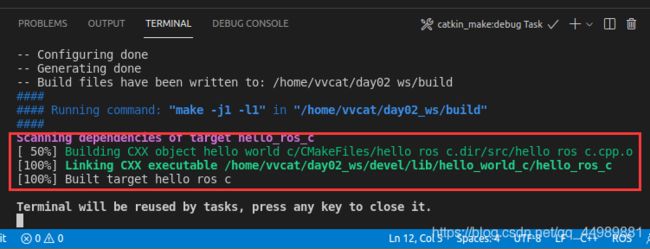
执行ROS功能包
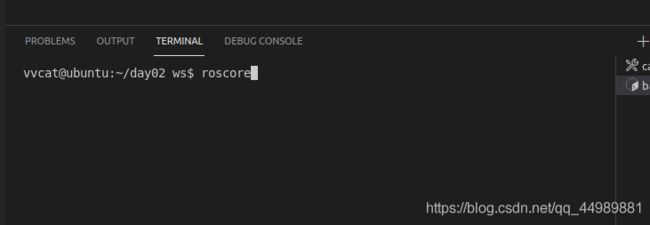
打开vscode自带的终端启动编写好的ros项目,可以在vscode中打开多个终端,执行以下命令。
roscore
source ./devel/setup.bash
使用C++在控制台输出 Hello ROS !!!
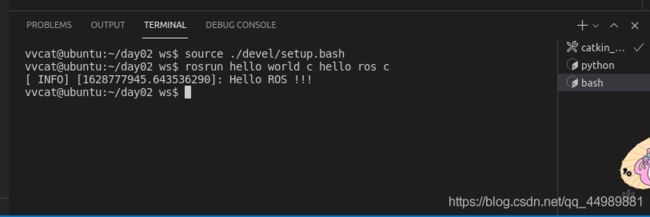
rosrun hello_world_c hello_ros_c
使用Python在控制台输出 你好 Python
rosrun hello_world_c hello_ros_p.py
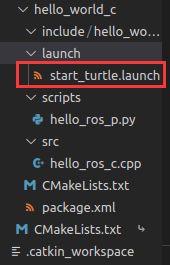
添加launch文件启动ROS节点
<launch>
    <node pkg="hello_world_c" type="hello_ros_c" name="hello" output="screen" />
    <node pkg="hello_world_c" type="hello_ros_c" name="hello" output="screen" />
launch>
设置环境变量
source ~/工作空间名/devel/setup.bash
使用以下命令启动launch文件
roslaunch hello_world_c start_turtle.launch
roslaunch 功能包名 自定义launch文件名.launch
launch文件的使用:https://blog.csdn.net/qq_44989881/article/details/118607995
踩坑
注意1.:当使用C++编写的ROS__INFO 终端输出有中文时,会出现乱码
INFO: ???
解决办法:在函数开头加入下面代码的任意一句
setlocale(LC_CTYPE, "zh_CN.utf8");
setlocale(LC_ALL, "");

当使用Python编写的loginfo终端输出有中文时,会出现以下错误
SyntaxError: Non-ASCII character ‘\xe7’ in file /home/vvcat/day02_ws/src/hello_world_c/scripts /hello_ros_p.py on line 4, but no encoding declared; see http://python.org/dev/peps/pep-0263/ for details
解决办法:在Python文件的开头加上以下代码
#-*- coding: UTF-8 -*-
注意2.:如果在编写c++代码没有代码提示
需要修改 .vscode/c_cpp_properties.json 文件。
我的.vscode/c_cpp_properties.json文件如下
{
  "configurations": [
    {
      "browse": {
        "databaseFilename": "",
        "limitSymbolsToIncludedHeaders": true
      },
      "includePath": [
        "/home/vvcat/catkin_ws/devel/include/**",
        "/opt/ros/melodic/include/**",
        "/home/vvcat/catkin_ws/src/test_pkg/include/**",
        "/usr/include/**"
      ],
      "name": "ROS",
    }
  ],
  "version": 4
}
在 “name”: “ROS”,后面添加了
 "intelliSenseMode": "gcc-x64",
 "compilerPath": "/usr/bin/gcc",
 "cStandard": "gnu17",
 "cppStandard": "c++17"
添加后成功解决代码提示问题。
注:除了 “name”: “ROS” 后面添加几条内容,其它地方无需修改。
修改完后的.vscode/c_cpp_properties.json文件如下:
{
  "configurations": [
    {
      "browse": {
        "databaseFilename": "",
        "limitSymbolsToIncludedHeaders": true
      },
      "includePath": [
        "/home/vvcat/catkin_ws/devel/include/**",
        "/opt/ros/melodic/include/**",
        "/home/vvcat/catkin_ws/src/test_pkg/include/**",
        "/usr/include/**"
      ],
      "name": "ROS",
      "intelliSenseMode": "gcc-x64",
      "compilerPath": "/usr/bin/gcc",
      "cStandard": "gnu17",
      "cppStandard": "c++17"
    }
  ],
  "version": 4
}
注意3.:
如果抛出异常: /usr/bin/env: “python”: 没有那个文件或目录
解决1:Linux中在代码的第一行解释器声明,可以使用绝对路径定位到 python3 的安装路径
#! /usr/bin/python3
或
# !/usr/bin/python
解决2: 创建一个链接符号到 python 命令:
sudo ln -s /usr/bin/python3 /usr/bin/python
解决3:
在 CMakeLists.txt 文件下 添加以下内容
catkin_install_python(PROGRAMS
  scripts/自定义文件名.py
  DESTINATION ${CATKIN_PACKAGE_BIN_DESTINATION}
)
总结
编译: ctrl + shift + B
执行: 和之前一致,只是可以在 VScode 中添加终端,首先执行:
source ./devel/setup.bash
使用其它开发工具集成ROS插件:http://wiki.ros.org/IDEs
