windows+tensorflow2+python3环境配置faster-rcnn详解
windows+tensorflow2+python3环境配置faster-rcnn详解
- Github下载代码
-
- 下载Git源码与数据
- 解压相应数据至对应目录
- 调试代码
-
- 'tensorflow' has no attribute 'app'
- No module 'tensorflow.contrib'
- 'tensorflow_core.compat.v1' has no attribute 'contrib'
- 'NoneType' is not iterable
tf2改版后有了较大的改动,以前很多的经典算法都建立在tf1的版本上,需要做相应的修改才能在tf2上运行。本文详细记录了在win+tf2+python3环境下配置faster-rcnn的过程以及遇到的问题。本机具体版本为win10、python3.6,tf2.1.0.
Github下载代码
下载Git源码与数据
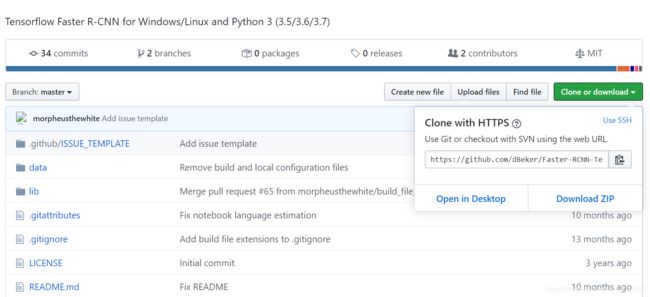
首先在Github搜索适用于win+tf的源码,本文下载源码链接: https://github.com/dBeker/Faster-RCNN-TensorFlow-Python3.

Download ZIP下载源码至自己的目录,然后根据readme.md文件中的内容要求依次执行相应的操作
1.通过运行以下命令安装需要的关联库
pip install -r requirements.txt
requirements.txt中包含的关联库如下:

为了在tf2中运行faster-rcnn还需要安装tf-slim关联库,用于替换tf.contrib.slim(后面会用到)
但经过测试直接用pip install安装的tf-slim在使用中仍旧会报错,需要在https://github.com/google-research/tf-slim该地址下载安装包,cd到下载目录下。
python setup.py install
为避免该版本失效,也分享了网盘
链接:https://pan.baidu.com/s/16NIGi5Q6fZHAL5lAdXswyA
提取码:som6
下载所需的安装包。
2.在cmd命令行中cd到./data/coco/PythonAPI执行以下命令(该步骤是安装使用MS COCO数据集的api,可以在以后使用MS coco数据集时使用,如果已经安装过不想添加到python site-package的话可以运行第一行命令即可)
python setup.py build_ext --inplace
python setup.py build_ext install
![]()
![]()
执行完成后会生成一些新的文件。

3.cd到 ./lib/utils目录执行以下命令
python setup.py build_ext --inplace
同样执行完成后会生成新的文件夹

4.根据该链接中的提示下载Pascal VOC2007数据,

复制以下内容在迅雷中下载即可
http://host.robots.ox.ac.uk/pascal/VOC/voc2007/VOCtrainval_06-Nov-2007.tar
http://host.robots.ox.ac.uk/pascal/VOC/voc2007/VOCtest_06-Nov-2007.tar
http://host.robots.ox.ac.uk/pascal/VOC/voc2007/VOCdevkit_08-Jun-2007.tar
5.下载VGG16预训练模型http://download.tensorflow.org/models/vgg_16_2016_08_28.tar.gz
现在已经下载好了所需的东西,接下来解压放置到需要的目录即可
解压相应数据至对应目录
1.解压VOC2007数据集,将以下文件夹放入同一目录下解压

后生成VOCdevit文件夹,文件名修改为VOCdecvit2007(因为在代码中使用该目录),然后移动该文件夹到data文件夹下:

2.解压VGG16压缩包vgg_16_2016_08_28.tar.gz得到vgg_16.ckpt文件,修改名字为vgg16.ckpt,然后在data文件夹中创建imagenet_weights文件夹,将vgg16.ckpt模型预训练文件放置在该文件夹中。

调试代码
现在需要的代码、关联库以及数据均已经下载完成,开始调试代码,根据readme.md文件中流程,此时只需要运行train.py文件即可,但直觉告诉我们事情不会如此简单。。。。。
我们在spyder中打开train.py运行(自个的笔记本GPU比较差,就在tran.py代码中添加了以下内容只用CPU跑即可,有GPU就不需要添加了)
#only execute in cpu
import os
os.environ["CUDA_DEVICE_ORDER"] = "PCI_BUS_ID"
os.environ["CUDA_VISIBLE_DEVICES"] = "-1"
果然出现了报错,没关系,出现什么问题我们就解决什么,不要慌,这波可以。

‘tensorflow’ has no attribute ‘app’
这个问题很常见,tf2中弃用了app等诸多函数,在train.py、config.py(该文件在./lib/config目录下)、vgg16.py(该文件在./lib/nets目录下)、network.py(该文件在/lib/nets文件夹下)代码最开始添加以下语句以兼容模式运行tf1版本即可(如果还报这样的错误,就在报错定位到的文件中添加该语句)。
import tensorflow.compat.v1 as tf
tf.disable_v2_behavior()
No module ‘tensorflow.contrib’
好的,修改完tf1兼容模式之后,我们再次运行代码,果然,又出现了bug,这次是ModuleNotFoundError: No module named ‘tensorflow.contrib’

这个问题还是老样子,还是tf2不用contrib这玩意了,不过没关系,我们有替换函数,之前下载关联库的时候提到了以下命令安装tf-slim,这时候就派上用场了。
pip install tf-slim
注释掉#import tensorflow.contrib.slim as slim语句,然后以下行语句替换
import tf_slim as slim
修改完后的vgg16.py文件开头是这样式的:

然后继续运行train.py又出现了No module named 'tensorflow.contrib’报错,这次还是同样的问题,只要在network.py文件中用tf-slim替换即可

把以下语句注释掉:
#import tensorflow.contrib.slim as slim
#from tensorflow.contrib.slim import arg_scope
然后替换为
import tf_slim as slim
from tf_slim import arg_scope
‘tensorflow_core.compat.v1’ has no attribute ‘contrib’
继续运行train.py,出现以下错误
  File "E:\_detection\Faster-RCNN-TensorFlow-Python3-master\lib\nets\network.py", line 287, in create_architecture
    weights_regularizer = tf.contrib.layers.l2_regularizer(cfg.FLAGS.weight_decay)

AttributeError: module 'tensorflow_core.compat.v1' has no attribute 'contrib'
因为tf2弃用了tf.contib.layers,该语句是一个l2正则化网络层,用tf-slim的l2_regularizer替换即可,
代码修改方式为将network.py 287行的语句注释掉,修改为
weights_regularizer = slim.l2_regularizer(cfg.FLAGS.weight_decay)
‘NoneType’ is not iterable
继续Train.py,出现以下错误
  File "E:/_detection/Faster-RCNN-TensorFlow-Python3-master/train.py", line 225, in
    train.train()

  File "E:/_detection/Faster-RCNN-TensorFlow-Python3-master/train.py", line 131, in train
    variables_to_restore = self.net.get_variables_to_restore(variables, var_keep_dic)

  File "E:\_detection\Faster-RCNN-TensorFlow-Python3-master\lib\nets\vgg16.py", line 70, in get_variables_to_restore
    if v.name.split(':')[0] in var_keep_dic:

TypeError: argument of type 'NoneType' is not iterable
很多人出现这个错误是因为没有将vgg_16.ckpt文件名修改为vgg16.ckpt,因为代码中使用这个名字,所以无法读入文件。
比较奇怪的是在修改后有时候运行还是会报这个错误。返回去看这个报错
Instructions for updating:
Use the `axis` argument instead
Loading initial model weights from ./data/imagenet_weights/vgg16.ckpt
module 'tensorflow_core.python.pywrap_tensorflow' has no attribute 'NewCheckpointReader'
Traceback (most recent call last):

  File "", line 1, in
    runfile('E:/_detection/Faster-RCNN-TensorFlow-Python3-master/train.py', wdir='E:/_detection/Faster-RCNN-TensorFlow-Python3-master')
可以看到错误出现前程序运行到了读取vgg16模型的地方,出现一句话(有时候我又运行的时候没问题,搞不清为啥)
module 'tensorflow_core.python.pywrap_tensorflow' has no attribute 'NewCheckpointReader'
anyway,出现这个报错的话就是tf2没有这个函数,在tf2
的文档中链接可以看到其实是有替换函数的:

修改方式为注释掉train.py文件12行和181行的语句
#from tensorflow.python import pywrap_tensorflow
#reader =pywrap_tensorflow.NewCheckpointReader(file_name)
分别修改为
from tensorflow.compat.v1.train import NewCheckpointReader
reader=NewCheckpointReader(file_name)
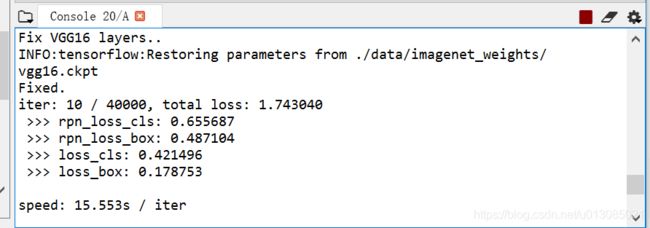
即可解决。这个问题我之前跑了一次没有出现,后面又出现了,不知道原因是什么,以后找到原因了再来更新一下,修改后的结果如图:


继续运行train.py,就可以读入vgg16模型了。
finally,可以顺利训练模型了,至此,就完成了在tf2上运行faster rcnn的全部流程,如果嫌麻烦的童鞋也可以直接在github上下载我修改好的代码https://github.com/huobanlqs/faster-rcnn-win-tf2,其中’NewCheckpointReader’的问题我在提交这个版本的时候没有出现,所以没有修改,大家要是出现这个问题的话,按上述步骤修改即可。


