《GANs实战》学习笔记(四)第四章 深度卷积生成对抗网络(DCGAN)
![]()
第四章 深度卷积生成对抗网络(DCGAN)
生成器和鉴别器都使用卷积神经网络,这种GAN架构称为深度卷积生成对抗网络(DCGAN)。
DCGAN复杂架构在实践中变为可行的关键性突破之一:批归一化(Batch Normalization)。
一、卷积神经网络
1、卷积滤波器
卷积是通过在输入层上滑动一个或多个滤波器(filter)来执行的。每个滤波器都有一个相对较小的感受野(宽乘高),但它贯穿输入图像的全部深度。
2、参数共享
滤波器参数被其所有输入值共享,这具有直观和实用的优点。直观地讲,参数共享能够有效地学习视觉特征和形状(如线条和边缘),无论它们在输入图像中位于何处。(位置无关性。)
二、批归一化
就像对网络输入进行归一化一样,每个小批量训练数据通过网络时,对每个层的输入进行归一化。
1、理解归一化
归一化(Normalization)是数据的缩放,使它具有零均值和单位方差。这是通过取每个数据点x减去平均值![]() ,然后除以标准偏差得到的。
,然后除以标准偏差得到的。
归一化有几个优点:最重要的一点或许是:使得具有巨大尺度差异的特征之间的比较变得更容易。从而使训练过程对特征的尺度不那么敏感。
归一化通过将每个特征值缩放到一个标准化的尺度上解决了这个问题,这样一来每个数据点都不表示为其实际值,而是以一个相对的“分数”表示给定数据点与平均值的标准偏差。
在处理具有多层的深度神经网络时,仅规范化输入可能还远远不够。当输入值经过一层又一层网络时,他们将被每一层中的可训练参数进行缩放。当参数通过反向传播得到调整时,每一层输入的分布在随后的训练中都容易发生变化,从而影响学习过程的稳定性。在学术界,这个问题称为:协变量偏移(covariate shift)。批归一化通过按每个小批量的均值和方差缩放每个小批量中的值来解决该问题。
2、计算批归一化
批归一化的计算方式与之前介绍的简单归一化方程在几个方面有所不同。
令![]() 为小批量B的平均值,
为小批量B的平均值,![]() 为小批量B的方差(均方误差)。归一化值
为小批量B的方差(均方误差)。归一化值![]() 的计算公式
的计算公式
增加![]() 项是为了保持数值稳定性,主要是为了避免被零除,一般设置为一较小的正常数。例如0.001。
项是为了保持数值稳定性,主要是为了避免被零除,一般设置为一较小的正常数。例如0.001。
同时,在批归一化中,不直接使用这些归一化值,而是将它们乘以![]() 并加上
并加上![]() 后,再作为输入传递到下一层。
后,再作为输入传递到下一层。
重要的是:![]() 和
和![]() 是可训练的参数,就像权重和偏置一样在网络训练期间进行调整。这样做有助于将中间的输入值标准化,使其均值在0附近(但非0)。方差也不是1。
是可训练的参数,就像权重和偏置一样在网络训练期间进行调整。这样做有助于将中间的输入值标准化,使其均值在0附近(但非0)。方差也不是1。![]() 和
和![]() 是可训练的,因此网络可以学习哪些值最有效。
是可训练的,因此网络可以学习哪些值最有效。
Keras中的函数Keras.layers.BatchNormalization可以处理所有小批量计算并在后台进行更新。
三、教程:用DCGAN生成手写数字
1、导入依赖包
%matplotlib inline

import matplotlib.pyplot as plt
import numpy as np

from keras.datasets import mnist
from keras.layers import Activation, BatchNormalization, Dense, Dropout, Flatten, Reshape
from keras.layers.advanced_activations import LeakyReLU
from keras.layers.convolutional import Conv2D, Conv2DTranspose
from keras.models import Sequential
from keras.optimizers import Adam
模型输入维度,图像尺寸和噪声向量z的长度。
img_rows = 28
img_cols = 28
channels = 1

# Input image dimensions
img_shape = (img_rows, img_cols, channels)

# Size of the noise vector, used as input to the Generator
z_dim = 100
2、构造生成器
ConvNet传统上用于图像分类任务,图像以尺寸——高度×宽度×颜色通道数作为输入,并通过一系列卷积层输出一个维数维1×n的类别得分向量,n是类别标签数。要使用ConvNet结构生成图像,则是上述过程的逆过程:并非获取图像再将其处理为向量,而是获取向量并调整其大小以使之变为图像。
这一过程的关键是转置卷积(transposed convolution)。我们通常使用卷积减小输入的宽度和高度,同时增加其深度。转置卷积与其相反,用于增加宽度和高度,同时减少深度。
多层转置卷积如上,在卷积层之间应用批归一化来稳定训练过程。
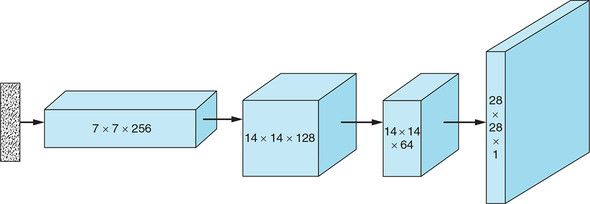
生成器从噪声向量z开始,使用一个全连接层将 向量重塑为具有小的宽×高和大的深度的三维隐藏层。使用转置卷积对输入进行逐步重塑,以使其宽×高增大而深度减小,直到具有想要合成的图像大小28×28×1。
在每个转置卷积层之后,应用批归一化和LeakyReLU激活函数;在最后一层不应用批归一化,并且使用tanh激活函数代替ReLU。
综合所有步骤如下:
(1)取一个随机噪声向量z,通过全连接层将其重塑为7×7×256张量。
(2)使用转置卷积,将7×7×256张量转换为14×14×128张量。
(3)应用批归一化和LeakyReLU激活函数。
(4)使用转置卷积,将14×14×128张量转换为14×14×64张量。注意:宽度和高度尺寸保持不变。可以通过Conv2DTranspose中的stride参数设置为1来实现。
(5)应用批归一化和LeakyReLU激活函数。
(6)使用转置卷积,将14×14×64张量转换为输出图像大小28×28×1。
(7)应用tanh函数。
def build_generator(z_dim):

    model = Sequential()

    # Reshape input into 7x7x256 tensor via a fully connected layer
    model.add(Dense(256 * 7 * 7, input_dim=z_dim))
    model.add(Reshape((7, 7, 256)))

    # Transposed convolution layer, from 7x7x256 into 14x14x128 tensor
    model.add(Conv2DTranspose(128, kernel_size=3, strides=2, padding='same'))

    # Batch normalization
    model.add(BatchNormalization())

    # Leaky ReLU activation
    model.add(LeakyReLU(alpha=0.01))

    # Transposed convolution layer, from 14x14x128 to 14x14x64 tensor
    model.add(Conv2DTranspose(64, kernel_size=3, strides=1, padding='same'))

    # Batch normalization
    model.add(BatchNormalization())

    # Leaky ReLU activation
    model.add(LeakyReLU(alpha=0.01))

    # Transposed convolution layer, from 14x14x64 to 28x28x1 tensor
    model.add(Conv2DTranspose(1, kernel_size=3, strides=2, padding='same'))

    # Output layer with tanh activation
    model.add(Activation('tanh'))

    return model
3、构造鉴别器
鉴别器时一种我们熟悉的ConvNet,接收图像并输出预测向量。
综合所有步骤如下。
(1)使用卷积层将28×28×1的输入图像转换为14×14×32的张量。
(2)应用LeakyReLU激活函数。
(3)使用卷积层将14×14×32的张量转换为7×7×64的张量。
(4)应用批归一化和LeakyReLU激活函数。
(5)使用卷积层将7×7×64的张量转换为3×3×128的张量。
(6)应用批归一化和LeakyReLU激活函数。
(7)使用卷积层将3×3×128的张量转换为3×3×128-1152的向量。(Flatten)
(8)使用全连接层,输入sigmoid激活函数计算输入图像是否真实的概率。
def build_discriminator(img_shape):

    model = Sequential()

    # Convolutional layer, from 28x28x1 into 14x14x32 tensor
    model.add(
        Conv2D(32,
               kernel_size=3,
               strides=2,
               input_shape=img_shape,
               padding='same'))

    # Leaky ReLU activation
    model.add(LeakyReLU(alpha=0.01))

    # Convolutional layer, from 14x14x32 into 7x7x64 tensor
    model.add(
        Conv2D(64,
               kernel_size=3,
               strides=2,
               input_shape=img_shape,
               padding='same'))

    # Batch normalization
    model.add(BatchNormalization())

    # Leaky ReLU activation
    model.add(LeakyReLU(alpha=0.01))

    # Convolutional layer, from 7x7x64 tensor into 3x3x128 tensor
    model.add(
        Conv2D(128,
               kernel_size=3,
               strides=2,
               input_shape=img_shape,
               padding='same'))

    # Batch normalization
    model.add(BatchNormalization())

    # Leaky ReLU activation
    model.add(LeakyReLU(alpha=0.01))

    # Output layer with sigmoid activation
    model.add(Flatten())
    model.add(Dense(1, activation='sigmoid'))

    return model
4、构建并运行DCGAN
构建并编译DCGAN
def build_gan(generator, discriminator):

    model = Sequential()

    # Combined Generator -> Discriminator model
    model.add(generator)
    model.add(discriminator)

    return model
# Build and compile the Discriminator
discriminator = build_discriminator(img_shape)
discriminator.compile(loss='binary_crossentropy',
optimizer=Adam(),
metrics=['accuracy'])
# Build the Generator
generator = build_generator(z_dim)
# Keep Discriminator’s parameters constant for Generator training
discriminator.trainable = False
# Build and compile GAN model with fixed Discriminator to train the Generator
gan = build_gan(generator, discriminator)
gan.compile(loss='binary_crossentropy', optimizer=Adam())训练DCGAN
losses = []
accuracies = []
iteration_checkpoints = []


def train(iterations, batch_size, sample_interval):

    # Load the MNIST dataset
    (X_train, _), (_, _) = mnist.load_data()

    # Rescale [0, 255] grayscale pixel values to [-1, 1]
    X_train = X_train / 127.5 - 1.0
    X_train = np.expand_dims(X_train, axis=3)

    # Labels for real images: all ones
    real = np.ones((batch_size, 1))

    # Labels for fake images: all zeros
    fake = np.zeros((batch_size, 1))

    for iteration in range(iterations):

        # -------------------------
        #  Train the Discriminator
        # -------------------------

        # Get a random batch of real images
        idx = np.random.randint(0, X_train.shape[0], batch_size)
        imgs = X_train[idx]

        # Generate a batch of fake images
        z = np.random.normal(0, 1, (batch_size, 100))
        gen_imgs = generator.predict(z)

        # Train Discriminator
        d_loss_real = discriminator.train_on_batch(imgs, real)
        d_loss_fake = discriminator.train_on_batch(gen_imgs, fake)
        d_loss, accuracy = 0.5 * np.add(d_loss_real, d_loss_fake)

        # ---------------------
        #  Train the Generator
        # ---------------------

        # Generate a batch of fake images
        z = np.random.normal(0, 1, (batch_size, 100))
        gen_imgs = generator.predict(z)

        # Train Generator
        g_loss = gan.train_on_batch(z, real)

        if (iteration + 1) % sample_interval == 0:

            # Save losses and accuracies so they can be plotted after training
            losses.append((d_loss, g_loss))
            accuracies.append(100.0 * accuracy)
            iteration_checkpoints.append(iteration + 1)

            # Output training progress
            print("%d [D loss: %f, acc.: %.2f%%] [G loss: %f]" %
                  (iteration + 1, d_loss, 100.0 * accuracy, g_loss))

            # Output a sample of generated image
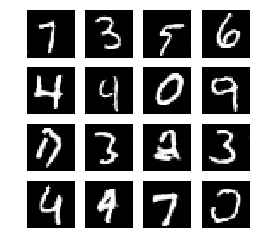
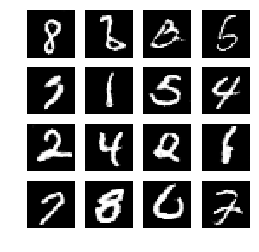
            sample_images(generator)
显示生成图像
def sample_images(generator, image_grid_rows=4, image_grid_columns=4):

    # Sample random noise
    z = np.random.normal(0, 1, (image_grid_rows * image_grid_columns, z_dim))

    # Generate images from random noise
    gen_imgs = generator.predict(z)

    # Rescale image pixel values to [0, 1]
    gen_imgs = 0.5 * gen_imgs + 0.5

    # Set image grid
    fig, axs = plt.subplots(image_grid_rows,
                            image_grid_columns,
                            figsize=(4, 4),
                            sharey=True,
                            sharex=True)

    cnt = 0
    for i in range(image_grid_rows):
        for j in range(image_grid_columns):
            # Output a grid of images
            axs[i, j].imshow(gen_imgs[cnt, :, :, 0], cmap='gray')
            axs[i, j].axis('off')
            cnt += 1
运行模型:
# Set hyperparameters
iterations = 20000
batch_size = 128
sample_interval = 1000

# Train the DCGAN for the specified number of iterations
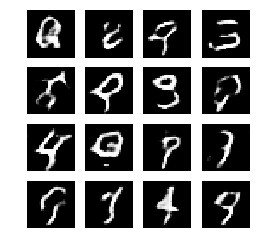
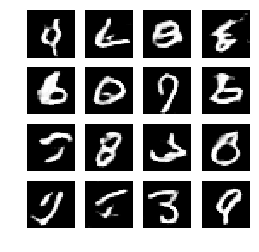
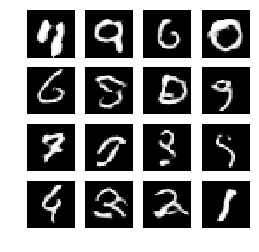
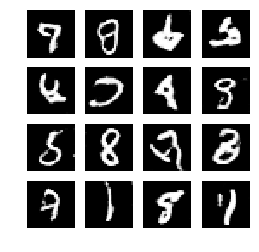
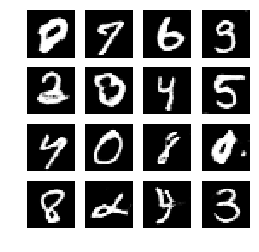
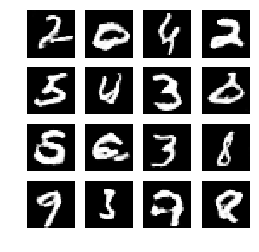
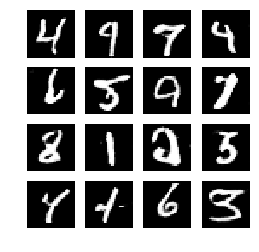
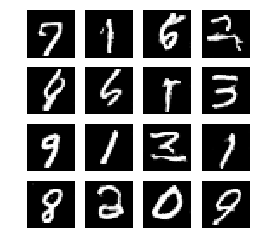
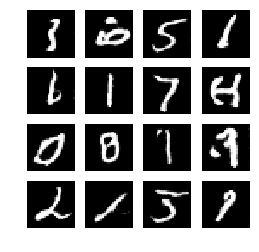
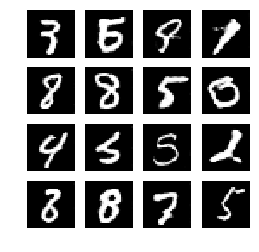
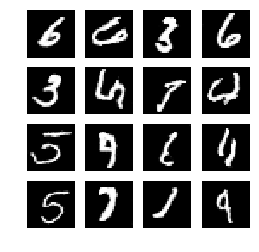
train(iterations, batch_size, sample_interval)
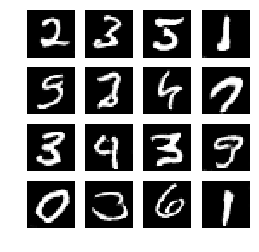
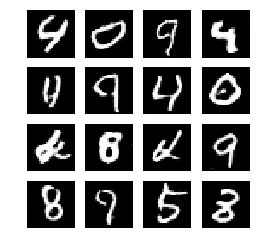
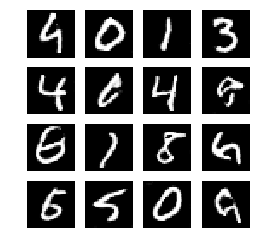
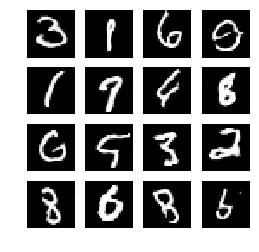
结果:
1000 [D loss: 0.060258, acc.: 99.22%] [G loss: 3.153120]
2000 [D loss: 0.095265, acc.: 97.66%] [G loss: 3.270874]
3000 [D loss: 0.058115, acc.: 100.00%] [G loss: 3.982487]
4000 [D loss: 0.096438, acc.: 96.88%] [G loss: 4.376909]
5000 [D loss: 0.078698, acc.: 98.83%] [G loss: 3.213646]
6000 [D loss: 0.049456, acc.: 99.61%] [G loss: 3.152102]
7000 [D loss: 0.041337, acc.: 100.00%] [G loss: 4.183327]
8000 [D loss: 0.045351, acc.: 99.61%] [G loss: 5.117743]
9000 [D loss: 0.121347, acc.: 95.31%] [G loss: 6.924962]
10000 [D loss: 0.066321, acc.: 99.22%] [G loss: 3.495584]
11000 [D loss: 0.030278, acc.: 100.00%] [G loss: 3.440806]
12000 [D loss: 0.018707, acc.: 100.00%] [G loss: 5.285069]
13000 [D loss: 0.019536, acc.: 100.00%] [G loss: 4.794941]
14000 [D loss: 0.056859, acc.: 98.05%] [G loss: 3.332899]
15000 [D loss: 0.069105, acc.: 98.05%] [G loss: 5.515018]
16000 [D loss: 0.037824, acc.: 99.22%] [G loss: 5.258029]
17000 [D loss: 0.057579, acc.: 99.22%] [G loss: 3.989349]
18000 [D loss: 0.041294, acc.: 99.61%] [G loss: 4.690066]
19000 [D loss: 0.031994, acc.: 100.00%] [G loss: 3.294029]
20000 [D loss: 0.033530, acc.: 100.00%] [G loss: 4.654783]
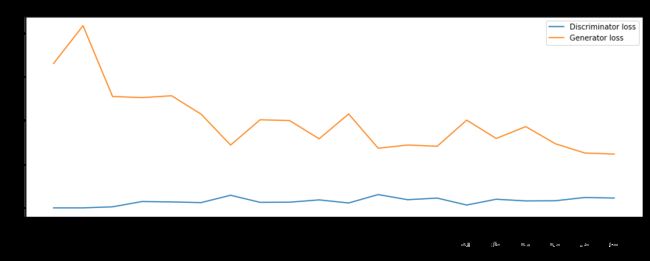
5、模型输出
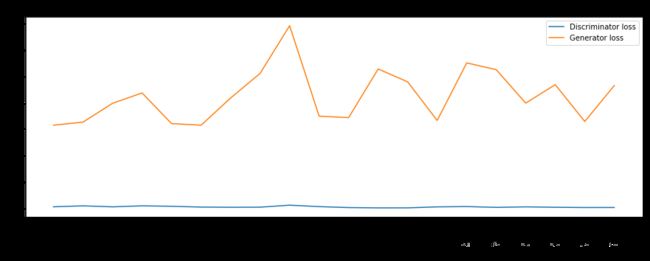
losses = np.array(losses)

# Plot training losses for Discriminator and Generator
plt.figure(figsize=(15, 5))
plt.plot(iteration_checkpoints, losses.T[0], label="Discriminator loss")
plt.plot(iteration_checkpoints, losses.T[1], label="Generator loss")

plt.xticks(iteration_checkpoints, rotation=90)

plt.title("Training Loss")
plt.xlabel("Iteration")
plt.ylabel("Loss")
plt.legend()
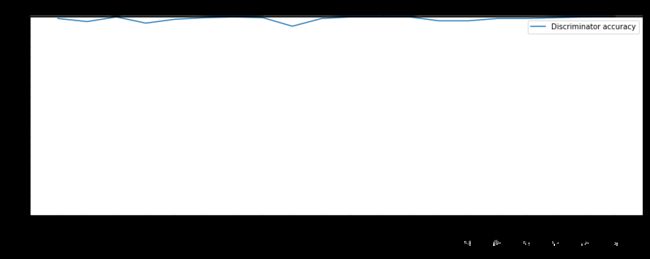
accuracies = np.array(accuracies)
# Plot Discriminator accuracy
plt.figure(figsize=(15, 5))
plt.plot(iteration_checkpoints, accuracies, label="Discriminator accuracy")
plt.xticks(iteration_checkpoints, rotation=90)
plt.yticks(range(0, 100, 5))
plt.title("Discriminator Accuracy")
plt.xlabel("Iteration")
plt.ylabel("Accuracy (%)")
plt.legend()就我个人观察:我发现通过引入卷积神经网络,鉴别器的Loss稳定且更低了,相比之前的只用两层的全连接层效果。但是采用转置卷积的生成器Loss不稳定。

