iTop 运维工具学习心得-持续更新 版本3.0.1
1.Portal 名字显示顺序调整
文件路径
iTop\web\datamodels\2.x\itop-portal-base\portal\templates\layout.html.twig
修改前:
{% set sUserFullname = app['combodo.current_user'].Get('first_name') ~ ' ' ~ app['combodo.current_user'].Get('last_name') %}

修改后:
{% set sUserFullname = app['combodo.current_user'].Get('last_name') ~ ' ' ~ app['combodo.current_user'].Get('first_name') %}
2.隐藏 Portal字段
文件路径
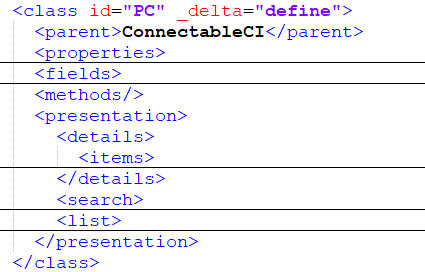
iTop\web\datamodels\2.x\itop-tickets\datamodel.itop-tickets.xml
修改前:


修改后:
3.SMTP 邮件设置
文件路径
iTop\web\conf\production\config-itop.php
'email_transport' => 'SMTP',
'email_transport_smtp.host' => 'IP地址',
'email_transport_smtp.port' => '25',
4.LDAP 域控访问设置
文件路径
iTop\web\conf\production\config-itop.php
'authent-ldap' => array (
	'host' => 'IP地址',
	'port' => 389,
	'default_user' => '账户名',
	'default_pwd' => '密码',
	'base_dn' => 'dc=公司域名,dc=com',
	'user_query' => '(SamAccountName=%1$s)',
	'options' => array (
	  17 => 3,
	  8 => 0,
	),
	'start_tls' => false,
	'debug' => false,
	'servers' => array (
	),
5.数据库备份设置
文件路径
iTop\web\conf\production\config-itop.php
'itop-backup' => array (
		'mysql_bindir' => 'C:\wamp64\bin\mysql\mysql5.7.36\bin',
		'week_days' => 'monday, tuesday, wednesday, thursday, friday',
		'time' => '23:30',
		'retention_count' => 5,
		'enabled' => true,
		'itop_backup_incident' => '',
	),
6.局域网访问设置
6.1把绝对路径改成相对路径,可以使局域网访问时,正常加载页面和图片
文件路径
iTop\web\conf\production\config-itop.php
修改前

'app_root_url' => 'http://localhost/itop/web/',

修改后

'app_root_url' => '/itop/web/',
6.2 拒绝访问403错误
wamp64\bin\apache\apache2.4.51\conf\extra\httpd-vhosts.conf
把Deny from all 改为 Required all granted就可以解决
修改前

  ServerName localhost
  ServerAlias localhost
  DocumentRoot "${INSTALL_DIR}/www"

    Options +Indexes +Includes +FollowSymLinks +MultiViews
    AllowOverride All
    Deny from all


修改后

  ServerName localhost
  ServerAlias localhost
  DocumentRoot "${INSTALL_DIR}/www"

    Options +Indexes +Includes +FollowSymLinks +MultiViews
    AllowOverride All
    Require all granted
6.3 因为6.2改成相对路径,部分图片无法加载
文件路径
wamp64\www\iTop\web\data\cache-production\portals\itop-portal-prod\ContainerNmvmbxk\srcProdProjectContainer.php
删除http头,图片就可以正常加载。调试方法edge或是chrome,启用F12开发者工具,查看加载失败的URL,根据图片的名称在itop工程里搜索,即可找到对应的文件。
修改前
'logo' => 'http://localhost/itop/web/images/logo-itop-dark-bg.svg?t=1653041501.4401',

修改后
'logo' => '/itop/web/images/logo-itop-dark-bg.svg?t=1653041501.4401',
6.4 忘记密码,邮件里的链接地址不完整,缺少http头部的处理方法
文件路径
wamp64\www\iTop\web\application\loginwebpage.class.inc.php
追加完整路径,http://ip地址 或者 http://域名
修改前
$sResetUrl = utils::GetAbsoluteUrlAppRoot().'pages/UI.php?loginop=reset_pwd&auth_user='.urlencode($oUser->Get('login')).'&token='.urlencode($sToken);

修改后
$sResetUrl = 'http://ip地址'.utils::GetAbsoluteUrlAppRoot().'pages/UI.php?loginop=reset_pwd&auth_user='.urlencode($oUser->Get('login')).'&token='.urlencode($sToken);
7. Internet访问设置
IIS反向代理的核心设置代码
1.Internet访问地址
  http://域名/itop/web/pages/UI.php

2.反向代理
  Rewrite URL:http://192.168.0.2/{R:1}
  Pattern:^(.*)
  Conditon:{HTTP_HOST} ^域名$

3.局域网的访问URL:
  http://192.168.0.2/itop/web/pages/UI.php

排错技巧,Rewrite写到哪里合适

如果改成 Rewrite URL:http://192.168.0.2/itop/web/{R:1}
会出现,只能打开首页,css加载不正确,点击登录提示找不到页面的错误,
因为链接变成了,itop/web/itop/web 多了一层。
8. 为已有的类添加共有属性
8.1准备工作
下载iTopDataModelToolkit-2.3.zip
下载完成后解压至wamp64\www\iTop\web路径下
完整路径wamp64\www\iTop\web\toolkit
8.2业务需求
父类:物理设备(PhysicalDevice)
子类:电脑(PC),服务器类(Server)
共同业务需求:创建PC和Server时,需要添加发票号码Invoice,采购编号:OrderNo共有信息,
PC需要,再增加配置项:硬盘容量HDD,CD机规格,CPU速度
8.3生成数据模型模板
步骤1:创建空模板,用于向数据库添加新的字段
https://www.itophub.io/wiki/page?id=2_5_0%3Acustomization%3Adatamodel#creating_a_moduleCompany Name:随意输入
Extension Name:随意输入
Extension Label:随意输入,安装时会以该名字显示
Version:随意输入
Dependencies:依赖的模型,这里选择itop-endusers-devices,因为PC属于该数据模型下,后续需要再该模型中配置页面显示
输入完成后,点击Generate
Generate一个zip压缩文件,解压缩后放入wamp64\www\iTop\web\extensions
完整路径wamp64\www\iTop\web\extensions\itop-pd-ext
重复上述步骤,制作PC模块的模板zip,解压结果如下
wamp64\www\iTop\web\extensions\itop-pc-ext8.4运行setup,添加扩展模块itop-pc-ext和itop-pd-ext,只需下一步下一步,在最后一页选择对应的扩展名称就可以。
http://localhost/itop/web/setup/8.5配置XML文件
8.5.1添加PhysicalDevice的字段
在wamp64\www\iTop\web\extensions\itop-pd-ext路径下
打开datamodel.itop-pd-ext.xml文件
class id="PhysicalDevice" 指定需要修改的数据库对象
filed id = orderno 指定追加的字段orderno
filed id = invoice 指定追加的字段invoice
			  orderno

			  true


			  invoice

			  true
8.5.2添加PC字段
找到并打开datamodel文件
在wamp64\www\iTop\web\extensions\itop-pc-ext路径下
打开datamodel.itop-pc-ext.xml
修改XML内容如下
			  cpuspeed

			  true


			  hd

			  true


			  cd

			  true
8.5.3在各个画面显示
首先在PC画面显示,orderno,invoice,cpuspeed,hdd,cd,打开编辑下面的文件
wamp64\www\iTop\web\datamodels\2.x\itop-endusers-devices\datamodel.itop-enduser-devices.xml找到PC类,找到presentation下的details下的items,添加cpuspeed,hdd等信息
-
20
-
60
-
60
-
70
-
80
-
90
...
8.6 运行更新
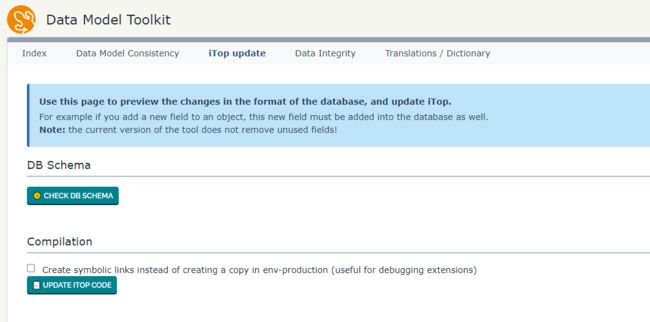
http://localhost/itop/web/toolkit先点击iTop update下的Check DB Schema,更新SQL字段(根据提示内容,复制SQL语句然后黏贴到数据库管理器运行),再点击UpdateiTopCode更新代码。
9.修改MYSQL的参数,避免同步时提示如下错误信息
mysql_error = Index column size too large. 需要将default row format的值由campct改成dynamic
10.同步导入Persons
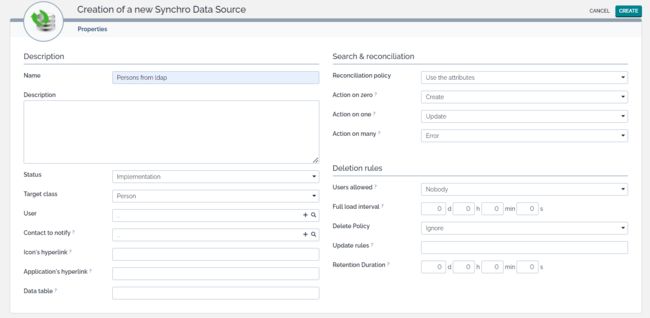
创建一个同步源,输入Name:任意,Target Class:必须,这里选择Person类,点击应用
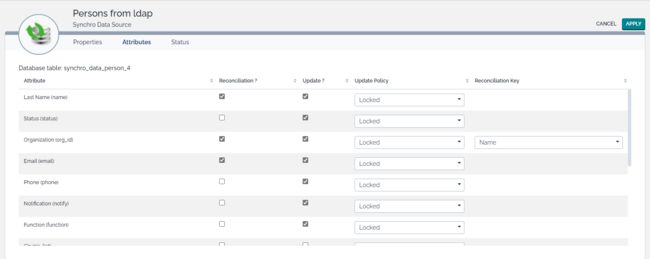
设置:需要同步的字段,需要更新的字段,和同步后不允许手动修改的字段。
CSV文件
primary_key;first_name;name;org_id;email;function;mobile_phone
"admin";"wang";"haha";"IT-Department";"[email protected]";"Manager";"136XXXXXXXX"
执行语句
注意,这里data_source_id=4里面的数字4,是对应数据库的表
php synchro_import.php --auth_user=admin --auth_pwd=密码 --csvfile=persons.csv --data_source_id=4 --output=summary完成后,可以查看记录,这里显示成功创建一条记录。
11.LDAP 同步
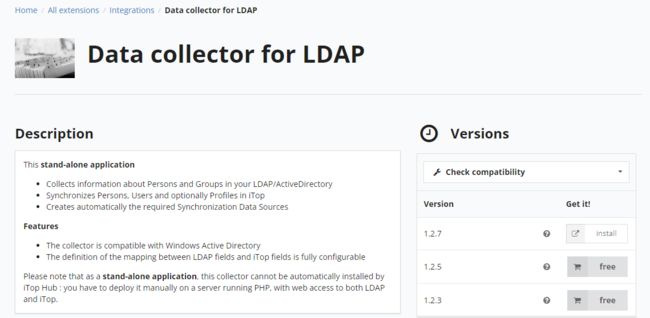
原文https://www.itophub.io/wiki/page?id=extensions%3Aldap-data-collector下载Data collector for LDAP Extention扩展,解压后放在任意路径。
https://store.itophub.io/en_US/products/ldap-data-collector复制params.distrib.xml,改名为params.local.xml
C:\wamp64\www\iTop\ldap-data-collector\conf\params.distrib.xml
给管理员添加REST角色
先添加组织,否则LDAP同步会失败
注意事项:
itop_login和itop_password写itop的管理眼账户和密码
ldapuri写ad服务器的ip地址,端口号默认389根据实际情况修改
ldapdn:根据实际AD目录填写,如
dc=com
      |-ou=user
            |-cn=zhangsan
关键点,根据实际需求填写过滤条件:
本项目的过滤条件说明:
(&(objectClass=user)(objectCategory=person)(mail=*@xx.cn)(title=*)(!(userAccountControl:1.2.840.113556.1.4.803:=2)))

(objectClass=user) 对象是user   这里官方教程写的是person,这里需要避坑
(objectCategory=person) 目录是person
(mail=*@mxx.cn) 所有的邮件都是以@xx.cn结尾,因为存在代理商的账户,通过邮件过滤该账户
(title=*) 所有职责不为空的用户,因为有的用户有两个账户,子账户职责为空,过滤该账户
(userAccountControl:1.2.840.113556.1.4.803:=2)) 过滤停用的账户
完整版内容如下:
	http://localhost/iTop/web/
	admin
	root
	[email protected]
	admin
	ldap://192.168.0.2:389
	DC=org,DC=com
	账户
	密码
	1000

	(&(objectClass=user)(objectCategory=person)(mail=*@xx.cn)(title=*)(!(userAccountControl:1.2.840.113556.1.4.803:=2)))


			samaccountname
			sn
			givenname
			mail
			telephonenumber
			mobile
			title
			employeenumber
			department


			MEACH
			active


	no
	(&(objectClass=user)(objectCategory=person)(mail=*@xx.cn)(title=*)(!(userAccountControl:1.2.840.113556.1.4.803:=2)))
	no


			samaccountname
			samaccountname
			mail


			Portal user
			EN US
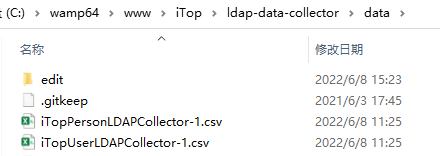
运行如下命令,模拟运行,查看预导入的LADP用户,会有两个csv文件。
php exec.php --console_log_level=9 --collect_only运行如下命令,正式导入。
php exec.php导入成功后,可以在person和users处看到相关的数据。

