图像风格快速迁移tensorflow实战
引言
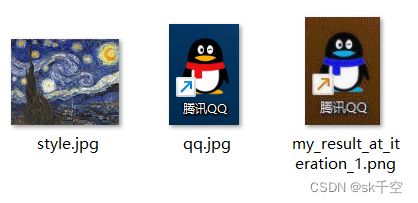
需要解决的问题是:利用tensorflow的快速风格迁移功能,把一张qq的logo图片转换成《星空》油画的风格,并打印输出。
如图所示,最右边图像是输入结果,左边两图是输入:
一、操作步骤
通过两天的学习,修了许多bug,踩了不少坑,终于把实验做成了。现在试着阐述相关的原理和具体操作步骤。
这里我把整个实验过程分为4大部分,每个部分都会给出详细的操作步骤。
A.软件的安装和配置
B.风格迁移代码的理解和操作
C.导入相关的库
D.开始运行
A.软件的安装和配置
本次实验我们通过python语言来实现,所以首先需要安装python编程环境。为节省以后额外下载安装各种集成包和调用各种库的时间,建议直接安装Anaconda,而不是安装裸的python。
1.通过Anaconda安装python编译环境:
1.下载Anaconda
通过清华大学开源软件镜像站下载最新版本的Anaconda。官网Anaconda | Anaconda Distribution下载也可,不同可能速度比较慢。
我使用的是windows系统,下载的是2021年11月的版本,名称为Anaconda3-2021.11-Windows-x86_64.exe。
2.安装Anaconda
3.环境变量的配置
4. 测试安装情况
2.安装相应版本的python。
在安装了Adaconda软件之后,会自动帮你集成最新python环境,但是有的代码和最新版Python不能兼容,所以,还需要下载能运行本实验代码的python3.6或者3.7版本。
1.下载python
从Python Releases for Windows | Python.org下载python的不同版本,我这里下载的是python-3.6.6-amd64.exe
2.安装python
3.检查python安装情况
3安装pycharm
B.风格迁移代码的理解和操作
代码如下:
from keras.preprocessing.image import load_img,img_to_array
import numpy as np
import cv2 as cv
from keras.applications import vgg19
from keras import backend as k
from scipy.optimize import fmin_l_bfgs_b
import time
target_image_path = './qq.jpg'
style_reference_image_path = './style.jpg'
print(target_image_path)
print(style_reference_image_path)
width, height = load_img(target_image_path).size            #加载图片的大小
img_height = 600
img_width = int(width * img_height / height)


"""
    预处理图片,包括变形到(1,width, height)形状,数据归一到0-1之间
    :param image: 输入一张图片
    :return: 预处理好的图片
    """
def preprocess_image(image_path):
    img = load_img(image_path, target_size=(img_height, img_width))
    img = img_to_array(img)
    img = np.expand_dims(img, axis=0)
    img = vgg19.preprocess_input(img)
    return img


"""
    将0-1之间的数据变成图片的形式返回
    :param x: 数据在0-1之间的矩阵
    :return: 图片,数据都在0-255之间
    """
def deprocess_image(x):
    x[:, :, 0] += 103.939
    x[:, :, 1] += 116.799
    x[:, :, 2] += 123.68
    # 'BGR'->'RGB'
    x = x[:, :, ::-1]
    x = np.clip(x, 0, 255).astype('uint8')              # 以防溢出255范围
    return x

target_image = k.constant(preprocess_image(target_image_path))
style_reference_image = k.constant(preprocess_image(style_reference_image_path))
combination_image = k.placeholder((1, img_height, img_width, 3))

input_tensor = k.concatenate([target_image,style_reference_image,combination_image], axis=0)

model = vgg19.VGG19(input_tensor=input_tensor,weights='imagenet',include_top=False)

print('Model loaded')

def content_loss(base, combination):
    return k.sum(k.square(combination - base))

def gram_matrix(x):          # Gram矩阵
    assert k.ndim(x)==3
    if k.image_data_format()=='channels_first':
        features=k.batch_flatten(x)
    else:
        features = k.batch_flatten(k.permute_dimensions(x,(2, 0, 1)))
    gram = k.dot(features, k.transpose(features))
    return gram

# 风格损失,是风格图片与结果图片的Gram矩阵之差,并对所有元素求和
def style_loss(style, combination):
    S = gram_matrix(style)
    C = gram_matrix(combination)
    channels = 3
    size = img_height * img_width
    return k.sum(k.square(S - C)) / (4. * (channels ** 2) * (size ** 2))

def total_variation_loss(x):
    a = k.square(
        x[:, :img_height - 1, :img_width - 1, :] -
        x[:, 1:, :img_width - 1, :]
    )
    b = k.square(
        x[:, :img_height - 1, :img_width - 1, :] -
        x[:, :img_height - 1, 1:, :]
    )
    return k.sum(k.pow(a + b, 1.25))

outputs_dict = dict([(layer.name,layer.output) for layer in model.layers])
content_layer = 'block5_conv2'
style_layers = ['block1_conv1','block2_conv1',
    'block3_conv1','block4_conv1','block5_conv1']

total_variation_weight = 1e-4
style_weight = 1.
content_weight = 0.025

loss = k.variable(0.)#最终损失值
layer_features = outputs_dict[content_layer]
target_image_features = layer_features[0, :, :, :]
combination_features = layer_features[2, :, :, :]
loss += content_weight*content_loss(target_image_features,combination_features)#加内容损失


for layer_name in style_layers:#加风格损失
    layer_features = outputs_dict[layer_name]
    style_reference_features = layer_features[1, :, :, :]
    combination_features = layer_features[2, :, :, :]
    sl = style_loss(style_reference_features, combination_features)
    loss += (style_weight / len(style_layers)) * sl

#加变异损失,得到最终损失函数值
loss += total_variation_weight * total_variation_loss(combination_image)

grads = k.gradients(loss, combination_image)[0]
fetch_loss_and_grads = k.function([combination_image], [loss, grads])

class Evaluator(object):
    def __init__(self):
        self.loss_value = None
        self.grads_values = None

    def loss(self, x):
        assert self.loss_value is None
        x = x.reshape((1, img_height, img_width, 3))
        outs = fetch_loss_and_grads([x])
        loss_value = outs[0]
        grad_values = outs[1].flatten().astype('float64')
        self.loss_value = loss_value
        self.grad_values = grad_values
        return self.loss_value

    def grads(self, x):
        assert self.loss_value is not None
        grad_values = np.copy(self.grad_values)
        self.loss_value = None
        self.grad_values = None
        return grad_values

evaluator = Evaluator()

result_prefix = 'my_result'
iterations = 2

x = preprocess_image(target_image_path)#目标图片路径
x = x.flatten()#展开,应用l-bfgs

for i in range(iterations):
    print('Start of iteration', i)
    start_time = time.time()
    #在生成图片上运行L-BFGS优化;注意传递计算损失和梯度值必须为两个不同函数作为参数
    x, min_val, info = fmin_l_bfgs_b(evaluator.loss, x,
    fprime=evaluator.grads,maxfun=20)
    print('Current loss value:', min_val)
    img = x.copy().reshape((img_height, img_width, 3))
    img = deprocess_image(img)
    if i==iterations-1:
        fname = result_prefix + '_at_iteration_%d.png' % i
        cv.imwrite(fname, img)
        print('Image saved as', fname)
    end_time = time.time()
    print('Iteration %d completed in %ds' % (i, end_time - start_time))
C.导入相关的库
以上步骤完成之后,我们就可以开始导入各种库来实现图像风格快速迁移。所需要的导入的功能package包括:
- Keras==2.2.4
- Tensorflow==1.13.0(或者tensorflow==1.13.1)
- Opencv-python
- Pillow
- Numpy
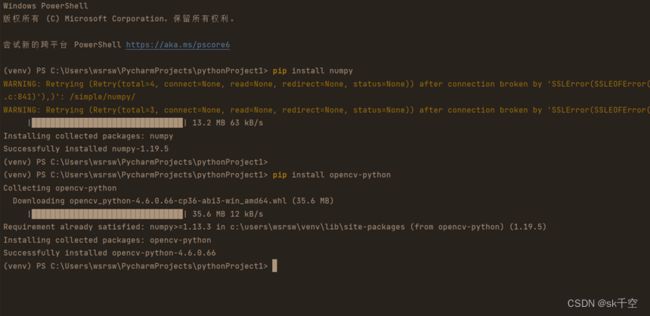
导入的方法有很多中,这里推荐使用命令行安装。而且,导入之前,把pycharm.exe以管理员身份运行。由于国内直接安装可能速度较慢,建议使用阿里云镜像站点安装。
执行代码示例:
pip install -i https://mirrors.aliyun.com/pypi/simple/ numpy
pip install -i https://mirrors.aliyun.com/pypi/simple/ keras==2.2.4
pip install -i https://mirrors.aliyun.com/pypi/simple/ tensorflow==1.13.1
Tensorflow安装结束显示
同理
pip install -i https://mirrors.aliyun.com/pypi/simple/ opencv-python
在安装各种库的时候,可能需要安装pillow。
执行代码:
pip3 install pillow
对于常见的错误,百度也能找到答案。
D.开始运行
检查无问题后,可以开始执行程序。
这里有个进度条,等大约5-10分钟就可以跑完。跑完结果显示如下:
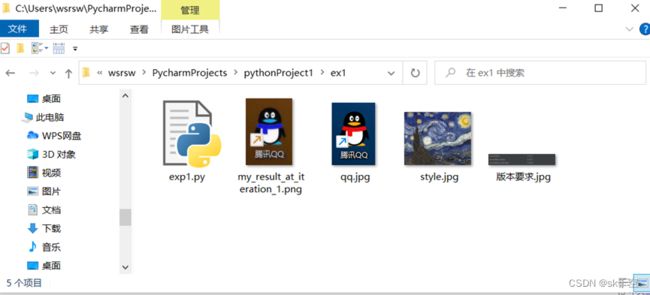
可以看到,png文件已经保存至项目文件夹中。
三、实验结果
在项目文件夹中,得到了my_result_at_iteration_1.png文件。
参考
1.《智能计算系统》陈云霁
2. 代码参考 http://t.csdn.cn/sxksM
3. pycharm安装:pycharm安装教程,超详细_皮小孩ls的博客-CSDN博客_pycharm
4. 安装Anaconda: Anaconda安装(Python) - 知乎


