基于插值的图像超分辨率
基于插值的图像超分辨率
插值:在修改图像尺寸的的时候,通过旧图像中已知的像素点去计算新图像中未知的像素点
分类:最近邻插值、双线性差值、双三次插值
三种方法从左至右,效果越来越好,开销越来越大
最近邻插值:
srcX=dstX* (srcWidth/dstWidth) , srcY = dstY *(srcHeight/dstHeight)
src代表的是原图像,dst代表的是新图像,这个公式是计算新图像上的坐标点对应的是旧图像像上的哪个坐标点。若得到的结果是小数,则进行四舍五入,或者直接舍掉小数部分,建议直接舍掉小数部分,因为有的时候四舍五入会导致越界。
Python代码实现:https://zhuanlan.zhihu.com/p/89409337
# -*-coding:utf-8-*-
import math
from PIL import Image
import numpy as np
import matplotlib.pyplot as plt  # plt 用于显示图片
import matplotlib.image as mpimg  # mpimg 用于读取图片
import numpy as np

def nearest(image, target_size):
    """
    Nearest Neighbour interpolate for RGB  image

    :param image: rgb image
    :param target_size: tuple = (height, width)
    :return: None
    """
    if target_size[0] < image.shape[0] or target_size[1] < image.shape[1]:
        raise ValueError("target image must bigger than input image")
    # 1:按照尺寸创建目标图像
    target_image = np.zeros(shape=(*target_size, 3))
    # 2:计算height和width的缩放因子
    alpha_h = target_size[0] / image.shape[0]
    alpha_w = target_size[1] / image.shape[1]

    for tar_x in range(target_image.shape[0] - 1):
        for tar_y in range(target_image.shape[1] - 1):
            # 3:计算目标图像人任一像素点
            # target_image[tar_x,tar_y]需要从原始图像
            # 的哪个确定的像素点image[src_x, xrc_y]取值
            # 也就是计算坐标的映射关系
            # src_x = round(tar_x / alpha_h)
            # src_y = round(tar_y / alpha_w)
            src_x = int(math.floor(tar_x / alpha_h))
            src_y = int(math.floor(tar_y / alpha_w))

            # 4:对目标图像的任一像素点赋值
            target_image[tar_x, tar_y] = image[src_x, src_y]

    return target_image

if __name__ == '__main__':
    image = mpimg.imread('face.png')  # 读取和代码处于同一目录下的 lena.png
    # 此时 lena 就已经是一个 np.array 了,可以对它进行任意处理

    image.shape  # (512, 512, 3)
    target = nearest(image, [1104,1104])
    # print(target.shape)
    from PIL import Image
    Image.fromarray(np.uint8(target*255)).convert('RGB').save('face_x8.png',"png")
    # im = Image.fromarray(np.uint8(target))
    # im.save("your_file.jpeg")
    # plt.subplot(2, 2, 1)
    plt.imshow(image)  # 显示图片
    plt.show()
    # plt.subplot(2, 2, 2)
    plt.imshow(target)
    # plt.axis('off')
    # plt.savefig('face_x8.png')
    plt.axis('off')  # 不显示坐标轴
    plt.show()

原图像
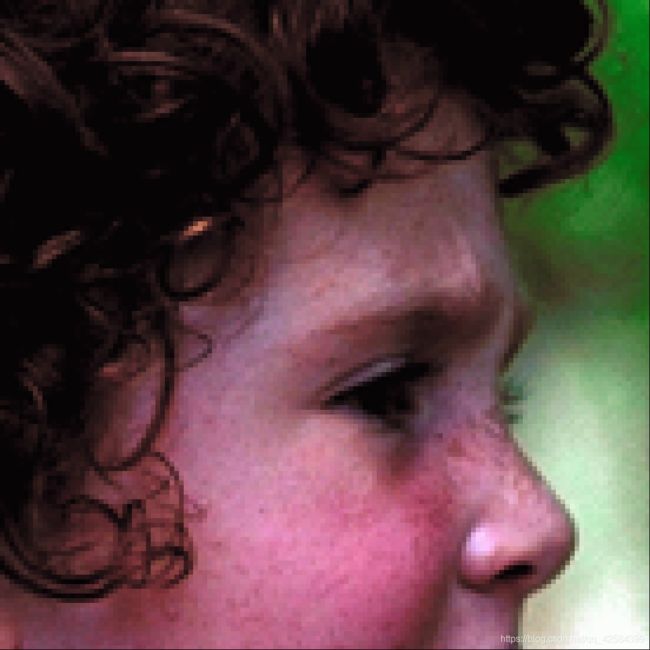
放大8倍后的图片
可以看见图片中,鼻子处有明显的锯齿状
双线性插值
双线性插值,需要通过原图像上的4个点求放大后图像上的新像素点。
双线性插值需要经过3次单项性插值。
具体过程参考该博客:[(https://blog.csdn.net/weixin_39928686/article/details/111390038?utm_term=%E4%B8%8B%E9%87%87%E6%A0%B7%E5%8F%8C%E4%B8%89%E6%AC%A1&utm_medium=distribute.pc_aggpage_search_result.none-task-blog-2allsobaiduweb~default-3-111390038&spm=3001.4430)
Python代码实现:https://blog.csdn.net/vfi7018/article/details/98440628
# -*-coding:utf-8-*-
from PIL import Image
from datetime import datetime
import matplotlib.pyplot as plt
import numpy as np
import math
import os

img_path = 'face.png'
img_arr = np.array(Image.open(img_path), np.uint8)

target_size = (1104, 1104, 3)
cur_size = img_arr.shape
ratio_x, ratio_y = target_size[0] / cur_size[0], target_size[1] / cur_size[1]


def cal(x, y, c):
    t_left_x, t_left_y = math.floor(x), math.floor(y)
    w1 = t_left_x + 1 - x
    w2 = x - t_left_x
    w3 = t_left_y + 1 - y
    w4 = y - t_left_y
    t_right_x = t_left_x + 1 if t_left_x + 1 <= cur_size[0]-1 else cur_size[0]-1
    t_right_y = t_left_y + 1 if t_left_y + 1 <= cur_size[1]-1 else cur_size[1]-1


    p1 = w1 * img_arr[t_left_x, t_left_y, c] + w2 * img_arr[t_right_x, t_left_y, c]
    p2 = w1 * img_arr[t_left_x, t_right_y, c] + w2 * img_arr[
        t_right_x, t_right_y , c]

    v = w3 * p1 + w4 * p2

    return v


if __name__ == '__main__':
    start = datetime.now()
    resized_img = [cal(i / ratio_x, j / ratio_y, c) for i in range(target_size[0]) for j in range(target_size[1]) for c
                   in range(target_size[2])]
    resized_img = np.array(resized_img).reshape((target_size[0], target_size[1], target_size[2]))
    end = datetime.now()

    seconds = (end - start).seconds
    print('process cost {}s'.format(seconds))

    resized_show = Image.fromarray(resized_img.astype(np.uint8))
    resized_show.save('face_x8_bilinear.png', "png")
    plt.imshow(resized_show)
    plt.show()

放大8倍后的结果
双三次插值:
参考该文章:https://blog.csdn.net/Ibelievesunshine/article/details/104942406
Python代码实现:
# -*-coding:utf-8-*-
from PIL import Image
import numpy as np
import math


# 产生16个像素点不同的权重
def BiBubic(x):
    x = abs(x)
    if x <= 1:
        return 1 - 2 * (x ** 2) + (x ** 3)
    elif x < 2:
        return 4 - 8 * x + 5 * (x ** 2) - (x ** 3)
    else:
        return 0


# 双三次插值算法
# dstH为目标图像的高,dstW为目标图像的宽
def BiCubic_interpolation(img, dstH, dstW):
    scrH, scrW, _ = img.shape
    # img=np.pad(img,((1,3),(1,3),(0,0)),'constant')
    retimg = np.zeros((dstH, dstW, 3), dtype=np.uint8)
    for i in range(dstH):
        for j in range(dstW):
            scrx = i * (scrH / dstH)
            scry = j * (scrW / dstW)
            x = math.floor(scrx)
            y = math.floor(scry)
            u = scrx - x
            v = scry - y
            tmp = 0
            for ii in range(-1, 2):
                for jj in range(-1, 2):
                    if x + ii < 0 or y + jj < 0 or x + ii >= scrH or y + jj >= scrW:
                        continue
                    tmp += img[x + ii, y + jj] * BiBubic(ii - u) * BiBubic(jj - v)
            retimg[i, j] = np.clip(tmp, 0, 255)
    return retimg


im_path = 'face.png'
image = np.array(Image.open(im_path))
image2 = BiCubic_interpolation(image, image.shape[0] * 8, image.shape[1] * 8)
image2 = Image.fromarray(image2.astype('uint8')).convert('RGB')
image2.save('face_x8_BiCubic.png')
放大8倍后的结果