用 linq to sql+wcf service+datagrid 创建基本的silverlight2.0应用程序
这是我在codeproject上看到的一篇关于sliverlight tutorial的文章,使用了Linq to sql,wcf service.尽管用这2种技术开发silverlight应用程序已经掌握.不过这篇文章写的的确很好,如果我一开始学习silverlight开发时就能少走很多弯路,除了以上的应用之外,文章还是讲到了部署wcf service,跨域访问,以及客户端访问策略等知识,所以还是把它贴过来了,以便查阅。
文章原文:Silverlight Tutorial: Creating a data centric web app with DataGrid, LINQ, and WCF Web Service。
Tutorial Part 1: Building the application and testing it locally
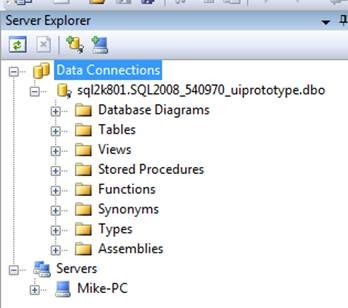
- For this tutorial you will need access to a web accessible database. As mentioned in the introduction, I use web hosting account from discountasp.net with a SQL Server 2008 add-on, but there are many options of hosting providers to choose from. To establish a connection with your remote database, select View from the menu, and then Server Explorer. Click on the connect to database option and then fill in with SQL Server Name and Database Login that you can get from your hosting provider. Click test connection to confirm that you’re set up.


- Create a new SilverlightApplication called SilverlightClient. Call the solution WcfSqlDemo.
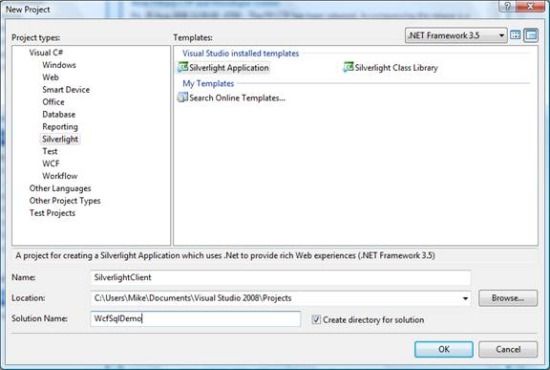
- VS2008 will ask you if you want to add a Web to the solution. Select “Web Application Project” instead of the default “Web Site”. Name the web WcfSqlDemoWeb.
- Right click on WcfSqlDemoWeb and select add, new item. Select Data, LINQ to SQL Classes, and leave the name DataClasses1.dbml

What you should see next is:

- If you set up your server at the beginning of the project you will already have a database in the server explorer view as I do (in my case it’s named sql2k801.SQL2008_540970). If you haven’t, click on the cylinder with a plus sign icon under Server Explorer to connect to database.
- Right click “Table” on your connected database and select add new table. Fill in table as shown below. Under properties name the table DemoTable.


- Drag DataTable onto DataClasses1.dbml

- Set key as the primary key
- View properties for DataClasses1.dml. Set the serialization mode to unidirectional so that it is compatible with web services.

- Okay, that takes care of your database. Now let’s set up the web service. Right click on the WcfSqlDemoWeb project and add a new item. Select the Silverlight-enabled WCF Service template and name it DemoService.svc

- Delete DoWork method and replace with the two methods below plus the following using references. By the way, the “var selected_rows = from rows in db.DemoTables select rows” stuff, that’s LINQ. It’s fantastic. It’s a very clean sensible query language that is built into .NET 3.5 that can be used for querying databases, XML, and even collections. One of the easier ways to figure out what link is, is to look at some examples. I recommend Microsoft’s 101 LINQ Samples . The LINQ line that I use in the GetRows method loosely means “Take the table db.DemoTable and assign the elements of that table to the collection rows then select all those rows and assign them to the collection selected rows”.
    using System.Collections.Generic;

using System.Text;
and also
// Return the list of valid data [OperationContract] public ListGetRows() { DataClasses1DataContext db = new DataClasses1DataContext(); var selected_rows = from rows in db.DemoTables select rows; return selected_rows.ToList(); } // Insert a new data into the database [OperationContract] public void InsertData(string testItem1, string testItem2) { DataClasses1DataContext db = new DataClasses1DataContext(); // Create a new row object. DemoTable row = new DemoTable { Key = Guid.NewGuid(), TestItem1 = testItem1, TestItem2 = testItem2 }; // Add the new object to the collection. db.DemoTables.InsertOnSubmit(row); // Submit the change to the database. db.SubmitChanges(); }
- Now we need to let our Silverlight client know about the web service we’ve just created. Right click SilverlightClient and select Add Service Reference. Click Discover. VS2008 should find the service from the project. Allow it to be saved in the namespace ServiceReference1.

- Open page.xaml in ExpressionBlend. Make a form that looks something like what I’ve created below. Name the text
boxes TestItem1TxtBox and TestItem2TxtBox

- Now let’s add the datagrid into which the data we retrieve from the web service will be placed. The Datagrid control is not a default control of your Silverlight project, so you’ll have to add it. Right click on references in SilverlightClient and add a reference to System.Windows.Control.Data. Go to page.xaml. Add the following attribute to the user control element so we can get access to the DataGrid
xmlns:my="clr-namespace:System.Windows.Controls;assembly=System.Windows.Controls.Data"
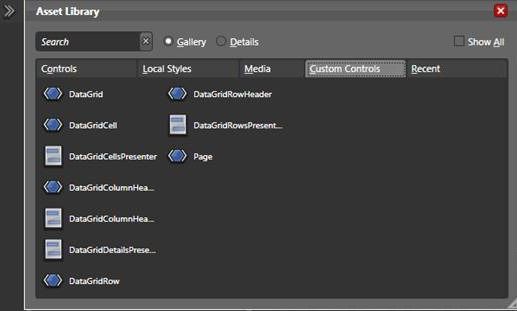
- Now you can go to the asset library and find DataGrid under Custom Controls.

- Add a DataGrid to the project and size it. Name the grid ResultsGrid. If you look at the XAML it should look similar to the below.
        <my:DataGrid Margin="8,283,51,87" AutoGenerateColumns="True"

x:Name="ResultsGrid"/>
- Add a button and label it “Get”. The end result should be something like as follows:
- Add OnGetBtnClicked and OnSubmitBtnClicked to the clicked events of the respective buttons in Expression Blend. This will add the attributes to the XAML button tags and will wake up VS2008 and add the specified methods to the code behind file.
- Fill in the OnSubmitBtnClick and OnGetBtnClick as shown below. Create a call back to handle the GetRowsCompleted event. (By the way, are you noticing how easy this is? Look at how much is getting done with a few lines of code and look how clean and sensible these few lines are.)
private void OnGetBtnClick(object sender, RoutedEventArgs e) { DemoServiceClient webService = new DemoServiceClient(); webService.GetRowsCompleted += new EventHandler(webService_GetRowsCompleted); webService.GetRowsAsync(); } void webService_GetRowsCompleted(object sender, GetRowsCompletedEventArgs e) { ResultsGrid.ItemsSource = e.Result; } private void OnSubmitBtnClick(object sender, RoutedEventArgs e) { DemoServiceClient webService = new DemoServiceClient(); webService.InsertDataAsync(TestItem1TxtBox.Text, TestItem2TxtBox.Text); }
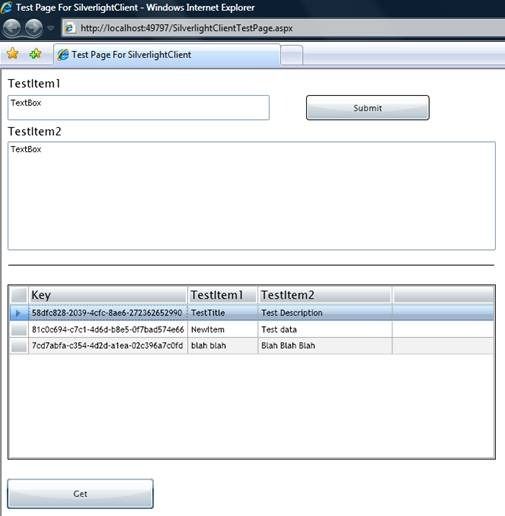
- Build and test. Try submitting a few items and then getting the results. You should see something like the following:

- Easy right? Notice how we didn’t even have to do anything to get the DataGrid to display our results other than assign our results to the DataGrid’s ItemsSource. The only down side to this simplicity is that we’re seeing everything returned including the guid representing the key. That’s not very user friendly. Let’s get rid of the auto-generation of columns and create custom ones. Also it seems I needed to add an explicit size to the DataGrid or I’d get a funny rendering of the grid when it’s empty.
      <my:datagrid margin="8,283,51,85" autogeneratecolumns="False" x:name="ResultsGrid"

width="641" height="232">

<my:DataGrid.Columns>

<my:DataGridTextColumn

Header="Test Item 1"

DisplayMemberBinding="{Binding TestItem1}"/>

<my:DataGridTextColumn

Header="Test Item 2"

DisplayMemberBinding="{Binding TestItem2}"/>

</my:DataGrid.Columns>

</my:datagrid>
- Build and debug. The results should look exactly like before, except this time no column for Key.
- By now you’re probably collecting some garbage in your database, because we have no way to delete any items. Let’s change that now. First let’s modify our web service to be able to delete items from our database. Add the following to DemoService. Note that we’re using more LINQ. The line below written in LINQ loosely means “Take the table db.DemoTable and assign the elements of that table to the collection rows then select those rows where the key is the passed guid and assign those selected rows to the collection selectedrow”.
        // Delete the item specified by the passed key

[OperationContract]

public void DeleteRow(Guid key)

{

DataClasses1DataContext db = new DataClasses1DataContext();

var selected_row = from rows in db.DemoTables where rows.Key==key select rows;

// Delete the selected "rows".  There will actual be only one

// item in this collection because the Guid is unique and is the

// primary key for the table.

db.DemoTables.DeleteAllOnSubmit(selected_row);

// Submit the change to the database.

db.SubmitChanges();

}
- Add a delete button. When the delete button is clicked will delete whatever item in our DataGrid that was selected.
private void OnDeleteClick(object sender, RoutedEventArgs e) { DemoTable selectedRow = ResultsGrid.SelectedItem as DemoTable; // Now access the service to delete the item DemoServiceClient webService = new DemoServiceClient(); webService.DeleteRowAsync(selectedRow.Key); // Now refresh the grid webService.GetRowsCompleted += new EventHandler(webService_GetRowsCompleted); webService.GetRowsAsync(); }
- Rebuild and Debug. Now you can select items and delete them.
Tutorial Part 2: Deploying the web app to a remote server
-
- Publishing the application to the web can be a little difficult. The instructions below have been tried out on my web hosting provider discountasp.net, but you’re likely to need to do something similar for other host providers as well.
- To see the difficulty, publish the website. Now DemoService is located at your server right? All you might think you need to do is reconfigure your silverlight client to reference the service at your website. Go ahead and try it. Right click on ServiceReference1 and select Configure service reference. Add the address of the service. In my case it is http://uiprototype.web702.discountasp.net/DemoService.svc. You’ll get the error below and you won’t be able to proceed.
- Here’s the work around. We’re going to override the way the server creates the Service Host. Add the following class to DemoService.svc.cs
    public class MyServiceHostFactory : ServiceHostFactory

    {

    protected override ServiceHost CreateServiceHost(Type serviceType, Uri[] baseAddresses)

    {

    // Specify the exact URL of your web service

    Uri webServiceAddress = new Uri("http://uiprototype.web702.discountasp.net/DemoService.svc");

    ServiceHost webServiceHost = new ServiceHost(serviceType, webServiceAddress);

    return webServiceHost;

    }

    }
- Go to DemoService.svc, right click to view markup and you’ll see the below:
 <%@ ServiceHost Language="C#" Debug="true" Service="WcfSqlDemoWeb.DemoService" CodeBehind="DemoService.svc.cs" %>

    Add the follow attribute:Factory="WcfSqlDemoWeb.MyServiceHostFactory"
- Now rebuild all and publish. Now go back to ServiceReference1 Right click on ServiceReference1 and select Configure service reference. Add the address of the service. In my case it is http://uiprototype.web702.discountasp.net/DemoService.svc. Now it should accept it.
Tutorial Part 3: Configuring your application and your remote server so that you can debug in a variety of local and remote configurations.
- The only problem with the work around described in Part2 is that you can’t debug your application locally anymore. If you now try to debug your silverlight page and you click on either of your buttons (thereby attempting to access the webservice) you’ll get an exception saying the webservice wasn’t found. This is due to crossdomain security restrictions. When you debug, your client is hosted on localhost and web service is hosted on your remote server (in my case as discountasp.net). When the localhost hosted Silverlight client reaches out and trys to talk to the DiscountAsp.net hosted webservice, that’s a crossdomain communication and you need to explicitly grant permission for that type of access of your web service. To grant this crossdomain access, you’ll need to put a crossdomain.xml and clientaccesspolicy.xml on your remote server.
Here’s the crossdomain.xml file you’ll need to add to your web project:
<?xml version="1.0" encoding="utf-8"?>

    <access-policy>

    <cross-domain-access>

    <policy>

    <allow-from http-request-headers="*">

    <domain uri="*"/>

    </allow-from>

    <grant-to>

    <resource path="/" include-subpaths="true"/>

    </grant-to>

    </policy>

    </cross-domain-access>

    </access-policy>
Here’s the clientaccesspolicy.xml file you’ll need to add to your web project:
<?xml version="1.0" encoding="utf-8"?>

    <access-policy>

    <cross-domain-access>

    <policy>

    <allow-from http-request-headers="*" >

    <domain uri="*"/>

    </allow-from>

    <grant-to>

    <resource path="/" include-subpaths="true"/>

    </grant-to>

    </policy>

    </cross-domain-access>

    </access-policy>
- What if you want to go back to debugging both client and the webservice itself from localhost like we’re doing at the beginning of this tutorial. There may be a better way, but here’s what I did. Go to your Web.config file and find your appSettings tag. Replace it with the following:
  <appSettings>

    <!--<add key="ServiceUri_WcfSqlDemo" value="http://uiprototype.web702.discountasp.net/DemoService.svc"/>-->

    <add key="ServiceUri_WcfSqlDemo" value="http://localhost:49797/DemoService.svc"/>

    </appSettings>
- Now go back to DemoService.svc.cs
Add the following using statement:
using System.Configuration;Change the Uri as follows in your CreateServiceHost method to look up the address in the Web.config file:
Uri webServiceAddress = new Uri(ConfigurationManager.AppSettings["ServiceUri_WcfSqlDemo"]);
- Right click on ServiceReference1 and click on configure service reference. Set the address to http://localhost:49797/DemoService.svc
- Now rebuild all and debug. Things should be working as before except now the webservice is back to being hosted locally. If you don’t believe it, go and delete everything from the server.
- Now you can go back and for by changing the address in ServiceReference1 and Web.config
- That’s it!