Flutter 常见问题总结
文章目录
-
- 1、内容简介
- 2、使用Column等容器包裹ListView报错的问题
- 3、Navigator operation requested ... does not include a Navigator.
- 4、设置Container背景色
- 5、去除AppBar 阴影
- 6、组件描边,圆角
- 7、如何给row或column布局添加手势监听?
- 8、ListView和GridView嵌套报错?
- 9、在Android studio中导入Flutter项目报错
- 10、给新页面传值
- 11、实现滑动关闭、删除item
- 12、添加Material触摸水波效果
- 13、处理点击
- 14、实现Icon可以用Image替换
- 15、验证码倒计时功能
- 16、从新页面返回数据给上一个页面
- 17、创建一个 grid List
- 18、使用不同类型的子项创建列表
- 19、使用长列表
- 20、用占位符淡入淡出的显示图片
- 21、Dart中dynamic,var,object三者的区别
- 22、TextField设置默认值默认值和光标位置
- 23、限制TextField只能输入汉字或英文字母或数字,并限制输入最多中文10字符,英文20字符
- 24、Dart之正则表达式相关方法总结
- 25、使用正则表达式验证手机号
- 26、去掉输入框最大字数显示
- 27、TextField 限制只允许输入数字,字母,小数,设置限制小数位数
- 28、TextField 文本输入框的基本属性及详解
- 29、实现农历(阴历)转公历(阳历)
- 30、SDK升级
- 31、Expanded组件不能直接嵌套LitView报错,解决办法
- 32、ListView不能直接嵌套ListView解决办法
- 32、Text的overflow属性不生效(14)
喜欢记得点个赞哟,我是王睿,很高兴认识大家!
1、内容简介
本文主要总结了开发时遇到的Bug、报错、开发时遇到的技术难题等。同时,让大家能够快速解决自己遇到额问题和避免采坑。如果对您有帮助,希望在文章的末尾能点个赞,谢谢!
2、使用Column等容器包裹ListView报错的问题
报错如下所示:
I/flutter ( 4625): EXCEPTION CAUGHT BY RENDERING LIBRARY
I/flutter ( 4625): The following assertion was thrown during performResize():
I/flutter ( 4625): Vertical viewport was given unbounded height.
I/flutter ( 4625): Viewports expand in the scrolling direction to fill their container.In this case, a vertical
I/flutter ( 4625): viewport was given an unlimited amount of vertical space in which to expand. This situation
I/flutter ( 4625): typically happens when a scrollable widget is nested inside another scrollable widget.
I/flutter ( 4625): If this widget is always nested in a scrollable widget there is no need to use a viewport because
I/flutter ( 4625): there will always be enough vertical space for the children. In this case, consider using a Column
I/flutter ( 4625): instead. Otherwise, consider using the “shrinkWrap” property (or a ShrinkWrappingViewport) to size
I/flutter ( 4625): the height of the viewport to the sum of the heights of its children.
解决方案:
使用扩展小部件Expanded包裹ListView

new Expanded(
child: new ListView(
          .....
          )
);
这告诉ListView尽可能地获取宽度和高度。
3、Navigator operation requested … does not include a Navigator.
原错误: Navigator operation requested with a context that does not include a Navigator.
flutter 最容易报的一个错误就是does not include,因为其思想是组合
这种情况即使是外面包裹了materialapp也是无效的,因为flutter会根据这个context一直上溯,一直到根节点的widget,注意,上溯是根据context的,会上溯到这个context相关的widget的最根节点
14down vote
This error is unrelated to the destination. It happens because you used a context that doesn’t contain a Navigator instance as parent.
How do I create a Navigator instance then ?
This is usually done by inserting in your widget tree a MaterialApp or WidgetApp. Although you can do it manually by using Navigator directly but less recommended. Then, all children of such widget can access NavigatorState using Navigator.of(context).
Wait, I already have a MaterialApp/WidgetApp !
That’s most likely the case. But this error can still happens when you use a context that is a parent of MaterialApp/WidgetApp.
This happens because when you do Navigator.of(context), it will start from the widget associated to the context used. And then go upward in the widget tree until it either find a Navigator or there’s no more widget.
In the first case, everything is fine. In the second, it throws a
Navigator operation requested with a context that does not include a Navigator.
So, how do I fix it ?
First, let’s reproduce this error :
import 'package:flutter/material.dart';

void main() => runApp(MyApp());

class MyApp extends StatelessWidget {
  @override
  Widget build(BuildContext context) {
    return MaterialApp(
      home: Center(
        child: RaisedButton(
          child: Text("Foo"),
          onPressed: () => Navigator.pushNamed(context, "/"),
        ),
      ),
    );
  }
}
This example creates a button that attempts to go to ‘/’ on click but will instead throw an exception.
Notice here that in the
onPressed: () => Navigator.pushNamed(context, “/”),
we used context passed by to build of MyApp.
The problem is, MyApp is actually a parent of MaterialApp. As it’s the widget who instantiate MaterialApp! Therefore MyApp’s BuildContext doesn’t have a MaterialApp as parent!
To solve this problem, we need to use a different context.
In this situation, the easiest solution is to introduce a new widget as child of MaterialApp. And then use that widget’s context to do the Navigator call.
There are a few ways to achieve this. You can extract home into a custom class :
import 'package:flutter/material.dart';

void main() => runApp(MyApp());

class MyApp extends StatelessWidget {
  @override
  Widget build(BuildContext context) {
    return MaterialApp(
      home: MyHome()
    );
  }
}

class MyHome extends StatelessWidget {
  @override
  Widget build(BuildContext context) {
    return Center(
        child: RaisedButton(
          child: Text("Foo"),
          onPressed: () => Navigator.pushNamed(context, "/"),
        ),
      );
  }
}
Or you can use Builder :
import 'package:flutter/material.dart';

void main() => runApp(MyApp());

class MyApp extends StatelessWidget {
  @override
  Widget build(BuildContext context) {
    return MaterialApp(
      home: Builder(
        builder: (context) => Center(
              child: RaisedButton(
                child: Text("Foo"),
                onPressed: () => Navigator.pushNamed(context, "/"),
              ),
            ),
      ),
    );
  }
}
4、设置Container背景色
child: Container(

  decoration: new BoxDecoration(
    color: Colors.grey,
  ),
5、去除AppBar 阴影
页面本身是白色,所以我想将appbar 也设置成白色,并且需要去除阴影
child: Scaffold(
          appBar: AppBar(
            title: Text("xixi"),
            backgroundColor: Colors.white,
            elevation: 0,  //默认是4, 设置成0 就是没有阴影了
          ),
          backgroundColor: Colors.white,
6、组件描边,圆角
通常用Container组件的decoration来做
Container(
              padding: EdgeInsets.symmetric(horizontal: 4.0, vertical: 2.0),
              decoration: BoxDecoration(
                  border: Border.all(color: Colors.grey, width: 1.0),
                  borderRadius: BorderRadius.circular(3.0)),
              child: Text(_products[index]['description'])),
padding内边距属性,如果不添加描边会紧贴文字image加上边距之后image
EdgeInsets支持多种自定义方法
EdgeInsets.all() 全方向
EdgeInsets.only(left,top,right,bottom) 自定义各方向的边距
EdgeInsets.symmetric(vertical, horizontal)自定义垂直,水平对称边距
EdgeInsets.fromWindowPadding(ui.WindowPadding padding, double devicePixelRatio) 根据机型屏幕尺寸定义
decoration这里用到BoxDecoration组件 常用属性
color颜色
border 描边宽度
borderRadius 圆角值
boxShadow 阴影 支持gradient 梯度,混合模式backgroundBlendMode shape自定义形状 Border BorderRadius同样支持多种自定方法.
7、如何给row或column布局添加手势监听?
直接在需要坚挺的布局外面套一层如下的代码即可!
GestureDetector(
  behavior: HitTestBehavior.translucent,
  onTap(){		//监听器
	Navigator.pushNamed(context, '/guide');//处理一些相关逻辑

}
8、ListView和GridView嵌套报错?
直接在GridView布局里,加上这两句代码,即可解决问题!
physics: new NeverScrollableScrollPhysics(),//增加
shrinkWrap: true,//增加
例子如下:
GridView.count(
      physics: new NeverScrollableScrollPhysics(),//增加
      shrinkWrap: true, //增加
      ...
      ...
      children: <Widget>[
       ...
       ...
      ],
    );
9、在Android studio中导入Flutter项目报错
第一步:左上角File→Settings→Dart
配置如下:

第二步:

10、给新页面传值
效果图一:
点击跳转
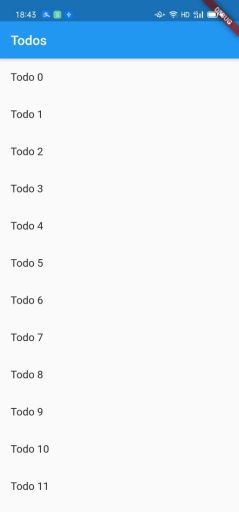
效果图二:
点击第四项后并传值到下一个页面来显示

代码+注释:
import 'package:flutter/foundation.dart';
import 'package:flutter/material.dart';

/**
 * 定义主页。
    添加一个打开选择页面的按钮。
    在选择页面上显示两个按钮。
    点击一个按钮时,关闭选择的页面。
    主页上弹出一个snackbar以显示用户的选择。
 */
class Todo {
  final String title;
  final String description;

  Todo(this.title, this.description);
}

void main() {
  runApp(new MaterialApp(
    title: 'Passing Data',
    home: new TodosScreen(
      todos: new List.generate(
        20,
            (i) => new Todo(
          'Todo $i',
          'A description of what needs to be done for Todo $i',
        ),
      ),
    ),
  ));
}

class TodosScreen extends StatelessWidget {
  final List<Todo> todos;

  TodosScreen({Key key, @required this.todos}) : super(key: key);

  @override
  Widget build(BuildContext context) {
    return new Scaffold(
      appBar: new AppBar(
        title: new Text('Todos'),
      ),
      body: new ListView.builder(
        itemCount: todos.length,
        itemBuilder: (context, index) {
          return new ListTile(
            title: new Text(todos[index].title),
            // When a user taps on the ListTile, navigate to the DetailScreen.
            // Notice that we're not only creating a new DetailScreen, we're
            // also passing the current todo through to it!
            /**
             *当用户点击ListTile时,导航到DetailScreen。请注意,我们不仅在创建新的DetailScreen,而且还在传递当前的待办事项!
             */
            onTap: () {
              Navigator.push(
                context,
                new MaterialPageRoute(
                  builder: (context) => new DetailScreen(todo: todos[index]),   //传入Todo对象
                ),
              );
            },
          );
        },
      ),
    );
  }
}

class DetailScreen extends StatelessWidget {
  // Declare a field that holds the Todo
  final Todo todo;  //接收Todo 对象

  // In the constructor, require a Todo
  DetailScreen({Key key, @required this.todo}) : super(key: key);

  @override
  Widget build(BuildContext context) {
    // Use the Todo to create our UI
    return new Scaffold(
      appBar: new AppBar(
        title: new Text("${todo.title}"),
      ),
      body: new Padding(
        padding: new EdgeInsets.all(16.0),
        child: new Text('${todo.description}'),
      ),
    );
  }
}
喜欢记得点个赞哟,我是王睿,很高兴认识大家!
更多原理请参考谷歌官网:给新页面传值
11、实现滑动关闭、删除item
效果图一:

效果图二:
右滑删除第六个item

效果图三:
左滑删除第4个item

效果图四:
最后看到,第四项和第六项都被删除了

代码+注释:
import 'package:flutter/foundation.dart';
import 'package:flutter/material.dart';

void main() {
  runApp(new MyApp(
    items: new List<String>.generate(20, (i) => "Item ${i + 1}"),
  ));
}

class MyApp extends StatelessWidget {
  final List<String> items;

  MyApp({Key key, @required this.items}) : super(key: key);

  @override
  Widget build(BuildContext context) {
    final title = 'Dismissing Items';

    return new MaterialApp(
      title: title,
      home: new Scaffold(
        appBar: new AppBar(
          title: new Text(title),
        ),
        body: new ListView.builder(
          itemCount: items.length,
          itemBuilder: (context, index) {
            final item = items[index];

            return new Dismissible(
              // Each Dismissible must contain a Key. Keys allow Flutter to
              // uniquely identify Widgets.
              /**
               * 每个可豁免项都必须包含一个密钥。 键使Flutter能够唯一标识小部件。
               */
              key: new Key(item),
              // We also need to provide a function that will tell our app
              // what to do after an item has been swiped away.
              /**
               * 我们还需要提供一个可以告诉我们应用程序的功能刷掉物品后该怎么办。
               * onDismissed —— 被解雇
               * direction —— 方位表示:删除方向是左边还是右边,startToEnd 左边,endToStart 右边
               */
              onDismissed: (direction) {
                print(direction);
                items.removeAt(index);    //根据坐标移除具体的item项
                // 显示移除了哪一条item
                Scaffold.of(context).showSnackBar(
                    new SnackBar(content: new Text("$item dismissed")));
              },
              // Show a red background as the item is swiped away
              // 滑动删除item时显示红色背景
              background: new Container(color: Colors.red),
              child: new ListTile(title: new Text('$item')),
            );
          },
        ),
      ),
    );
  }
}
喜欢记得点个赞哟,我是王睿,很高兴认识大家!
更多原理请参考谷歌官网:实现滑动关闭、删除item
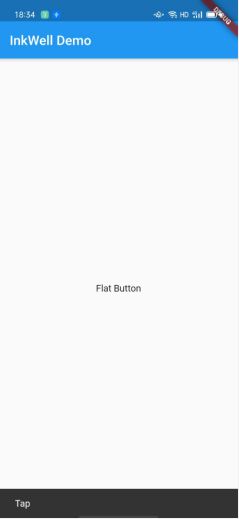
12、添加Material触摸水波效果
效果图一:
点击按钮出现灰色水波纹特效

效果图二:
显示底部弹出框
代码+注释:
import 'package:flutter/material.dart';

void main() => runApp(new MyApp());

class MyApp extends StatelessWidget {
  @override
  Widget build(BuildContext context) {
    final title = 'InkWell Demo';

    return new MaterialApp(
      title: title,
      home: new MyHomePage(title: title),
    );
  }
}

class MyHomePage extends StatelessWidget {
  final String title;

  MyHomePage({Key key, this.title}) : super(key: key);

  @override
  Widget build(BuildContext context) {
    return new Scaffold(
      appBar: new AppBar(
        title: new Text(title),
      ),
      body: new Center(child: new MyButton()),
    );
  }
}

class MyButton extends StatelessWidget {
  @override
  Widget build(BuildContext context) {
    // The InkWell Wraps our custom flat button Widget
    /// InkWell 有水波纹, GestureDetector 没有水波纹
    return new InkWell(
      // When the user taps the button, show a snackbar
      // 当用户点击按钮时,显示 snackbar
      onTap: () {
        Scaffold.of(context).showSnackBar(new SnackBar(
          content: new Text('Tap'),
        ));
      },
      child: new Container(
        padding: new EdgeInsets.all(12.0),
        child: new Text('Flat Button'),
      ),
    );
  }
}
喜欢记得点个赞哟,我是王睿,很高兴认识大家!
更多原理请参考谷歌官网:添加Material触摸水波效果
13、处理点击
效果图一:
点击按钮

效果图二:
显示底部弹出框

代码+注释:
import 'package:chapter02one/Api.dart';
import 'package:flutter/material.dart';

void main() => runApp(new MyApp());

class MyApp extends StatelessWidget {
  @override
  Widget build(BuildContext context) {
    final title = 'Gesture Demo';

    return new MaterialApp(
      title: title,
      home: new MyHomePage(title: title),
    );
  }
}

class MyHomePage extends StatelessWidget {
  final String title;

  MyHomePage({Key key, this.title}) : super(key: key);

  @override
  Widget build(BuildContext context) {
    return new Scaffold(
      appBar: new AppBar(
        title: new Text(title),
      ),
      body: new Center(child: new MyButton()),
    );
  }
}

class MyButton extends StatelessWidget {
  @override
  Widget build(BuildContext context) {
    // Our GestureDetector wraps our button
    ///我们的GestureDetector包裹了我们的按钮
    return new GestureDetector(
      // When the child is tapped, show a snackbar
      ///监听器
      onTap: () {
        /**
         * 准备: 底部弹出框对象
         * content 是一个组件,可以是自定义的任何类型组件,也可以是复合型组合组件,例如Column
         */
        final snackBar = new SnackBar(content: Text('底部弹出框呀'));
        // 显示 SnackBar
        Scaffold.of(context).showSnackBar(snackBar);
      },
      // Our Custom Button!
      child: new Container(
        padding: new EdgeInsets.all(12.0),
        decoration: new BoxDecoration(
          color: Theme.of(context).buttonColor,
          borderRadius: new BorderRadius.circular(8.0),
        ),
        child: new Text('My Button'),
      ),
    );
  }
}
喜欢记得点个赞哟,我是王睿,很高兴认识大家!
更多原理请参考谷歌官网:处理点击
14、实现Icon可以用Image替换
flutter实现Icon可以用Image替换
23/100
发布文章
qq_27494201
未选择任何文件
flutter的Icon可以用Image替换
15、验证码倒计时功能
效果图:

import 'dart:async';

import 'package:flutter/material.dart';
import '../widget/JdText.dart';
import '../widget/JdButton.dart';
import '../services/ScreenAdapter.dart';
import 'dart:async'; //Timer定时器需要引入
import '../config/Config.dart';
import 'package:dio/dio.dart';
import 'package:fluttertoast/fluttertoast.dart';

/**
 * 注册 — 第二步
 */
class RegisterSecondPage extends StatefulWidget {
  Map arguments;
  RegisterSecondPage({Key key, this.arguments}) : super(key: key);

  _RegisterSecondPageState createState() => _RegisterSecondPageState();
}

class _RegisterSecondPageState extends State<RegisterSecondPage> {
  String tel;         //手机号码
  bool sendCodeBtn = false; //判断发送短信按钮是否点击过标志
  int seconds = 10;   //倒计时 10秒
  String code;    //验证码

  @override
  void initState() {
    // TODO: implement initState
    super.initState();
    this.tel = widget.arguments['tel'];
    this._showTimer();
  }

  //倒计时
  _showTimer() {
    Timer t;
    t = Timer.periodic(Duration(milliseconds: 1000), (timer) {
      setState(() {
        this.seconds--;
      });
      if (this.seconds == 0) {
        t.cancel(); //清除定时器
        setState(() {
          this.sendCodeBtn = true;
        });
      }
    });
  }

  //重新发送验证码
  sendCode() async {
    setState(() {
      this.sendCodeBtn = false;
      this.seconds = 10;
      this._showTimer();
    });
    var api = '${Config.domain}api/sendCode';
    var response = await Dio().post(api, data: {"tel": this.tel});
    if (response.data["success"]) {
      print(response); //演示期间服务器直接返回  给手机发送的验证码
    }
  }
  //验证验证码

  validateCode() async {
    var api = '${Config.domain}api/validateCode';
    var response =
    await Dio().post(api, data: {"tel": this.tel, "code": this.code});
    if (response.data["success"]) {
      Navigator.pushNamed(context, '/registerThird',arguments: {
        "tel":this.tel,
        "code":this.code
      });
    } else {
      Fluttertoast.showToast(
        msg: '${response.data["message"]}',
        toastLength: Toast.LENGTH_SHORT,
        gravity: ToastGravity.CENTER,
      );
    }
  }

  @override
  Widget build(BuildContext context) {
    return Scaffold(
      appBar: AppBar(
        title: Text("用户注册-第二步"),
      ),
      body: Container(
        padding: EdgeInsets.all(ScreenAdapter.width(20)),
        child: ListView(
          children: <Widget>[
            SizedBox(height: 50),
            Container(
              padding: EdgeInsets.only(left: 10),
              child: Text("验证码已经发送到了您的${this.tel}手机,请输入${this.tel}手机号收到的验证码"),
            ),
            SizedBox(height: 40),
            Stack(
              children: <Widget>[
                Container(
                  child: JdText(
                    text: "请输入验证码",
                    onChanged: (value) {
                      // print(value);
                      this.code = value;
                    },
                  ),
                  height: ScreenAdapter.height(100),
                ),
                Positioned(
                  right: 0,
                  top: 0,
                  child: this.sendCodeBtn
                      ? RaisedButton(
                    child: Text('重新发送'),
                    onPressed: this.sendCode,
                  )
                      : RaisedButton(
                    child: Text('${this.seconds}秒后重发'),
                    onPressed: () {},
                  ),
                )
              ],
            ),
            SizedBox(height: 20),
            JdButton(
              text: "下一步",
              color: Colors.red,
              height: 74,
              cb: this.validateCode,
            )
          ],
        ),
      ),
    );
  }
}
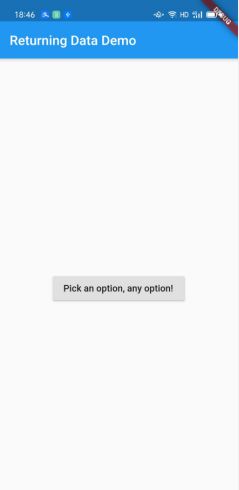
16、从新页面返回数据给上一个页面
效果图一:
点击按钮
效果图二:
点击YES后,返回上一级页面并传值

效果图三:
收到值,并用底部弹出框显示结果

注释+代码:
import 'package:flutter/material.dart';

void main() {
  runApp(new MaterialApp(
    title: 'Returning Data',
    home: new HomeScreen(),
  ));
}

class HomeScreen extends StatelessWidget {
  @override
  Widget build(BuildContext context) {
    return new Scaffold(
      appBar: new AppBar(
        title: new Text('Returning Data Demo'),
      ),
      body: new Center(child: new SelectionButton()),
    );
  }
}

class SelectionButton extends StatelessWidget {
  @override
  Widget build(BuildContext context) {
    return new RaisedButton(
      onPressed: () {
        _navigateAndDisplaySelection(context);
      },
      child: new Text('Pick an option, any option!'),
    );
  }

  // A method that launches the SelectionScreen and awaits the result from
  // Navigator.pop!
  /**
   * 一种启动SelectionScreen并等待以下结果的方法 Navigator.pop!
   */
  _navigateAndDisplaySelection(BuildContext context) async {
    // Navigator.push returns a Future that will complete after we call
    // Navigator.pop on the Selection Screen!
    /**
     * Navigator.push返回一个Future,它将在我们调用后完成选择屏幕上的Navigator.pop!
     */
    final result = await Navigator.push(
      context,
      new MaterialPageRoute(builder: (context) => new SelectionScreen()),
    );

    // After the Selection Screen returns a result, show it in a Snackbar!
    ///选择屏幕返回结果后,将其显示在小吃栏中!
    Scaffold
        .of(context)
        .showSnackBar(new SnackBar(content: new Text("$result")));
  }
}

class SelectionScreen extends StatelessWidget {
  @override
  Widget build(BuildContext context) {
    return new Scaffold(
      appBar: new AppBar(
        title: new Text('Pick an option'),
      ),
      body: new Center(
        child: new Column(
          mainAxisAlignment: MainAxisAlignment.center,
          children: <Widget>[
            new Padding(
              padding: const EdgeInsets.all(8.0),
              child: new RaisedButton(
                onPressed: () {
                  // Close the screen and return "Yep!" as the result
                  /// 关闭屏幕并返回“是!” 作为结果
                  Navigator.pop(context, 'Yep!');
                },
                child: new Text('Yep!'),
              ),
            ),
            new Padding(
              padding: const EdgeInsets.all(8.0),
              child: new RaisedButton(
                onPressed: () {
                  // Close the screen and return "Nope!" as the result
                  /// 关闭屏幕并返回“不!” 作为结果
                  Navigator.pop(context, 'Nope.');
                },
                child: new Text('Nope.'),
              ),
            )
          ],
        ),
      ),
    );
  }
}
喜欢记得点个赞哟,我是王睿,很高兴认识大家!
更多原理请参考谷歌官网:从新页面返回数据给上一个页面
17、创建一个 grid List
效果图:

代码+注释:
import 'package:flutter/material.dart';

void main() {
  runApp(new MyApp());
}

class MyApp extends StatelessWidget {
  @override
  Widget build(BuildContext context) {
    final title = 'Grid List';

    return new MaterialApp(
      title: title,
      home: new Scaffold(
        appBar: new AppBar(
          title: new Text(title),
        ),
        body: new GridView.count(
          // Create a grid with 2 columns. If you change the scrollDirection to
          // horizontal, this would produce 2 rows.
          /**
           * 创建一个包含2列的网格。 如果将scrollDirection更改为水平,这将产生2行。
           */
          crossAxisCount: 2,
          // Generate 100 Widgets that display their index in the List
          // 生成100个在列表中显示其索引的小部件,参数一: 数量,参数二: 下标
          children: new List.generate(100, (index) {
            return new Center(
              child: new Text(
                'Item $index',
                style: Theme.of(context).textTheme.headline,
              ),
            );
          }),
        ),
      ),
    );
  }
}
喜欢记得点个赞哟,我是王睿,很高兴认识大家!
更多原理请参考谷歌官网:创建一个 grid List
18、使用不同类型的子项创建列表
效果图:

代码+注释:
import 'package:flutter/foundation.dart';
import 'package:flutter/material.dart';

void main() {
  runApp(new MyApp(
    //  List.generate构造函数 —— 生成拥有1000个字符串的列表
    items: new List<ListItem>.generate(
      1000,
          (i) => i % 6 == 0       //根据规律: 每一个标题后面会跟着五条内容
          ? new HeadingItem("Heading $i")     //标题类型
          : new MessageItem("Sender $i", "Message body $i"),    //内容类型
    ),
  ));
}

class MyApp extends StatelessWidget {
  final List<ListItem> items;

  MyApp({Key key, @required this.items}) : super(key: key);

  @override
  Widget build(BuildContext context) {
    final title = 'Mixed List';

    return new MaterialApp(
      title: title,
      home: new Scaffold(
        appBar: new AppBar(
          title: new Text(title),
        ),
        body: new ListView.builder(
          // Let the ListView know how many items it needs to build
          // 让ListView知道需要构建多少个项目
          itemCount: items.length,
          // Provide a builder function. This is where the magic happens! We'll
          //  提供构建器功能。 这就是魔术发生的地方! 好
          // convert each item into a Widget based on the type of item it is.
          //  根据项目类型将每个项目转换为Widget。
          itemBuilder: (context, index) {
            final item = items[index];      //得到具体的items

            if (item is HeadingItem) {    //是否为标题类型
              return new ListTile(
                title: new Text(
                  item.heading,
                  style: Theme.of(context).textTheme.headline,
                ),
              );
            } else if (item is MessageItem) { //是否为内容类型
              return new ListTile(
                title: new Text(item.sender),
                subtitle: new Text(item.body),
              );
            }
          },
        ),
      ),
    );
  }
}

// The base class for the different types of items the List can contain
// 列表可以包含的不同类型的项目的基类
abstract class ListItem {}

// A ListItem that contains data to display a heading
// 一个ListItem,其中包含显示标题的数据
class HeadingItem implements ListItem {
  final String heading;

  HeadingItem(this.heading);
}

// A ListItem that contains data to display a message
// 一个ListItem包含显示消息的数据
class MessageItem implements ListItem {
  final String sender;
  final String body;

  MessageItem(this.sender, this.body);
}
喜欢记得点个赞哟,我是王睿,很高兴认识大家!
更多原理请参考谷歌官网:使用不同类型的子项创建列表
19、使用长列表
效果图:
利用 List.generate构造函数 —— 配合 ListView 生成拥有10000个字符串的列表

代码+注释:
import 'package:flutter/foundation.dart';
import 'package:flutter/material.dart';

void main() {
  runApp(new MyApp(
    //  List.generate构造函数 —— 生成拥有10000个字符串的列表
    items: new List<String>.generate(10000, (i) => "Item $i"),
  ));
}

class MyApp extends StatelessWidget {
  final List<String> items;

  MyApp({Key key, @required this.items}) : super(key: key);

  @override
  Widget build(BuildContext context) {
    final title = 'Long List';

    return new MaterialApp(
      title: title,
      home: new Scaffold(
        appBar: new AppBar(
          title: new Text(title),
        ),
        body: new ListView.builder(
          itemCount: items.length,          //List长度
          itemBuilder: (context, index) {   //Item构造者
            return new ListTile(
              title: new Text('${items[index]}'),
            );
          },
        ),
      ),
    );
  }
}
喜欢记得点个赞哟,我是王睿,很高兴认识大家!
更多原理请参考谷歌官网:
使用长列表
20、用占位符淡入淡出的显示图片
效果图一:
由于是网络图片,加载速度由网速决定,所以先显示进度条圈圈

效果图二:
加载完毕后,淡入淡出的显示图片,不是一下子显示的哟!

导入依赖:
transparent_image: ^1.0.0
代码+注释:
import 'package:chapter02one/Api.dart';
import 'package:flutter/material.dart';
import 'package:transparent_image/transparent_image.dart';

void main() {
  runApp(new MyApp());
}

class MyApp extends StatelessWidget {
  @override
  Widget build(BuildContext context) {
    final title = 'Fade in images';

    return new MaterialApp(
      title: title,
      home: new Scaffold(
        appBar: new AppBar(
          title: new Text(title),
        ),
        body: new Stack(
          children: <Widget>[
            new Center(child: new CircularProgressIndicator()),
            new Center(
              /**
               * FadeInImage.memoryNetwork
               * 正在加载时,会显示加载进度条
               * 加载完毕后,会慢慢淡入淡出的显示图片
               */
              child: new FadeInImage.memoryNetwork(
                placeholder: kTransparentImage,
                image:
                '${Api.URL}/aa.png',
              ),
            ),
          ],
        ),
      ),
    );
  }
}
喜欢记得点个赞哟,我是王睿,很高兴认识大家!
更多原理请参考谷歌官网:
用占位符淡入图片
21、Dart中dynamic,var,object三者的区别
void main()//dynamic,var,object三者的区别
{
  //dynamic
  dynamic x = 'hello';//编译时不会揣测数据类型,但是运行时会推断
  print(x.runtimeType);//String
  print(x);
  //但是这样的坏处就是会让dart的语法检查失效,所以有可能会造成混乱而不报错
  //所以不要直接使用dynamic
  x = 123;
  print(x.runtimeType);//int,说明类型是可变的
  print(x);

  //var
  var a = 'hello';
  print(a.runtimeType);
  print(a);
  //a = 123;//会报错
  a = '123';
  print(a);

  //Object
  Object w = 1;
  print(w.runtimeType);
  print(w);
  //不能调用Object不存在的方法

}
22、TextField设置默认值默认值和光标位置
TextField(
          //输入键盘类型
              keyboardType: TextInputType.text,
              autofocus: true,
              decoration: InputDecoration(
                border: OutlineInputBorder(
                    borderRadius: BorderRadius.circular(),
                    borderSide: BorderSide.none),
              ),
              onChanged: (value) {
                this._keyword = value;
              },
              controller: TextEditingController.fromValue(TextEditingValue(
                  text: '${this._keyword == null ? "" : this._keyword}',  //判断keyword是否为空
                  // 保持光标在最后

                  selection: TextSelection.fromPosition(TextPosition(
                      affinity: TextAffinity.downstream,
                      offset: '${this._keyword}'.length)))),
            ),
23、限制TextField只能输入汉字或英文字母或数字,并限制输入最多中文10字符,英文20字符
原文地址
第一步,给textfield设置输入法则:
inputFormatters: [
WhitelistingTextInputFormatter(RegExp(
“[a-zA-Z]|[\u4e00-\u9fa5]|[0-9]”)), //只能输入汉字或者字母或数字
LengthLimitingTextInputFormatter(maxLength),//最大长度
],
第二步,动态修改最大字长:
onChanged: (value) {
_changeMaxLimit(value);
},
/// 改字数限制,每输入一个中文字符,要减1。
/// 字符要求:10个汉字或20个英文
void _changeMaxLimit(String value) {
maxLength = 20;
for (int i = 0; i < value.length; i++) {
if (value.codeUnitAt(i) > 122) {
maxLength–;
}
}
setState(() {});
}
我这里简略写了关键部分,关于maxLength的初始化,textfield别的参数设置,大家还请自行解决。
24、Dart之正则表达式相关方法总结
原文地址
【Dart学习】–Dart之正则表达式相关方法总结
一,部分属性
RegExp exp = new RegExp(r"(\w+)");
返回正则表达式的哈希码
print(exp.hashCode);
正则表达式是否区分大小写
print(exp.isCaseSensitive);
正则表达式是否匹配多行
print(exp.isMultiLine);
返回源正则表达式字符串
print(exp.pattern);
返回对象运行时的类型
print(exp.runtimeType);
二,常用方法
…
25、使用正则表达式验证手机号
RegExp exp = RegExp(
          r'^((13[0-9])|(14[0-9])|(15[0-9])|(16[0-9])|(17[0-9])|(18[0-9])|(19[0-9]))\d{8}$');
bool matched = exp.hasMatch(mobileTextController.text);
26、去掉输入框最大字数显示
new TextField(
       maxLength:11 ,
       enabled:widget.phone == null?true:false,
       keyboardType: TextInputType.number,
       decoration: InputDecoration(`在这里插入代码片`
       counterText: "",//此处控制最大字符是否显示
       hintText: widget.phone == null?'手机号':widget.phone,
       hintStyle: TextStyle(fontSize: 14,color: AppColors.colorGrayText),
       border: InputBorder.none,
     ),
     controller: _phoneContro,    ));
27、TextField 限制只允许输入数字,字母,小数,设置限制小数位数
原文地址
TextField(
          inputFormatters: [
          //只允许输入字母
            WhitelistingTextInputFormatter(RegExp("[a-zA-Z]")),
          ],
   ),
    TextField(
    //只允许输入数字
          inputFormatters: [WhitelistingTextInputFormatter.digitsOnly],
   ),
    TextField(
      			inputFormatters: [
                          //只允许输入小数
                            WhitelistingTextInputFormatter(RegExp("[0-9.]")),
                          ],
    )
    ,
    TextField(
      			inputFormatters: [
                          //限制小数位数
                            _MyNumberTextInputFormatter(digit:5),
                          ],
    )


// 限制小数位数
class _MyNumberTextInputFormatter extends TextInputFormatter {
  static const defaultDouble = 0.001;
  ///允许的小数位数,-1代表不限制位数
  int digit;
  _MyNumberTextInputFormatter({this.digit=-1});
  static double strToFloat(String str, [double defaultValue = defaultDouble]) {
    try {
      return double.parse(str);
    } catch (e) {
      return defaultValue;
    }
  }
  ///获取目前的小数位数
  static int getValueDigit(String value){
    if(value.contains(".")){
      return value.split(".")[1].length;
    }else{
      return -1;
    }
  }


  @override
  TextEditingValue formatEditUpdate(TextEditingValue oldValue, TextEditingValue newValue) {
    String value = newValue.text;
    int selectionIndex = newValue.selection.end;
    if (value == ".") {
      value = "0.";
      selectionIndex++;
    } else if (value != ""
        && value != defaultDouble.toString()
        && strToFloat(value, defaultDouble) == defaultDouble
        ||getValueDigit(value)>digit) {
      value = oldValue.text;
      selectionIndex = oldValue.selection.end;
    }
    return new TextEditingValue(
      text: value,
      selection: new TextSelection.collapsed(offset: selectionIndex),
    );
  }
}
28、TextField 文本输入框的基本属性及详解
const TextField({
    Key key,
    this.controller,                    // 控制正在编辑文本
    this.focusNode,                     // 获取键盘焦点
    this.decoration = const InputDecoration(),              // 边框装饰
    TextInputType keyboardType,         // 键盘类型
    this.textInputAction,               // 键盘的操作按钮类型
    this.textCapitalization = TextCapitalization.none,      // 配置大小写键盘
    this.style,                         // 输入文本样式
    this.textAlign = TextAlign.start,   // 对齐方式
    this.textDirection,                 // 文本方向
    this.autofocus = false,             // 是否自动对焦
    this.obscureText = false,           // 是否隐藏内容,例如密码格式
    this.autocorrect = true,            // 是否自动校正
    this.maxLines = 1,                  // 最大行数
    this.maxLength,                     // 允许输入的最大长度
    this.maxLengthEnforced = true,      // 是否允许超过输入最大长度
    this.onChanged,                     // 文本内容变更时回调
    this.onEditingComplete,             // 提交内容时回调
    this.onSubmitted,                   // 用户提示完成时回调
    this.inputFormatters,               // 验证及格式
    this.enabled,                       // 是否不可点击
    this.cursorWidth = 2.0,             // 光标宽度
    this.cursorRadius,                  // 光标圆角弧度
    this.cursorColor,                   // 光标颜色
    this.keyboardAppearance,            // 键盘亮度
    this.scrollPadding = const EdgeInsets.all(20.0),        // 滚动到视图中时,填充边距
    this.enableInteractiveSelection,    // 长按是否展示【剪切/复制/粘贴菜单LengthLimitingTextInputFormatter】
    this.onTap,                         // 点击时回调
})
29、实现农历(阴历)转公历(阳历)
/**
 * 农历的工具类
 */
class LunarCalendarUtil {
  /**
   * 支持转换的最小农历年份
   */
  static final int MIN_YEAR = 1900;

  /**
   * 支持转换的最大农历年份
   */
  static final int MAX_YEAR = 2099;
  /**
   * 公历每月前的天数
   */
  static final List<int> DAYS_BEFORE_MONTH = [0, 31, 59, 90, 120, 151, 181, 212, 243, 273, 304, 334, 365];

  /**
   * 用来表示1900年到2099年间农历年份的相关信息,共24位bit的16进制表示,其中:
   * 1. 前4位表示该年闰哪个月;
   * 2. 5-17位表示农历年份13个月的大小月分布,0表示小,1表示大;
   * 3. 最后7位表示农历年首(正月初一)对应的公历日期。
   * 以2014年的数据0x955ABF为例说明:
   * 1001 0101 0101 1010 1011 1111
   *  闰九月   农历正月初一对应公历1月31号
   */
  static final List<int> LUNAR_INFO = [
    /*1900*/
    0x84B6BF,
    /*1901-1910*/
    0x04AE53, 0x0A5748, 0x5526BD, 0x0D2650, 0x0D9544, 0x46AAB9, 0x056A4D, 0x09AD42, 0x24AEB6, 0x04AE4A,
    /*1911-1920*/
    0x6A4DBE, 0x0A4D52, 0x0D2546, 0x5D52BA, 0x0B544E, 0x0D6A43, 0x296D37, 0x095B4B, 0x749BC1, 0x049754,
    /*1921-1930*/
    0x0A4B48, 0x5B25BC, 0x06A550, 0x06D445, 0x4ADAB8, 0x02B64D, 0x095742, 0x2497B7, 0x04974A, 0x664B3E,
    /*1931-1940*/
    0x0D4A51, 0x0EA546, 0x56D4BA, 0x05AD4E, 0x02B644, 0x393738, 0x092E4B, 0x7C96BF, 0x0C9553, 0x0D4A48,
    /*1941-1950*/
    0x6DA53B, 0x0B554F, 0x056A45, 0x4AADB9, 0x025D4D, 0x092D42, 0x2C95B6, 0x0A954A, 0x7B4ABD, 0x06CA51,
    /*1951-1960*/
    0x0B5546, 0x555ABB, 0x04DA4E, 0x0A5B43, 0x352BB8, 0x052B4C, 0x8A953F, 0x0E9552, 0x06AA48, 0x6AD53C,
    /*1961-1970*/
    0x0AB54F, 0x04B645, 0x4A5739, 0x0A574D, 0x052642, 0x3E9335, 0x0D9549, 0x75AABE, 0x056A51, 0x096D46,
    /*1971-1980*/
    0x54AEBB, 0x04AD4F, 0x0A4D43, 0x4D26B7, 0x0D254B, 0x8D52BF, 0x0B5452, 0x0B6A47, 0x696D3C, 0x095B50,
    /*1981-1990*/
    0x049B45, 0x4A4BB9, 0x0A4B4D, 0xAB25C2, 0x06A554, 0x06D449, 0x6ADA3D, 0x0AB651, 0x095746, 0x5497BB,
    /*1991-2000*/
    0x04974F, 0x064B44, 0x36A537, 0x0EA54A, 0x86B2BF, 0x05AC53, 0x0AB647, 0x5936BC, 0x092E50, 0x0C9645,
    /*2001-2010*/
    0x4D4AB8, 0x0D4A4C, 0x0DA541, 0x25AAB6, 0x056A49, 0x7AADBD, 0x025D52, 0x092D47, 0x5C95BA, 0x0A954E,
    /*2011-2020*/
    0x0B4A43, 0x4B5537, 0x0AD54A, 0x955ABF, 0x04BA53, 0x0A5B48, 0x652BBC, 0x052B50, 0x0A9345, 0x474AB9,
    /*2021-2030*/
    0x06AA4C, 0x0AD541, 0x24DAB6, 0x04B64A, 0x6a573D, 0x0A4E51, 0x0D2646, 0x5E933A, 0x0D534D, 0x05AA43,
    /*2031-2040*/
    0x36B537, 0x096D4B, 0xB4AEBF, 0x04AD53, 0x0A4D48, 0x6D25BC, 0x0D254F, 0x0D5244, 0x5DAA38, 0x0B5A4C,
    /*2041-2050*/
    0x056D41, 0x24ADB6, 0x049B4A, 0x7A4BBE, 0x0A4B51, 0x0AA546, 0x5B52BA, 0x06D24E, 0x0ADA42, 0x355B37,
    /*2051-2060*/
    0x09374B, 0x8497C1, 0x049753, 0x064B48, 0x66A53C, 0x0EA54F, 0x06AA44, 0x4AB638, 0x0AAE4C, 0x092E42,
    /*2061-2070*/
    0x3C9735, 0x0C9649, 0x7D4ABD, 0x0D4A51, 0x0DA545, 0x55AABA, 0x056A4E, 0x0A6D43, 0x452EB7, 0x052D4B,
    /*2071-2080*/
    0x8A95BF, 0x0A9553, 0x0B4A47, 0x6B553B, 0x0AD54F, 0x055A45, 0x4A5D38, 0x0A5B4C, 0x052B42, 0x3A93B6,
    /*2081-2090*/
    0x069349, 0x7729BD, 0x06AA51, 0x0AD546, 0x54DABA, 0x04B64E, 0x0A5743, 0x452738, 0x0D264A, 0x8E933E,
    /*2091-2099*/
    0x0D5252, 0x0DAA47, 0x66B53B, 0x056D4F, 0x04AE45, 0x4A4EB9, 0x0A4D4C, 0x0D1541, 0x2D92B5
  ];

  /**
   * 将农历日期转换为公历日期
   * @param year    农历年份
   * @param month   农历月
   * @param monthDay   农历日
   * @param isLeapMonth   该月是否是闰月(该参数可以根据本类中leapMonth()方法,先判断一下要查询的年份是否有闰月,并且闰的几月)
   * @return 返回农历日期对应的公历日期,year0, month1, day2.
   */
  static  List<int> lunarToSolar(int year, int month, int monthDay, bool isLeapMonth) {
    int dayOffset;
    int leapMonth;
    int i;
    if (year < MIN_YEAR || year > MAX_YEAR || month < 1 || month > 12
        || monthDay < 1 || monthDay > 30) {
      throw new Exception(
          "Illegal lunar date, must be like that:\n\t" +
              "year : 1900~2099\n\t" +
              "month : 1~12\n\t" +
              "day : 1~30");
    }
    dayOffset = (LUNAR_INFO[year - MIN_YEAR] & 0x001F) - 1;
    if (((LUNAR_INFO[year - MIN_YEAR] & 0x0060) >> 5) == 2) {
      dayOffset += 31;
    }
    for (i = 1; i < month; i++) {
      if ((LUNAR_INFO[year - MIN_YEAR] & (0x80000 >> (i - 1))) == 0) {
        dayOffset += 29;
      } else {
        dayOffset += 30;
      }
    }
    dayOffset += monthDay;
    leapMonth = (LUNAR_INFO[year - MIN_YEAR] & 0xf00000) >> 20;
    // 这一年有闰月
    if (leapMonth != 0) {
      if (month > leapMonth || (month == leapMonth && isLeapMonth)) {
        if ((LUNAR_INFO[year - MIN_YEAR] & (0x80000 >> (month - 1))) == 0) {
          dayOffset += 29;
        } else {
          dayOffset += 30;
        }
      }
    }
    if (dayOffset > 366 || (year % 4 != 0 && dayOffset > 365)) {
      year += 1;
      if (year % 4 == 1) {
        dayOffset -= 366;
      } else {
        dayOffset -= 365;
      }
    }
    List<int> solarInfo = new List(3);
    for (i = 1; i < 13; i++) {
      int iPos = DAYS_BEFORE_MONTH[i];
      if (year % 4 == 0 && i > 2) {
        iPos += 1;
      }
      if (year % 4 == 0 && i == 2 && iPos + 1 == dayOffset) {
        solarInfo[1] = i;
        solarInfo[2] = dayOffset - 31;
        break;
      }
      if (iPos >= dayOffset) {
        solarInfo[1] = i;
        iPos = DAYS_BEFORE_MONTH[i - 1];
        if (year % 4 == 0 && i > 2) {
          iPos += 1;
        }
        if (dayOffset > iPos) {
          solarInfo[2] = dayOffset - iPos;
        } else if (dayOffset == iPos) {
          if (year % 4 == 0 && i == 2) {
            solarInfo[2] = DAYS_BEFORE_MONTH[i] - DAYS_BEFORE_MONTH[i - 1] + 1;
          } else {
            solarInfo[2] = DAYS_BEFORE_MONTH[i] - DAYS_BEFORE_MONTH[i - 1];
          }
        } else {
          solarInfo[2] = dayOffset;
        }
        break;
      }
    }
    solarInfo[0] = year;
    return solarInfo;
  }

  /**
   * 传回农历year年month月的总天数
   *
   * @param year   要计算的年份
   * @param month        要计算的月
   * @return 传回天数
   */
  static int daysInMonth(int year, int month) {
    return daysInMontaThree(year, month, false);
  }

  /**
   * 传回农历year年month月的总天数
   *
   * @param year   要计算的年份
   * @param month    要计算的月
   * @param leap   当月是否是闰月
   * @return 传回天数,如果闰月是错误的,返回0.
   */
  static int daysInMontaThree(int year, int month, bool leap) {
    int mLeapMonth = leapMonth(year);
    int offset = 0;
    // 如果本年有闰月且month大于闰月时,需要校正
    if (leapMonth != 0 && month > mLeapMonth) {
      offset = 1;
    }
    // 不考虑闰月
    if (!leap) {
      return daysInLunarMonth(year, month + offset);
    } else {
      // 传入的闰月是正确的月份
      if (leapMonth != 0 && leapMonth == month) {
        return daysInLunarMonth(year, month + 1);
      }
    }
    return 0;
  }

  /**
   * 传回农历 year年的总天数
   *
   * @param year 将要计算的年份
   * @return 返回传入年份的总天数
   */
  static int daysInLunarYear(int year) {
    int i, sum = 348;
    if (leapMonth(year) != 0) {
      sum = 377;
    }
    int monthInfo = LUNAR_INFO[year - MIN_YEAR] & 0x0FFF80;
    for (i = 0x80000; i > 0x7; i >>= 1) {
      if ((monthInfo & i) != 0) {
        sum += 1;
      }
    }
    return sum;
  }

  /**
   * 传回农历 year年month月的总天数,总共有13个月包括闰月
   *
   * @param year  将要计算的年份
   * @param month 将要计算的月份
   * @return 传回农历 year年month月的总天数
   */
  static int daysInLunarMonth(int year, int month) {
    if ((LUNAR_INFO[year - MIN_YEAR] & (0x100000 >> month)) == 0) {
      return 29;
    } else {
      return 30;
    }
  }

  /**
   * 传回农历 year年闰哪个月 1-12 , 没闰传回 0
   * @param year 将要计算的年份
   * @return 传回农历 year年闰哪个月1-12, 没闰传回 0
   */
  static int leapMonth(int year) {
    return ((LUNAR_INFO[year - MIN_YEAR] & 0xF00000)) >> 20;
  }
}
测试数据:
测试数据:2020年12月5日转公历结果为:2021年1月17日
Text('${LunarCalendarUtil.lunarToSolar(2020, 12, 5, true)}'),
30、SDK升级
1、在终端中使用flutter upgrade
2、删除SDK包重新下载
31、Expanded组件不能直接嵌套LitView报错,解决办法
这样写,即可解决问题!
Row(
          children: <Widget>[
            Expanded(
              flex: 1,
              child: Container(
                height: 180,
                child: ListView(
                  children: <Widget>[
                    Container(
                      height: 85,
                      child: Image.network("https://www.itying.com/images/flutter/3.png",fit: BoxFit.cover),

                    ),
                    SizedBox(height: 10),
                    Container(
                      height: 85,
                      child: Image.network("https://www.itying.com/images/flutter/4.png",fit: BoxFit.cover),
                    )
                  ],
                )
              )
            ),

          ],
        )
32、ListView不能直接嵌套ListView解决办法
ListView(
        scrollDirection: Axis.horizontal,
        children: <Widget>[
          Container(
            width: 180,
            color: Colors.orange,
            child: ListView(
              children: <Widget>[
                Image.network("https://www.itying.com/images/flutter/1.png"),
                Text('我是一个文本')
              ],
            ),
          ),
        ],
      ),
直接套一个Container即可解决问题
32、Text的overflow属性不生效(14)
Text的overflow属性不生效(14)
33、