Nginx概述 Nginx部署 Nginx的站点 Nginx日志 PHP5.6.40编译安装
文章目录
-
-
- Nginx
- Nginx概述
- Nginx使用Epool网络模型
- Nginx部署
- 1、epel源安装
- 2、yum安装
- 3、源码编译安装
- nginx客户端参数详解
- Nginx的使用
- Nginx的站点
- 线上域名
- Nginx排错
- Nginx日志
- 日志的切割
-
- PHP5.6.40编译安装
-
Nginx
Nginx概述
Nginx是一个开源且高性能、可靠的Http Web服务、代理服务。
开源: 直接获取源代码
高性能: 支持海量并发
可靠: 服务稳定

Nginx是基于HTTP协议和反向代理的WEB服务器。同时还支持IMAP/POP3/SMTP服务(email邮件)
#   http://nginx.org/
静态服务器:不需要服务器做特殊处理的代码就是静态资源。(html、图片、音频、视频)
代理服务器:将一个服务的请求转移另一个服务。
安全服务器:nginx做安全需要LUA脚本语言配合使用。
Nginx使用Epool网络模型
(apache)select:当用户发起一次请求,select模型就会进行一次遍历扫描,从而导致性能低下;
(nginx)Epoll:当用户发起请求,epoll模型会直接进行处理,效率高效,并无连接限制。
Nginx部署
nginx安装可以有3种方式:
1、epel源安装
2、yum安装
3、源码编译安装
1、epel源安装
# 安装epel源
[root@web01 ~]# vim /etc/yum.repos.d/epel.repo
[epel]
name='this is epel repo'
baseurl=https://repo.huaweicloud.com/epel/7/x86_64/
gpgcheck=0

[root@web01 ~]# yum clean all
[root@web01 ~]# yum makecache

# 安装nginx
[root@web01 ~]# yum install nginx --nogpgcheck
[root@web01 ~]# systemctl start nginx
2、yum安装
# 安装官方源
##  nginx.org ---> documentation ---> Installing nginx ---> packages --->   RHEL/CentOS

# http://nginx.org/en/linux_packages.html#RHEL-CentOS

[root@web01 ~]# cd /etc/yum.repos.d/
[root@web01 yum.repos.d]# vim nginx.repo
[nginx-stable]
name=nginx stable repo
baseurl=http://nginx.org/packages/centos/7/$basearch/
gpgcheck=1
enabled=1
gpgkey=https://nginx.org/keys/nginx_signing.key
module_hotfixes=true

[nginx-mainline]
name=nginx mainline repo
baseurl=http://nginx.org/packages/mainline/centos/7/$basearch/
gpgcheck=1
enabled=0
gpgkey=https://nginx.org/keys/nginx_signing.key
module_hotfixes=true
[root@web1 ~]# yum clean all
[root@web1 ~]# yum makecache
[root@web1 ~]# yum install nginx -y

#启动
[root@web01 yum.repos.d]# systemctl start nginx
#加入开机自启
[root@web01 ~]# systemctl enable nginx
#nginx重新加载配置文件
[root@web01 ~]# systemctl reload nginx
3、源码编译安装
# 下载源码包
## nginx.org ---> download ---> 下载Mainline version

# http://nginx.org/en/download.html

[root@web3 opt]# wget http://nginx.org/download/nginx-1.19.10.tar.gz
[root@web3 opt]# tar -xf nginx-1.19.10.tar.gz

# 检查并设置系统
[root@web3 nginx-1.19.10]# yum install pcre pcre-devel -y
[root@web3 nginx-1.19.10]# yum -y install perl-devel perl-ExtUtils-Embed
[root@web03 nginx-1.19.10]# yum install openssl openssl-devel -y

# 设置参数并检查系统
[root@web3 nginx-1.19.10]# ./configure --user=www --group=www --prefix=/usr/local/nginx  --with-stream    --with-mail        --with-http_perl_module      --without-http_gzip_module     --with-http_ssl_module


# 编译(编译的时候需要内存比较多)
[root@web3 nginx-1.19.10]# make -j # -j:多核编译

# 清除编译残留文件
[root@web3 nginx-1.19.10]# make clean

# 安装
[root@web3 nginx-1.19.10]# make install

 # 启动Nginx
/usr/local/nginx/sbin/nginx

 # 查看Nginx进程是否启动
 ps aux | grep nginx

#把nginx命令添加到环境变量
使用软连接将nginx链接到/usr/local/sbin

ln -s /usr/local/nginx/sbin/nginx /usr/local/sbin
ll /usr/local/sbin/ | grep "nginx"

#编辑.bash_profile文件 加入环境变量
vim ~/.bash_profile
export PATH=$PATH:/usr/local/nginx/sbin

source ~/.bash_profile

#配置文件目录
[root@web03 ~]# cd /usr/local/nginx
nginx客户端参数详解
nginx:
	-v :查看版本
	-h : 帮助
	-t : 测试配置文件
	-s : 执行一些指令
	-p : 指定的是安装nginx的目录
	-e : 指定错误日志的目录
	-c : 指定配置文件路径
	-g : 指定配置项
	-V : 查看模块信息
	-e : 指定错误日志
	-p : 指定nginx安装路径
Nginx的使用
# 配置文件/etc/nginx.conf
## yum安装:/etc/nginx
## 源码包安装:安装家目录的conf文件夹中
# ---------- 全局配置(全局生效) ------------------
user  nginx;							# 启动nginx work进程的用户名
worker_processes  auto;					# 启动的worker进程数(auto默认跟cpu数量相同)

error_log  /var/log/nginx/error.log notice;	# 错误日志路径
pid        /var/run/nginx.pid;			# PID 文件路径

# ---------- 系统事件配置模块(全局生效)-----------------------
events {								# 事件配置模块
    worker_connections  1024;			# 最大连接数
    use epool;							# 指定网络模型(select、pool、epool)
}

# ---------- HTTP 请求模块(处理HTTP请求的模块)
http {											# 模块名称
    include       /etc/nginx/mime.types;		# nginx可以处理的文件类型
    default_type  application/octet-stream;		# 默认的文件类型

    log_format  main  '$remote_addr - $remote_user [$time_local] "$request" '
                      '$status $body_bytes_sent "$http_referer" '
                      '"$http_user_agent" "$http_x_forwarded_for"'; # 设置日志的格式

    access_log  /var/log/nginx/access.log  main;			# 访问日志

	# TCP连接配置
    sendfile        on;
    #tcp_nopush     on;

	# 长链接配置
    keepalive_timeout  65;

	# gzip压缩
    #gzip  on;

	# 包含其他文件
    include /etc/nginx/conf.d/*.conf;

    server { # 每一个Server就是一个网站
        listen       80;						# 监听的端口
        server_name  localhost;					# 域名

        #access_log  /var/log/nginx/host.access.log  main; # 访问日志

        location / {							# 位置(指定访问的站点)
            root   /usr/share/nginx/html;		# 指定的站点目录
            index  index.html index.htm;		# 指定索引文件
        }
    }
}
Nginx的站点
web网站,nginx是支持多站点的服务的。
- Nginx基于域名代理多个站点
[root@web01 ~]# mkdir web01
[root@web01 ~]# mkdir web02
[root@web01 ~]# echo "web01" > web01/index.html
[root@web01 ~]# echo "web02" > web02/index.html
[root@web01 ~]# cd /etc/nginx/conf.d/
[root@web01 conf.d]# ll
total 4
-rw-r--r-- 1 root root 1072 Apr 26 19:19 default.conf
[root@web01 conf.d]# gzip default.conf
[root@web01 conf.d]# ll
total 4
-rw-r--r-- 1 root root 472 Apr 26 19:19 default.conf.gz
[root@web01 ~]# vim web01.conf
[root@web01 ~]# mv ./* /usr/share/nginx/
# web01: /etc/nginx/conf.d/web01.conf
server {

	listen 80;
	server_name www.web01.com;
	location / {
		root /usr/share/nginx/web01/;
		index index.html;
	}
}
[root@web01 ~]# vim web02.conf
# web02:/etc/nginx/conf.d/web02.conf
server {

	listen 80;
	server_name www.web02.com;
	location / {
		root /usr/share/nginx/web02/;
		index index.html;
	}
}
[root@web01 conf.d]# systemctl restart nginx
[root@web01 web01]# chown -R nginx.nginx index.html
192.168.15.7   www.web01.com
#加入hosts文件就可以访问了
线上域名
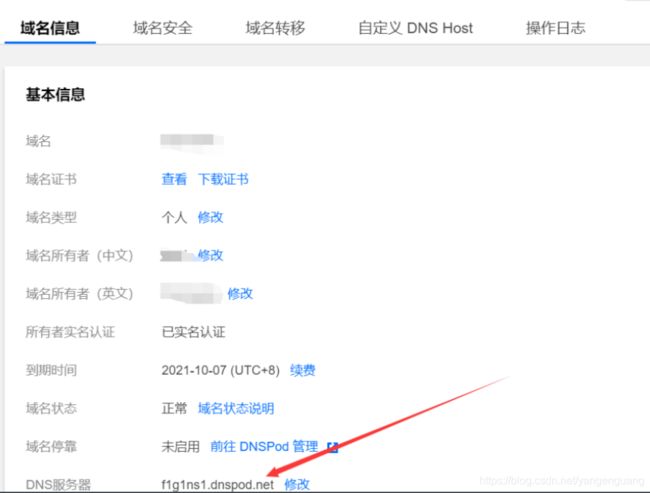
# 购买域名 ---> 备案域名 ---> 解析


# 域名解析
A记录:将域名解析到服务器上

CNAME:将一个域名解析到另一个域名上(域名转发)
- Nginx基于IP的多个站点
# web01: /etc/nginx/conf.d/web01.conf
server {

	listen 80;
	server_name 192.168.1.8:80;
	location / {
		root /usr/share/nginx/web01/;
		index index.html;
	}
}

# web02:/etc/nginx/conf.d/web02.conf
server {

	listen 80;
	server_name 172.16.1.8:80;
	location / {
		root /usr/share/nginx/web02/;
		index index.html;
	}

}
- 基于多端口的多站点
# web01: /etc/nginx/conf.d/web01.conf
server {

	listen 8080;
	server_name localhost;
	location / {
		root /usr/share/nginx/web01/;
		index index.html;
	}
}

# web02:/etc/nginx/conf.d/web02.conf
server {

	listen 8090;
	server_name localhost;
	location / {
		root /usr/share/nginx/web02/;
		index index.html;
	}

}
Nginx排错
Nginx日志
nginx运行过程中,会留下很多日志。每访问一次就会生成一条日志
#json日志模板

log_format access_json '{"@timestamp":"$time_iso8601",'
                           '"host":"$server_addr",'
                           '"clientip":"$remote_addr",'
                           '"size":$body_bytes_sent,'
                           '"responsetime":$request_time,'
                           '"upstreamtime":"$upstream_response_time",'
                           '"upstreamhost":"$upstream_addr",'
                           '"http_host":"$host",'
                           '"url":"$uri",'
                           '"domain":"$host",'
                           '"xff":"$http_x_forwarded_for",'
                           '"referer":"$http_referer",'
                           '"status":"$status"}';

access_log  /var/log/nginx/access.log  access_json;

#日志的格式

$remote_addr        # 记录客户端IP地址
$remote_user        # 记录客户端用户名
$time_local         # 记录通用的本地时间
$time_iso8601       # 记录ISO8601标准格式下的本地时间
$request            # 记录请求的方法以及请求的http协议
$status             # 记录请求状态码(用于定位错误信息)
$body_bytes_sent    # 发送给客户端的资源字节数,不包括响应头的大小
$bytes_sent         # 发送给客户端的总字节数
$msec               # 日志写入时间。单位为秒,精度是毫秒。
$http_referer       # 记录从哪个页面链接访问过来的
$http_user_agent    # 记录客户端浏览器相关信息
$http_x_forwarded_for #记录经过的所有服务器的IP地址
$X-Real-IP		   #记录起始的客户端IP地址和上一层客户端的IP地址
$request_length     # 请求的长度(包括请求行, 请求头和请求正文)。
$request_time       # 请求花费的时间,单位为秒,精度毫秒
# 注:如果Nginx位于负载均衡器,nginx反向代理之后, web服务器无法直接获取到客 户端真实的IP地址。
# $remote_addr获取的是反向代理的IP地址。 反向代理服务器在转发请求的http头信息中,
# 增加X-Forwarded-For信息,用来记录客户端IP地址和客户端请求的服务器地址。
日志的切割
logrotate:/etc/logrotate.d/
[root@web03 local]# pwd
/etc/logrotate.d/
[root@web03 local]# cat nginx
/var/log/nginx/*.log {
        daily				# 切割日志的时间
        missingok			# 忽略错误
        rotate 52			# 日志最多存放52次
        compress			# 使用gzip压缩
        delaycompress		# 延时压缩
        notifempty			# 不处理空文件
        create 640 nginx adm# 定义日志的权限
        sharedscripts		# 开始执行脚本
        postrotate			# 标注脚本内容
                if [ -f /var/run/nginx.pid ]; then
                        kill -USR1 `cat /var/run/nginx.pid`
                fi
        endscript			# 结束
}
PHP5.6.40编译安装
#下载安装包
wget https://www.php.net/distributions/php-5.6.40.tar.gz

#解压
tar xf php-5.6.40.tar.gz

#进入PHP源码目录
cd php-5.6.40

#对依赖的安装包进行扩展安装,提高效率
     yum install libxml2 libxml2-devel openssl openssl-devel libcurl libcurl-devel libjpeg libjpeg-devel libpng libpng-devel freetype freetype-devel libmcrypt libmcrypt-devel -y

   #配置编译参数命令
      ./configure --prefix=/usr/local/php --with-mysqli --with-pdo-mysql --with-iconv-dir --with-freetype-dir --with-jpeg-dir --with-png-dir --with-zlib --with-libxml-dir --enable-simplexml --enable-xml --disable-rpath --enable-bcmath --enable-soap --enable-zip --with-curl --enable-fpm --with-fpm-user=www --with-fpm-group=www--enable-mbstring --enable-sockets --with-gd --with-openssl --with-mhash --enable-opcache --disable-fileinfo
# 对配置完善的二进制进行编译和安装
 make -j && make install

[root@web03 ~]# groupadd -g 666 www
[root@web03 ~]# useradd -u 666 -g 666 -s /sbin/nologin -M www
[root@web03 ~]# id www
uid=666(www) gid=666(www) groups=666(www)

[root@web03 php-5.6.40]# vim /root/.bash_profile
export PATH=$PATH:/usr/local/php/sbin
[root@web03 php-5.6.40]# source /root/.bash_profile

#处理配置文件
[root@web02 php-5.6.40]# mv php.ini-development /usr/local/lib/php.ini
[root@web02 php-5.6.40]# php --ini
Configuration File (php.ini) Path: /usr/local/lib
Loaded Configuration File:         /usr/local/lib/php.ini
Scan for additional .ini files in: (none)
Additional .ini files parsed:      (none)
[root@web02 php-5.6.40]# php -m
[PHP Modules]
mysql
Core
ctype
curl
date
dom
ereg
filter
...


