2019-12-18 爬网页12-简单滑块验证(selenium模拟-click_and_hold和release方法)
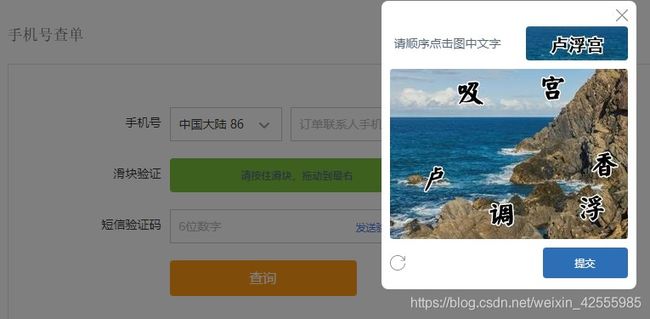
上图就是一个典型的滑块应用。
出现这个的目的就是为了防止恶意攻击。不过对于爬网站确实增加了一点麻烦。现在一般都是通过selenium来模拟滑块验证。
selenium中提供了ActionChains类来处理鼠标事件。这个类中有2个方法和滑块移动过程相关
- click_and_hold():模拟按住鼠标左键在源元素上,点击并且不释放
- release():松开鼠标按键
字面意思就可以理解这2个函数的作用。
实现代码如下:
#coding:utf-8
from selenium import webdriver
import selenium.webdriver.support.ui as ui
from selenium.webdriver.common.by import By
from selenium.webdriver.common.action_chains import ActionChains

url="https://passport.ctrip.com/user/member/fastOrder"

# Chrome,此步骤很重要,设置为开发者模式,防止被各大网站识别出来使用了Selenium
options = webdriver.ChromeOptions()
options.add_experimental_option('excludeSwitches', ['enable-automation'])
driver = webdriver.Chrome(options=options)
driver.maximize_window()

driver.get(url)
time.sleep(5)

sour=driver.find_element(By.CLASS_NAME,'cpt-drop-btn') #获取滑块
ele=driver.find_element(By.CLASS_NAME,'cpt-bg-bar') #获取整个滑块框

print ele.size,ele.location['x']

action = ActionChains(driver)
action.click_and_hold(on_element=sour).perform()
print sour.size
print sour.location['x']
time.sleep(0.15)
ActionChains(driver).move_to_element_with_offset(to_element=sour, xoffset=30, yoffset=0).perform()
time.sleep(1)
print 30,sour.location['x'],sour.location['y']
ActionChains(driver).move_to_element_with_offset(to_element=sour, xoffset=100, yoffset=0).perform()
time.sleep(0.5)
print 100,sour.location['x'],sour.location['y']
ActionChains(driver).move_to_element_with_offset(to_element=sour, xoffset=190, yoffset=0).release().perform()
print 190,sour.location['x'],sour.location['y']
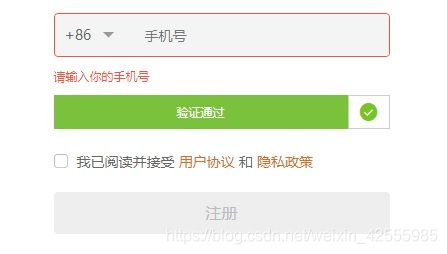
滑块验证通过后,会跳出图片验证。这说明代码是可行的。
简单说明如下:
- options.add_experimental_option(‘excludeSwitches’, [‘enable-automation’]),作用是为了防止被识别出window.navigator.webdriver,详细说明参见https://blog.csdn.net/weixin_42555985/article/details/103479002
- move_to_element_with_offset(to_element, xoffset, yoffset) ——移动到距某个元素(左上角坐标)多少距离的位置。上例中从开始到结束,移动了3次。
- perform()方法:上述的所有方法(模拟鼠标的动作),只有执行了perform()后才会被依次执行。
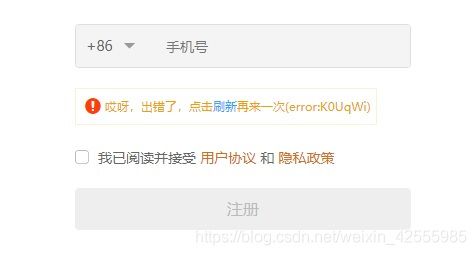
但是同样的代码,在另外一个网站上模拟的时候出错了。
url="https://passport.zcool.com.cn/regPhone.do?appId=1006&cback=https://my.zcool.com.cn/focus/activity"

# Chrome,此步骤很重要,设置为开发者模式,防止被各大网站识别出来使用了Selenium

options = webdriver.ChromeOptions()
options.add_experimental_option('excludeSwitches', ['enable-automation'])
driver = webdriver.Chrome(options=options)
driver.maximize_window()

driver.get(url)
time.sleep(10)

# 找到滑块span
need_move_span = driver.find_element_by_xpath('//*[@id="nc_1_n1t"]/span')

#背景
bar = driver.find_element_by_xpath('//*[@id="nc_1__scale_text"]/span')
print 'bar',bar.size,bar.location['x']

# 模拟按住鼠标左键
#ActionChains(driver).click_and_hold(need_move_span).perform()
action = ActionChains(driver)

action.click_and_hold(on_element=need_move_span).perform()

time.sleep(0.15)
ActionChains(driver).move_to_element_with_offset(to_element=need_move_span, xoffset=30, yoffset=0).perform()
time.sleep(1)
print 30,need_move_span.location['x'],need_move_span.location['y']
ActionChains(driver).move_to_element_with_offset(to_element=need_move_span, xoffset=100, yoffset=0).perform()
time.sleep(0.5)
print 100,need_move_span.location['x'],need_move_span.location['y']
ActionChains(driver).move_to_element_with_offset(to_element=need_move_span, xoffset=190, yoffset=0).perform()
print 190,need_move_span.location['x'],need_move_span.location['y']
ActionChains(driver).move_to_element_with_offset(to_element=need_move_span, xoffset=58, yoffset=0).release().perform()
print 58,need_move_span.location['x'],need_move_span.location['y']
滑块走到底后,界面上只能显示上面这个效果。
经过反复测试后,可以得到以下结论
- selenium模拟滑块出错后,点击刷新,手工滑动依然出错
- selenium模拟滑块出错后,刷新浏览器页面,再手工滑动成功
- selenium模拟滑块出错后,点击浏览器加号,打开新标签。在新标签中输入网址,手工滑动成功
- selenium打开浏览器,直接手工滑动成功
现在看来,应该是在selenium中执行模拟鼠标的过程被识别了。
查到了一篇文章解释了这个原理,https://blog.csdn.net/sayyy/article/details/99649372。
然后在另外一个网站中有一段代码不错,可以用来检验是否被识别。https://stackoverflow.com/questions/33225947/can-a-website-detect-when-you-are-using-selenium-with-chromedriver
runBotDetection = function () {
    var documentDetectionKeys = [
        "__webdriver_evaluate",
        "__selenium_evaluate",
        "__webdriver_script_function",
        "__webdriver_script_func",
        "__webdriver_script_fn",
        "__fxdriver_evaluate",
        "__driver_unwrapped",
        "__webdriver_unwrapped",
        "__driver_evaluate",
        "__selenium_unwrapped",
        "__fxdriver_unwrapped",
    ];

    var windowDetectionKeys = [
        "_phantom",
        "__nightmare",
        "_selenium",
        "callPhantom",
        "callSelenium",
        "_Selenium_IDE_Recorder",
    ];

    for (const windowDetectionKey in windowDetectionKeys) {
        const windowDetectionKeyValue = windowDetectionKeys[windowDetectionKey];
        if (window[windowDetectionKeyValue]) {
	console.log("1");
            return true;
        }
    };
    for (const documentDetectionKey in documentDetectionKeys) {
        const documentDetectionKeyValue = documentDetectionKeys[documentDetectionKey];
        if (window['document'][documentDetectionKeyValue]) {
	console.log("2");
            return true;
        }
    };

    for (const documentKey in window['document']) {
        if (documentKey.match(/\$[a-z]dc_/) && window['document'][documentKey]['cache_']) {
	console.log(documentKey);
            return true;
        }
    }

    if (window['external'] && window['external'].toString() && (window['external'].toString()['indexOf']('Sequentum') != -1)) return true;

    if (window['document']['documentElement']['getAttribute']('selenium')) return true;
    if (window['document']['documentElement']['getAttribute']('webdriver')) return true;
    if (window['document']['documentElement']['getAttribute']('driver')) return true;

    return false;
};
我稍稍做了些改动,在出错情况下运行,结果如下
runBotDetection()
$cdc_asdjflasutopfhvcZLmcfl_
true
果然,存在**$cdc_asdjflasutopfhvcZLmcfl_**,被识别了。
找到原因,解决办法就简单了。按照攻略中,修改chromedriver.exe就行了。
再次实行代码,
成功了。
再运行一下runBotDetection(),结果就是false。


