篇章三 层叠样式表CSS【可发】
文章目录
- 一、CSS3基础知识
-
- 1、CSS3新特性简介
- 2、圆角 + 过渡效果
- 3、伪类选择器
-
- 1. 动态伪类选择器:在交互时触发的选择器
- 2. UI 元素状态伪类选择器
- 3. 结构伪类选择器
- 4. 伪元素
- 4、实战
-
- 1、对话框
- 2、菱形
- 3、平行四边形
- 4、五角星和六角星
- 5、正方形
- 6、心形
- 7 、画太极阴阳图
- 5、过渡transition特效
- 6、@keyframes关键帧实现动画
- 7、Loading动画
- 8、字体设置
- 9、text-overflow解决文字排版问
- 二、页面切图和布局实现
-
- 1、浮动布局
- 2、定位布局
- 3、盒子模型
- 4、Grid 布局
- 5、Flex 布局
-
- 1、传统布局与 flex 布局
- 2、flex布局原理
- 3、flex布局父项常见属性
- 4、flex布局子项常见属性
- 5、案例 - top栏
- 6、flex简写扩展
- 三、六个案例学会页面响应式布局
-
- 1、媒体查询@media
- 2、媒体查询引入方式
- 3、js 获取设备宽度
- 四、css3开发技巧
-
- 1、鼠标经过显示手形
- 2、控制`div`一直位于底部:
- 3、希望页面缩小时,布局不乱
- 4、CSS `justify-content` 属性:
- 5、块元素在页面中居中显示——四种方法
-
- 5.1、 利用table中内容在单元格中默认垂直居中的特性。
- 5.2、 利用css3中的transform属性
- 5.3、 利用margin属性
- 5.4、 利用利用position属性把left,top,right,bottom四个的值设为0,再用margin:auto;
- 6、设置背景透明
- 7、文本框去边框
- 8、input框中改变placeholder颜色
- 9、设置元素的透明
- 10、设置边框阴影实现立体效果
- 11、实现居中效果
- 12、flex布局
- 13、快速生成 `li` 标签的快捷键
- 14、CSS 中position定位
-
- 1. static(静态定位):
- 2. relative(相对定位):
- 3. absolute(绝对定位):
- 4. fixed(固定定位):
- 15、将导航nav固定在页面上并不随页面滚动而滚动
- 16、对中间内容设置高度
-
- 1、方法一:使用定位实现
- 2、使用calc计算方法实现
- 17、`.native`使用封装返回顶部的组件
- 18、Vue项目中解决首页中Better-Scroll可滚动区域的问题
- 19、CSS中如何设拉伸背景图片铺满屏幕
- 20、更改图片大小
- 21、相邻块元素垂直外边距的合并
- 22、HTML有用的字符实体和颜色名
- 23、HTML_网页模块命名规范
- 24、点击文字获取输入框中的焦点
- 25、让图片在相应位置处正常大小放置的最快方法:`width:100%`
一、CSS3基础知识
1、CSS3新特性简介
- 强大的CSS3选择器
- 抛弃图片的视觉效果
- 盒模型变化(多列布局和弹性盒模型)
- 阴影效果
- Web 字体和 web Font 图标
- CSS3 过渡与动画交互效果
- 媒体查询,响应式布局
2、圆角 + 过渡效果

3、伪类选择器
1. 动态伪类选择器:在交互时触发的选择器
博客zhu虎康
"">博客zhu虎康
2. UI 元素状态伪类选择器
"text">
"text" disabled>
3. 结构伪类选择器
:first-child选择某个元素的第一个子元素:last-child选择某个元素的最后一个子元素:nth-child()选择谋和元素的一个或多个特定的子元素:nth-last-child()选择某个元素的一个或多个特定的子元素,从这个元素的最后一个子元素开始算:nth-of-type()选择指定的元素:nth-last-of-type()选择指定的元素,从元素的最后一个开始计算:first-of-type选择一个上级元素下的第一个同类子元素:last-of-type选择一个上级元素的最后一个同类子元素
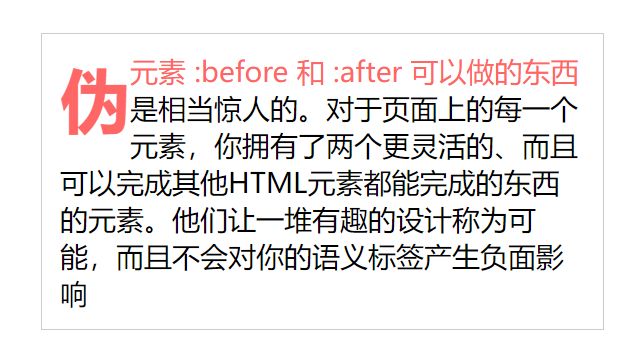
4. 伪元素
- css伪元素用于向某些选择器设置特殊效果
:first-letter将特殊的样式添加到文本的首字母:first-line将特殊的样式添加到文本的首行:before在某元素之前插入某些内容:after在某元素之后插入某些内容
4、实战
1、对话框
"dialog">
Everyone, I'm 博客zhu虎康!
"dialog">
Everyone, I'm 博客zhu虎康!
2、菱形
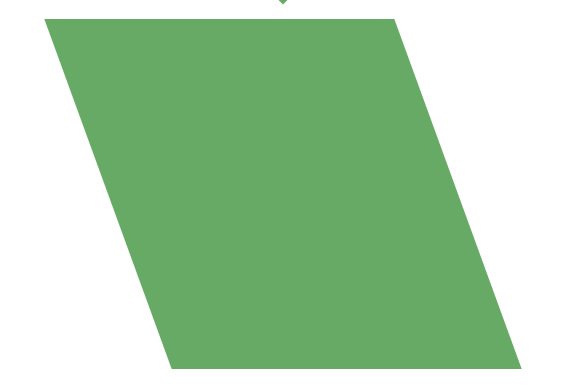
3、平行四边形
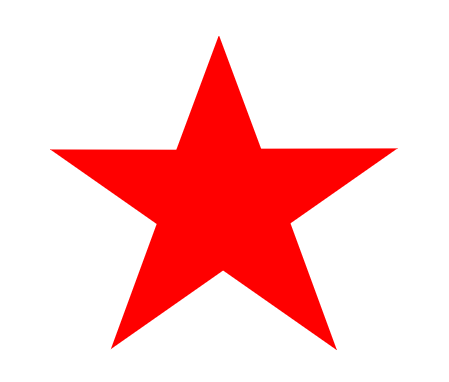
4、五角星和六角星
5、正方形
6、心形
♥
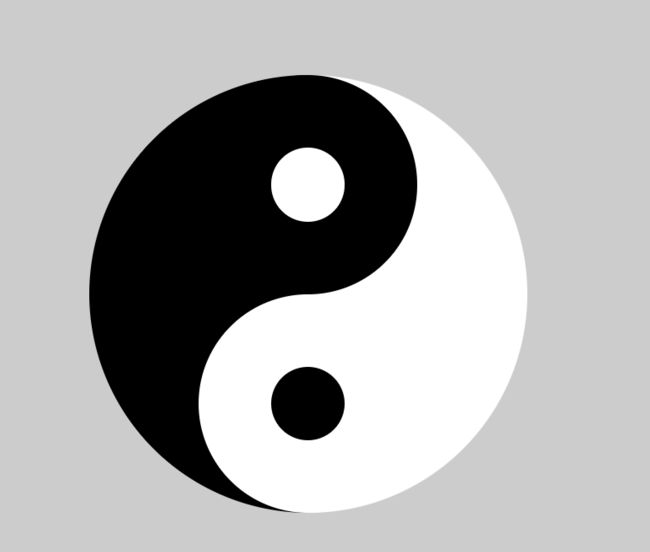
7 、画太极阴阳图
画太极阴阳图
5、过渡transition特效
- transition-property:过渡属性(默认值是all)
- transition-duration:过渡持续时间(默认值为0s)
- transition-timing-function:过渡函数(默认值为ease函数)
- transition-delay:过渡延迟时间(默认值为0s)
6、@keyframes关键帧实现动画
animation: mymove 2s infinite alternate;
"utf-8">
<span class="token atrule"><span class="token rule">@keyframes</span>关键帧
"rect">
7、Loading动画
Loading动画
8、字体设置
```css
字体设置
发光字体
Apple Style
3D 字体效果
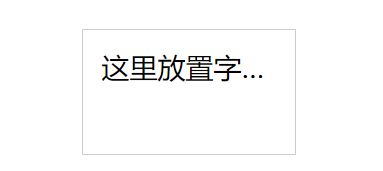
9、text-overflow解决文字排版问
text-overflow:ellipsis;
-webkit-text-overflow:ellipsis;
overflow: hidden;
white-space: nowrap;
text-overflow解决文字排版问题
这里放置字体,这里放置字体这里放置字体这里放置字体这里放置字体这里放置字体这里放置字体这里放置字体这里放置字体这里放置字体这里放置字体这里放置字体这里放置字体这里放置字体这里放置字体这里放置字体这里放置字体这里放置字体这里放置字体这里放置字体这里放置字体这里放置字体这里放置字体这里放置字体
二、页面切图和布局实现
1、浮动布局
DOCTYPE html>
<html>
	<head>
		<meta charset="utf-8">
		<title>浮动布局+定位布局title>
	head>
	<body>
		<div class="father">
			<div class="nav">div>
			<div>
				<div class="div1 lfMove">div>
				<div class="div2 lfMove">div>
				<div class="div3 lfMove">div>
			div>
			<div style="float:right">
				<div class="div4">div>
				<div class="div5">div>
				<div class="div6">div>
			div>

		div>
		<style type="text/css">
			.father{
				width: 100%;
				height: 1000px;
				position: relative;
				background-color: #bfbfbf;
				padding: 0;
				margin: 0;
			}
			.nav{
				width: 100%;
				height: 80px;
				top: 0;
				position: sticky;
				background-color: #592c86;
			}
			.lfMove{
				float: left;
				width: 200px;
				height: 300px;
				margin: 10px;
			}
			.div1{
				background-color: orangered;
			}
			.div2{
				background-color: lawngreen;
			}
			.div3{
				background-color: skyblue;
			}
			.div4{
				width: 400px;
				height: 100px;
				background-color: orangered;
				margin: 10px;
			}
			.div5{
				width: 100px;
				height: 300px;
				background-color: orange;
				margin: 10px;
				float: left;
			}
			.div6{
				width: 100px;
				height: 300px;
				background-color: palegreen;
				float: right;
				margin: 10px;
			}
		style>
	body>
html>
2、定位布局
定位布局position,一般设置为子绝父相
- static:静态布局,默认布局方式,
- relative:相对布局
- absolute:绝对布局
- fixed:固定布局
- sticky:在页面发生滑动时,固定在页面上,一般用于nav导航栏
3、盒子模型
- visibility:hidden;元素不可以见(但空间占着)
- visibility:visible;元素可见
- display:none;隐藏(空间会释放)
- display:inline;行级元素
- 多个元素占一行
- 不可以设置宽高
- span、a、strong
- display:block;块级元素
- 自己占一行
- 可以设置宽高
- div、h1~h6、table、ul、li
- display:inline-block;行级块元素
- 多个元素占一行
- 可以设置宽高
- img、input、button,既可以跟其他元素共占一行,又可以设置宽高
4、Grid 布局
什么是grid布局?
Flex 布局是轴线布局,只能指定“项目”针对轴线的位置,可以看作是
一维布局,Grid布局则是将容器划分成行和列,产生单元格,然后指定“项目所在”的单元格,可以看作是二维布局,Grid布局远比Flex布局强大
left
top
button
right
5、Flex 布局
1、传统布局与 flex 布局
- 传统布局
- 兼容性好
- 布局繁琐
- 局限性,不能在移动端很好的布局
flex弹性布局 - 操作方便,布局极为简单,移动端应用很广泛
- PC端浏览器支持情况较差
- IE11或更低版本,不支持或仅部分支持
因此:
1. 如果是PC端页面布局,我们还是传统布局
2. 如果是移动端或者不考虑兼容性问题的PC端页面布局,我们还是使用flex弹性布局
2、flex布局原理
flex 是 flexible Box 的缩写,意为“弹性布局”,用来为盒状模型提供最大的灵活性,任何一个容器都可以指定为flex布局
即通过给父盒子添加flex属性,来控制子盒子的位置盒排列方式
- 当我们父盒子设为flex布局以后,子元素的float、clear、和vertical-align属性将失效
- 伸缩布局 = 弹性布局 = 伸缩盒布局 = 弹性盒布局 = flex布局
3、flex布局父项常见属性
先给父级 display:flex;
- flex-direction: 设置主轴的方向
- flex-direction: row; 默认值从左到右
- flex-direction: row-reverse; 从右到左
- flex-direction: column; 从上到下
- flex-direction: column-reverse; 从下到上
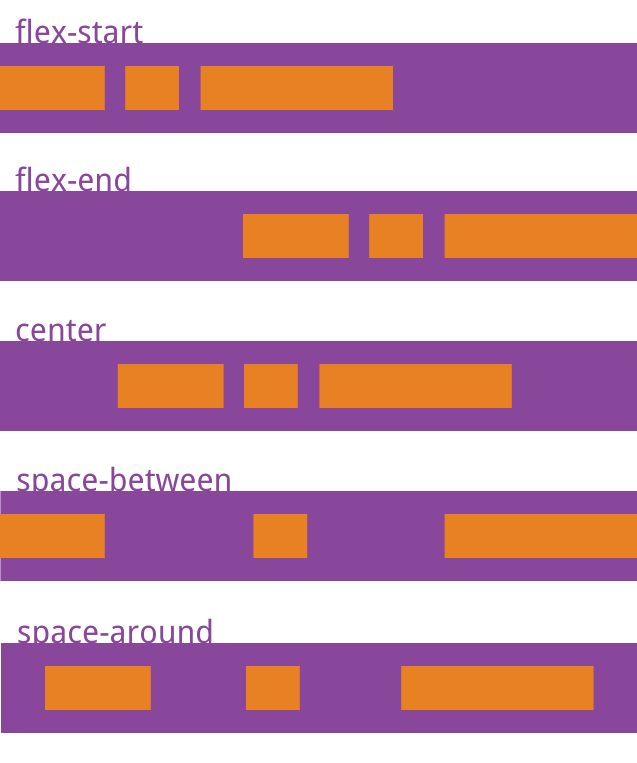
- justify-content: 设置主轴上的子元素排列方式
- justify-content: flex-start; 默认值从头部开始,如果主轴是x轴,则从左到右
- justify-content: flex-end; 从尾部开始排列
- justify-content: center; 在主轴居中对齐如果主轴是 x 轴则水平居中
- justify-content: space-around; 平分剩余空间
- justify-content: space-between; 先两边贴边,再平分剩余空间(重要)
- flex-wrap: 设置子元素是否换行
默认情况下,项目都排在一条线(又称轴线)上,flex-wrap 属性定义,flex 布局中默认是不换行的,如果装不开,会缩小子元素的宽度,放到父元素里面
- flex-wrap: nowrap; 默认值,不换行
- flex-wrap: wrap;换行
- align-content: 设置侧轴上的子元素的排列方式(多行)
设置子项在侧轴上的排列方式并且只能用于子项出现换行的情况(多行),在单行下是没有效果的
- align-content: flex-start; 默认值在侧轴的头部开始排列
- align-content: flex-end; 在侧轴的尾部开始排列
- align-content: center; 挤在一起居中(垂直居中)
- align-content: stretch; 拉伸
- align-items: 设置侧轴上的子元素的排列方式==(只适用于单行)==
- align-items: flex-start; 默认值,从上到下
- align-items: flex-end; 从下到上
- align-items: center; 在侧轴中间显示
- align-items: space-around; 子项在侧轴平分剩余空间
- align-items: space-between; 子项在侧轴先分布两头,再平分剩余空间
- align-items: stretch; 设置子项元素高度平分父元素高度
- flex-flow: 复合属性,相当于同时设置了 flex-direction 和 flex-wrap
- flex-flow: row wrap;
- 综上,实现水平、垂直居中效果
justify-content: center;
align-items: center;
4、flex布局子项常见属性
flex布局子项常见属性
- flex属性定义子项目分配剩余空间,用flex来表示占多少份数
- flex: number(默认是0,可以是占几份分配几份)
- align-self 控制子项自己在侧轴上的排列方式
align-self 属性允许单个项目有与其他项目不一样的对齐方式,可覆盖 align-items 属性,默认值是 auto,表示继承父元素的align-items 属性,如果没有父元素,则等同于stretch- 让第二个元素放到下边
span:nth-child(2){
align-self: flex-end;
}
- 让第二个元素放到下边
- order 属性定义项目的排列顺序,数值越小,越靠前,默认为0。注意:与 z-index 不同
1
2
3
5、案例 - top栏
top
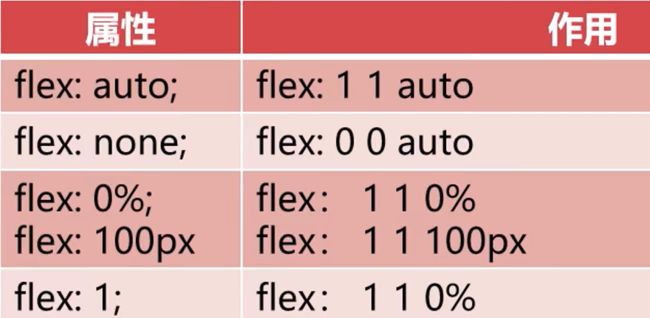
6、flex简写扩展
三、六个案例学会页面响应式布局
1、媒体查询@media
表示在页面不同大小时展现的效果不同
min-device-width:移动端设备宽度min-width:PC端网页宽度@media screen and (min-device-width:100px) and (max-device-width:300px){}
2、媒体查询引入方式
3、js 获取设备宽度
四、css3开发技巧
1、鼠标经过显示手形
cursor: pointer;
2、控制div一直位于底部:
position:fixed;bottom:0;
3、希望页面缩小时,布局不乱
-
给body加上一个min-width最小宽度,以px为单位,这样当页面变小时,当达到你所设置的最小宽度,body的宽度不再改变,超出的部分会用横向滚动条显示,其内所有元素的布局也不会受影响。
-
使用百分比设置宽度,所有会在页面变化后布局改变的元素的宽度都设置成百分比宽度,这样在缩放时,页面内的各个元素也会跟着缩放,宽度占比不变,当然前提是设置CSS样式前,先给body和html这两个元素设置宽度为100%,避免后面出错。
4、CSS justify-content 属性:
-
项目位于各行之间留有空白的容器内:
display: flex; justify-content: space-between;

-
项目位于各行之前、之间、之后都留有空白的容器内:
display: flex; justify-content: space-around;

5、块元素在页面中居中显示——四种方法
5.1、 利用table中内容在单元格中默认垂直居中的特性。
DOCTYPE html>
<html lang="en">
<head>
    <meta charset="UTF-8">
    <title>块元素绝对居中title>
    <style>
        html,body,table{
            margin:0;
            height:100%;
        }
        table{
            width:100%;
        }
        #box{
            width:300px;
            height:300px;
            background:teal;
            margin:auto;
        }
    style>
head>
<body>
    <table>
        <tr>
            <td>
                <div id="box">div>
            td>
        tr>
    table>
body>
html>
5.2、 利用css3中的transform属性
DOCTYPE html>
<html lang="en">
<head>
    <meta charset="UTF-8">
    <title>块元素绝对居中title>
    <style>
        *{
            margin:0;
        }
        #box{
            width:300px;
            height:300px;
            background:maroon;
            position:absolute;
            left:50%;
            top:50%;
            transform:translate(-50%,-50%);
         }
    style>
head>
<body>
    <div id="box">div>
body>
html>
5.3、 利用margin属性
DOCTYPE html>
<html lang="en">
<head>
    <meta charset="UTF-8">
    <title>块元素绝对居中title>
    <style>
        *{
            margin:0;
        }
        #box{
            width:300px;
            height:300px;
            background:silver;
            position:absolute;
            left:50%;
            top:50%;
            margin-left:-150px;
            margin-top:-150px;
        }
    style>
head>
<body>
    <div id="box">div>
body>
html>
5.4、 利用利用position属性把left,top,right,bottom四个的值设为0,再用margin:auto;
DOCTYPE html>
<html lang="en">
<head>
    <meta charset="UTF-8">
    <title>块元素绝对居中title>
    <style>
        *{
            margin:0;
        }
        #box{
            width:300px;
            height:300px;
            background:pink;
            position:absolute;
            left:0;
            right:0;
            top:0;
            bottom:0;
            margin:auto;
        }
    style>
head>
<body>
    <div id="box">div>
body>
html>
6、设置背景透明
background-color: transparent;
7、文本框去边框
input{{
    outline: none;
}
input:focus{
    outline: none;
}
8、input框中改变placeholder颜色
input::-webkit-input-placeholder{
    color: #FFFFFF;
}
9、设置元素的透明
opacity: 0;
10、设置边框阴影实现立体效果
box-shadow:0 15px 35px rgba(0,0,0,0.1);
11、实现居中效果
display: inline-block;
vertical-align: middle;
#body1{
	  width: 100%;
	  /*把行高和div高度设置成一样的,是因为 vertical-align 是相对于line-heigjt设置的*/
	  height: 300px;
	  line-height: 300px;
	  background-color: aqua;
	  /*水平居中*/
	  text-align: center;
	}
.switch{
	  /*对于vertical-align来说对行内元素起作用*/
	  display: inline-block;
	  vertical-align: middle;
	  width: 80%;
	  height: 274px;
	  background-color: dodgerblue;
	}
-
行内元素,父元素设置:
div{ height:60px line-height:60px; text-align: center; } -
块级元素,已知宽度
div { width:100px; margin:0 auto; } -
块级元素,未知宽度-- flex/定位,
flex布局div{ display: flex; justify-content: center; align-items: center; } -
绝对定位
div{
    position: absolute;
    top: 50%;
    left: 50%;
    transform: translate(-50%,-50%);
}
12、flex布局
flex: 1:的使用:https://www.cnblogs.com/zhuhukang/p/15717197.html
.box {
  justify-content: flex-start | flex-end | center | space-between | space-around;
}
13、快速生成 li 标签的快捷键
- 代码为:
ul>li{消息$}*4
- Tab后效果为:
  <ul>
    <li>消息1</li>
    <li>消息2</li>
    <li>消息3</li>
    <li>消息4</li>
  </ul>
14、CSS 中position定位
css中position相对定位和绝对定位:https://www.cnblogs.com/yy95/p/5672440.html
position 属性的四个值:
1. static(静态定位):
默认值。没有定位,元素出现在正常的流中(忽略 top, bottom, left, right 或者 z-index 声明)。
2. relative(相对定位):
-
生成相对定位的元素,通过top,bottom,left,right的设置相对于其正常(原先本身)位置进行定位。可通过z-index进行层次分级。 无论父级存在不存在,无论有没有TRBL,均是以父级的左上角进行定位,但是父级的Padding属性会对其影响。
-
定位为relative的元素脱离正常的文本流中,但其在文本流中的位置依然存在。
-
他是默认参照父级的原始点为原始点,无父级则以文本流的顺序在上一个元素的底部为原始点,配合TRBL进行定位,当父级内有padding等CSS属性时,当前级的原始点则参照父级内容区的原始点进行定位,有以下属性:
- 如果没有TRBL,以父级的左上角,在没有父级的时候,他是参照浏览器左上角(到这里和absolute第一条一样),如果在没有父级元素的情况下,存在文本,则以文本的底部为原始点进行定位并将文字断开(和absolut不同)。
- 如果设定TRBL,并且父级没有设定position属性,仍旧以父级的左上角为原点进行定位(和absolut不同)。
- 如果设定TRBL,并且父级设定position属性(无论是absolute还是relative),则以父级的左上角为原点进行定位,位置 由TRBL决定(前半段和absolute一样)。如果父级有Padding属性,那么就以内容区域的左上角为原点,进行定位(后半段和absolut不 同)。
以上三点可以总结出,无论父级存在不存在,无论有没有TRBL,均是以父级的左上角进行定位,但是父级的Padding属性会对其影响。
综合上面对relative的叙述,我们就可以将position属性为relative的DIV视成可以用TRBL进行定位的的普通DIV,或者说 只要将我们平时布局页面的div的CSS属性中加上position:relative后,就不只是用float布局页面了,还可以用TRBL进行布局页 面 了,或者说加上position:relative的DIV也可以像普通的DIV进行布局页面了,只不过还可以用TRBL进行布局页面。但是 position属性为absolute不可以用来布局页面,因为如果用来布局的话,所有的DIV都相对于浏览器的左上角定位了,所以只能用于将某个元素 定位于属性为absolute的元素的内部某个位置。
Top的值表示对象相对原位置向下偏移的距离,bottom的值表示对象相对原位置向上偏移的距离,两者同时存在时,只有Top起作用。left的值表示对象相对原位置向右偏移的距离,right的值表示对象相对原位置向左偏移的距离,两者同时存在时,只有left起作用。
3. absolute(绝对定位):
-
生成绝对定位的元素,相对于 static 定位以外的第一个父元素进行定位。元素的位置通过 “left”, “top”, “right” 以及 “bottom” 属性进行规定。可通过z-index进行层次分级。
定位为absolute的层脱离正常文本流,但与relative的区别是其在正常流中的位置不再存在。 -
这个属性总是有人给出误导。说当position属性设为absolute后,总是按照浏览器窗口来进行定位的,这其实是错误的。实际上,这是fixed属性的特点。
- 如果没有TRBL(top、right、bottom、left),以父级的左上角,在没有父级的时候,他是参照浏览器左上角,如果在没有父级元素的情况下,存在文本,则以它前面的最后一个文字的右上角为原点进行定位但是不断开文字,覆盖于上方。
- 如果设定TRBL,并且父级没有设定position属性,那么当前的absolute则以浏览器左上角为原始点进行定位,位置将由TRBL决定。
- 如果设定TRBL,并且父级设定position属性(无论是absolute还是relative),则以父级的左上角为原点进行定位,位置由 TRBL决定。即使父级有Padding属性,对其也不起作用,说简单点就是:它只坚持一点,就以父级左上角为原点进行定位,父级的padding对其根 本没有影响。
以上三点可以总结出,若想把一个定位属性为absolute的元素定位于其父级元素内,只有满足两个条件:
第一:设定TRBL
第二:父级设定Position属性
上面的这个总结非常重要,可以保证你在用absolue布局页面的时候,不会错位,并且随着浏览器的大小或者显示器分辨率的大小,而不发生改变。
只要有一点不满足,元素就会以浏览器左上角为原点,这就是初学者容易犯错的一点,已经定位好的板块,当浏览器的大小改变,父级元素会随之改变,但是设 定Position属性为absolute的板块和父级元素的位置发生改变,错位了,这就是因为此时元素以浏览器的右上角为原点的原因。
若想定位到父级板块中,并且当浏览器的大小改变或显示器的分辨率改变,布局不发生改变,是需要满足两个条件的,只要有一点不满足,元素就会以浏览器左上角为原点,从而导致页面布局错位。
Top的值表示对象上边框与浏览器窗口顶部的距离,bottom的值表示对象下边框与浏览器窗口底部的距离,两者同时存在时,只有Top起作用;如果两者都未指定,则其顶端将与原文档流位置一致,即垂直保持位置不变。left的值表示对象左边框与浏览器窗口左边的距离,right的值表示对象右边框与浏览器窗口右边的距离,两者同时存在时,只有left起作用;如果两者都未指定,则其左边将与原文档流位置一致,即水平保持位置不变。
在Position属性值为absolute的同时,如果有一级父对象(无论是父对象还是祖父对象,或者再高的辈分,一样)的Position属性值为Relative时,则上述的相对浏览器窗口定位将会变成相对父对象定位,这对精确定位是很有帮助的。
4. fixed(固定定位):
生成绝对定位的元素,相对于浏览器窗口进行定位。元素的位置通过 “left”, “top”, “right” 以及 “bottom” 属性进行规定。可通过z-index进行层次分级。
6. 使用static 定位或无position定位的元素z-index属性是无效的
只有三种情况会使得元素脱离文档流,分别是:浮动绝对定位和相对定位。
文档流是将窗体自上而下分成一行行, 并在每行中按从左至右的顺序排放元素
15、将导航nav固定在页面上并不随页面滚动而滚动
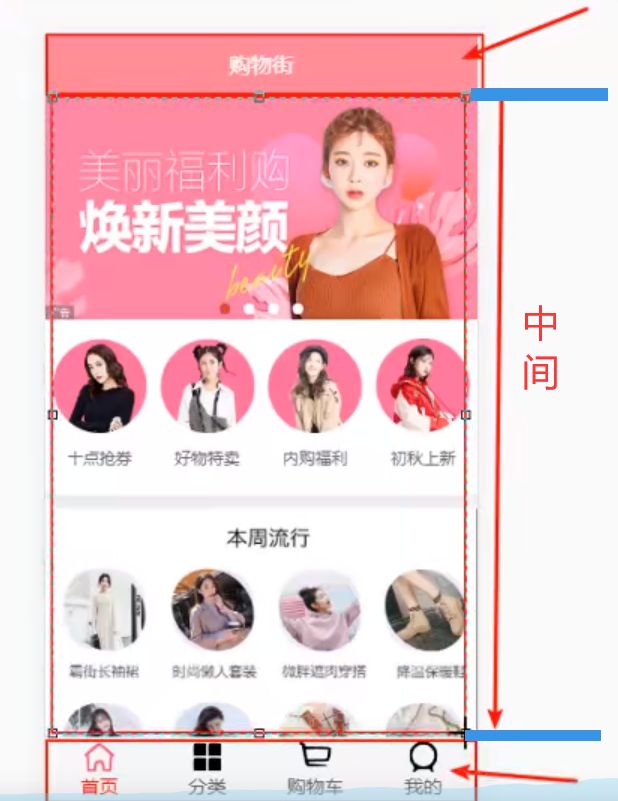
实现效果如下:在滑动滚动条的时候,对表头“购物街”进行定位,不让它随着滚动而消失
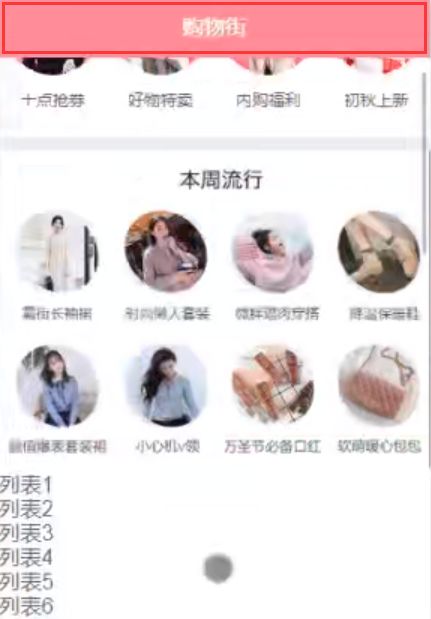
实现思路代码:
- 将top下的内容home设置一个
padding-top,为了防止top脱离文档流
#home{
	padding-top:44px;
- 对该top进行css设置:
.nav{
	position:fixed;
	left:0;
	right:0;
	top:0;
	z-index:0;
16、对中间内容设置高度
1、方法一:使用定位实现
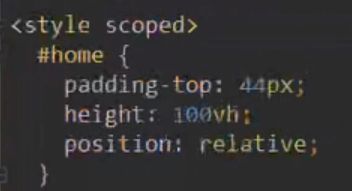
可以使用定位实现:对大的父级设置relative相对定位,对小的子级设置absolute绝对定位
2、使用calc计算方法实现
17、.native使用封装返回顶部的组件
.native- 对组件的监听事件- 使用
@click.native="backClick",执行对原生组件的根元素的监听
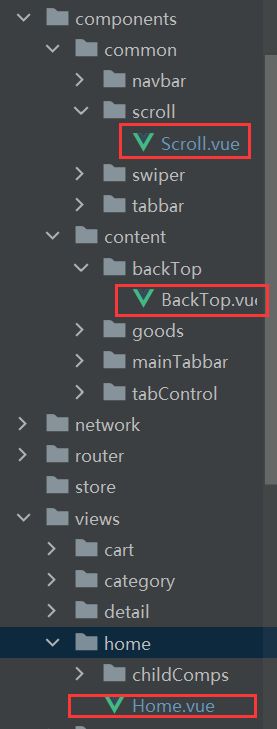
src/components/content/backTop/BackTop.vue
<template>
  <div class="back-top">
    <img src="~assets/img/common/top.png" alt="">
  </div>
</template>

<script>
  export default {
    name: "BackTop"
  }
</script>

<style scoped>
  .back-top {
    position: fixed;
    right: 8px;
    bottom: 55px;
  }

  .back-top img {
    width: 43px;
    height: 43px;
  }
</style>
src/components/common/scroll/Scroll.vue
<template>
  <div class="wrapper" ref="wrapper">
    <div class="content">
      <slot></slot>
    </div>
  </div>
</template>

<script>
  import BScroll from 'better-scroll'

  export default {
    name: "Scroll",
    props: {
      probeType: {
        type: Number,
        default: 0
      },
      pullUpLoad: {
        type: Boolean,
        default: false
      }
    },
    data() {
      return {
        scroll: null,
        message: '哈哈哈'
      }
    },

    mounted() {
      // 1.创建BScroll对象
      this.scroll = new BScroll(this.$refs.wrapper, {
        click: true,
        probeType: this.probeType,
        pullUpLoad: this.pullUpLoad
      })

      // 2.监听滚动的位置
      if (this.probeType === 2 || this.probeType === 3) {
        this.scroll.on('scroll', (position) => {
          // console.log(position);
          this.$emit('scroll', position)
        })
      }

      // 3.监听scroll滚动到底部
      if (this.pullUpLoad) {
        this.scroll.on('pullingUp', () => {
          this.$emit('pullingUp')
        })
      }
    },
    methods: {
      scrollTo(x, y, time=300) {
        this.scroll && this.scroll.scrollTo(x, y, time)
      },
      refresh() {
        this.scroll && this.scroll.refresh()
      },
      finishPullUp() {
        this.scroll && this.scroll.finishPullUp()
      },
      getScrollY() {
        return this.scroll ? this.scroll.y : 0
      }
    }
  }
</script>

<style scoped>

</style>
src/views/home/Home.vue
<template>
  <div id="home" class="wrapper">
    <nav-bar class="home-nav"><div slot="center">购物街</div></nav-bar>
    <tab-control :titles="['流行', '新款', '精选']"
                 @tabClick="tabClick"
                 ref="tabControl1"
                 class="tab-control" v-show="isTabFixed"/>
    <scroll class="content"
            ref="scroll"
            :probe-type="3"
            @scroll="contentScroll"
            :pull-up-load="true"
            @pullingUp="loadMore">
      <home-swiper :banners="banners" @swiperImageLoad="swiperImageLoad"/>
      <recommend-view :recommends="recommends"/>
      <feature-view/>
      <tab-control :titles="['流行', '新款', '精选']"
                   @tabClick="tabClick"
                   ref="tabControl2"/>
      <good-list :goods="showGoods"/>
    </scroll>
    <back-top @click.native="backClick" v-show="isShowBackTop"/>
  </div>
</template>

<script>
  import HomeSwiper from './childComps/HomeSwiper'
  import RecommendView from './childComps/RecommendView'
  import FeatureView from './childComps/FeatureView'

  import NavBar from 'components/common/navbar/NavBar'
  import TabControl from 'components/content/tabControl/TabControl'
  import GoodList from 'components/content/goods/GoodsList'
  import Scroll from 'components/common/scroll/Scroll'
  import BackTop from 'components/content/backTop/BackTop'

  import { getHomeMultidata, getHomeGoods } from "network/home"
  import {debounce} from "common/utils";

  export default {
    name: "Home",
    components: {
      HomeSwiper,
      RecommendView,
      FeatureView,
      NavBar,
      TabControl,
      GoodList,
      Scroll,
      BackTop
    },
    data() {
      return {
        banners: [],
        recommends: [],
        goods: {
          'pop': {page: 0, list: []},
          'new': {page: 0, list: []},
          'sell': {page: 0, list: []},
        },
        currentType: 'pop',
        isShowBackTop: false,
        tabOffsetTop: 0,
        isTabFixed: false,
        saveY: 0
      }
    },
    computed: {
      showGoods() {
        return this.goods[this.currentType].list
      }
    },
    destroyed() {
      console.log('home destroyed');
    },
    activated() {
      this.$refs.scroll.scrollTo(0, this.saveY, 0)
      this.$refs.scroll.refresh()
    },
    deactivated() {
      this.saveY = this.$refs.scroll.getScrollY()
    },
    created() {
      // 1.请求多个数据
      this.getHomeMultidata()

      // 2.请求商品数据
      this.getHomeGoods('pop')
      this.getHomeGoods('new')
      this.getHomeGoods('sell')
    },
    mounted() {
      // 1.图片加载完成的事件监听
      const refresh = debounce(this.$refs.scroll.refresh, 50)
      this.$bus.$on('itemImageLoad', () => {
        refresh()
      })
    },
    methods: {
      /**
       * 事件监听相关的方法
       */
      tabClick(index) {
        switch (index) {
          case 0:
            this.currentType = 'pop'
            break
          case 1:
            this.currentType = 'new'
            break
          case 2:
            this.currentType = 'sell'
            break
        }
        this.$refs.tabControl1.currentIndex = index;
        this.$refs.tabControl2.currentIndex = index;
      },
      backClick() {
        /*返回顶部*/
        this.$refs.scroll.scrollTo(0, 0)
      },
      /*该方法是判断滑动的时候是否显示返回顶部的按钮*/
      contentScroll(position) {
        // 1.判断BackTop是否显示,加负号是为了让其转为正数
        this.isShowBackTop = (-position.y) > 1000

        // 2.决定tabControl是否吸顶(position: fixed)
        this.isTabFixed = (-position.y) > this.tabOffsetTop
      },
      loadMore() {
        this.getHomeGoods(this.currentType)
      },
      swiperImageLoad() {
        this.tabOffsetTop = this.$refs.tabControl2.$el.offsetTop;
      },
      /**
       * 网络请求相关的方法
       */
      getHomeMultidata() {
        getHomeMultidata().then(res => {
          this.banners = res.data.banner.list;
          this.recommends = res.data.recommend.list;
        })
      },
      getHomeGoods(type) {
        const page = this.goods[type].page + 1
        getHomeGoods(type, page).then(res => {
          this.goods[type].list.push(...res.data.list)
          this.goods[type].page += 1

          // 完成上拉加载更多
          this.$refs.scroll.finishPullUp()
        })
      }
    }
  }
</script>
<!--scoped 表示局部作用域,代表此处的css只在当前文件中起效果
-->

<style scoped>
  #home {
    /*padding-top: 44px;*/
    height: 100vh; /*vh 表示viewport height视口高度*/
    position: relative;
  }

  .home-nav {
    background-color: var(--color-tint);
    color: #fff;

    /*在使用浏览器原生滚动时, 为了让导航不跟随一起滚动*/
    /*position: fixed;*/
    /*left: 0;*/
    /*right: 0;*/
    /*top: 0;*/
    /*z-index: 9;*/
  }

  .content {
    overflow: hidden;

    position: absolute;
    top: 44px;
    bottom: 49px;
    left: 0;
    right: 0;
  }

  .tab-control {
    position: relative;
    z-index: 9;
  }

  /*.content {*/
    /*height: calc(100% - 93px);*/
    /*overflow: hidden;*/
    /*margin-top: 44px;*/
  /*}*/
</style>
18、Vue项目中解决首页中Better-Scroll可滚动区域的问题
- Better-Scroll在决定有多少区域可以滚动时,是根据scrollerHeight属性决定
- Better-Scroll属性是根据放Better-Scroll的content的子组件的高度
- 但是我们的首页中,刚开始在计算scrollerHeight属性时,是没有将图片计算在内的
- 所以,计算出来的告诉是错误的
- 后来图片加载进来之后有了新的高度,但是scrollerHeight属性并没有进行更新
- 所以滚动出现了问题
- 如何解决该问题
- 监听每一张图片是否加载完成,只要有一张图片加载完成了,就执行一次refresh()方法
- 如何监听图片加载完成了?
- 原生的js监听图片:
img.onload = function(){} - Vue中监听:
@load='方法',
- 原生的js监听图片:
- 调用scroll的refresh()
- 如何将GoodListItem.vue中的时间传入到Home.vue中
- 因为涉及到非父子组件的通信,所以这里我们选择了事件总线
- bus->总线
- Vue.prototype.$bus = new Vue()
this.$bus.$emit('时间名称','参数')this.$bus.$on('事件名称',回调函数(参数))
19、CSS中如何设拉伸背景图片铺满屏幕
body{

	background: url("image.png") no-repeat;

	height:100%;

	width:100%;

	overflow: hidden;

	background-size:cover;或者background-size:100%,100%;

}
20、更改图片大小
如果你插入的图片是通过标签的方式来插入的话,可以通过自身的属性控制图片大小,代码格式如下。

21、相邻块元素垂直外边距的合并
https://blog.csdn.net/qq_53810245/article/details/122402152
22、HTML有用的字符实体和颜色名
https://blog.csdn.net/qq_53810245/article/details/122340603
23、HTML_网页模块命名规范
https://blog.csdn.net/qq_53810245/article/details/122505746
24、点击文字获取输入框中的焦点
实现方法如下:在 input 框前放一个 label ,并注明为input中的id服务
<form action="">
    <label for="demo">账号:</label>
    <input type="text" id="demo">
</form>


