dask 使用
Dask has been reviewed by many and compared to various other tools, including Spark, Ray and Vaex. Developed in coordination with other community projects like Numpy, Pandas, and Scikit-Learn, it is definitely a great tool for scaling machine learning.
D ask已被许多人评论,并与其他各种工具(包括Spark,Ray和Vaex)进行了比较。 它与其他社区项目(如Numpy,Pandas和Scikit-Learn)协调开发,绝对是扩展机器学习的绝佳工具。
Hence, the purpose of this article is not to compare the pros and cons of Dask (for that, you can refer to the reference links at the end of this article), but rather to add to existing documentation on the deployment of Dask on cloud and specifically Google Cloud. It definitely also helps that Google Cloud has a free trial for new signups, so you can experiment at no cost.
因此,本文的目的不是比较Dask的优缺点(为此,您可以参考本文末尾的参考链接),而是将其添加到有关在云上部署Dask的现有文档中特别是Google Cloud。 Google Cloud 免费试用新注册无疑也有帮助,因此您可以免费试用 。
在Google Cloud上部署Dask的步骤 (Steps to Deploy Dask on Google Cloud)
We list down first the general steps to take before detailing each of the steps with screenshots (feel free to click on each step to navigate). Having a Google Cloud account is the only prerequisite for following this article.
我们先列出要执行的一般步骤,然后再用屏幕截图详细说明每个步骤(可随时单击每个步骤进行导航)。 拥有Google Cloud帐户是遵循本文的唯一先决条件。
Creating a Kubernetes cluster
创建一个Kubernetes集群
Setting up Helm
设置头盔
Deploying Dask processes and Jupyter
部署Dask流程和Jupyter
Connecting to Dask and Jupyter
连接到Dask和Jupyter
Configuring environment
配置环境
Removing your cluster
删除集群
1.创建Kubernetes集群 (1. Creating Kubernetes Cluster)
Our first step is to set up a Kubernetes Cluster through Google Kubernetes Engine (GKE).
我们的第一步是通过Google Kubernetes Engine(GKE)建立一个Kubernetes集群。
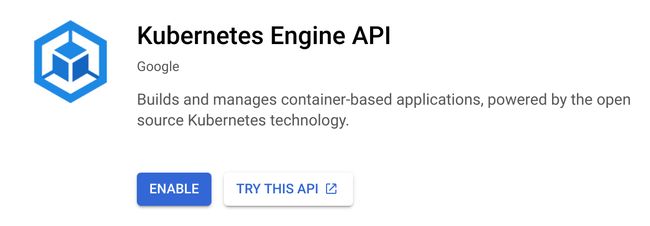
a) Enable the Kubernetes Engine API after logging in to your Google Cloud console
a)登录到Google Cloud控制台后启用Kubernetes Engine API
b) Start Google Cloud Shell
b)启动Google Cloud Shell
You should see a button similar to the one in red box below in the top right corner of your console page. Click on it and a terminal will pop out. The virtual machine behind this terminal has various tools preinstalled, most importantly kubectl, which is a tool for controlling Kubernetes clusters.
您应该在控制台页面右上角看到一个类似于下面红色框中的按钮。 单击它,将弹出一个终端。 该终端后面的虚拟机已预先安装了各种工具,最重要的是kubectl ,它是用于控制Kubernetes集群的工具。
Google Cloud Shell Google Cloud Shellc) Create a managed Kubernetes cluster
c)创建一个托管的Kubernetes集群
Key in the following into Google Cloud Shell to create a managed Kubernetes cluster, replacing
在Google Cloud Shell中键入以下内容以创建托管的Kubernetes集群,将
gcloud container clusters create \
  --machine-type n1-standard-4 \
  --num-nodes 2 \
  --zone us-central1-a \
  --cluster-version latest \
A brief description of the parameters in the code above:
上面代码中参数的简要说明:
machine-type specifies the amount of CPU and RAM for each node. You can choose other types from this list.
机器类型指定每个节点的CPU和RAM数量。 您可以从此列表中选择其他类型。
num-nodes determines the number of nodes to spin up.
num-nodes确定要向上旋转的节点数。
zone refers to the data center zone that your cluster resides in. You can choose somewhere that is not too far away from your users.
区指的是数据中心地带,你的集群所在。您可以选择的地方 ,是不是太远离你的用户。
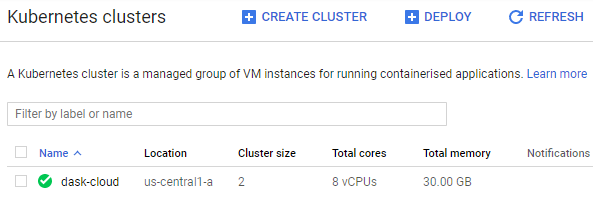
While your cluster is initializing, you can also see it spinning up on the Kubernetes Clusters page:
在集群初始化期间,您还可以在Kubernetes集群页面上看到它旋转:
Key in kubernetes clusters in the search bar at the top of your console page.
在控制台页面顶部的搜索栏中键入kubernetes集群 。
- Select Kubernetes Clusters from the drop down list. 从下拉列表中选择Kubernetes集群。
Your cluster with the
可以看到指定了
的 群集正在旋转。 等待直到出现绿色勾号,您的集群已准备就绪。
Alternatively, you can also verify if your cluster is initialized by running:
另外,您还可以通过运行以下命令来验证集群是否已初始化:
kubectl get nodeWhen your cluster is deployed, you should see the status as Ready.
部署集群后,您应该看到状态为Ready 。
d) Provide account permissions to cluster
d)提供群集的帐户权限
kubectl create clusterrolebinding cluster-admin-binding \
  --clusterrole=cluster-admin \
  --user=
Replace
将
2.设置头盔 (2. Setting up Helm)
We will use Helm for installing, upgrading and managing applications on a Kubernetes cluster.
我们将使用Helm在Kubernetes集群上安装,升级和管理应用程序。
a) Install Helm by running installer script in Google Cloud Shell
a)通过在Google Cloud Shell中运行安装程序脚本来安装Helm
curl https://raw.githubusercontent.com/kubernetes/helm/master/scripts/get | bashb) Initialize Helm on your Kubernetes cluster
b)在Kubernetes集群上初始化Helm
Set up a service account for use by tiller (a.k.a. server in the lingo of Helm; client is called helm).
设置一个供分till器使用的服务帐户(Helm术语中的又名服务器;客户端称为helm) 。
kubectl --namespace kube-system create serviceaccount tillerGive the service account full permissions to manage the cluster.
授予服务帐户完全权限来管理群集。
kubectl create clusterrolebinding tiller --clusterrole cluster-admin --serviceaccount=kube-system:tillerInitialize helm and tiller.
初始化头盔和分till器 。
helm init --service-account tiller --history-max 100 --waitc) Install security patch
c)安装安全补丁
This ensures that tiller is secure from access inside the cluster. Read here for more details.
这样可以确保分till器不受群集内部访问的影响。 在此处阅读更多信息。
kubectl patch deployment tiller-deploy --namespace=kube-system --type=json --patch='[{"op": "add", "path": "/spec/template/spec/containers/0/command", "value": ["/tiller", "--listen=localhost:44134"]}]'d) Verify that Helm is installed properly
d)确认头盔已正确安装
helm versionMake sure the version is at least 2.11.0, and the client version matches that of the server.
确保版本至少为2.11.0,并且客户端版本与服务器的版本匹配。
3.部署Dask流程和Jupyter (3. Deploying Dask processes and Jupyter)
We are almost there… Just a couple more steps before we can start running our machine learning code.
我们已经快到了……在开始运行我们的机器学习代码之前,还需要几个步骤。
a) Add and update packages information with Dask’s Helm chart repository
a)使用Dask的Helm图表存储库添加和更新软件包信息
helm repo add dask https://helm.dask.org/
helm repo update
b) Launch Dask on Kubernetes cluster
b)在Kubernetes集群上启动Dask
helm install --name my-dask dask/dask --version 4.1.13 --set scheduler.serviceType=LoadBalancer --set jupyter.serviceType=LoadBalancerThis deploys a dask-scheduler, three dask-workers, and also a Jupyter server by default.
默认情况下,这将部署一个dasch-scheduler,三个dask-worker以及一个Jupyter服务器。
Depending on your use case, you may amend the options in the code above:
根据您的用例,您可以修改上面代码中的选项:
— name is used to reference your Dask setup, in our case it’s my-dask.
—名称用于引用您的Dask设置,在本例中为my-dask 。
— version refers to the Helm chart version to install and is optional. The full list of versions can be found here. If option is left out, then the latest version will be installed by default. In our case, version 4.1.13 is used as the latest versions have compatibility issues on my end. This may not be true depending on your situation then, hence do amend or leave it out accordingly.
—版本是指要安装的Helm图表版本,是可选的。 版本的完整列表可以在这里找到。 如果省略了选项,则默认情况下将安装最新版本。 在我们的案例中,使用4.1.13版本,因为最新版本对我来说有兼容性问题。 视您的情况而定,这可能不正确,因此请相应地进行修改或将其省略。
— set will set the parameters scheduler.serviceType and jupyter.serviceType to the value LoadBalancer. This is necessary to have external IP addresses that we can use to access the Dask dashboard and Jupyter server. Without this option, only cluster IP will be set up by default as mentioned in this Stack Overflow post.
— set将参数scheduler.serviceType和jupyter.serviceType设置为值LoadBalancer 。 必须具有外部IP地址,我们可以使用该IP地址访问Dask仪表板和Jupyter服务器。 如果没有此选项,则默认情况下将仅设置群集IP,如本Stack Overflow文章中所述 。
4.连接到Dask和Jupyter (4. Connecting to Dask and Jupyter)
In the previous step, we launched Dask on the cluster. However, it may take a minute to deploy and you can check the status with kubectl after a while:
在上一步中,我们在集群上启动了Dask。 但是,部署可能需要一分钟,您可以在一段时间后使用kubectl检查状态:
kubectl get servicesOnce ready,the external IPs will show up for your Jupyter server (my-dask-jupyter) and Dask scheduler (my-dask-scheduler). If you see
一旦准备好,外部IP将为您的Jupyter服务器( my-dask-jupyter )和Dask调度程序( my-dask-scheduler )显示。 如果您在EXTERNAL-IP下看到
Entering the external IP addresses for my-dask-jupyter and my-dask-scheduler in your web browser will allow you to access your Jupyter server and Dask dashboard respectively.
在Web浏览器中输入my-dask-jupyter和my-dask-scheduler的外部IP地址将使您可以分别访问Jupyter服务器和Dask仪表板。
For the Jupyter server, you can log in with default password dask. To change this password, please see the next section.
对于Jupyter服务器,您可以使用默认密码dask登录 。 要更改此密码,请参阅下一节。
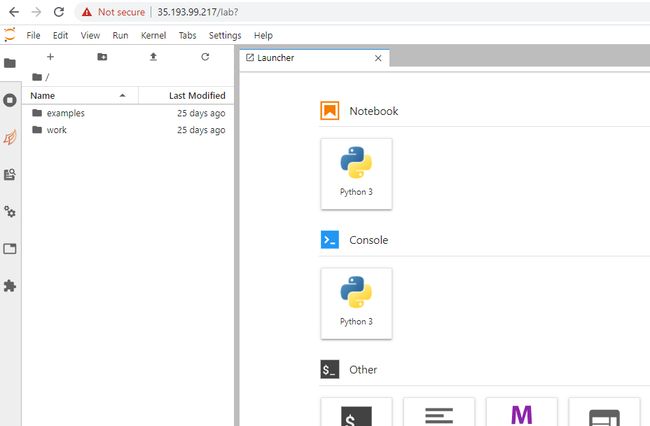
Congratulations! You can now start running your Dask code :)
恭喜你! 您现在可以开始运行Dask代码了:)
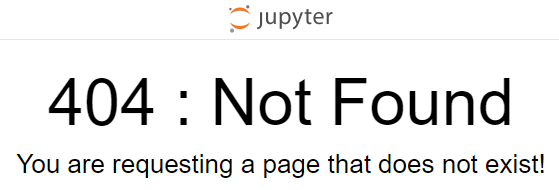
Click button under Notebook to get started :) 单击笔记本下的按钮开始使用:)Note: If you face 404 error when accessing Jupyter, just click on the Jupyter logo at the top to be directed to the login page.
注意:如果在访问Jupyter时遇到404错误,只需单击顶部的Jupyter徽标即可定向到登录页面。
5.配置环境 (5. Configuring Environment)
You may be able to perform some basic Dask code after step 4 but what if you would like to run dask-ml? That is not installed by default. And what if you would like to launch more than the default three workers? How about changing your Jupyter server password?
您可以在第4步之后执行一些基本的Dask代码,但是如果您想运行dask-ml怎么办? 默认情况下未安装。 而且,如果您想推出更多默认的三名员工,该怎么办? 如何更改Jupyter服务器密码?
Hence, we need a way to customize our environment and we can configure it by creating a yaml file. The values in this yaml file will then overwrite the default values of the corresponding parameters in the standard configuration file.
因此,我们需要一种自定义环境的方法,并且可以通过创建yaml文件对其进行配置。 然后,此yaml文件中的值将覆盖标准配置文件中相应参数的默认值。
For our illustration, we shall be using the values.yaml below. In general, the configurations are separated into three main sections; one each for the Scheduler, Worker and Jupyter.
为了便于说明,我们将使用下面的values.yaml 。 通常,配置分为三个主要部分: 分别为调度程序,工作者和Jupyter。
Configuration file template for Dask Helm deployment update Dask Helm部署更新的配置文件模板To update the configurations, simply perform the following:
要更新配置,只需执行以下操作:
In your Google Cloud Shell, run
nano values.yamlto create the file values.yaml.在您的Google Cloud Shell中,运行
nano values.yaml以创建文件values.yaml 。- Copy paste the template above (feel free to amend accordingly) and save. 复制粘贴上面的模板(随意进行相应的修改)并保存。
- Update your deployment to use this configuration file: 更新您的部署以使用此配置文件:
helm upgrade my-dask dask/dask -f values.yaml- Note that you may need to wait a while for the updates to be ready. 请注意,您可能需要等待一段时间才能准备好更新。
Overview of configurations
配置概述
We also provide below a general description of the commonly used configurations in our template.
我们还在下面提供了模板中常用配置的一般说明。
a) Install libraries
a)安装库
Under Worker and Jupyter, you can find the sub-section on env. Notice that installation can be via conda or pip and packages are separated by space.
在Worker和Jupyter下,您可以在env上找到小节。 请注意,可以通过conda或pip进行安装,并且软件包之间用空格隔开。
env:  # Environment variables.
  - name: EXTRA_CONDA_PACKAGES
    value: dask-ml shap -c conda-forge
  - name: EXTRA_PIP_PACKAGES
    value: dask-lightgbm --upgrade
b) Number of workers
b)工人人数
Number of workers can be specified through replicas parameter. In our case, we requested 4 workers.
可以通过副本参数指定工作者数。 在我们的案例中,我们要求4名工人。
worker:
  replicas: 4  # Number of workers.
c) Resource allocated
c)分配的资源
Depending on your needs, you can increase the amount of memory or CPUs allocated to your scheduler, workers and/or Jupyter through the resources sub-section.
根据您的需求,可以通过“ 资源”小节增加分配给调度程序,工作程序和/或Jupyter的内存或CPU的数量。
resources:
  limits:
    cpu: 1
    memory: 4G
  requests:
    cpu: 1
    memory: 4G
c) Jupyter password
c)Jupyter密码
The Jupyter password is a hashed value under password parameter. You can change your password by replacing this field.
Jupyter密码是password参数下的哈希值。 您可以通过替换此字段来更改密码。
jupyter:
  password: 'sha1:aae8550c0a44:9507d45e087d5ee481a5ce9f4f16f37a0867318c'
To generate the hashed value of your new password,
要生成新密码的哈希值,
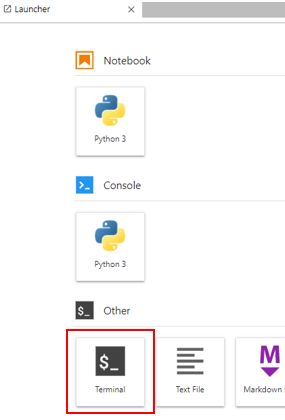
- Launch a terminal in your Jupyter Launcher first. 首先在Jupyter Launcher中启动终端。
Run
jupyter notebook passwordin the command-line and key in your new password. The hashed password will be written to a file named jupyter_notebook_config.json.在命令行中运行
jupyter notebook password,然后输入新密码。 哈希密码将被写入名为jupyter_notebook_config.json的文件。- View and copy the hashed password. 查看并复制哈希密码。
Replace the password field in values.yaml.
替换values.yaml中的密码字段。
6.删除集群 (6. Removing cluster)
To remove your Helm deployment, execute in Google Cloud Shell:
要删除您的Helm部署,请在Google Cloud Shell中执行:
helm del --purge my-daskNote that this does not destroy the Kubernetes cluster. To do so, you can delete your cluster from the Kubernetes Cluster page.
请注意,这不会破坏Kubernetes集群。 为此,您可以从Kubernetes集群页面删除集群。
Through the guide above, we hope that you are now able to deploy Dask on Google Cloud.
通过以上指南,我们希望您现在能够在Google Cloud上部署Dask。
Thanks for reading and I hope the article was useful :) Please also feel free to comment with any questions or suggestions that you may have.
感谢您的阅读,希望本文对您有用:)也请随时提出任何问题或建议,以发表评论。
翻译自: https://towardsdatascience.com/scalable-machine-learning-with-dask-on-google-cloud-5c72f945e768
dask 使用
