centos安装配置OPEN*PN
centos安装配置OPENVPN
- 安装程序
- 生成证书密钥
-
- 创建PKI
- 生成CA证书
- 为服务器生成证书密钥
- 为客户端生成证书密钥
- 生成Diffie hellman 参数
- 生成TLS认证密钥
- 编辑open服务器配置文件
-
- 1.复制配置示例文件
- 2.编辑配置文件
-
- 我使用的配置:
- 部分配置解释:
- 设置NAT及防火墙
- 启动open
- 准备客户端文件
-
- 复制证书密钥到一个文件夹下
- 编辑客户端配置文件
- windos客户端使用
- 常见问题
-
- 连接成功但流量不走open
- TCP: connect to [AF_INET]111.111.111.111:1194 failed: Unknown error
安装程序
yum install -y epel-release && yum -y update && yum install -y easy-rsa open
生成证书密钥
创建PKI
mkdir /etc/open/easy-rsa
cp -r /usr/share/easy-rsa/3.0.8/* /etc/open/easy-rsa/
cd /etc/open/easy-rsa/
./easyrsa init-pki
生成CA证书
./easyrsa build-ca
生成过程中需要创建CA密码,密码要记住。
输出:
[root@izwz9idz1lgutvrfidg8inz easy-rsa]#  ./easyrsa build-ca
Using SSL: openssl OpenSSL 1.0.2k-fips  26 Jan 2017
Enter New CA Key Passphrase:                      	设置CA密码,下面有用
Re-Enter New CA Key Passphrase:                   	确认密码
Generating RSA private key, 2048 bit long modulus
...........................+++
..+++
e is 65537 (0x10001)
You are about to be asked to enter information that will be incorporated
into your certificate request.
What you are about to enter is what is called a Distinguished Name or a DN.
There are quite a few fields but you can leave some blank
For some fields there will be a default value,
If you enter '.', the field will be left blank.
-----
Common Name (eg: your user, host, or server name) [Easy-RSA CA]:openCA    随便输入证书名
CA creation complete and you may now import and sign cert requests.
Your new CA certificate file for publishing is at:
/etc/open/easy-rsa/pki/ca.crt
为服务器生成证书密钥
server 为证书名称,可以自由替换
nopass 是免密码,避免启动open服务需要输入证书密码
./easyrsa build-server-full server nopass
输出:
[root@izwz9idz1lgutvrfidg8inz easy-rsa]# ./easyrsa build-server-full  server nopass
Using SSL: openssl OpenSSL 1.0.2k-fips  26 Jan 2017
Generating a 2048 bit RSA private key
.................................................+++
.............+++
writing new private key to '/etc/open/easy-rsa/pki/easy-rsa-14878.omWrcN/tmp.bsrEu4'
-----
Using configuration from /etc/open/easy-rsa/pki/easy-rsa-14878.omWrcN/tmp.VTOMKj
Enter pass phrase for /etc/open/easy-rsa/pki/private/ca.key:      输入刚刚创建CA证书时设置的密码
Check that the request matches the signature
Signature ok
The Subject's Distinguished Name is as follows
commonName            :ASN.1 12:'server'
Certificate is to be certified until Sep 13 15:11:37 2024 GMT (825 days)

Write out database with 1 new entries
Data Base Updated
为客户端生成证书密钥
根据需要的客户端证书数量创建证书,client1为证书名,可自由替换
# 创建名为client1的证书密钥
./easyrsa build-client-full  client1
#不想客户端需要输入密码可以使用下面命令,建议使用密码
# ./easyrsa build-client-full  client1 nopass
输出:
[root@izwz9idz1lgutvrfidg8inz easy-rsa]# ./easyrsa build-client-full  client1
Using SSL: openssl OpenSSL 1.0.2k-fips  26 Jan 2017
Generating a 2048 bit RSA private key
....................+++
........+++
writing new private key to '/etc/open/easy-rsa/pki/easy-rsa-15014.QOzFN6/tmp.uQz8Xk'
Enter PEM pass phrase:                                      为客户端证书设置密码
Verifying - Enter PEM pass phrase:							确认密码
-----
Using configuration from /etc/open/easy-rsa/pki/easy-rsa-15014.QOzFN6/tmp.YgmEO6
Enter pass phrase for /etc/open/easy-rsa/pki/private/ca.key:  输入刚刚创建CA证书时设置的密码
Check that the request matches the signature
Signature ok
The Subject's Distinguished Name is as follows
commonName            :ASN.1 12:'client1'
Certificate is to be certified until Sep 13 15:21:24 2024 GMT (825 days)

Write out database with 1 new entries
Data Base Updated
生成Diffie hellman 参数
./easyrsa gen-dh
生成TLS认证密钥
open --genkey --secret ta.key
编辑open服务器配置文件
1.复制配置示例文件
cp /usr/share/doc/open-2.4.12/sample/sample-config-files/server.conf /etc/open/server/server.conf
2.编辑配置文件
vim /etc/open/server/server.conf
我使用的配置:
port 1194
proto tcp
dev tun
ca /etc/open/easy-rsa/pki/ca.crt
cert /etc/open/easy-rsa/pki/issued/server.crt
key /etc/open/easy-rsa/pki/private/server.key
dh /etc/open/easy-rsa/pki/dh.pem
topology subnet
tls-auth  /etc/open/easy-rsa/ta.key 0
server 10.8.0.0 255.255.255.0
ifconfig-pool-persist ipp.txt
push "redirect-gateway def1 bypass-dhcp"
push "dhcp-option DNS 223.5.5.5"
push "dhcp-option DNS 223.6.6.6"
keepalive 10 120
cipher AES-256-CBC
user nobody
group nobody
persist-key
persist-tun
status open-status.log
log-append  open.log
verb 3
部分配置解释:
# 监听那个IP
;local a.b.c.d

# 监听那个端口
port 1194

# 监听TCP协议还是udp协议?
proto tcp
;proto udp

# "dev tun"路由
# "dev tap" 桥接模式
;dev tap
dev tun

# 刚刚创建的ca证书的位置
ca /etc/open/easy-rsa/pki/ca.crt
# 刚刚创建的服务器证书的位置
cert /etc/open/easy-rsa/pki/issued/server.crt
#刚刚创建的服务器证书密钥的位置
key /etc/open/easy-rsa/pki/private/server.key

# 刚刚生成的Diffie hellman 参数文件位置
dh /etc/open/easy-rsa/pki/dh.pem

#客户端连接的服务器网络拓扑方式
#参考链接:https://community.open.net/open/wiki/Topology
;topology subnet

# VPN使用子网,
server 10.8.0.0 255.255.255.0

# 记录客户端使用的虚拟IP地址文件,重启可重新分配给客户端
ifconfig-pool-persist ipp.txt


#设置客户端那些ip段走open通道
;push "route 192.168.10.0 255.255.255.0"
;push "route 192.168.20.0 255.255.255.0"

# 设置客户端所有流量都通过open
push "redirect-gateway def1 bypass-dhcp"

# 配置客户端dns
;push "dhcp-option DNS 223.5.5.5"
;push "dhcp-option DNS 223.6.6.6"

#取消注释则客户端可以互相访问
;client-to-client

#取消注释则一个证书可以多个客户端使用
;duplicate-cn

# 每10秒Ping一次,如果在120秒的时间内没有收到Ping,则假设对端已经掉线
keepalive 10 120

# tls密钥
tls-auth  /etc/open/easy-rsa/ta.key 0 # This file is secret

# 加密方式,客户端配置需相同
cipher AES-256-CBC


#最大客户端数量
;max-clients 100

#减少open系统权限
user nobody
group nobody

# 重启不重新读取或配置密钥、tun.
persist-key
persist-tun

#状态日志
status open-status.log

# 日志,log每次重启截断,log-append追加
;log         open.log
;log-append  open.log

#日志等级
verb 3
设置NAT及防火墙
禁用防火墙
systemctl stop firewalld
systemctl disable firewalld
关闭selinux
setenforce 0
开启ipv4转发
echo 'net.ipv4.ip_forward = 1' >> /etc/sysctl.conf
sysctl -p
安装iptables
yum install iptables-services
设置网卡nat
iptables -t nat -A POSTROUTING -s 10.8.0.0/24 -j MASQUERADE
启动open
设置并启动open
systemctl enable open-server@server
systemctl start [email protected]
检查状态
netstat -tlunp
systemctl status open-server@server
准备客户端文件
复制证书密钥到一个文件夹下
mkdir /etc/open/client/client1
cp /etc/open/easy-rsa/pki/ca.crt  /etc/open/client/client1/
cp /etc/open/easy-rsa/pki/issued/client1.crt /etc/open/client/client1/
cp /etc/open/easy-rsa/pki/private/client1.key  /etc/open/client/client1/
cp /etc/open/easy-rsa/ta.key /etc/open/client/client1/
编辑客户端配置文件
#windows、macOS
vim /etc/open/client/client1/client1.o
#linux
vim /etc/open/client/client1/client1.conf
client
dev tun
proto tcp
remote 111.111.111.111 1194   #修改111.111.111.111为服务器ip地址;1194为open端口
nobind
persist-key
persist-tun
ca ca.crt
cert client1.crt
key client1.key
tls-auth ta.key 1
remote-cert-tls server
cipher AES-256-CBC
verb 3
windos客户端使用
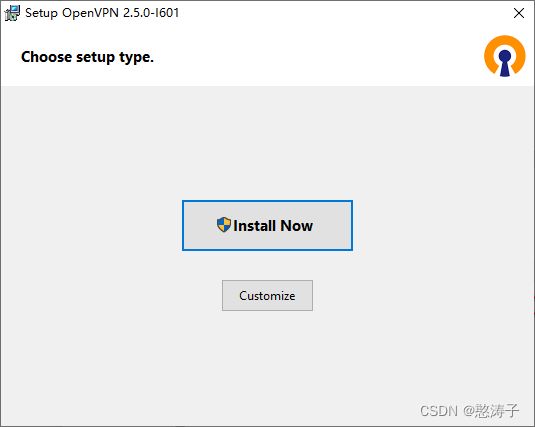
1.下载安装OpenVPN GUI :
-
CSDN下载:
https://download.csdn.net/download/hantaozi/85614329 -
官方下载地址:
https://open.net/community-downloads/
2.将刚刚服务器上准备的客户端文件夹【/etc/open/client/client1/】复制到客户端【C:\Program Files\OpenVPN\config】目录下面。
3.打开OpenVPN

4.输入client1证书生成时设置的密码即可连接成功

常见问题
连接成功但流量不走open
检查服务器配置文件是否设置了那些流量经过open
 #设置客户端那些ip段走open通道
;push "route 192.168.10.0 255.255.255.0"
;push "route 192.168.20.0 255.255.255.0"

# 设置客户端所有流量都通过open
push "redirect-gateway def1 bypass-dhcp"
TCP: connect to [AF_INET]111.111.111.111:1194 failed: Unknown error
检查端口是否可以访问
telnet 111.111.111.111 1194
检查防火墙设置,可能被iptables阻拦了
#清空iptables规则
iptables -F
#设置nat规则
iptables -t nat -A POSTROUTING -s 10.8.0.0/24 -j MASQUERADE
