人脸识别1.0 python+opencv
实现效果
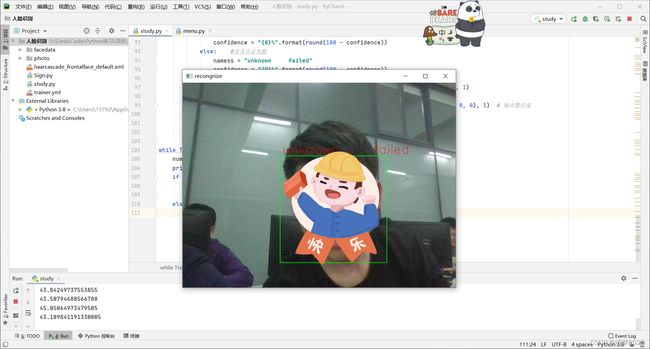
先上实现效果吧!
录入的人脸识别成功

没录入的人脸显示unknown

菜单功能还比较简易

Opencv安装
CMD中输入
pip install opencv-python
pip install numpy

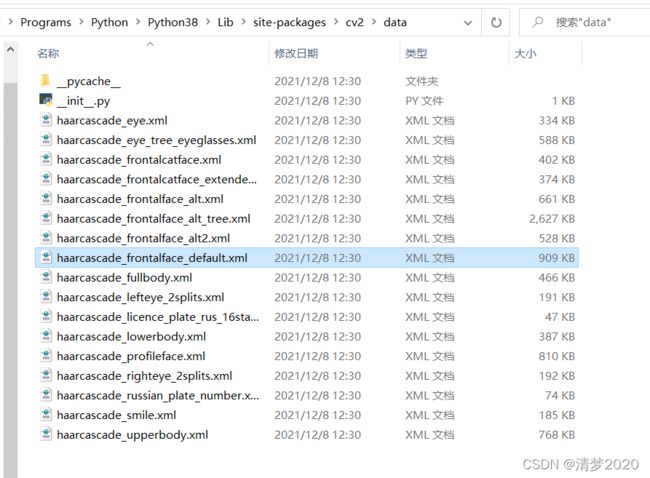
识别需要用到的文件haarcascade_frontalface_default.xml,在安装opencv-python的时候已经安装了。文件目录一般在
Users\电脑用户名\AppData\Local\Programs\Python\Python38\Lib\site-packages\cv2\data

代码实现
代码注解很详细
import os
from PIL import Image
import cv2
import numpy as np
import time

# 人脸监测初始化 基于Haar级联分类器
face_detect = cv2.CascadeClassifier('haarcascade_frontalface_default.xml')
# 调用默认摄像头
camera = cv2.VideoCapture(0)
#LBP局部二值模式人脸监测
recongnize=cv2.face_LBPHFaceRecognizer()
#如果facedata文件夹不存在,创建一个
def whether_file_exist():
    if(not os.path.exists('./facedata')): os.mkdir('./facedata')

def capture(): #录入人脸到facedata文件夹  ,确保文件夹有facedata文件夹
    #相机初始化
    camera = cv2.VideoCapture(0)
    whether_file_exist()
    face_name=input("please enter your name!")
    print()
    face_num=input("please enter your student_id!")
    print()
    count = 0
    print("3秒后即将录入,请正视摄像头")
    time.sleep(1)
    print("2秒后即将录入,请正视摄像头")
    time.sleep(1)
    print("1秒后即将录入,请正视摄像头")
    time.sleep(1)
    while True:
        if(count==80) :break
        flag, frame = camera.read()
        #将图片灰度化,灰度化舍弃了色彩,但是纹理更加清晰,且图片大小更小,便于计算,灰度图像可以用矩阵存储,然后计算,RGB图像是不行的
        image = cv2.cvtColor(frame, cv2.COLOR_BGR2GRAY)
        #进行多维度监测人脸
        faces=face_detect.detectMultiScale(image, 1.3, 5)
        #返回出的人脸位置
        for x, y, a, b in faces:
            #画出正方形
            cv2.rectangle(image, (x, y), (x + a, y + b), (0, 255, 0), 1, cv2.LINE_AA)
            count+=1
            #将捕获的人脸存在facedata文件夹,命名规则为 姓名(英文)+.+ID(随便起一个,但是不能重复,用于后期人脸认证的ID)+.+数字(递增)
            #image[y:y+b,x:x+a]
            cv2.imwrite("facedata/"+face_name+'.'+face_num+'.'+str(count)+'.jpg', image[y:y+b,x:x+a])
        cv2.imshow("row_image",frame)
        if cv2.waitKey(1) == ord('q'):
            break
    camera.release()
    # out.release()
    cv2.destroyAllWindows()

def face_training():   #将录入的所有人脸进行训练,生成trainer.yml
    # 人脸数据路径
    path = './facedata'
    recognizer = cv2.face.LBPHFaceRecognizer_create()
    def getImagesAndLabels(path):
        imagePaths = [os.path.join(path, f) for f in os.listdir(path)]  # join函数将多个路径组合后返回
        faceSamples = []
        ids = []
        for imagePath in imagePaths:
            PIL_img = Image.open(imagePath).convert('L')  # convert it to grayscale
            img_numpy = np.array(PIL_img, 'uint8')
            id = int(os.path.split(imagePath)[-1].split(".")[1])
            faces = face_detect.detectMultiScale(img_numpy)
            for (x, y, w, h) in faces:
                faceSamples.append(img_numpy[y:y + h, x: x + w])
                ids.append(id)
        return faceSamples, ids
    print('数据训练中')
    faces, ids = getImagesAndLabels(path)
    recognizer.train(faces, np.array(ids))
    recognizer.write(r'.\trainer.yml')

def face_identify():   #认证函数
    #相机初始化
    camera = cv2.VideoCapture(0)
    identify=cv2.face.LBPHFaceRecognizer_create()
    #让分类器读取原来训练好的数据trainer.yml
    identify.read('./trainer.yml')
    #学号-姓名字典
    names={}
    for f in os.listdir('./facedata'):
        #f.split('.') 代表着一个文件名  [姓名,ID,count,jpg]
        names[f.split('.')[1]]=f.split('.')[0]
    while True:
        flag, frame = camera.read()
        image=cv2.cvtColor(frame,cv2.COLOR_BGR2GRAY)
        faces = face_detect.detectMultiScale(image, 1.3, 4)
        for x,y,a,b in faces:
            cv2.rectangle(frame, (x, y), (x + a, y + b), (0, 255, 0), 1, cv2.LINE_AA)
            #用分类器对比认证的人脸与已经录入的人脸,并返回ID和可信度
            idnum, confidence = identify.predict(image[y:y + b, x:x + a])
            print(confidence)
            if confidence < 40:   #当可信度大于100-40=60的时候,表示认证成功,经过实测,confidence<40,效果最好
                namess = names[str(idnum)]+"   suceessful!"
                confidence = "{0}%".format(round(100 - confidence))
            else:    #负责认证失败
                namess = "unknown     failed"
                confidence = "{0}%".format(round(100 - confidence))
            #将ID对应的姓名打印在图片上
            cv2.putText(frame, str(namess), (x + 5, y - 5), cv2.LINE_AA, 1, (0, 0, 255), 1)
            #将可信度打印
            cv2.putText(frame, str(confidence), (x + 5, y + b - 5), cv2.LINE_AA, 1, (0, 0, 0), 1)  # 输出置信度
        #让图片连续起来,没有这个if语句,图片显示会卡住
        if cv2.waitKey(1) == ord('q'):
            break
        cv2.imshow("recongnize",frame)
while True:
    num=input("1.录入人脸\n2.监测人脸")
    print(num)
    if num=='1' :
        capture()
        face_training()
    else :
        face_identify()
目前是1.0,只是完成了基本的人脸识别然后认证,后期会加上mysql数据库+PyQt5图形化界面。