JAVA三维可视化组件:Matplot 3D for JAVA(V3.0) 一个纯JAVA开发的科学数据可视化组件包 类似 Python 的matplotlib(含示例代码)
目录
概述
组件下载及项目地址
效果展示和示例代码
概述
Matplot3D for JAVA(V3.0) 是一个基于JAVA SE 1.8环境开发的三维图形图表组件。 组件由纯JAVA SE 实现(Pure Java) ,封装为一个jar包,jar文件大小不超过300KB。内含自主研发的三维几何造型、绘制算法,无需依赖OpenGL、DriectX、JAVA 3D或JAVAFX等等第三方库,其只依托JRE自带的类库即可(即只需安装了JAVA就可使用),可以非常方便的将Matplot3D for JAVA(V3.0)显示面板嵌入到自己JAVA GUI程序中。类似 Python 的matplotlib
本组件提供简单的外观API,可以方便生成三维效果的图形图表。可用于大数据可视化、科学数据分析可视化等领域。在使用GUI显示时支持鼠标等输入设备交互式操作,可方便的缩放和改变观察角度。支持动态编程,可实时生成三维模型动态改变动画。也可以根据输入的数据直接生成图片文件,这可用于动态Web的服务端,从页面传入的数据生成图像文件,返回给页面显示。
组件下载及项目地址:
码云: https://www.gitee.com/tanling8334/Matplot3D-for-Java
Github: https://github.com/tanling8334/Matplot3D-for-Java
完整API请参看上面连接中的Readme.md文档,其中的demo结尾的.jar文件是可执行文件,实际开发使用时不需要引用。请在安装了64位java的系统中运行,运行demo可以看到实际效果和示例代码。实测在JAVA8和JAVA17上使用效果较好。欢迎大家推广使用和交流。
后续我也会继续写文章分享和交流具体样例的实现方法和调用代码例子
作者联系方式
email : [email protected] QQ :17746302
效果展示:
地形数据可视(动图)
引擎功能展示 地球(动图)
引擎功能展示 珠峰(动图)
数据阵列:
数据阵列演示代码:
import java.util.Random;

import tanling.matplot3d.app.facade.DataGridProcessor;
import tanling.matplot3d.app.facade.Matplot3D4JMgr;
import tanling.matplot3d.common.Range;
import tanling.matplot3d.d3d.color_style.ColorStyle;
import tanling.matplot3d.d3d.color_style.TopBottomColorStyle;

public class DataGridDemo {
	public static void main(String[] args) {
		DataGridProcessor processor = new DataGridProcessor();

		final Matplot3D4JMgr mgr=new Matplot3D4JMgr(processor);

		//=======================================
		//准备你的数据,是一个二维Double数组。表示均匀分布的网格点,数组内的值表示高度
		//数据一般来源于具体应用的非规则函数数据,例如某区域的DEM地形高程数据
		//以下代码创造一些虚拟数据用于展示如何使用

		Double[][] datas=new Double[20][20];

		Random random=new Random();

		for(int i=0;i
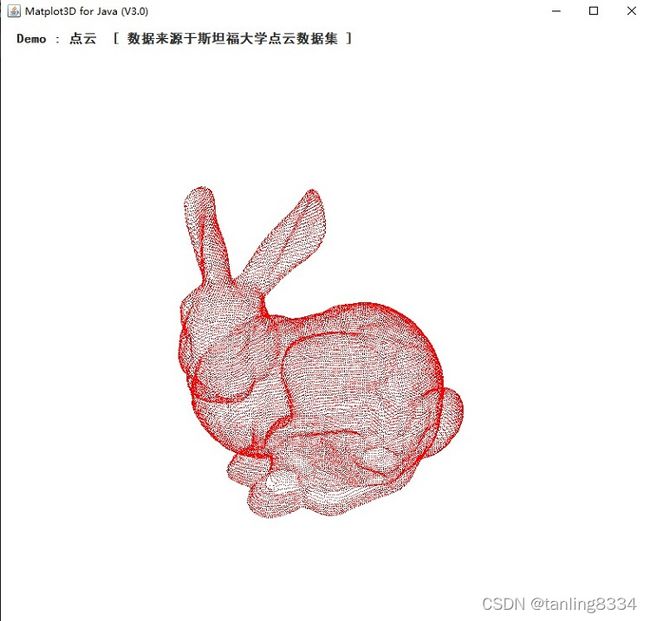
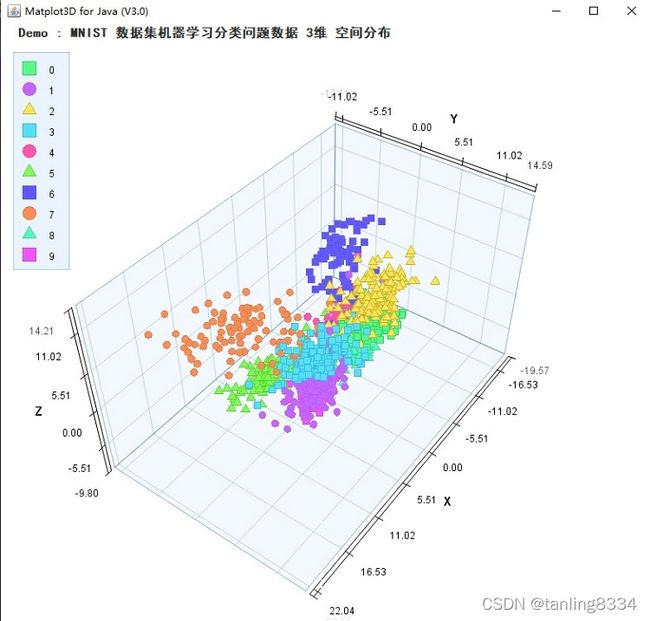
点云 :
引擎功能展示 珠峰:
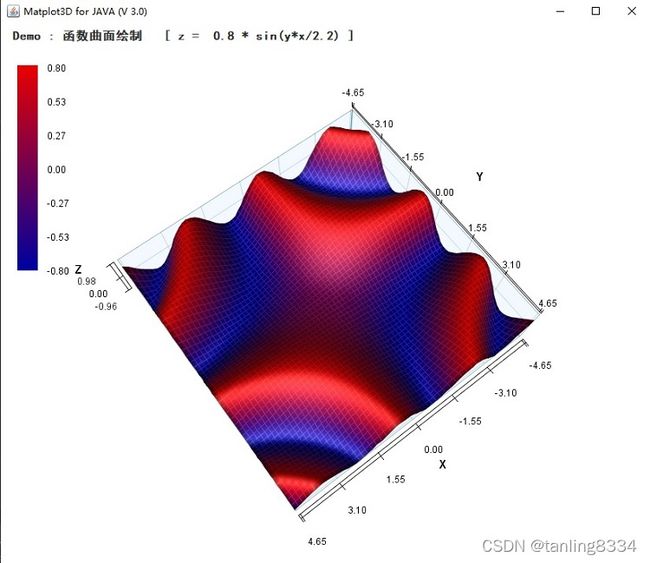
函数曲面:
函数曲面示例代码:
import tanling.matplot3d.app.facade.Function;
import tanling.matplot3d.app.facade.FunctionProcessor;
import tanling.matplot3d.app.facade.Matplot3D4JMgr;
import tanling.matplot3d.common.Range;

public class FunctionSurfaceDemo {

	public static void main(String[] args) {

		FunctionProcessor processor = new FunctionProcessor();

		final Matplot3D4JMgr mgr=new Matplot3D4JMgr(processor);

		//定义二维函数,根据xy值求y值
		Function f = new Function() {
			public Double f(double x, double y) {
				return Math.sin(y * x / 2.2) * 0.8;
			}
		};

		double pi = Math.PI;

		//将二维函数加入处理器,设置XY方向显示范围和采样分段数
		//可以加入多个函数
		processor.addData(f, "", new Range(-1.5*pi, 1.5*pi), new Range(-1.5*pi, 1.5*pi), 60, 60);

		mgr.setScaleZ(1.5);
		mgr.setScaleX(1.3);
		mgr.setScaleY(1.3);

		mgr.setSeeta(1.3);
		mgr.setBeita(1.1);

		mgr.setTitle("Demo : 函数曲面绘制   [ z =  0.8 * sin(y*x/2.2) ]");

		mgr.setCoordianteSysShowType(mgr.COORDINATE_SYS_ALWAYS_FURTHER);

		mgr.show();

	}

}
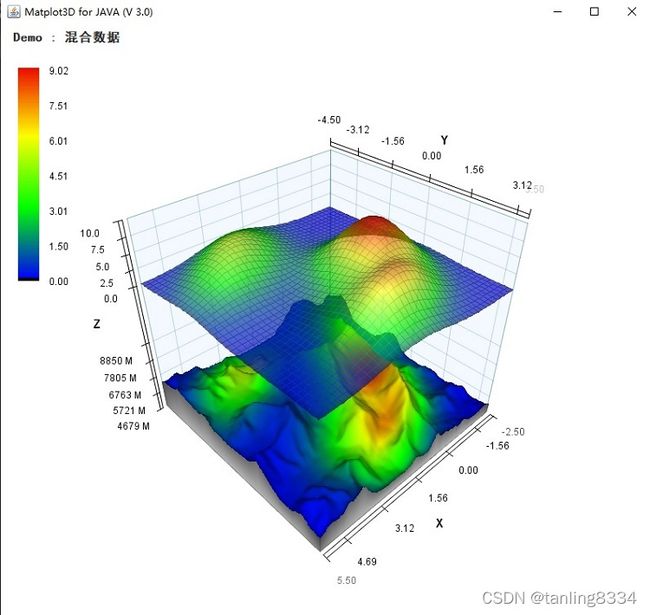
混合数据:
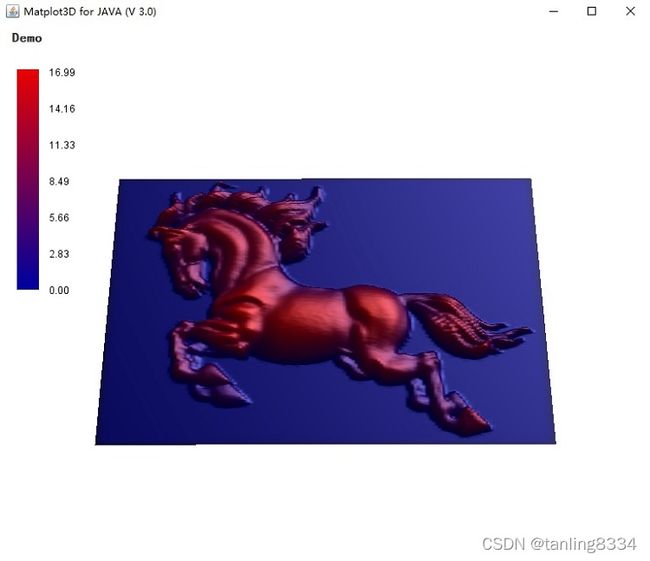
马 浮雕:
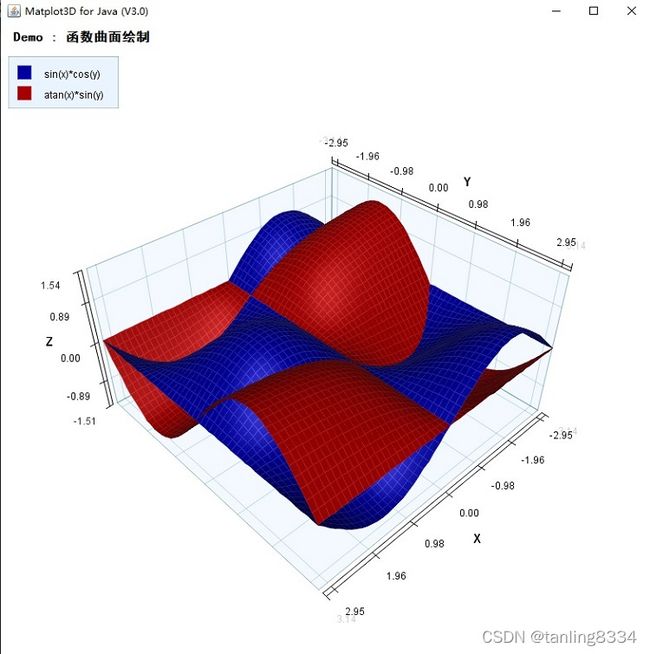
双函数曲面:
双函数曲面示例代码:
import java.awt.Color;

import javax.swing.JFrame;
import javax.swing.SwingUtilities;
import javax.swing.UIManager;

import tanling.matplot3d.app.facade.Function;
import tanling.matplot3d.app.facade.FunctionProcessor;
import tanling.matplot3d.app.facade.Matplot3D4JMgr;
import tanling.matplot3d.common.Range;

public class TwoFunctionsDemo {

	public static void main(String[] args) {

		FunctionProcessor processor = new FunctionProcessor();

		final Matplot3D4JMgr mgr=new Matplot3D4JMgr(processor);

		double pi = 1*Math.PI;

		//函数1
		Function f = new Function() {
			public Double f(double x, double y) {
				return Math.sin(x) * Math.cos(y);
			}
		};

		//函数2
		Function f2 = new Function() {
			public Double f(double x, double y) {
				return Math.atan(x) * Math.sin(y);
			}
		};

		//加入数据(定义颜色会在图例中显示不同的颜色)
		processor.addData(f,"sin(x)*cos(y)",Color.BLUE.darker() ,new Range(-pi, pi), new Range(-pi, pi), 50, 50,1.9f);
		processor.addData(f2,"atan(x)*sin(y)",Color.RED.darker(), new Range(-pi, pi), new Range(-pi, pi), 50, 50, 1.9f);

		//也可以使用颜色风格(ColorStyle),但加入不止一个函数时,不会显示图例
//		mgr.addData(f,"sin(x)*cos(y)",new Range(-pi, pi), new Range(-pi, pi), 50, 50,new TopBottomColorStyle(),1.9f);
//		mgr.addData(f2,"atan(x)*sin(y)", new Range(-pi, pi), new Range(-pi, pi), 50, 50,new TopBottomColorStyle(Color.YELLOW,Color.GREEN), 1.9f);

		mgr.setScaleZ(1.1);

		mgr.setSeeta(1.3);
		mgr.setBeita(1.1);

		mgr.setTitle("Demo");

		mgr.setCoordianteSysShowType(Matplot3D4JMgr.COORDINATE_SYS_STABLE);

		// 可以将Panel对象加入到自己的GUI程序中
		JFrame jf = new JFrame("InternalFrameTest");

		try {
			String lookAndFeel = UIManager.getSystemLookAndFeelClassName();
			UIManager.setLookAndFeel(lookAndFeel);
			SwingUtilities.updateComponentTreeUI(jf);
		} catch (Exception e) {
			e.printStackTrace();
		}

		jf.setContentPane(mgr.getPanel());

		jf.setDefaultCloseOperation(jf.EXIT_ON_CLOSE);
		jf.setSize(800, 800);
		jf.setVisible(true);
	}

}
云图:
云图示例代码:
import java.awt.Color;
import java.util.Random;

import tanling.matplot3d.app.facade.ContourDataGridProcessor;
import tanling.matplot3d.app.facade.Matplot3D4JMgr;
import tanling.matplot3d.common.Range;

public class ContourDataGridDemo {
	public static void main(String[] args) {

		ContourDataGridProcessor processor = new ContourDataGridProcessor();
//		DataGridProcessor processor = new DataGridProcessor();

		 Matplot3D4JMgr mgr=new Matplot3D4JMgr(processor);

		//=======================================
		//准备你的高度数据,是一个二维Double数组。表示均匀分布的网格点,数组内的值表示高度
		//数据一般来源于具体应用的非规则函数数据,例如某区域的DEM地形高程数据
		//以下代码创造一些虚拟数据用于展示如何使用

		Double[][] datas=new Double[100][100];

		Random random=new Random();

		for(int i=0;i
折线:
折线图示例代码:
import java.awt.Color;
import java.awt.Font;
import java.awt.geom.Point2D;
import java.util.ArrayList;
import java.util.List;
import java.util.Random;

import tanling.matplot3d.app.facade.LineChartProcessor;
import tanling.matplot3d.app.facade.Matplot3D4JMgr;

public class LineChart2dsDemo {

	public static void main(String[] args) {

		LineChartProcessor processor = new LineChartProcessor();

		Matplot3D4JMgr mgr=new Matplot3D4JMgr(processor);

		Random ra = new Random();

//		int groupCount = 5;

		int pointCount = 25;

		//==================================================
		//在此准备数据
		//折线图中所有平面中二维点由Point2D.Double表示,按照顺序放入List中
		//prepare your data here

		List[] targets = new ArrayList[pointCount];

		// 设置最终的数据
		for (int c = 1; c <= targets.length; c++) {

			List li = new ArrayList();
			targets[c - 1] = li;

			for (int i = 0; i < pointCount; i++) {
				li.add(new Point2D.Double(i, i * c * 0.05 + (ra.nextDouble() * 0.8)));
			}
		}

		//将数据加入处理器
		processor.addData("Item系列 1", null, targets[0]);
		processor.addData("Item系列 2", null, targets[1]);
		processor.addData("Item系列 3", null, targets[2]);
		processor.addData("Item系列 4", null, targets[3]);
		processor.addData("Item系列 5", null, targets[4]);

		mgr.setBeita(4.3);
		mgr.setSeeta(0.3);

		mgr.setScaleY(1);
		mgr.setScaleX(1);
		mgr.setScaleZ(1.6);// 拉伸Z方向,使图形显得更高

		mgr.setTitle("Demo : 多层2维折线图");

		mgr.setRulerYVisable(false);

		mgr. setXName("X_月份");
		mgr. setZName("Z_指标");

		mgr. setRulerTextColor(new Color(11, 79, 107));
		mgr. setRulerTextFont(new Font("方正正楷", Font.PLAIN, 13));

		mgr. setAxisNameTextColor(new Color(138, 171, 205));

		// 自定义标尺(使标尺不使用默认的数量进行显示)
		String[] labels = new String[13];
		double[] positions = new double[13];

		labels[0] = "    2019    "; // 加入空格会扩大文字和标尺的距离
		positions[0] = 0;

		for (int i = 2; i < pointCount; i += 2) {
			labels[i / 2] = i / 2 + "月";
			positions[i / 2] = i;
		}

		mgr. setRulerLabelsX(labels, positions);//设置X方向标尺自定义可读文字

		mgr. setRulerYVisable(false);//不显示Y方向标尺

		mgr. setCoordianteSysShowType(Matplot3D4JMgr.COORDINATE_SYS_STABLE);

		mgr.show();
	}
}
柱状图:
柱状图示例代码:
import java.util.Random;

import tanling.matplot3d.app.facade.HistogramProcessor;
import tanling.matplot3d.app.facade.Matplot3D4JMgr;

public class BarsDemo {

	public static void main(String[] args) {

		HistogramProcessor processor = new HistogramProcessor();

		Matplot3D4JMgr mgr=new Matplot3D4JMgr(processor);

		//===========================================
		//在此准备数据
		//每组数据在一个或多个二维数组中,数组中表示柱体高度(标1表示组号,相同组号同颜色;下标2表示同组中的不同列)
		//prepare your data here

		Random ra=new Random();
		double[][] ds1 = new double[][] { { 3, 4, 5, 6, 7 }, { 2, 3, 4, 9, 6 }, { 1, 2, 3, 8, 5 } };

		double[][] ds2 = new double[][] {
				{ 3 + ra.nextDouble(), 4 + ra.nextDouble(), 5 + ra.nextDouble(), 6 + ra.nextDouble(),
						7 + ra.nextDouble() },
				{ 2 + ra.nextDouble(), 3 + ra.nextDouble(), 4 + ra.nextDouble(), 5 + ra.nextDouble(),
						6 + ra.nextDouble() },
				{ 1 + ra.nextDouble(), 2 + ra.nextDouble(), 3 + ra.nextDouble(), 4 + ra.nextDouble(),
						5 + ra.nextDouble() } };

		double[][] ds3 = new double[][] {
				{ 3 + ra.nextDouble(), 4 + ra.nextDouble(), 5 + ra.nextDouble(), 6 + ra.nextDouble(),
						7 + ra.nextDouble() },
				{ 2 + ra.nextDouble(), 3 + ra.nextDouble(), 4 + ra.nextDouble(), 5 + ra.nextDouble(),
						6 + ra.nextDouble() },
				{ 1 + ra.nextDouble(), 2 + ra.nextDouble(), 3 + ra.nextDouble(), 4 + ra.nextDouble(),
						5 + ra.nextDouble() } };

		double[][] ds4 = new double[][] {
				{ 3 + ra.nextDouble(), 4 + ra.nextDouble(), 5 + ra.nextDouble(), 6 + ra.nextDouble(),
						7 + ra.nextDouble() },
				{ 2 + ra.nextDouble(), 3 + ra.nextDouble(), 4 + ra.nextDouble(), 5 + ra.nextDouble(),
						6 + ra.nextDouble() },
				{ 1 + ra.nextDouble(), 2 + ra.nextDouble(), 3 + ra.nextDouble(), 4 + ra.nextDouble(),
						5 + ra.nextDouble() } };

		double[][] ds5 = new double[][] {
				{ 3 + ra.nextDouble(), 4 + ra.nextDouble(), 5 + ra.nextDouble(), 6 + ra.nextDouble(),
						7 + ra.nextDouble() },
				{ 2 + ra.nextDouble(), 3 + ra.nextDouble(), 4 + ra.nextDouble(), 5 + ra.nextDouble(),
						6 + ra.nextDouble() },
				{ 1 + ra.nextDouble(), 2 + ra.nextDouble(), 3 + ra.nextDouble(), 4 + ra.nextDouble(),
						5 + ra.nextDouble() } };


		processor.addData("项目1", ds1);
		processor.addData("项目2", ds2);
		processor.addData("项目3", ds3);
		processor.addData("项目4", ds4);
		processor.addData("项目5", ds5);

		mgr.setTitle("Demo : 多层柱状图");

		//可进行相对线度显示比例调整,即一个逻辑长度可以对应不同的显示长度
		mgr.setScaleZ(8);
		mgr.setScaleX(1.2);
		mgr.setScaleY(2);

		mgr.setSeeta(0.3);//观察的初始俯仰角
		mgr.setBeita(1.2);//观察的初始方位角

		//自定义区标签,数量与组数对应
		mgr.setRulerLabelsX(new String[] { "A区", "B区", "C区", "D区", "E区" });
		mgr.setRulerLabelsY(new String[] { "2018", "2017", "2016" });

		//列方向标签
		mgr.setXName("X_区域");
		mgr.setYName("Y_年份");
		mgr.setZName("Z_指标");

		//坐标系平面空间位置稳定
		mgr.setCoordianteSysShowType(Matplot3D4JMgr.COORDINATE_SYS_STABLE);

		mgr.show();
	}

}

